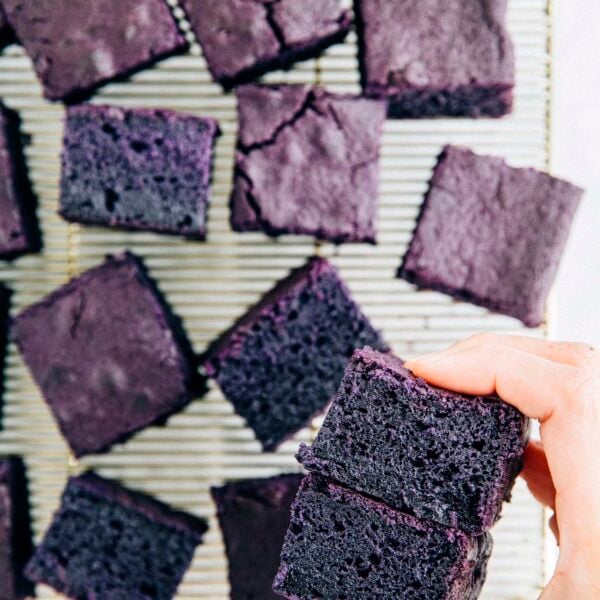
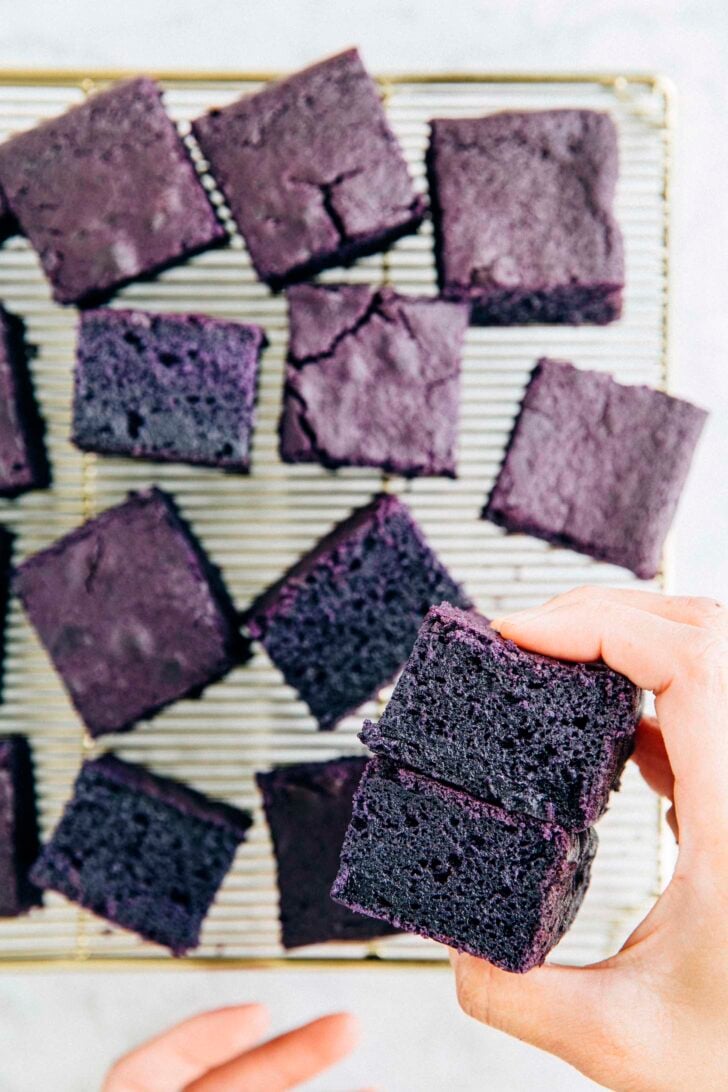
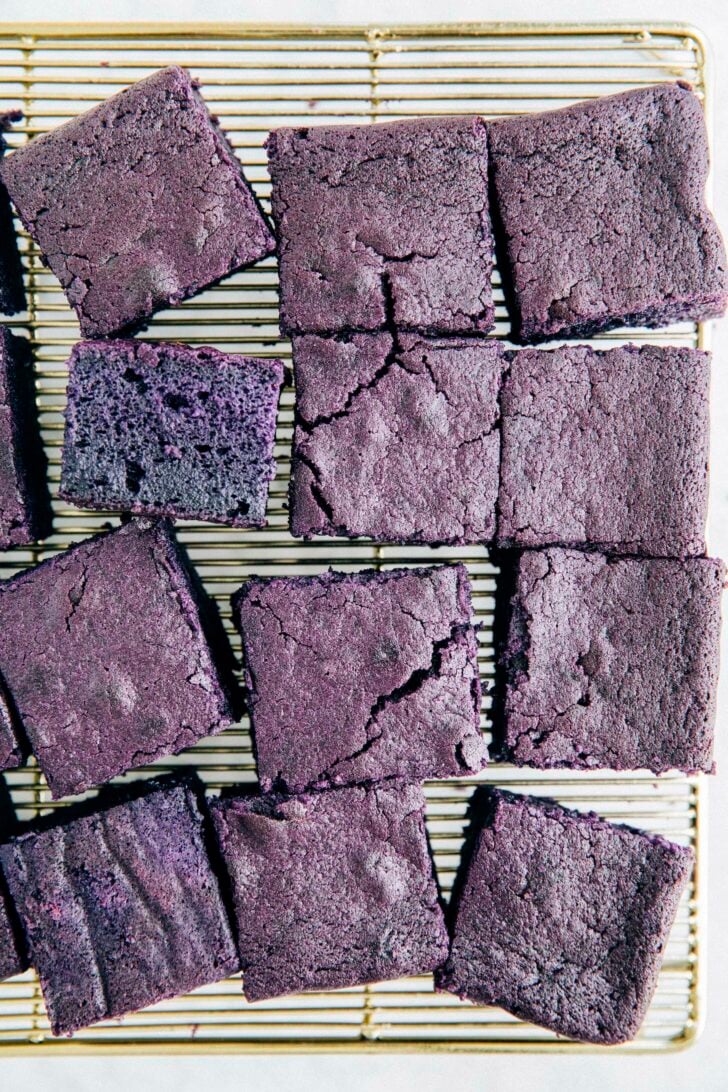
About This Ube Mochi Cake Recipe
This easy gluten free ube mochi cake recipe is bouncy, chewy, and 100% gluten free! Like many Asian desserts, this butter mochi cake is subtly flavored with Filipino ube and coconut. It’s just the right amount of “not too sweet”, with a bouncy crumb and crispy tops and edges. The best part?
The recipe comes together quickly and easily with just 10 minutes of work, using just a few bowls and a whisk. No stand mixer required!
For more ube recipes, check out this post rounding up all the ube dessert recipes on Hummingbird High. And if you’re looking for more Filipino-Hawaiian recipes, check out this recipe for Malasadas (Hawaiian Donuts) filled with passion fruit, and this Pink Guava Sheet Cake!
@hummingbirdhigh bouncy chewy #ube #mochi #cake ♬ original sound – ꜰɪɪʀᴍᴇᴏʟᴅɪᴇꜱ✩
Ingredients and Substitutions
Let’s talk about some of the recipe’s key ingredients, where to find them, and any potential substitutions:
- Sweet Rice Flour: Sweet rice flour is also known as mochiko sweet rice flour, sweet white rice flour, or glutinous rice flour. My favorite brand of sweet rice flour is Koda Farms Mochiko Sweet Rice Flour (it’s readily available in most Asian grocery stores).
- Kosher Salt: Learn why kosher salt is the best salt for baking recipes in this blog post. But in a pinch, you can replace the kosher salt in the recipe with half its amount in table salt.
- Canned Coconut Milk: You need 1 (13.5-ounce) can of coconut milk for this ube mochi cake. My favorite kind is Arroy-D coconut milk (it’s readily available in most Asian grocery stores). In a pinch, you can substitute the coconut milk with regular milk or a dairy-free alternative like almond, coconut, oat, or soy milk. However, doing so will affect the flavor of the cake and make it taste bland.
- Ube Halaya Jam: I used Monika ube halaya jam to make this recipe; however, you can use any variety (most Asian grocery stores stock ube halaya jam, usually in the “Filipino” or dessert section). If you can’t find any, check out my recipe on how to make ube halaya jam for baking! However, note that Trader Joe’s Ube Spread is NOT the same as ube halaya jam. It will not work in this recipe.
- Ube Extract: I like Butterfly or McCormick ube extract. Both are typically available online or in most Asian grocery stores (check the baking aisles).
- Purple Food Coloring: I used the Regal Purple food coloring in Americolor’s Nifty Fifty Kit. In a pinch, you can skip the purple food coloring (especially if you’re using a deep purple ube extract like the ones I recommended). Your mochi cake will just come out a slightly different color than mine!
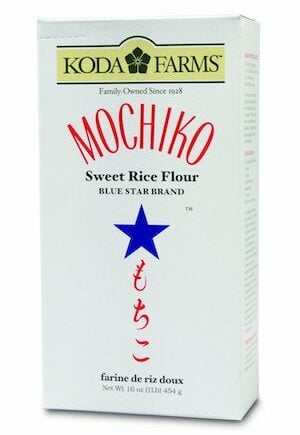
Koda Farms Mochiko Sweet Rice Flour
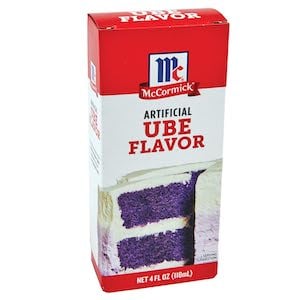
McCormick Ube Extract
Want to learn more about ube, the Filipino purple yam that’s often used in Southeast Asian desserts? Check out my blog post all about ube, which answers questions like “What is ube?” “What does ube taste like?” and “Is ube and taro the same?
Photos Of The Ube Mochi Cake Making Process
Here are some photos showing the key steps on how to make this ube mochi cake recipe from scratch:

Recipe Troubleshooting and FAQ
Help! My cake batter looked like it curdled. What did I do wrong?
In the section above, I instruct folks to pay attention to ingredient temperatures. It’s especially important that you bring ingredients—especially the eggs—to room temperature. If you add eggs that are too cold and straight from the fridge to the melted butter, it will curdle the batter!
Want to learn how to bring baking ingredients to room temperature quickly and easily? Check out this article I wrote for Bon Appetit magazine with all my best tips and tricks. It’s actually an excerpt from my cookbook, Weeknight Baking!
Help! My cake batter is super lumpy. What did I do wrong?
In the section above, I also warn folks that it’s important to add the ingredients in the order that they are listed in the recipe to the batter. If you change the order, you could potentially end up with a lumpy batter!
Best Recipe Tips
- Make sure to shake the can of coconut milk vigorously before opening! Coconut milk likes to separate when stored; shaking it before opening the can will make your life easier.
- To save yourself a dish, melt the butter in a large bowl. This bowl will eventually become your batter bowl! You add the sugars, eggs, and remaining ingredients directly to the melted butter in this bowl.
I like to melt the butter first, then measure out all the ingredients for the recipe. Doing so gives the butter time to cool to the perfect warm-yet-not-too-hot temperature needed for this recipe! - Don’t panic if the butter and sugar turns lumpy once you mix them together! This is normal, I promise. Add the eggs one at a time—doing so will smoothen out the mixture. I add the sugar first to the melted butter first to bring its temperature down and ensure that it doesn’t accidentally scramble the eggs.
Get the Recipe: Bouncy Chewy Gluten Free Ube Mochi Cake
Ingredients
- 2 cups (10.60 ounces or 300 grams) mochiko sweet rice flour
- 2 teaspoons baking powder
- ½ teaspoon kosher salt
- ½ cup (1 stick or 4 ounces or 113 grams) unsalted butter, melted and cooled slightly
- 1 cup (7 ounces or 198 grams) granulated sugar
- 2 large eggs, at room temperature
- 2 Tablespoons (1 ounce or 28 grams) ube halaya jam
- 2 teaspoons ube extract
- 2 teaspoons purple food coloring
- 1 (13.5-ounce) can coconut milk, well shaken
Instructions
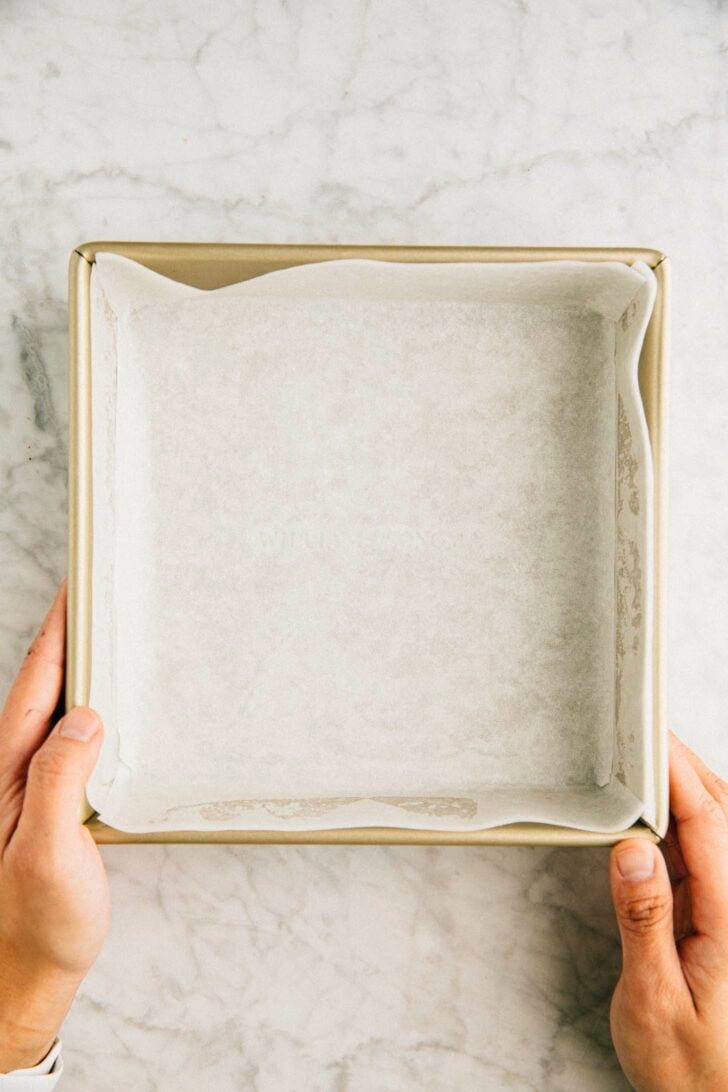
- Prep the oven and baking pan. Position a rack in the center of the oven and preheat the oven to 350°F. Lightly spray an 8-inch square pan with cooking spray and line with parchment paper, leaving a 2-inch overhang on each of the pan's sides. Spray the parchment paper, too.
- Mix the dry ingredients. In a small bowl, whisk together the mochiko sweet rice flour, baking powder, and kosher salt.
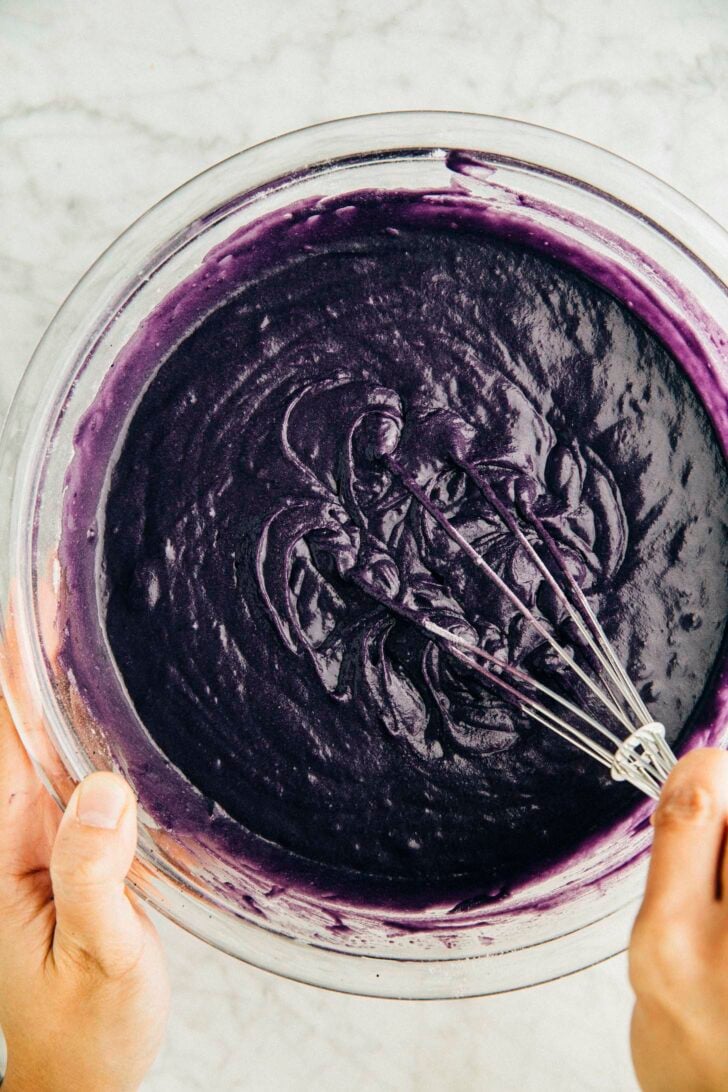
- Mix the wet ingredients. In a medium bowl, whisk together the butter and sugar until combined. Whisk in the eggs, one at a time, only adding the next egg when the previous one is fully incorporated.Add the ube jam, ube extract, and purple food coloring and whisk until combined. Gradually whisk in the coconut milk until just combined.
- Add the dry ingredients to the wet ingredients. Gradually mix in the dry ingredients into the wet ingredients until just combined.
- Assemble the mochi cake. Pour the batter into the prepared pan and use an offset spatula to spread it evenly across the pan and smooth the top.
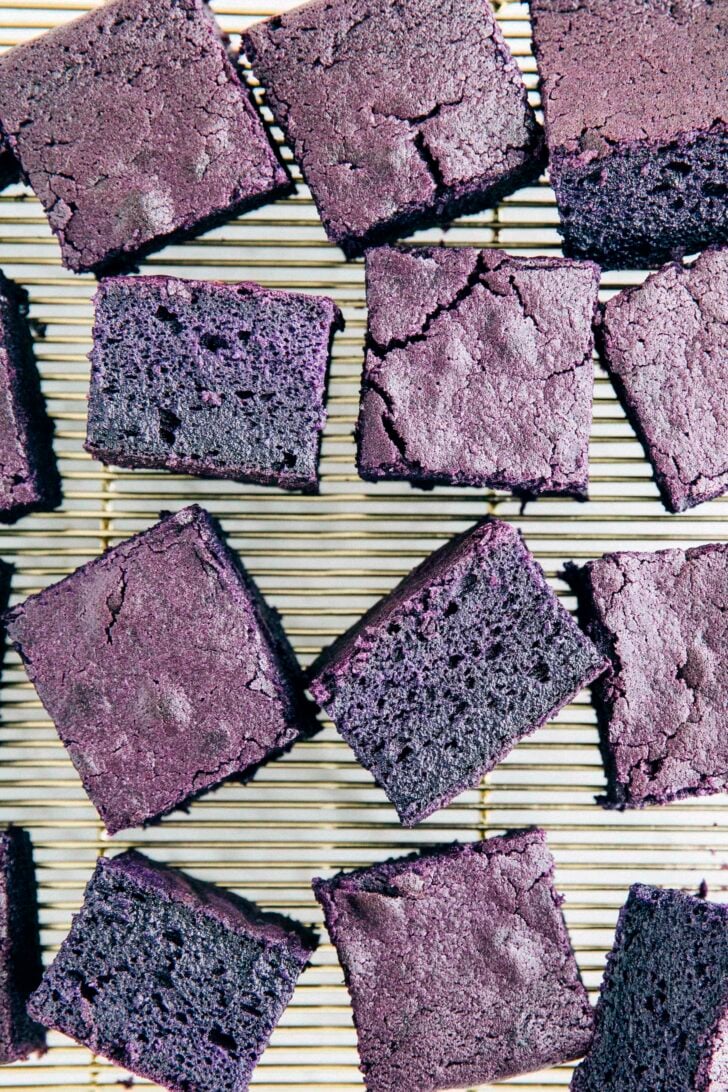
- Bake the mochi cake. Bake for 48 to 50 minutes, or until a skewer inserted into the center of the mochi cake comes out with a few crumbs attached. Cool completely on a wire rack before slicing.
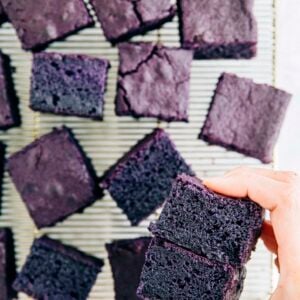
- Serve and store. Run a butter knife or the offset spatula along the edges of the pan and use the overhanging parchment as handles to lift the cake out of the pan and onto a cutting board. Slice into 2-inch squares and serve.The mochi cake is best the day it's made, but can be stored in an airtight container or zip-top bag at room temperature for up to 3 days.
Notes
How To Store Ube Mochi Cake
The mochi cake is best the day it’s made, but can be stored in an airtight container or zip-top bag at room temperature for up to 3 days. When stored, the cake loses its crispy exterior but is still pretty delicious.Can you freeze ube mochi cake?
Yes, with reservations. The mochi cake will keep in the freezer, but lose its crispy exterior when thawed after storing. It’s still good—just different texturally! To freeze the mochi cake, tightly wrap the entire thing (or any leftover slices of cake) in plastic wrap and freeze for up to 3 months. To serve, transfer to the refrigerator to thaw overnight. Rewarm for 10 to 20 second intervals in the microwave until room temperature.get new recipes via email:

buy the book
Weeknight Baking:
Recipes to Fit your Schedule
Over the past several years of running Hummingbird High, I kept a crucial aspect of my life hidden from my readers: I had a full-time, extremely demanding job in the tech world. In my debut cookbook, Weeknight Baking, I finally reveal the secrets to baking delicious desserts on a tight schedule.
I just made it today and it is EXCELLENT. I couldn’t wait for it to cool before I tried a bit, and wow!! Buttery, the right amount of sweetness, the abundance of ube flavor! This was my first time making a mochi cake, and it definitely won’t be the last time. Thank you for the wonderful recipe!
Instructions easy to follow, made the recipe to use up leftover coconut milk, everyone loved them!