My Best Shortbread Cookies
My best shortbread cookie recipe makes pale golden cookies that are super buttery and salty, with a tender crumb that melts in your mouth. Despite this tender crumb, the cookies have just enough crunch to snap like any good roll-out cookie recipe!
The best part?
The cookies are made with an old-fashioned technique that doesn’t require any cookie cutters. Instead, I instruct you to cut the rolled-out dough into squares. Doing so results in beautiful and almost rustic shortbread cookies.
A big thank you to Land O’Lakes for sponsoring this recipe! Learn more in the blog post, and thank you for supporting the sponsors that keep Hummingbird High up and running!
Why You Should Make This Recipe
Here are all the reasons to make my best shortbread cookie recipe:
The recipe only has four ingredients, all of which are probably already in your pantry and fridge.
Traditional shortbread cookie recipes typically only contain four ingredients: flour, sugar, butter, and salt. That’s right—there are usually no leaveners like baking powder or baking soda in the recipe!
The recipe doesn’t require any specialty cookie cutters.
Fun Fact: I developed this recipe many years ago, back when I was living in my old house with a fairly modest-sized kitchen. Back then, I didn’t have much space for specialty cooking and baking equipment. I love cut-out cookies, but find that specialty cookie cutters tend to be clunky. They took up far too much valuable real estate in my space-strapped kitchen!
So I worked hard to develop a shortbread cookie recipe that wouldn’t require any additional tools beyond what I used on a regular basis for other recipes. And indeed—the resulting instructs you to shape the cookies into squares with just a rolling pin and a sharp knife!
The cookies come together quickly and easily, with almost no mess.
Many cut-out cookies instruct you to roll out the dough on a floured kitchen countertop. Doing so prevents the cookie dough from sticking to the counter. However, it can also create a big mess, with flour flying everywhere in your kitchen and getting into all its little nooks and crannies.
So what if I told you there’s an easier, more consistent way to roll out the dough? One that involves almost no mess?
Like in this recipe!
Instead of rolling out the shortbread cookie dough on a floured surface, I instruct you to sandwich it between two large sheets of parchment paper. The bottom sheet prevents the dough from sticking to the counter. The top sheet prevents the dough from sticking to the rolling pin.
That’s it!
And with this method, there are no floured surfaces to wipe and clean afterwards. You can even reuse the parchment paper to line your sheet pans when it comes time to bake the cookies. Cool, right?
The cookies store well.
These shortbread cookies keep well BEFORE and AFTER being baked! I like to shape the dough into cookies and freeze them. You can bake them straight from the freezer without any additional work.
They also keep well after being baked thanks to the generous amount of butter in the recipe. I find I like them best one to two days after being baked; they soften into the perfect tender texture, and the buttery, salty flavors of the cookies are more pronounced!
Ingredients and Substitutions
Now that I’ve convinced you to make my best shortbread cookie recipe, here’s everything you need to make them:
Shopping List for My Best Shortbread Cookie Recipe
Be sure to scroll down to the recipe card for the exact ingredient quantities:
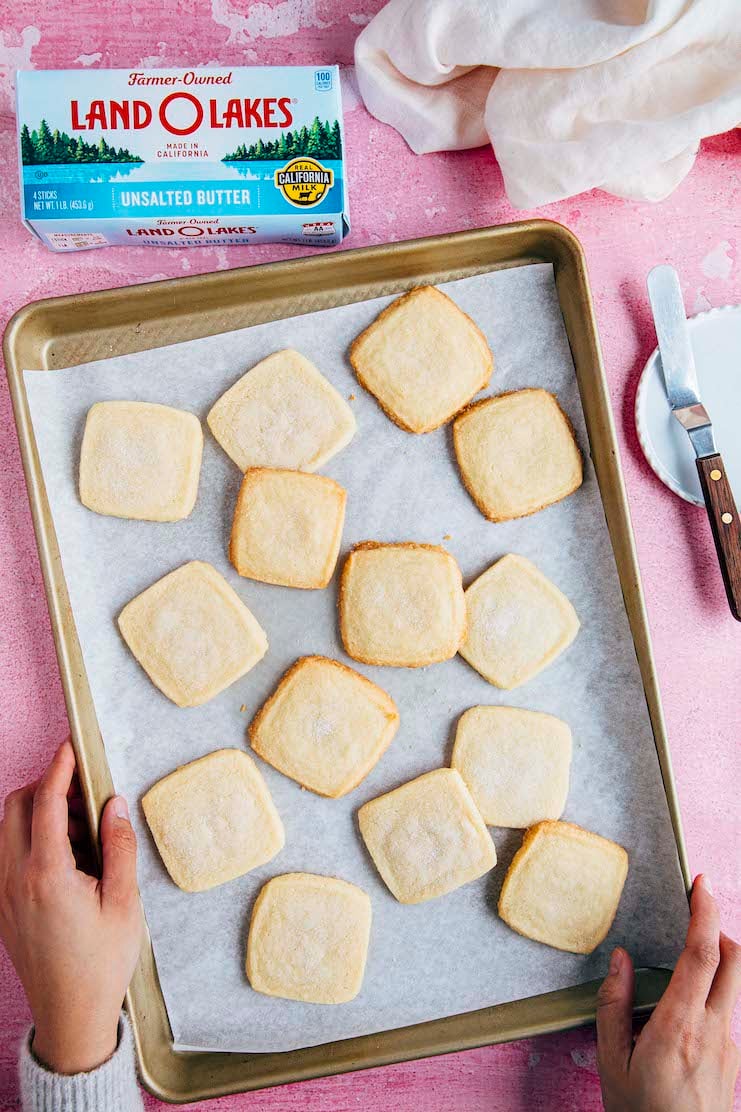
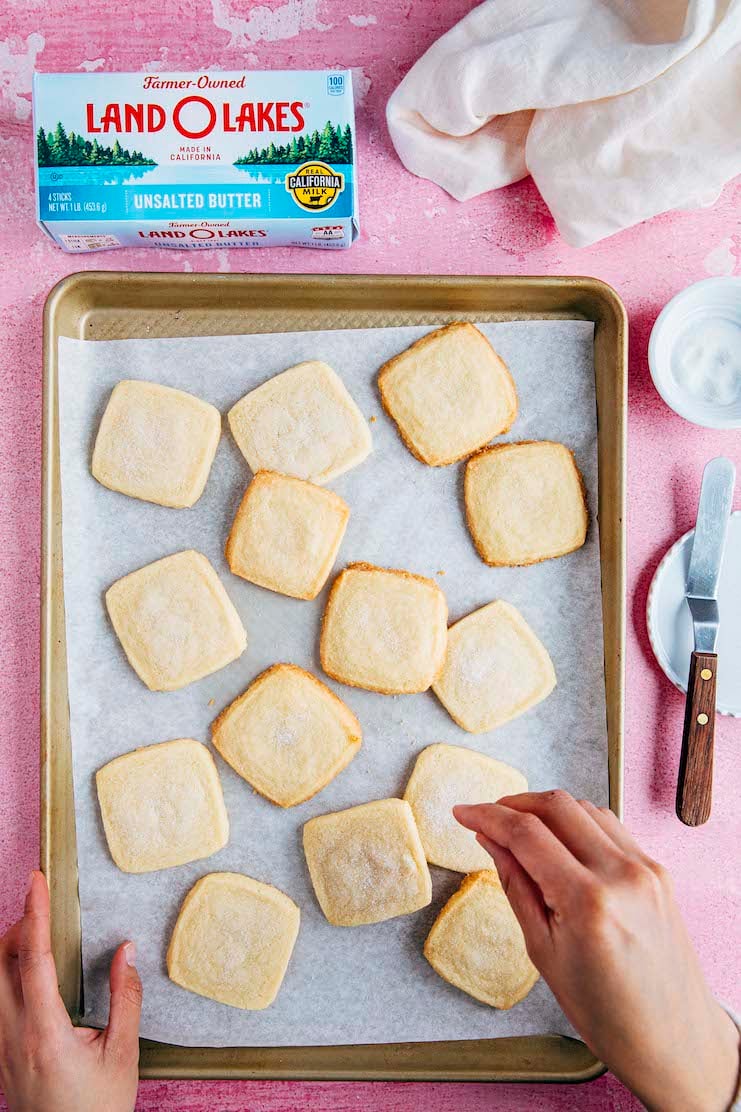
- Land O Lakes® Unsalted Butter
- all-purpose flour
- granulated sugar
- kosher salt
Why You Should Use Land O Lakes® Unsalted Butter In This Recipe
Real Talk: Land O Lakes® Unsalted Butter is the all-purpose MVP butter I use in my recipes. To me, Land O Lakes® Unsalted Butter is the standard to which I hold all other butters. It improves every recipe—baking or otherwise—that I use it in. I love it so much that I even used it while testing all the recipes in my cookbook, Weeknight Baking! The best part? Land O’Lakes is farmer-owned, meaning that the 1,000+ farmer-owners who sell milk to Land O’Lakes have a stake in the company. You can learn more on Land O’Lakes’ website!
But back to the recipe. When it comes to baking, I also prefer to use unsalted butter. Doing so allows you to control the amount of salt in the recipe. It ensures that you don’t end up with a baked good that’s overly salty or umami!
How To Make The Recipe
Here are the basic steps to make my best shortbread cookie recipe:
First, prep the ingredients.
- Prep the ingredients. (Prep Time: 5 minutes)
Because this recipe contains so few ingredients, prep for it is a breeze! Simply measure out everything you need beforehand. You also don’t need to bring the butter to room temperature. In fact, the recipe works best if you use cold butter that’s straight from the fridge. You can even get away with using frozen butter, too! Cold butter makes the dough much easier to work with.
Next, make the cookie dough.
- Make the shortbread cookie dough. (Work Time: 5 minutes)
Similarly, the dough comes together quickly and easily. Mix the flour, sugar, and salt in a stand mixer, then add the cold butter. At first the dough will resemble a coarse meal—don’t panic! Keep beating it as instructed in the recipe. After a few minutes, it will turn into a more traditional cookie dough texture.
Then, shape and chill the cookies.
- Roll out the shortbread cookie dough. (Work Time: 5 minutes)
At this point, other cut-out cookie recipes will instruct you to form the dough into a ball. They will then instruct you to refrigerate it for a few hours before rolling the dough out and cutting it into cookies.
Between you and me, this is my least favorite part about making cut-out cookies. When I follow these instructions, I always find that the dough ends up *too* cold. It becomes too hard to roll out, and by the time I finish doing so, it usually needs to be chilled in the fridge once more in order to work with the cookie cutters.
So in my recipe, we skip that step and roll out the cookie dough immediately. Why? Remember, I instructed you to use butter that was very cold. In theory, your dough should still be cold enough at this point, making it the perfect temperature and texture for rolling out the dough!
The recipe below instructs you to roll and shape the cookie dough into a 9-inch square. This shape is the foundation for the shortbread cookies. - Chill the shortbread cookie dough. (Chill Time: 1 hour)
Sadly, the dough still needs to be chilled in the freezer one more time before baking. Shortbread dough is particularly finicky and prone to melting because of the generous amount of butter in the recipe.
You can get away with freezing the dough for just 1 hour before baking. However, I like to freeze mine overnight to prevent any potential mishaps.
Then, slice the cookies.
- Slice the shortbread cookies. (Work Time: 5 minutes)
Now comes the most “complicated” part of the recipe: slicing the shortbread cookies! I say “complicated” because everything sounds pretty intimidating when you see the instructions written out. However, you’ll find that, in practice, this part of the recipe is a breeze!
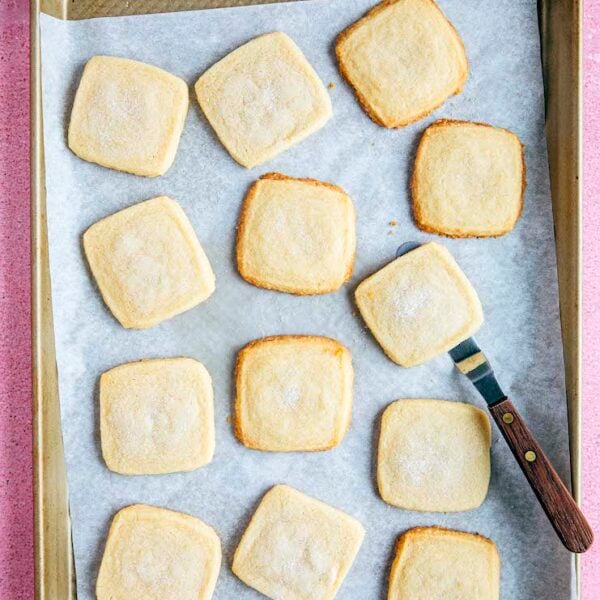
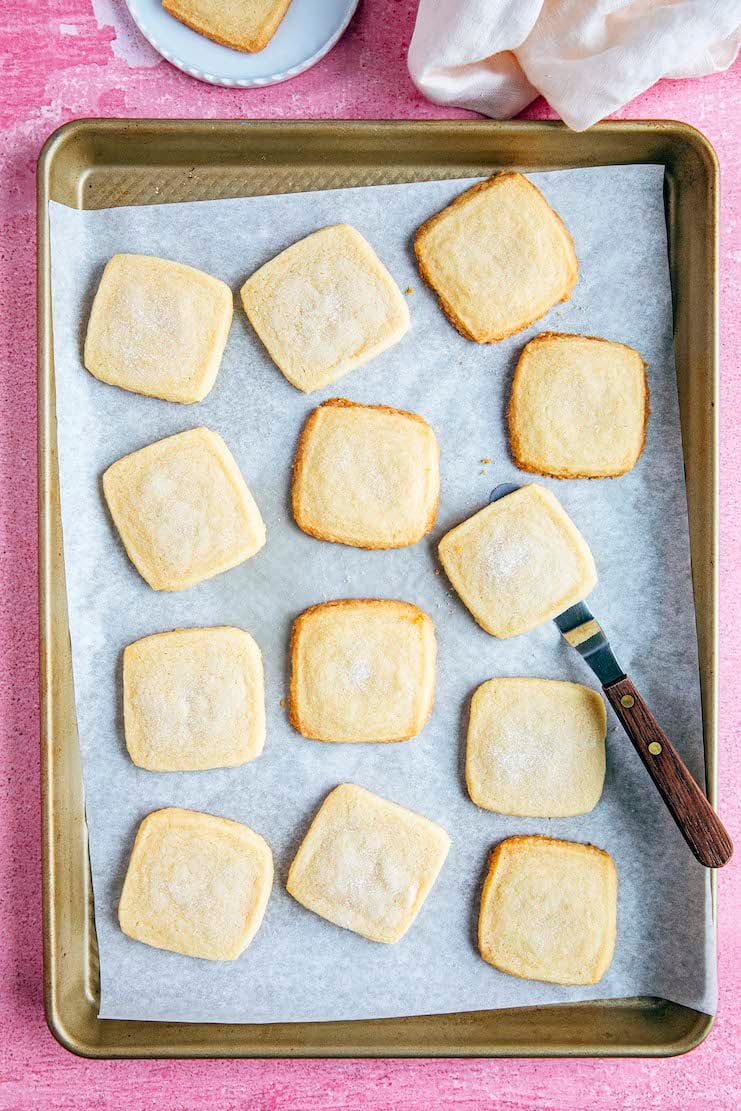
At this point, I’ve already instructed you to shape the cookie dough into a square. You’ll cut that square into four smaller squares by cutting the cookie dough square in half lengthwise, then again, crosswise. You’ll end up with four quadrants that are roughly the same size. Now, cut each of those quadrants into quadrants themselves in the same way. Boom! By the end of it, you’ll end up with 16 shortbread cookie squares.
Finally, bake the cookies.
- Freeze the shortbread cookies while you preheat the oven. (Chill Time: 10 minutes)
Although the cookie dough should still be cold at this point, I like to go the extra mile and freeze them while I preheat the oven. Doing so guarantees that the cookie dough will keep their shape as you bake them. - Bake the shortbread cookies. (Bake Time: 15 minutes)
The cookies need between 15 to 17 minutes in the oven. Bake them for the shorter amount of time if you want pale shortbread cookies with a softer and more tender crumb. Bake them for the longer amount of time if you want the cookies to have golden edges, as well as a slight snap in their texture.
Recipe Troubleshooting and FAQ
Can I cut out the cookie dough with cookie cutters instead?
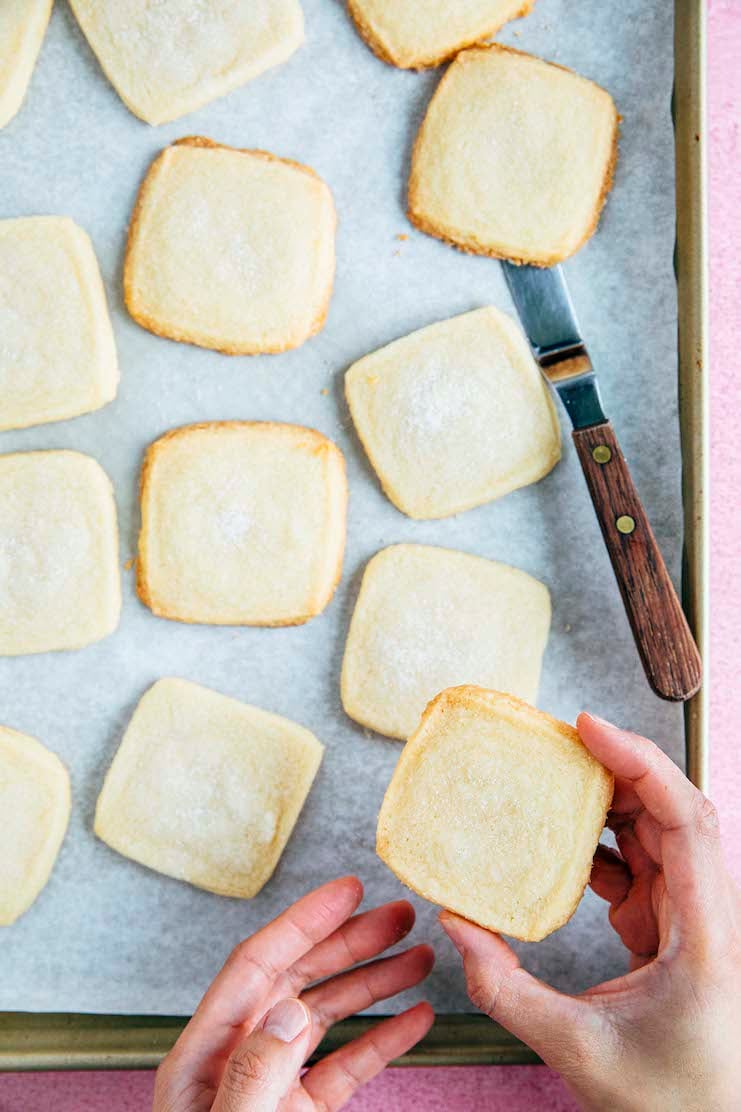
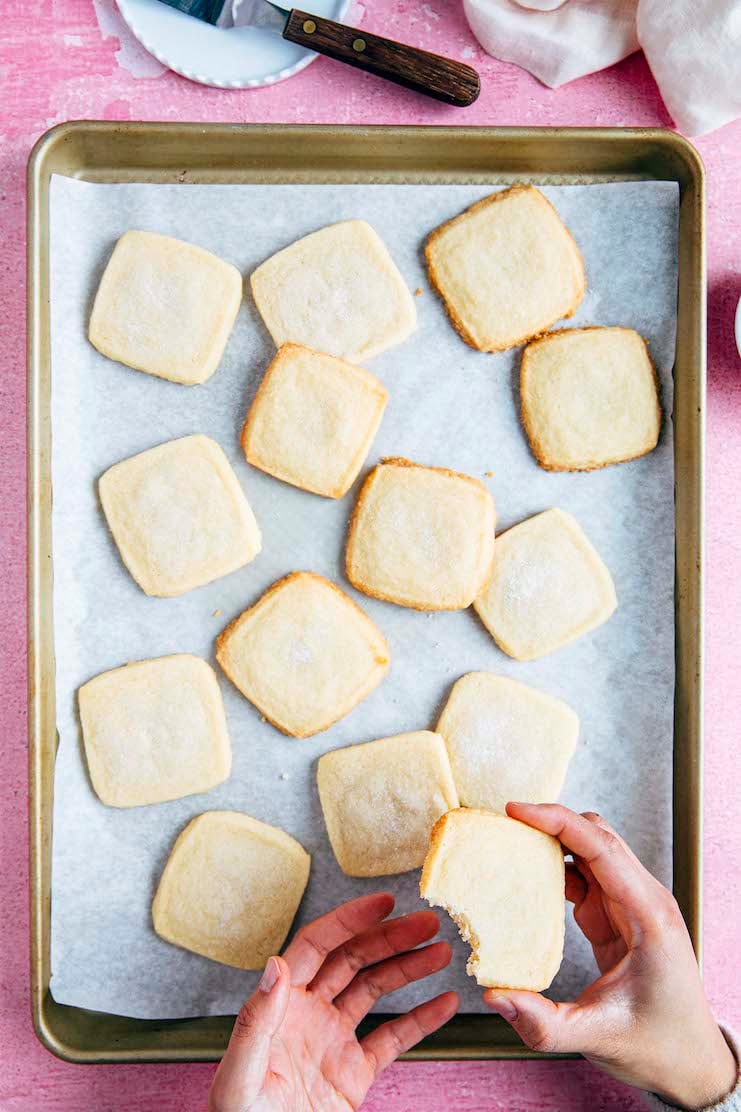
Yes, but I don’t recommend it. The dough won’t hold crisp edges after it’s baked. You can see what I mean in my photos of these cookies. The shortbread squares have rounded corners and edges.
If you’re looking for a more traditional cut-out sugar cookie recipe, definitely check out my cookbook, Weeknight Baking! It has the most reliable sugar cookie recipe; the dough will hold any elaborate shape and keep super sharp edges after baking.
Help! My shortbread cookies look a mess. They spread wayyy too much and lost their shape completely when I baked them. What did I do wrong?
Uh oh! If your cookies spread way too much and lost their shape completely, that means the dough wasn’t cold enough when they were baked. If you make the recipe again, try freezing the unbaked shortbread cookie squares overnight!
Can you freeze the shortbread cookies?
Yes! You can freeze the cookies in two ways:
- Freeze the UNBAKED shortbread cookie squares.
Follow the recipe instructions to make the shortbread cookie dough and slice it into squares. Loosely wrap the sheet pan with plastic wrap and freeze for 1 hour, or until the cookie squares are solid. Place the frozen cookie squares in an airtight container or zip-top bag. Freeze for up to 3 months.
To bake the frozen cookie dough, there’s no need to thaw the cookie dough beforehand. Follow the recipe’s instructions for preheating the oven. Follow the recipe instructions for arranging the squares on two sheet pans. Bake for 17 to 20 minutes, or until the edges and bottoms of the cookies are set and feel firm to the touch. - Freeze the BAKED shortbread cookies.
Stack any leftover cookies in a column. Wrap the stack in two layers of plastic wrap, then a layer of aluminum foil. The aluminum foil will prevent the cookies from absorbing any other flavors or odors in the freezer. When ready to serve, transfer to the refrigerator to chill overnight. Rewarm in the microwave or in the oven at 350°F for 5 minutes before serving.
Best Recipe Tips
Technique Tip
- When working with cut out dough, always be aware of the temperature of the dough. It should always feel firm and cool to the touch, similar to how a stick of butter feels right after you pull it out of the fridge. If at any point in the recipe the dough feels too warm or soft to the touch, ignore the next step of the recipe and chill the dough. Only proceed when the dough feels cool and firm again. Doing so will set you up for success!
Styling Tip
- The cookies will spread a little bit and lose their defined edges after baking. But if you want cleaner and straighter cookie edges, no worries! Gently press a bench scraper against the side of each cookie immediately after removing the cookies from the oven. The dough will still be fairly malleable, and can be easily shaped. However, it will firm up as the cookies cool—so work fast!

Get the Recipe: My Best Shortbread Cookie Recipe (No Cookie Cutters Required!)
Ingredients
- 1 cup (2 sticks or 8 ounces or 227 grams) Land O Lakes® Unsalted Butter
- 2 cups (9 ounces or 255 grams) all-purpose flour
- ½ cup (3.5 ounces or 99 grams) granulated sugar, plus more for garnish
- 2 teaspoons kosher salt
Equipment
- parchment paper
- a rolling pin
- a bench scraper
Instructions
- Prep the butter. Cut the butter into 1- to 1 ½-inch pieces and place them in a small bowl. Freeze while you prep the rest of the ingredients.
- Mix the dry ingredients. In the bowl of a stand mixer fitted with the paddle attachment, combine the flour, sugar, and salt. Beat on low until just combined, about 15 seconds.
- Beat in the butter to make the shortbread dough. Add the butter all at once and beat on low until the dough starts to resemble coarse meal, with pea-sized pieces of butter throughout, about 3 minutes. Increase the mixer to medium and beat until the dough clumps around the paddle and/or sides of the bowl, 1 to 2 minutes. If necessary, use a mixer cover (or throw a kitchen towel over the mixer bowl) while beating to prevent any pieces of dough from shooting out of the bowl.
- Roll out the shortbread dough. Tip the dough out onto a piece of parchment paper around the size of a half sheet pan and use your hands to shape it into a roughly 6-inch square. Place a second sheet of parchment over the dough, creating a parchment "sandwich" with the dough in the middle.Use a rolling pin to flatten the dough between the parchment sheets, working from left to right. Turn the dough 90 degrees and repeat every so often—doing so will help prevent the dough from cracking as you roll it. If the parchment starts to wrinkle and leave creases in the dough, pull the sheet loose and smooth it before rolling the dough more. Continue rotating and rolling until you have a 9-inch square of dough around ¼ inch thick.
- Chill the shortbread dough. Remove the top layer of parchment. Press a bench scraper against the sides of the dough to create straight edges. Transfer the slab of cookie dough, still on the bottom layer of parchment, to a half sheet pan. Cover with the top layer of parchment once more and freeze for at least 1 hour, preferably overnight.
- Once the dough is chilled and you're ready to bake the cookies, prep the pans for baking. Remove the sheet pan of dough from the refrigerator. Use the overhanging parchment as handles to carefully lift the slab of dough off the sheet pan and onto a cutting board. Peel the top layer of parchment from the slab and use it to line the sheet pan once more. Line a second half sheet pan with a new sheet of parchment paper.
- Slice and garnish the cookies. Use a paring knife to slice the slab of dough in half lengthwise, then slice each portion in half crosswise. You should have four smaller dough slabs of equal size.Repeat the process with each of the smaller dough slabs until you have 16 (2-inch) square cookies. Place the cookies at least 2 inches apart on the prepared sheet pans. Sprinkle the top of each cookie with a pinch of sugar.
- Freeze the cookies while you preheat the oven. Chill both sheet pans with the cookies in the freezer while you preheat the oven.Center a rack in the oven and preheat the oven to 350°F.
- Bake the cookies. Bake one pan at a time (keeping the other pan in the freezer) for 15 to 17 minutes, or until the edges of each cookie are pale golden brown with small hairline cracks visible on their surfaces. Cool the cookies on the pan on a wire rack for 20 minutes, or until the edges and bottoms of the cookies are set and feel firm to the touch. Repeat to bake the remaining sheet pan of cookies.
- Serve and store. Serve warm or at room temperature. The shortbread cookies can be stored in an airtight container or zip-top bag at room temperature for up to 3 days.
Did you make this recipe?
Please leave a comment and rating for the recipe using the form below!
Your ratings make it easier to find the recipe online, and I’m always looking for ways to improve Hummingbird High.
get new recipes via email:

buy the book
Weeknight Baking:
Recipes to Fit your Schedule
Over the past several years of running Hummingbird High, I kept a crucial aspect of my life hidden from my readers: I had a full-time, extremely demanding job in the tech world. In my debut cookbook, Weeknight Baking, I finally reveal the secrets to baking delicious desserts on a tight schedule.
For the second time in a week, I tried “My Best Shortbread Cookie Recipe” from Michelle’s cookbook “Weeknight Baking”. It’s incredibly delicious – salty, sweet, and buttery! The recipe was well-organized and laid out, making it easy to follow along. With the help of my trusty stand mixer, I was able to easily make a batch and then chill them before cutting. I highly recommend this recipe to anyone looking for a tasty and foolproof shortbread cookie recipe.