About My Best Foolproof Cut Out Sugar Cookie Recipe
This foolproof cut out sugar cookie recipe is the one you’ve been looking for. It makes an incredibly reliable, sturdy dough that will hold any kind of elaborate cookie cutter shape. The recipe also only uses 7 ingredients, most of which are likely already in your pantry.
The best part? The sugar cookies are delicious, too! The taste incredibly buttery and vanilla-forward—you could mistake them for shortbread!
In addition to making a reliable sugar cookie dough, the recipe teaches you tons of tips and tricks on how to make sugar cookies. These tricks will save you tons of time and clean-up in the kitchen!
@hummingbirdhigh its finally christmas cookie szn
♬ Elf – Main Theme – Geek Music
How To Make The Recipe (With Photos!)
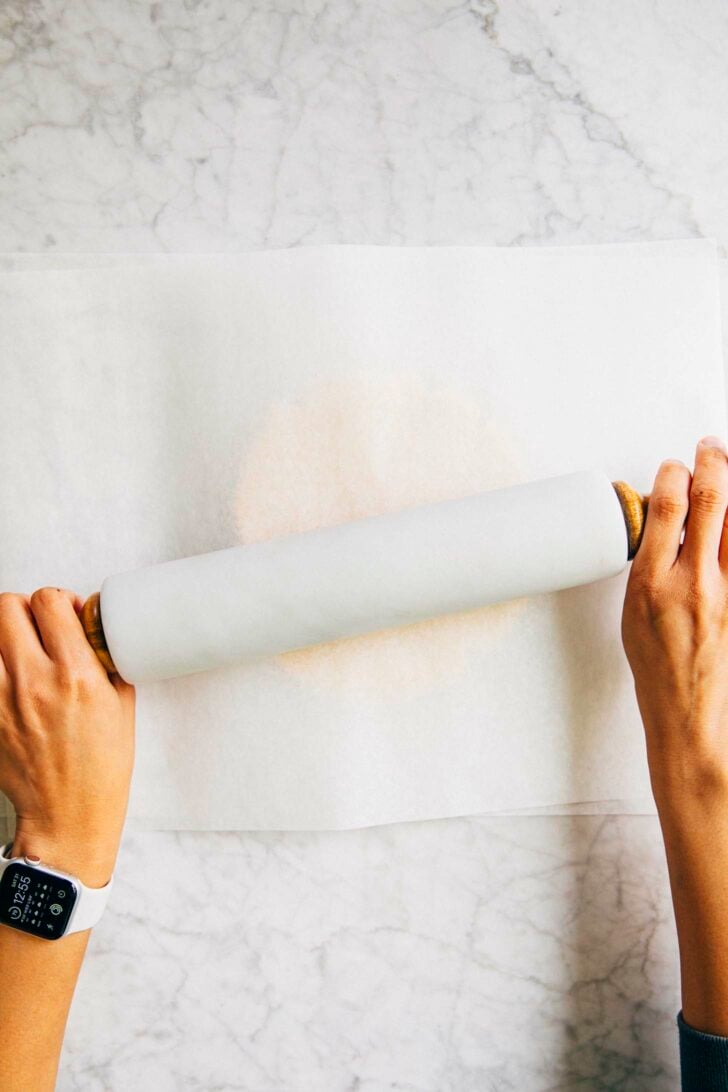
My cut out sugar cookie recipe is also unique in that you don’t need to use any extra flour to roll out the dough. Why? Instead, I instruct you to roll out the dough in between two sheets of parchment paper. The parchment paper acts like flour and prevents the dough from sticking to your countertop and rolling pin.

Best Recipe Tips
About Ingredients
- The recipe works best if your butter is VERY cold. I like to cut the butter first, then place it in the freezer as I measure out the rest of the ingredients to give. And check out my TikTok on how to slice butter into cubes quickly and efficiently!
Baking Equipment Recommendations
- The yield of this recipe will ultimately vary depending on the shape and size of your cookie cutter; however, I’ve provided an approximation based on a 3-inch round cookie cutter.
- The best cookie cutters are made with metal. If you’re a beginner baker, go for a shape without too many sharp corners. It’s easier to cut out hearts and circles than it is stars!
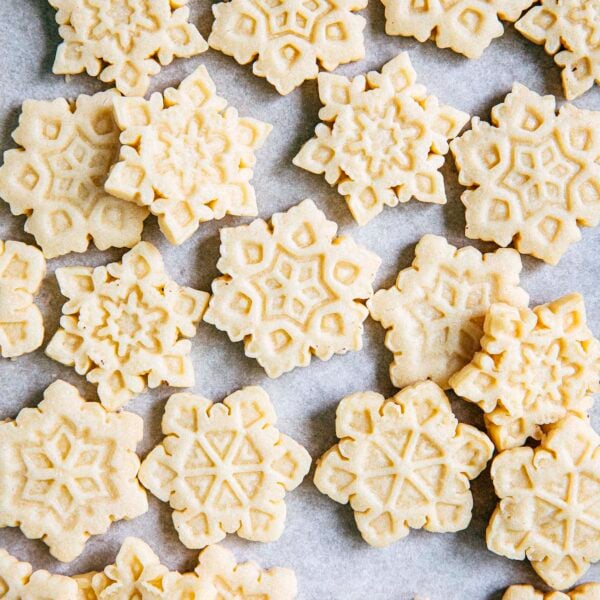
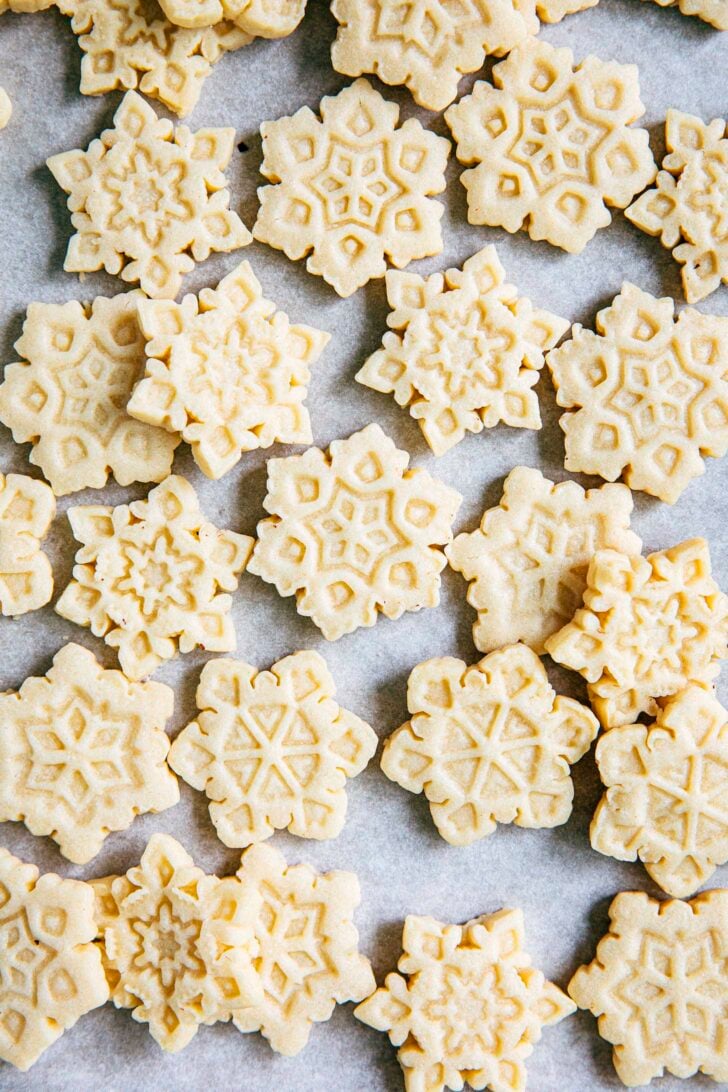
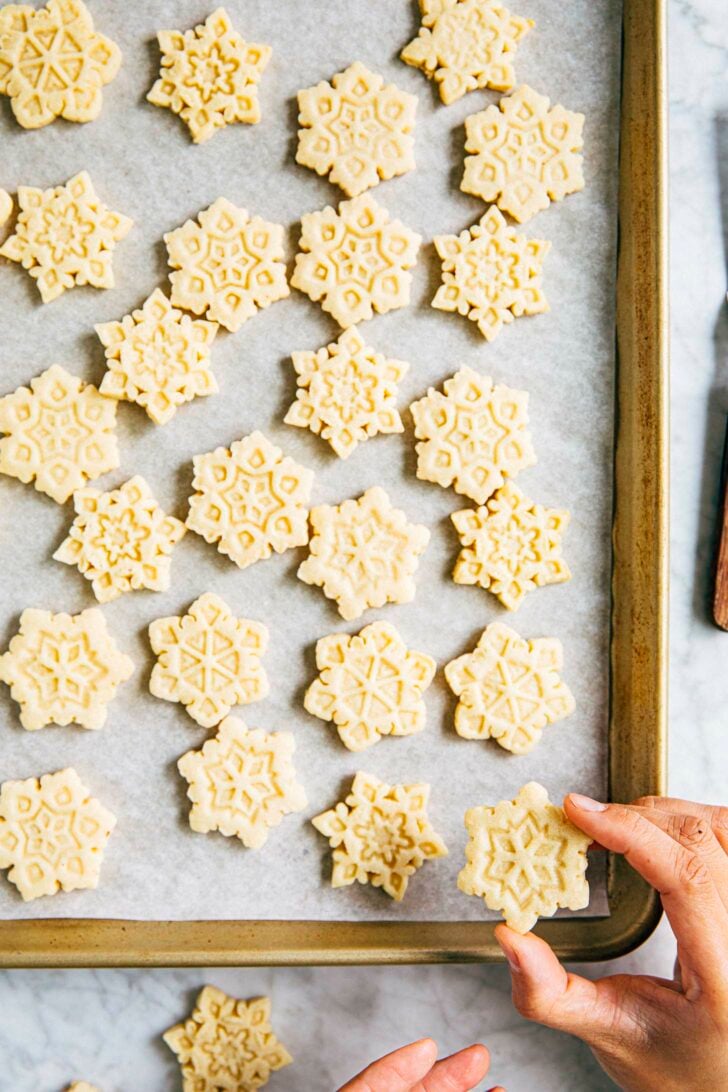
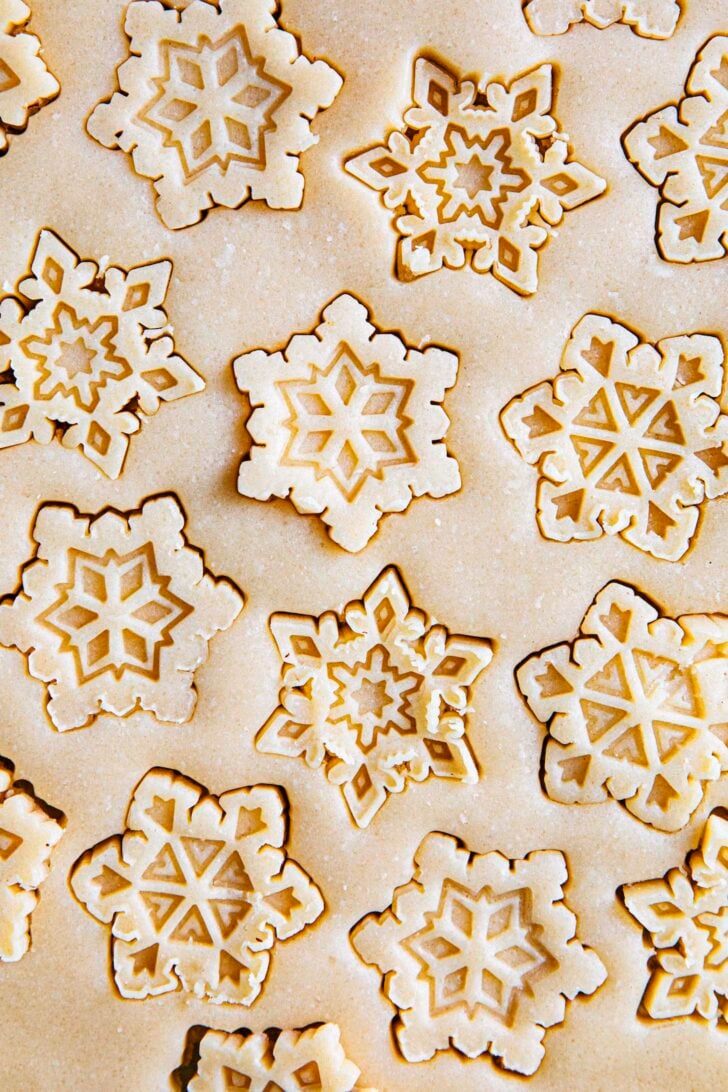
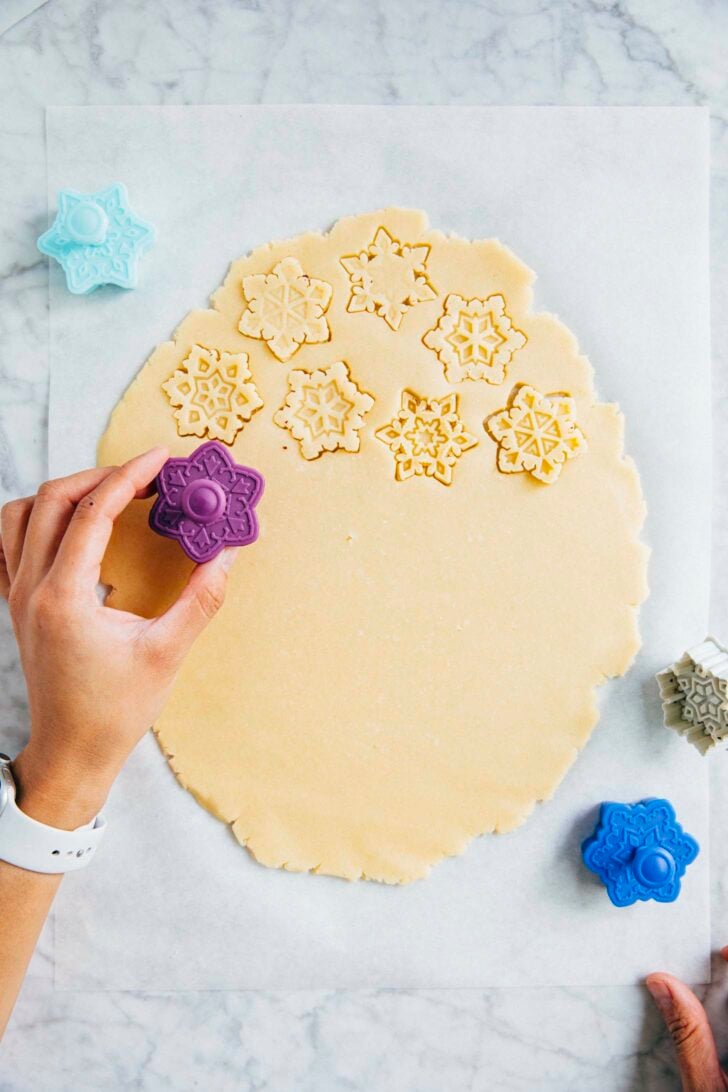
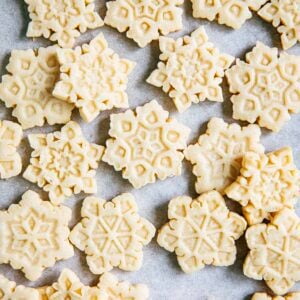
- I also recommend cookie cutters with stamps that press more elaborate shapes into the dough and/or push the cookie dough out of the cutter. Like the snowflake cookie cutters I used for these cookies!
Tips About Baking The Cookies
- I like to bake the cookies one pan at a time. I find that doing so makes the best cookies, ensuring that none of them have overly burnt bottoms or raw centers. However, to save time, you can bake two sheet pans at a time. Position a rack in the upper-third position of the oven, and a second one in the lower-third position of the oven. Bake a pan on each rack, swapping their positions half way through the Bake Time.
- If you want softer sugar cookies, roll out the dough on the thicker side (¼ inch thick) and bake each tray for 10 minutes. If you want a crispier sugar cookie, roll out the dough on the thinner side (⅛ inch thick) and bake each tray for 12 minutes.
Get the Recipe: Best Foolproof Cut Out Sugar Cookie Recipe
Ingredients
- 1 cup (2 sticks or 8 ounces or 227 grams) very cold unsalted butter, cut into 1-inch cubes
- 3 ⅓ cups (15 ounces or 425 grams) all-purpose flour
- 1 ½ teaspoons baking powder
- ¾ teaspoon kosher salt
- 1 cup (7 ounces or 198 grams) granulated sugar
- 1 teaspoon pure vanilla extract
- 1 cold large egg, straight from the fridge
Instructions
- Mix the dry ingredients. In a medium bowl, whisk together the flour, baking powder, and salt.
- Beat the butter, sugar, and vanilla, then add the egg and dry ingredients. In the bowl of a stand mixer fitted with the paddle attachment, combine the butter, sugar, and vanilla. Beat on medium until light, fluffy, and doubled in volume, 3 to 5 minutes, using a rubber spatula to scrape down the bottom and sides of the bowl as necessary. Reduce the mixer to low, add the egg, and beat until just incorporated. Scrape the bottom and sides of the bowl.With the mixer on low, gradually add the dry ingredients and beat until combined. Increase the mixer to medium-low and beat until the dough clumps around the paddle and/or sides of the bowl, 2 to 3 minutes.
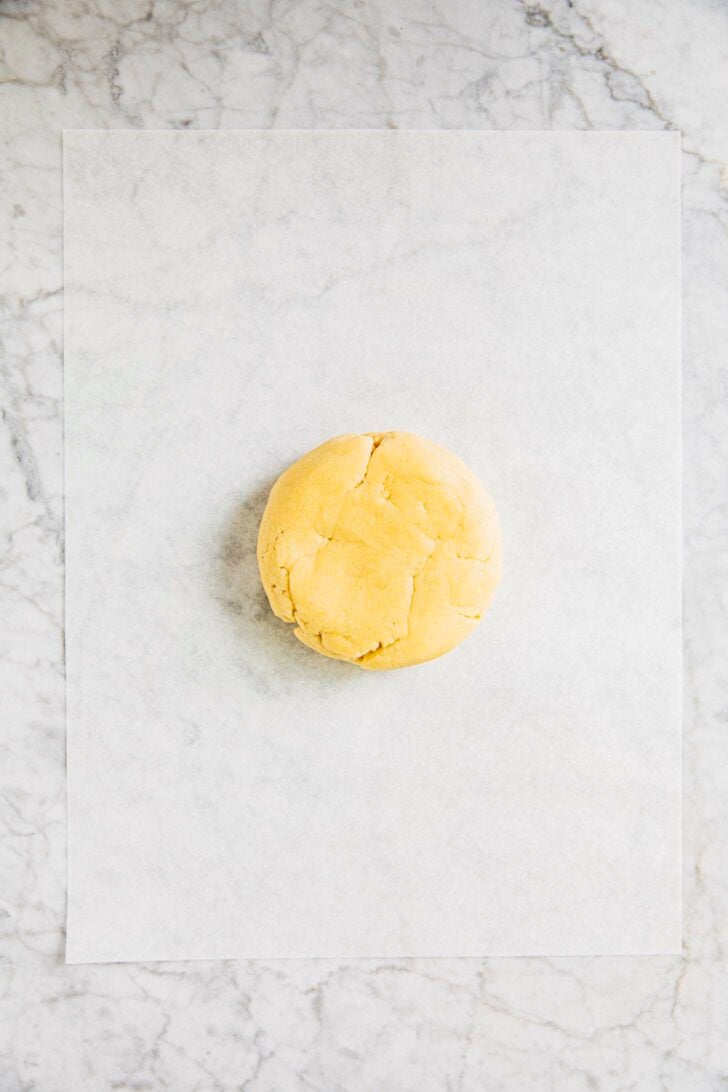
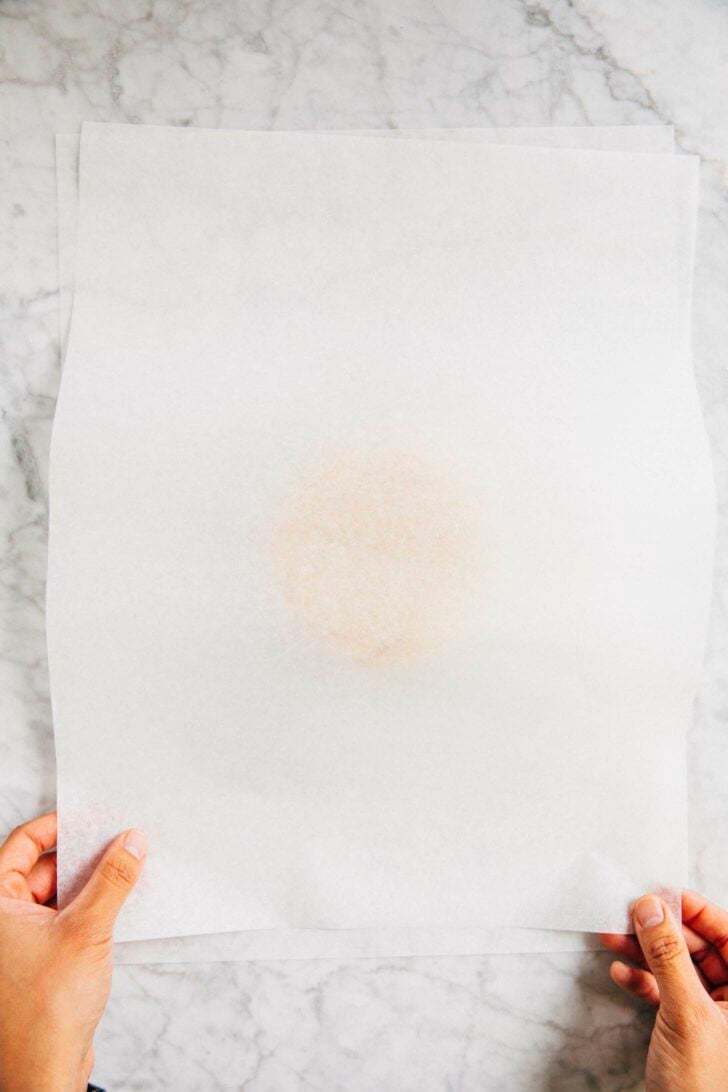
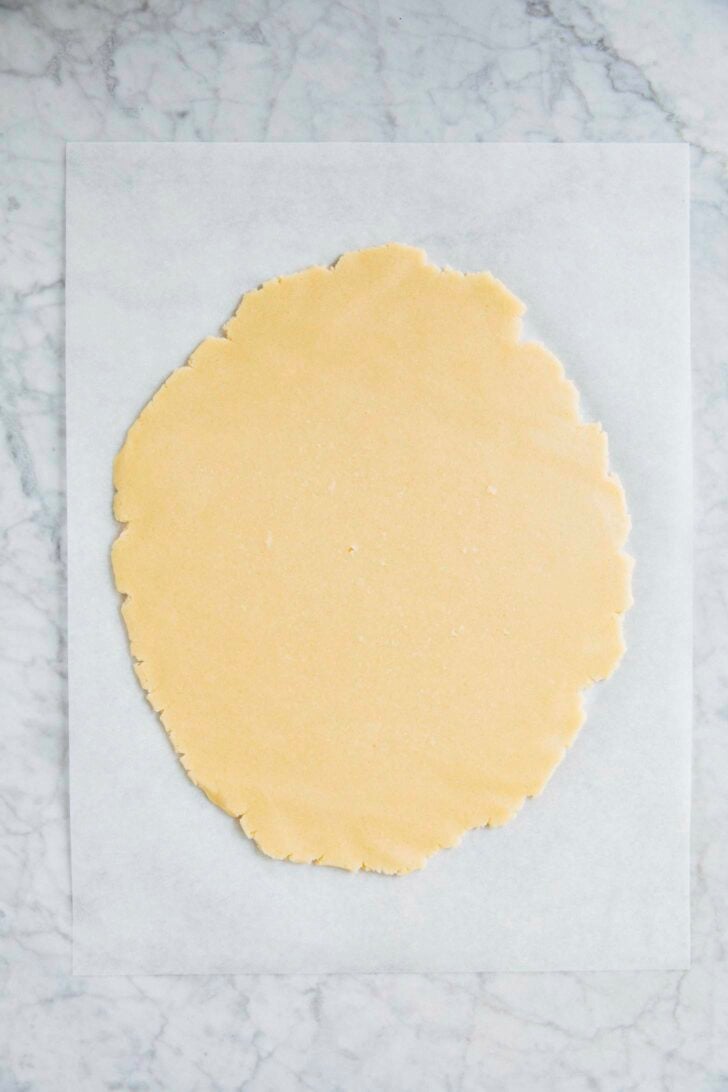
- Roll the dough between parchment paper. Tip the dough out onto a piece of parchment paper around the size of a half sheet pan and use your hands to shape it into a rough 6-inch disc. Place a second sheet of parchment over the dough, creating a parchment sandwich with the dough in the middle. Use a rolling pin to flatten the dough between the parchment, working from left to right. Turn the dough 90 degrees and repeat every so often—doing so will prevent the dough from cracking as you roll it. If the parchment starts to wrinkle and leave creases in the cookie dough, pull the sheet loose and smooth it before rolling the dough more.Continue rotating and rolling until you have a rough oval about 13 inches wide, 18 inches long, and between ⅛ and ¼ inch thick.
- Chill the dough. Transfer the slab of cookie dough, still in between the parchment, to a half sheet pan. Refrigerate for at least 1 hour (or up to 3 days).
- Prep the chilled dough for stamping out the cookies. Remove the sheet pan of dough from the refrigerator. Use the overhanging parchment as handles to carefully lift the slab of dough off the sheet pan and onto the counter. Peel the top layer of parchment from the slab and use it to line the sheet pan once more.Line a second half sheet pan with parchment as well.
- Stamp out cookies. Working quickly, use your favorite cookie cutters to cut out shapes, placing the cookies at least 1 ½ inches apart on the prepared sheet pans. As you work, the dough should remain cool and firm to the touch. Place each sheet pan in the freezer to chill for at least 10 minutes before baking.
- While the dough chills, preheat the oven. Position a rack in the center of the oven and preheat the oven to 350℉.
- Bake the cookies. Bake one pan at a time (keeping the other pan in the refrigerator) for 10 minutes, or until the cookies are golden brown around the edges. Cool the cookies on the pan on a wire rack for 20 minutes, or until the edges and bottoms of the cookies are set and feel firm to the touch. Repeat to bake the remaining cookies.
- Serve and store. Serve warm or at room temperature. If decorating the cookies, cool completely before frosting.The cookies can be stored in an airtight container or zip-top bag at room temperature for up to 3 days.
Notes
Can you freeze cut out sugar cookies?
Yes! You can freeze cut out sugar cookies several ways:- Freeze the cookie dough. You can freeze the cookie dough immediately after making it. You can freeze it as a disc like you would pie dough. But I like to roll it out per the recipe instructions below, and freeze the cut out cookies. I freeze them on a sheet pan and wrap the entire thing in plastic wrap. That way, I can bake the cut outs whenever I have a sugar cookie craving! Just follow the instructions for baking below—you may need to add 1 to 2 minutes extra to the Bake Time if baking from frozen.
- Freeze the baked cookies without any decoration. You can freeze the baked cookies without any decoration. Place them in an airtight container or Ziploc bag and freeze for up to 3 months. Thaw in the refrigerator overnight, then decorate when slightly chilled. Although this is doable, I don’t actually recommend it. It can make the cookies extremely soft. I much prefer freezing the cookie dough cut outs!
get new recipes via email:

buy the book
Weeknight Baking:
Recipes to Fit your Schedule
Over the past several years of running Hummingbird High, I kept a crucial aspect of my life hidden from my readers: I had a full-time, extremely demanding job in the tech world. In my debut cookbook, Weeknight Baking, I finally reveal the secrets to baking delicious desserts on a tight schedule.
Your “A Roll Out Sugar Cookie Recipe That Actually Has Your Back” recipe in Weeknight Baking is my absolute go-to. People always comment that my cookies taste as good as they look. It looks like this is the same or have you made any tweaks?
Yes! This is the exact recipe from Weeknight Baking. I think I made a VERY minor tweak in one of the steps/timing of the entire recipe. I shortened the first chill time maybe? But nothing life changing.
Okay bookmarking this right now! I love the snowflake cutters too!
Thank you for these great tips. I appreciate the extra effort you went to to create perfect a perfect sugar cookie recipe. Let me know if you come up with a good recipe to ensure good cookie stencils :-). I’ve got several high quality cookie presses but it is often hard to see the stencil on the top after baking.
Please proofread your instructions. The egg gets added in a couple different places. Otherwise, yum!
Hi! The instructions are correct. The italicized step is the abbreviated/shortened version of the more detailed step.
I’m excited to try these, but I have a question about the butter! I’m not sure that my (very old) stand mixer will be able to manage cold butter. Do you think the recipe would work with room-temperature butter and a longer dough chill time? Are there any other adjustments you would suggest?
Hm, I think cold butter straight from the fridge will probably be okay? I would definitely skip the tip about freezing it though.
Hi! I tried your Best Foolproof Cut Out Sugar Cookie recipe and this is the FIRST sugar cookie recipe that I have tried that literally stayed completely to form. No puffiness to blur lines or anything! I am very satisfied. I have a question. While I love the cookies, my husband has a super sweet tooth and they aren’t sweet enough. Can more sugar be added to this recipe without ruining it?
P.S. I sent you an email about vanilla. I hope you checked it out. 🙂
Hi! The cookies aren’t too sweet because they’re meant to be frosted with either buttercream frosting or a royal icing. Adding more sugar will probably blur the lines :/
hi so the parchment paper was impossible for me since it slid all over my counter even when i tried to weigh down the corners…. how on earth did you roll dough without that happening???
Love this recipe Shaped cookies can be difficult when littles are helping. But this recipe worked great. Love that it’s ready to use directly out of fridge. Helps so much with dough getting warm and spreading
This recipe is delicious! wow, thank you! However, I was frustrated by the cookie cutting itself. The dough was too hard for the cutter when I first took it out of the fridge, and once it was warm enough, the temperature window to cut without having the dough stick to the cutter was really narrow! It took several tries of cooling, warming, re-rolling, and cooling again.
I also do not have a fancy mixer. Just a wooden spoon, so I needed to warm the butter before mixing. What helped a little was cooling the cutter for a few minutes. It’s a 3D printed cutter (please follow link below), so this was a real challenge. https://www.portraitcutters.com/
First time making these, turned out great! a perfect flat top , not too sweet cookie for icing. Great with out icing also!
Since this was a trial run for me I followed directions exactly, though a question I have is::
Has anyone tried cutting them out and THEN chilling? to maybe make re-rolling leftover dough easier? or Would that be bad for butter reasons?
thank you for the great recipe!
To me they were just the usual cookie. They weren’t anything I would recommend a friend to make
I was looking for a recipe I could use with cookie stamps for St. Patrick’s Day and came across this one.
In the end, the cookies are good and what I was expecting – next time, I might add a little flavoring, rather than just vanilla.
However, after mixing all the ingredients, it was very dry and there wasn’t enough cohesion in the dough. I added a 2nd egg and a little water (maybe 1/8 cup), which was enough to get the dough to hold together so it could be rolled.
After binging on cheap, store-bought cut-outs and feeling sick af, i need homemade. If i want to decorate these with colored decorative sugar crystals pr sprinkles, should i brush with an egg wash and sprinkle atop before baking or…?
That should work, but the sugar will cause the edges to melt a bit/the cut outs will be less sharp.
A question…. Why use VERY COLD butter when it’s going to be creamed until it’s light and fluffy. I always thought to achieve a light and fluffy mix the butter must be at room temperature?
The recipe is unusual in that it instructs you to roll the dough right away after making the dough! Using cold butter helps keep the dough cold and easier to roll out when doing so. You can still cream cold butter and get it to incorporate into the sugar, it just takes a little longer!