
About This Pistachio Pudding Layer Cake
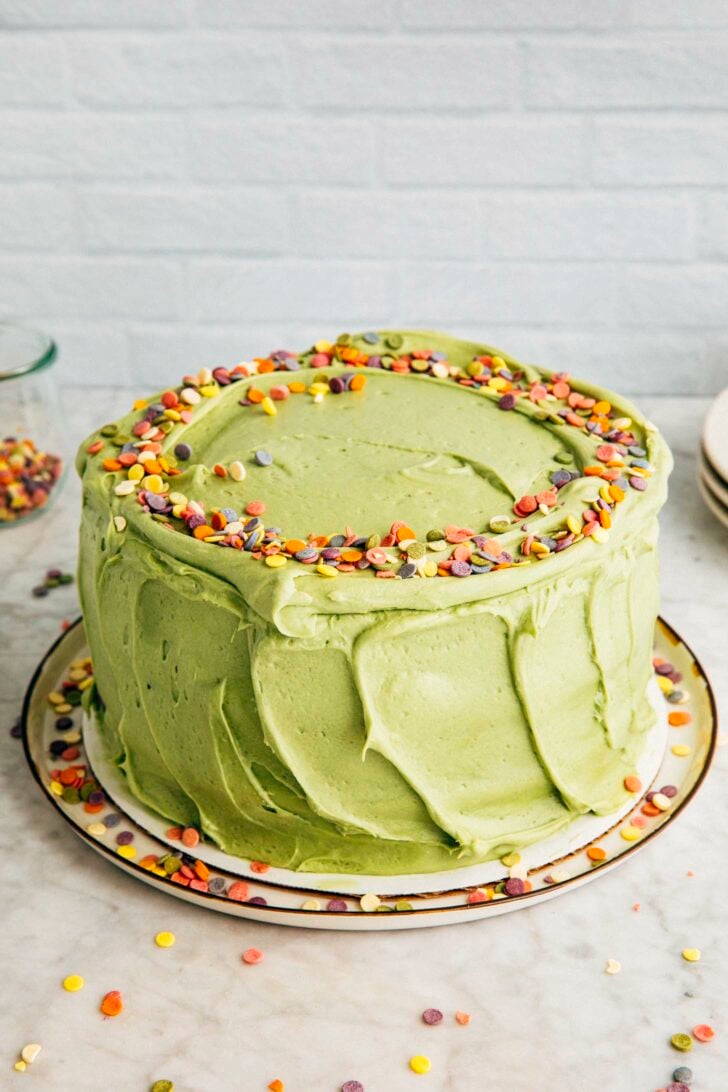
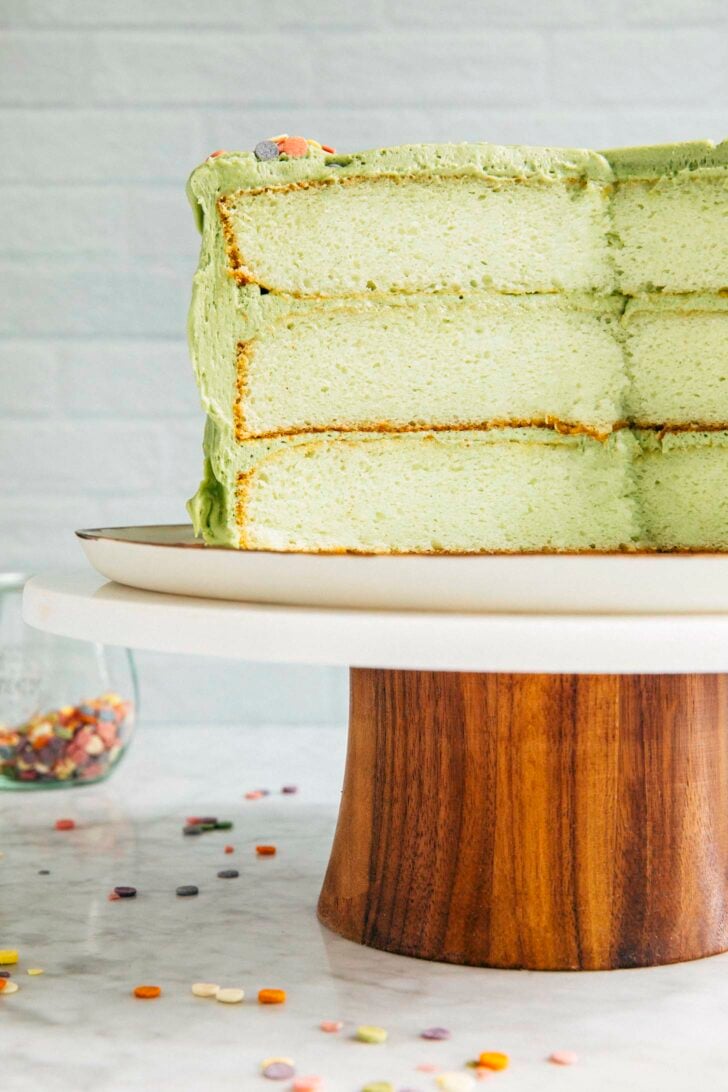
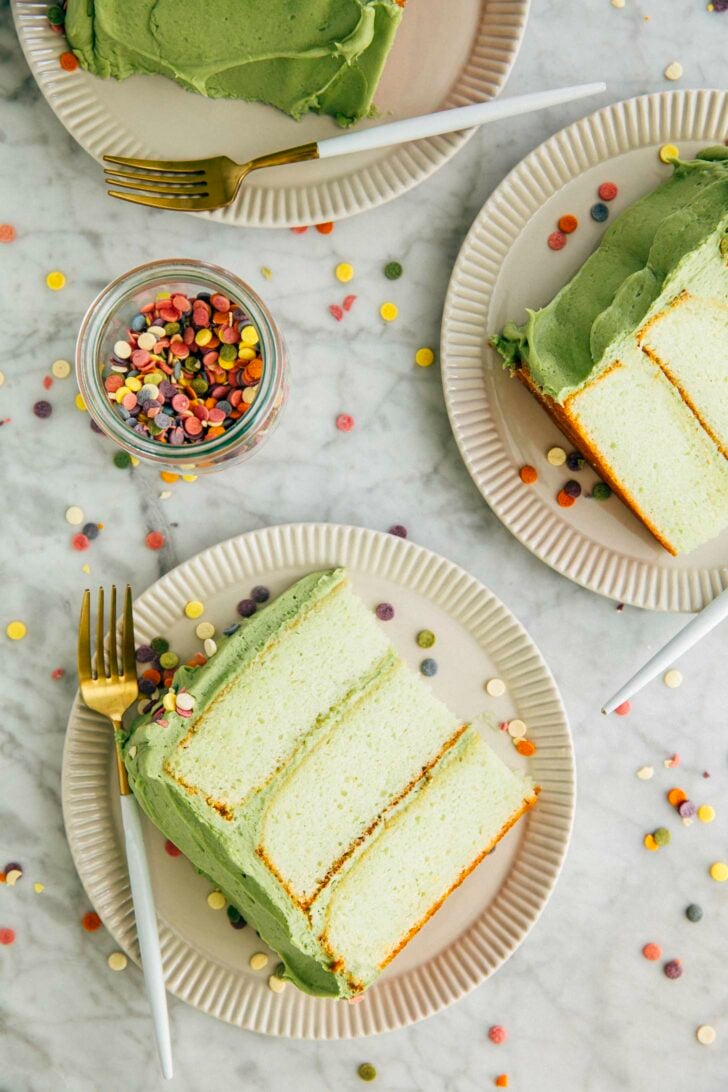
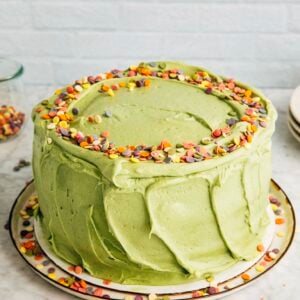
This pistachio pudding layer cake is made with 3 layers of incredibly soft and moist cake flavored with instant pistachio pudding mix. The pistachio pudding mix enhances the cake’s light and pillowy texture and gives the cake the nostalgic pistachio ice cream flavor you remember from your childhood. The cake is then decorated with a tangy cream cheese frosting that pipes beautifully into fun decorations and designs.
@hummingbirdhigh smash my face into this i dont care #caketok #bakingrecipe ♬ Pure Imagination Lofi – G Sounds
For more delicious layer cake recipes, check out Hummingbird High‘s layer cake recipe archive!
A Note About Hummingbird High‘s Twelfth Anniversary
I made this pistachio pudding layer cake to celebrate Hummingbird High‘s twelfth birthday! Twelve years ago today, I opened my laptop in Denver, CO to write my first ever Hummingbird High blog post. Since then, a LOT has happened. I’ve published a cookbook, had recipes and articles published in places like The New York Times, Bon Appetit, and more. Hummingbird High was also named one of the Best Baking Blog(s) On The Internet (twice!).
On the internet, 12 years doing the same thing makes me a literal dinosaur. And indeed, lots has changed since I started. Food bloggers started out as mostly storytellers, before facing a “just shut up and get to the recipe” backlash. This backlash led to today’s scene: many food bloggers have migrated to social media to show their individuality and personality (and even that is, as the kids say, “sus”—because don’t all food videos seem the same at the end of the day?). Food blogs are still around, yes, but many are hollow and impersonal. Most are now just filled with short SEO-optimized recipes that add nothing new or exciting to the dish (because what’s the point of trying something new if nobody’s going to Google it, I guess). Despite all the lingering complaints, it’s been a long time since I’ve seen a story about somebody’s grandma teaching them how to make a recipe.
Maybe you like it better that way. But I’m not sure I do.
I spent the last few years trying to follow these new rules in an effort to pay my mortgage, but it’s time to call it quits. It’s gotten to the point where Hummingbird High doesn’t feel like truly mine anymore. Instead, I’m spending my time making recipes based on strangers’ Google searches, social media trends, and expert advice as opposed to focusing on what I want to bake, make, and create. And while it’s perfectly valid to follow that path and continue being a girlboss entrepreneur or whatever, it’s not what *I* personally love.
What’s Next For Hummingbird High
So what does that mean for Hummingbird High?
Don’t worry, I’m not going anywhere. This is a space I built for myself 12 years ago, and I don’t ever see myself giving it up completely. But I am taking some steps to make Hummingbird High more my own again. Like moving to Seattle for the year to pursue a master’s degree! This has been a long saga that I’ve been agonizing about silently for the last few years—one that I would have written about in the 2010s, but kept mum about in order to keep Hummingbird High SEO-optimized and “just get to the recipe”-oriented.
But my hope is that my master’s degree will allow me to transition back into the corporate world, into a job with a steady paycheck with health insurance and retirement benefits. I want to take the pressure off things. I’m hoping that if I’m no longer reliant on Hummingbird High to pay my bills, I’ll be able to do what I want in this space again. Think: sharing stories from my real life (like how I unexpectedly ended up back in grad school as a 36-year-old student surrounded by folks much younger than me!), as well as more challenging but fun recipes based on my own tastes and preferences.
But we’ll see. I’ve got a lot of school left before I get to that point. And if you’ve read this far—thank you for being here and supporting my journey. I hope you continue to stick around to see what’s next for Hummingbird High 🙂
Ingredients and Substitutions
Let’s talk about some key ingredients and their potential substitutions:
- Instant Pistachio Pudding Mix: I recommend using Jell-O Instant Pistachio Pudding & Pie Filling for this recipe for the best and strongest pistachio flavor. However, I also used Kroger’s generic version during my recipe testing and the cake came out fine.
- Kosher Salt: Kosher salt is the best salt for baking recipes. But you can replace the kosher salt in the recipe with table salt. Just use half the amount listed in the recipe when you do!
- Canola Oil. In a pinch, you can replace the canola oil with other neutral flavored oil like grapeseed, vegetable, and more. If you want to splurge and make these muffins EXTRA fancy, use pistachio oil!
- Sour Cream: Using plain whole yogurt (Greek or otherwise) will work instead of sour cream. And if you’re feeling fancy, I recommend substituting the sour cream with crème fraîche!
- Whole Milk: In a pinch, whole milk can be substituted with 2% or skim milk. But using whole milk makes the cake more flavorful.
You can also substitute the whole milk with the plant-based milk of your choice. But note that you’ll also need to find plant-based alternatives for the sour cream, cream cheese, and butter if you want to make the cake dairy-free. - Pistachio Extract: You can typically buy pistachio extract in specialty baking stores or online. I recommend LorAnn Oils Pistachio Extract. In a pinch, you can skip the pistachio extract or use pure vanilla extract instead… but your cake won’t taste as pistachio-y. It’s worth finding pistachio extract!
- Large Eggs. You need a whopping 9 large egg whites to make the cake. If you want to make life easy, you can just buy egg whites in a carton (similar to this generic version by Safeway). Check out the FAQ for more information on how to use them!
- Green Food Coloring. I used Americolor Avocado food gel (which is part of their amazing Nifty Fifty food coloring kit) to dye my cream cheese frosting.
How To Make The Recipe
Here are the basic steps to make the pistachio pudding layer cake recipe from scratch:
First, make the pistachio pudding cake layers.
- Prep the oven, cake pans, and ingredients for the cake layers. (Prep Time: 10 minutes)
- Make the cake batter. (Work Time: 15 minutes)
- Prepare the cake batter for baking. (Work Time: 5 minutes)
- Bake the cakes. (Bake Time: 28 to 30 minutes)
- Cool the cakes. (Cool Time: 1 to 2 hours, preferably overnight)
You’ll need to cool each cake layer completely to room temperature before assembling and frosting the entire cake. If they layers are still warm when you build the cake, they could potentially crater in the center. They could also potentially melt the frosting. All of this combines to create an unstable cake!
So when making layer cakes, I actually like to make the cake the day beforehand to avoid waiting in the kitchen for several hours. I bake the cake layers the day before. Then, once they’re cooled to room temperature, I freeze them overnight. When I’m ready to assemble the cake, I let them thaw slightly at room temperature while I make the frosting. You want the layers cold still—this will help hold crumbs in place and prevent the crumbs from getting into the frosting!
Make the cream cheese frosting.
- Prep the ingredients for the cream cheese frosting. (Prep Time: 5 minutes)
- Make the frosting. (Work Time: 10 minutes)
Assemble the pistachio pudding layer cake.
- Build the cake. (Work Time: 10 minutes)
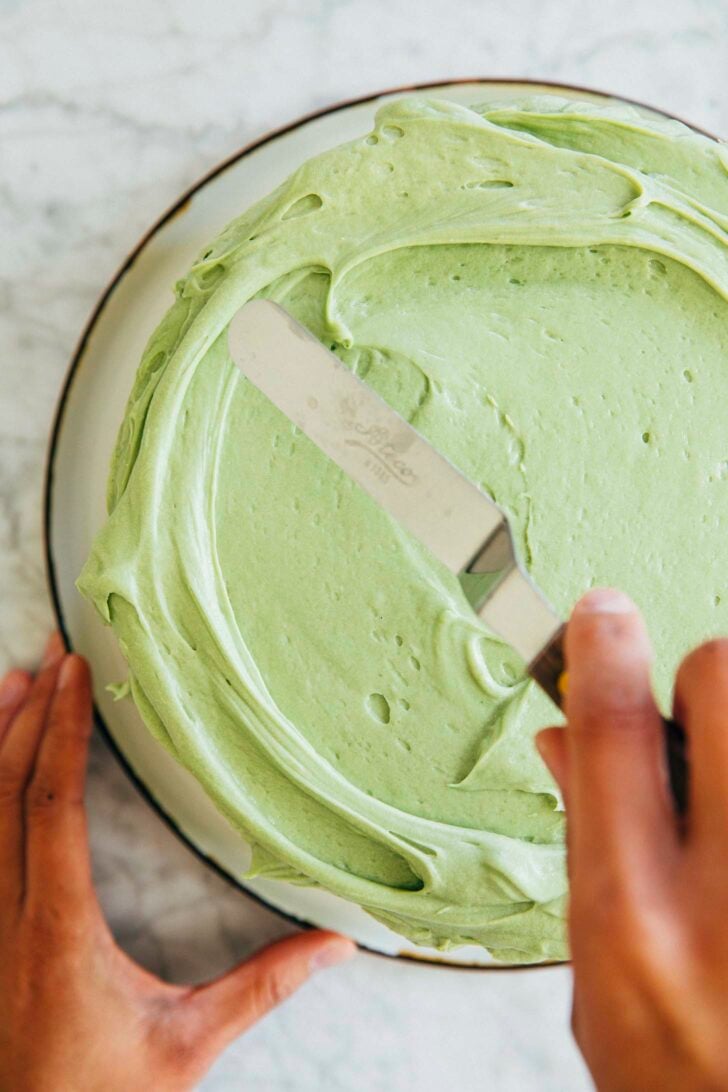
When ready to assemble the cake, level the top of the cakes if necessary. Place one of the cake layers on a cake board or serving platter in the center of a rotating cake stand. Take an offset spatula and drop a generous ½ cup of the cream cheese frosting right in the middle of the top of the cake. Spread it evenly all over the top, just like you would spread butter on toast. Repeat the process with a second layer of cake. Then, stack the third and last layer on top. - Crumb coat the cake. (Work Time: 15 minutes)
A crumb coat is a thin layer of frosting that’s spread over the naked cake to trap crumbs. If you’ve ever tried to frost a cake without a crumb coat, you’ll know that crumbs can shake loose from the cake and get caught in the frosting, leaving your cake with unsightly bumps. The crumb coat seals in any crumbs, allowing you to apply thicker and smoother layers of frosting later.
Finally, make the pistachio pudding layer cake pretty.
- Finish frosting the top and sides of the cake. (Work Time: 15 minutes)
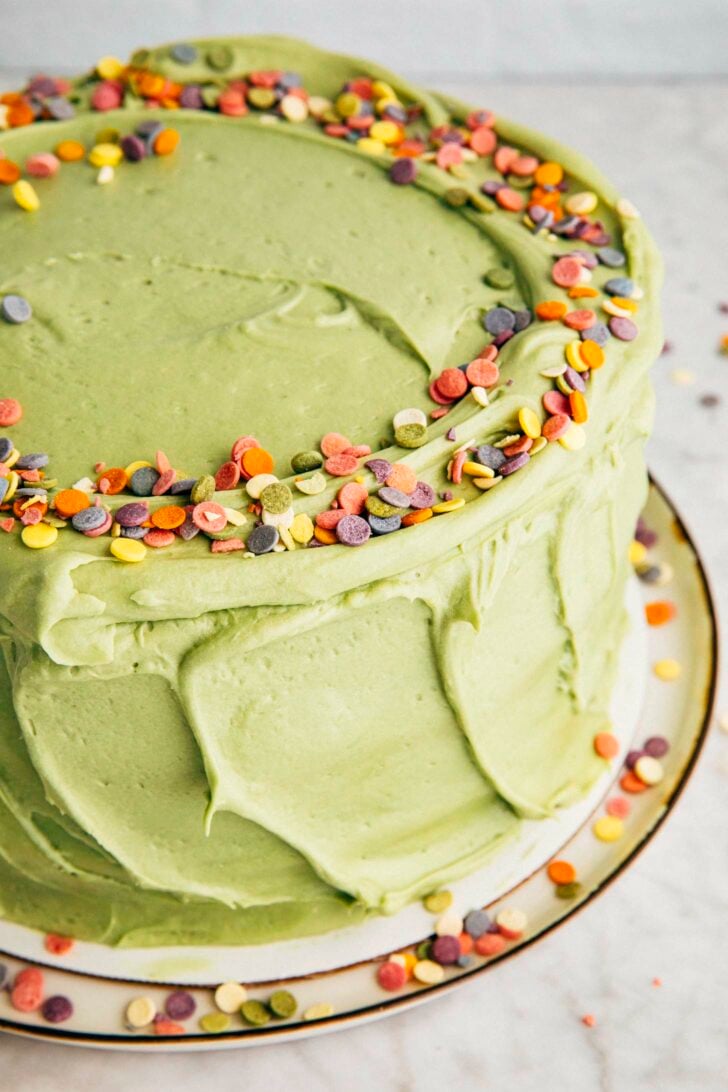
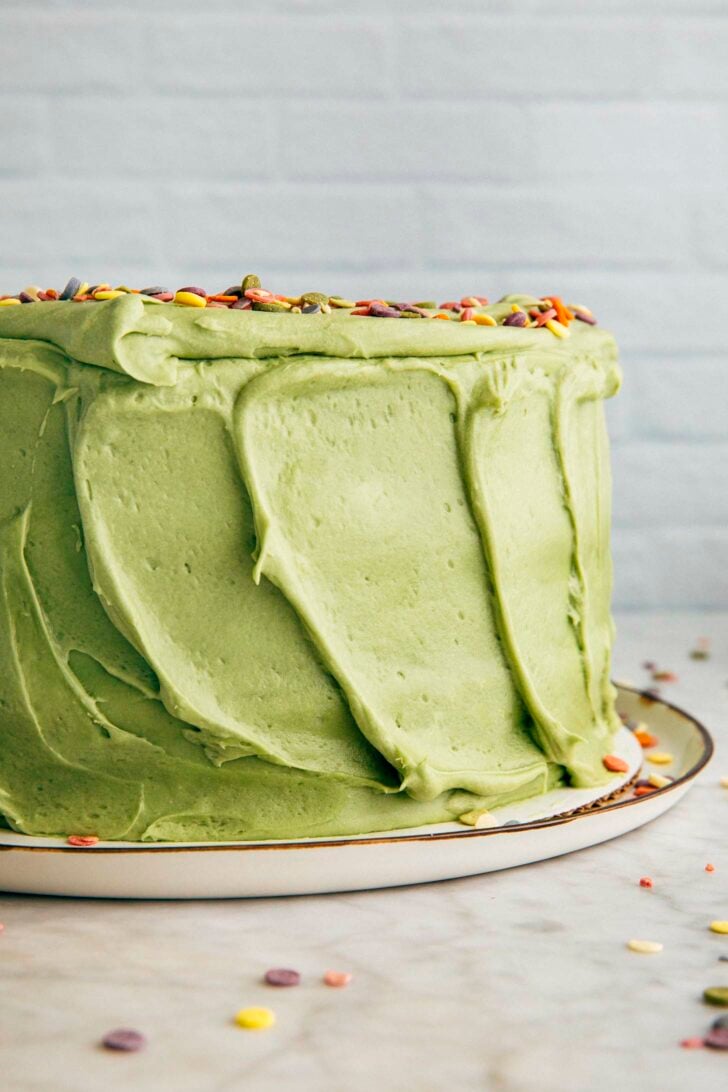
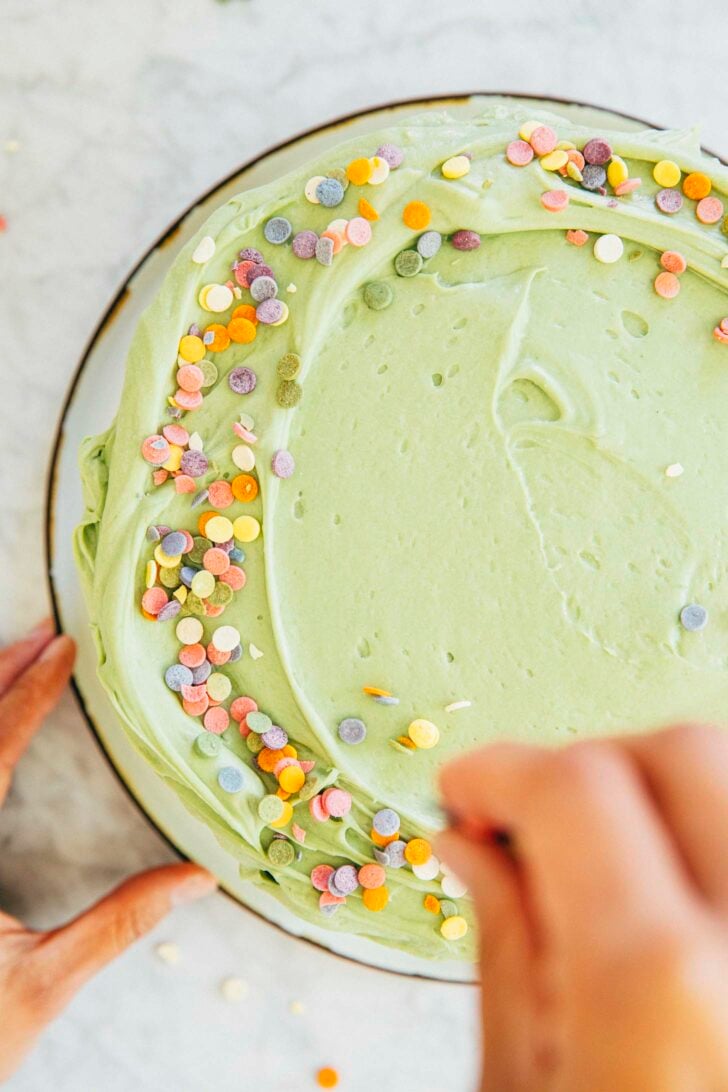
Once the crumb coat is set, finish frosting the cake—this is where you can be creative! I used the offset spatula to create rustic swirls (similar to what I did for this Hershey’s Perfectly Chocolate Cake, too). But you can use the remaining frosting to frost a perfectly smooth cake (similar to this Pink Champagne Cake), or stripes (like in this 6 Inch German Chocolate Cake Recipe), - Decorate the top of the cake. (Work Time: 5 minutes)
Again, you can get creative here—garnish the frosted cake with sprinkles, fresh pistachios, or whatever else suits your fancy. Or go the minimalist route and leave it as is. You do you!
Recipe Troubleshooting and FAQ
Do I really need to use egg whites in this recipe? Can I use whole eggs instead?
Yes, I get it. Egg prices are out of control and this recipe instructs you to use a whopping 9 egg whites.
I wish I could tell you to replace the egg whites with whole eggs (you’d need around 3 large egg whites to make up for the 9 egg whites). But every time I did, the cakes came out overly brown, with flat tops that were sunken in the middle. They still tasted okay, but I can’t whole heartedly recommend it!
How do I use egg whites from a carton in the recipe?
In the Ingredients and Substitutions section above, I say that you can use egg whites from a carton instead of fresh eggs. To do so, measure out 1 ⅓ cups (10.60 ounces or 300 grams) of egg whites from the carton. Use as instructed in the recipe below.
What can I do with my leftover egg yolks?
Make Filipino Leche Flan—the recipe uses 12 egg yolks! You can also make these Egg Yolk Chocolate Chip Cookies or this Vietnamese Egg Coffee Recipe!
How To Store Pistachio Pudding Layer Cake
The assembled cake can be stored at room temperature, under a cake dome or a large bowl turned upside down, for up to 1 day. Press a sheet of plastic wrap against any cut surfaces to prevent the cake from drying out. After that, cover the entire cake loosely with plastic wrap and refrigerate for up to 3 days.
Can you freeze pistachio pudding layer cake?
Yes! You can freeze the cake in the following ways:
Freeze the baked, unfrosted cake layers and the frosting.
Follow the recipe instructions for making and baking the cake layers. Once the layers have cooled, tightly wrap each cake layer in its own individual sheet of plastic wrap. Freeze for up to 3 months. To use in the recipe, there’s no need to thaw the cakes! Simply set the cake layers out on the counter 20 minutes before assembling the cake. Use in the recipe as directed.
You can also freeze the cream cheese frosting. Follow the recipe instructions to make the frosting. Transfer to a ziptop bag and squeeze any extra air out of the bag. Freeze for up to 3 months. To use in this recipe, transfer to the refrigerator to thaw overnight the day before assembling the cake. Then, thaw at room temperature to soften. Beat on medium-high in a stand mixer for 2 to 3 minutes to make it creamy again. Use in the recipe as directed.
Freeze any leftover slices of cake.
Tightly wrap any leftover slices of cake in plastic wrap and freeze for up to 3 months. To serve, transfer to the refrigerator to thaw overnight. Rewarm for 10 to 20 second intervals in the microwave until room temperature.
Best Recipe Tips
- For even cake layers, I like to actually weigh out the layers with a digital kitchen scale to make sure they’re even. The easiest way to do this is to set a prepared cake pan on a digital scale and tare it to “0”. Pour batter into the pan until the scale registers the weight listed in the recipe (because yes, I’ve included the approximate weight of the batter needed for each pan!). Repeat with the second and third cake pans.
- I recently discovered that you don’t really need to sift cocoa powder or confectioners’ sugar when making frosting. Because you’ll be mixing the frosting at high speed, most of the lumps in these ingredients work themselves out pretty easily! Save yourself time and energy—don’t bother sifting these ingredients.
That being said, DON’T apply this advice to other recipes beyond American buttercream. I still encourage you to sift these ingredients (ESPECIALLY if they look really lumpy) when making baked goods with delicate crumbs like angel food cake. You’ll also need to sift confectioners’ sugar when making royal icing.
More Hummingbird High Anniversary Posts
- 11: Swedish Princess Layer Cake
- 10: My Best Chocolate Birthday Cake
- 9: Strawberry Yellow Sheet Cake
- 8: Red Velvet Cupcakes
- 7: Ube Layer Cake
- 6: Hummingbird Cake
- 5: The Best Red Velvet Cake
- 4: A Naked Red Velvet Cake
- 3: Homemade Funfetti Cake
- 2: Pink Champagne Cupcakes
- 1: Confetti Cookies
Get the Recipe: Pistachio Pudding Layer Cake
Ingredients
For The Pistachio Pudding Cake Layers
- 2 ¾ cups (12.35 ounces or 350 grams) all-purpose flour
- 1 (3.4-ounce) box instant pistachio pudding mix
- 4 teaspoons baking powder
- 1 teaspoon kosher salt
- 1 ¼ cups (10 ounces or 283 grams) canola oil
- ¾ cup (6 ounces or 170 grams) sour cream, at room temperature
- ¾ cup (6 ounces or 170 grams) whole milk, at room temperature
- 2 teaspoons pistachio extract
- 9 large egg whites
- 2 ½ cups (17.5 ounces or 496 grams) granulated sugar
For The Cream Cheese Frosting
- 1 ½ cups (1 ½ boxes or 12 ounces or 347 grams) cream cheese, at room temperature
- ¾ cup (1 ½ sticks or 6 ounces or 170 grams) unsalted butter, at room temperature
- ½ teaspoon kosher salt
- 6 cups (24 ounces or 680 grams) confectioners' sugar, sifted if necessary
Equipment
- 3 (8-inch) round cake pans
- stand mixer with a whisk and paddle attachment
Instructions
- First, make the cake layers. Position a rack in the center of the oven and preheat the oven to 350°F. Generously spray three 8-inch cake pans with cooking spray and line the bottom of each with a parchment paper circle. Spray the parchment, too.
- Mix the dry ingredients. In a medium bowl, whisk together the flour, pistachio pudding mix, baking powder, and salt.
- Mix the wet ingredients. In a large liquid measuring cup, whisk together the oil, sour cream, milk, and pistachio extract.
- Whisk the egg whites and sugar. In the bowl of a stand mixer fitted with the whisk attachment, whisk the egg whites. Whisk on low speed for 1 minute, then add the sugar.Turn the mixer up to medium-high and whisk for 5 minutes, or until thick, marshmallowy, and tripled in volume.
- Mix the wet ingredients, followed by the dry ingredients, into the egg mixture. Use a rubber spatula to scrape down the bottom and sides of the bowl, and swap the whisk attachment with the paddle attachment.With the mixer on low, slowly pour in the wet ingredients, and beat until just combined.Scrape down the bottom and sides of the bowl, then gradually add the dry ingredients and beat until just combined.
- Divide the cake batter between the pans. Divide the batter evenly between the pans; if using a digital scale to measure out layers, note that this recipe makes around 65 ounces (1843 grams) of batter—pour 21.65 ounces (614 grams) of batter into each cake pan.
- Bake and cool the cakes. Bake for 28 to 30 minutes. When done, the top of the cake should bounce back when gently pressed and a skewer inserted into the center of the cake should come out with a few crumbs attached. Cool completely in the pans on a wire rack before frosting.
- Make the cream cheese frosting. In the bowl of a stand mixer fitted with the paddle attachment, combine the cream cheese, butter, and salt. Beat on medium-high for 5 minutes, until very soft and creamy. Scrape down the bottom and sides of the bowl with a rubber spatula. With the mixer on low, gradually add the confectioners' sugar and beat until just combined. Scrape down the bottom and sides of the bowl with a rubber spatula once more. Then, beat on medium-high for 5 minutes, until completely smooth. Use immediately.
- Prep the cake layers for assembly. If necessary, level the top of the cakes. Place one of the cake layers on a cake board or serving platter in the center of a rotating cake stand. This will be the first layer of the cake.
- Build the layers. Use a rubber spatula or cookie dough scoop to drop a slightly heaping ½ cup of the frosting in the middle of the first cake layer. Use an offset spatula to spread it evenly all over the top, just like you would spread butter on toast.Place the second cake on top of this frosting, stacking it evenly on top of the first layer. Use the rubber spatula or cookie dough scoop to drop another ½ cup of the frosting in the middle of this cake layer. Spread it evenly all over the top.Finally, place the third cake on top of this layer, stacking it evenly on top of the first two cakes.
- Next, crumb coat the cake. Use the offset spatula to cover the surface of the entire layer cake with a thin layer of frosting. Use just enough frosting to cover the entire cake completely. Refrigerate, uncovered, for 10 to 15 minutes to stiffen and "set" the frosting.
- After the crumb coat sets, finish frosting the cake. Use the offset spatula to cover the cake with the remaining frosting. Then, use the spatula to make large, random sweeping motions across the frosting on the top and sides of the cake. The sweeping motions will create swirls.Garnish the top of the cake with sprinkles or other toppings if desired.
- Serve and store. Serve immediately. The assembled pistachio pudding layer cake can be stored at room temperature, under a cake dome or a large bowl turned upside down, for up to 1 day. Press a sheet of plastic wrap against any cut surfaces to prevent the cake from drying out. After that, cover the entire cake loosely with plastic wrap and refrigerate for up to 2 days.
get new recipes via email:

buy the book
Weeknight Baking:
Recipes to Fit your Schedule
Over the past several years of running Hummingbird High, I kept a crucial aspect of my life hidden from my readers: I had a full-time, extremely demanding job in the tech world. In my debut cookbook, Weeknight Baking, I finally reveal the secrets to baking delicious desserts on a tight schedule.
I’m so glad you’re moving away from the SOE optimization – I followed you for your writing and I’ve really missed that in the last couple of years. Excited to see what’s to come!
Came here to say exactly this. I’m excited about what’s to come!
I’m in awe of you! Hurrah for school and for charting a course that makes you happier!
That cake sounds amazing, gimme pistachio everything!
I’m so happy for you and your next chapter – and excited to see as much of it as you feel like sharing!
And welcome to Seattle, from a former grad student (you can do it!)
I love your blog and I love how long the posts are due to stories, interesting facts/tidbits, helpful hints, etc. I’m sad that more and more blogs are moving away from this as I actually enjoy reading more than just the recipe. Good luck with grad school and I can’t wait to follow along!
Michelle, you are one of my go-to recipe sources. I tell everyone about Weeknight Baking, and I love your blog. I’m glad you’re shifting to do what feels good and fulfilling to you. Best of luck in all your pursuits!
And this cake looks delish!
Congrats on 12 years of Hummingbird High, and best of luck with going back to school!
Good for you! Happy for you 🙂
This cake looks delicious! Do you think the recipe would work well for cupcakes, too?
Yes! Check out this recipe for pistachio pudding muffins: https://www.hummingbirdhigh.com/2023/03/bakery-style-pistachio-pudding-muffins.html It’s slightly different (I think this one uses a different amount of eggs), but you can follow the Bake Time to turn this cake into cupcakes. Just be aware that it’s gonna make a LOT of muffins without some major tweaking.
I’m excited on both levels! So happy you are going back to school and that it means you will be able to bring this site back to what makes you happy. I for one love your long detail blogs and loathe the direction food bloggers are headed to stay relevant. You always give so much detail about why the recipe works the way it does. It’s as much a chemistry lesson as it is a recipe. Which is exactly what you need for baking.
Yay for figuring out what will make you happy & going for it! I will continue to enjoy whatever recipes & stories you post. 🙂
Hello. I was wondering if this could be made as a Bundt cake?
Yes! Use a 12-cup bundt pan, bake for between 60 to 75 minutes.
Congrats on your anniversary, Michelle. Can you please tell me the weight of the egg whites? I froze containers of them after going on a home-made ice-cream making binge which used just yolks. So I can pour them out by weight, but don’t know how many are in each container. Thank you.
How exciting!! I agree – and have also really dropped off reading other people’s blogs for the same reason. I love the stories and insights into other people’s lives the best, and so the SEO-optimised blog posts get boring. It’s hard to get off the instagram scroll loop to get back to an actual website too. Glad I checked here today though. All the best for the masters and look forward to hearing more about it!
i came on specifically to find out how you made that frosting in that particular shade but no mention of it nor is it listed in the ingredients…???
Oh! I just added food coloring to the cream cheese frosting that’s in this post. I used a green called “pistachio” from this food coloring kit: https://amzn.to/4jpZrMM
It’s also available in an individual sized bottle: https://amzn.to/40DGdvR
Hi, on the pistachio pudding layer cake, did you omit the milk since it was crossed out
No, you still need the milk—you must have done it on your end accidentally, you can cross out the ingredients as you use them.
sounds delicious! can you use buttermilk instead of regular milk
Yes! Buttermilk works 🙂