Why You Should Make Pie Crust In A Stand Mixer
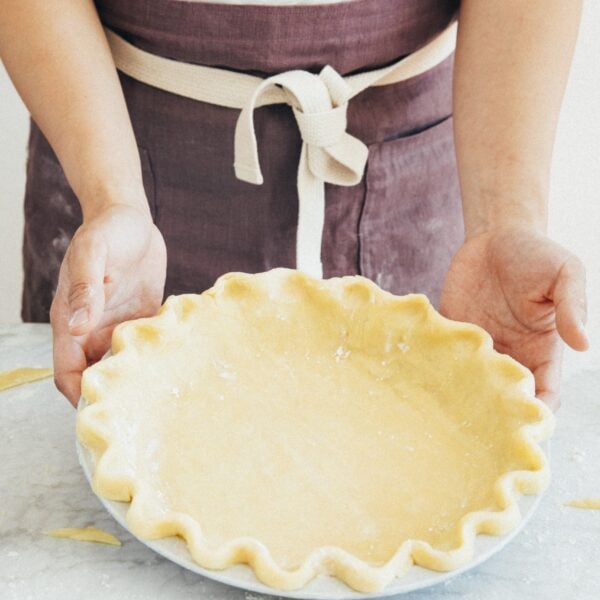
Yes, you can make buttery, flaky pie crust in a stand mixer!
Most pie recipes instruct you to make the dough for its crust in a handful of ways. Some will instruct you to make it by hand (either with tools like a pastry cutter, or without them), or to use a food processor. I never, ever recommend making pie dough by hand. It’s too messy and time-consuming! And while using a food processor is faster, it’s easy to overwork the butter and end up with a flat, dense, crust.
So what do I do?
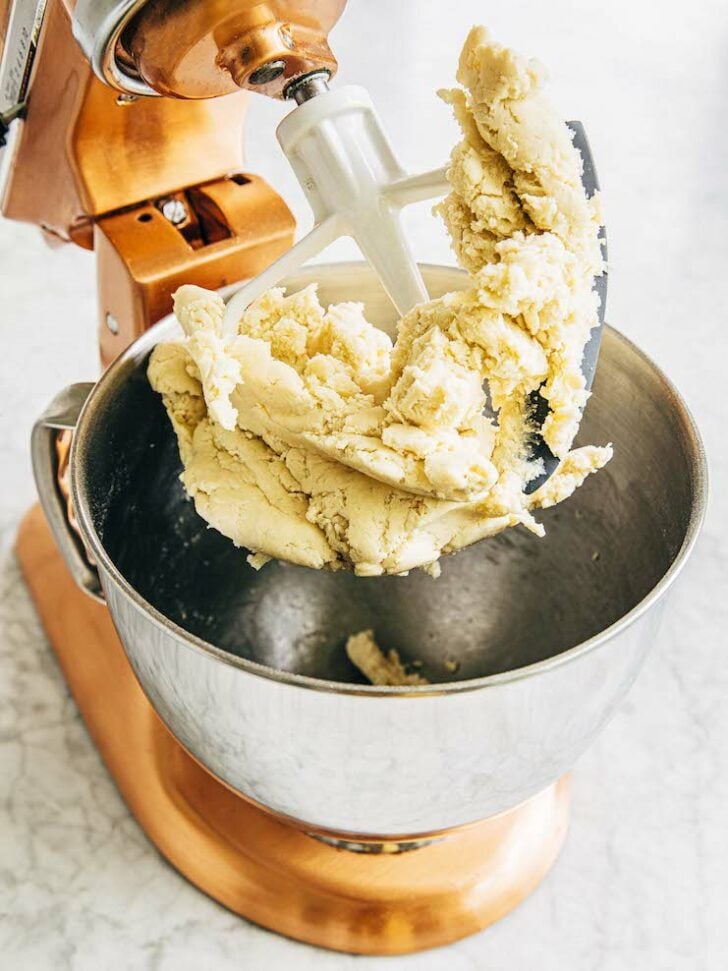
I make my pie dough with a STAND MIXER. After chilling the ingredients for the crust for five minutes, I throw it all into a stand mixer. I then mix everything on low speed like you would a cookie dough to make the crust.
It takes less than 5 minutes to come together and eliminates TONS of mess and work. Furthermore, unlike a food processor, a stand mixer allows you more control and visibility as the dough comes together—no flat, dense crusts!
This stand mixer pie crust recipe is from my cookbook, Weeknight Baking. I now use it exclusively for all the pie and tarts recipe collection on Hummingbird High!
@hummingbirdhigh the easiest way to make #pie dough, i promise! #bakingtiktok #bakinghacks ♬ Happy Pizza – Tom Howe
For even more important pie making techniques, check out my post on how and (and why!) to pre-bake pie crust!
How To Make Pie Crust In A Stand Mixer
Now that I’ve convinced you to make this kitchen mixer pie crust, let’s talk about the basic steps to make it from scratch:
1. Prep the ingredients for the pie dough. (Prep Time: 5 minutes)
It’s important to pay attention to the temperatures of the ingredients listed in the recipe! If you make pie dough with butter or water that’s too warm, the dough will be too sticky and hard to work with.
When making pie dough, it’s best to use ingredients that are straight from the fridge, or even frozen in the freezer for 10 to 15 minutes beforehand.
In this case, that means slicing the cold butter and freezing it for 5 minutes while you work with the rest of the ingredients. Mix the water, vinegar, and ice mixture and keep it refrigerated while you measure out the dry ingredients.
2. Make the pie dough. (Work Time: 10 minutes)
Because of my stand mixer technique, this pie dough comes together in less than 10 minutes!
To make it, combine the flour, sugar, and salt in the bowl of a stand mixer fitted with the paddle attachment. Add the butter all at once and beat on low until the mixture has the texture of a coarse meal for about 3 minutes. Finally, add 6 Tablespoons of water from the water-vinegar-ice mixture and beat until the dough clumps around the paddle.
That’s it! Easy, right?
3. Chill the pie dough. (Chill Time: 1+ hours)
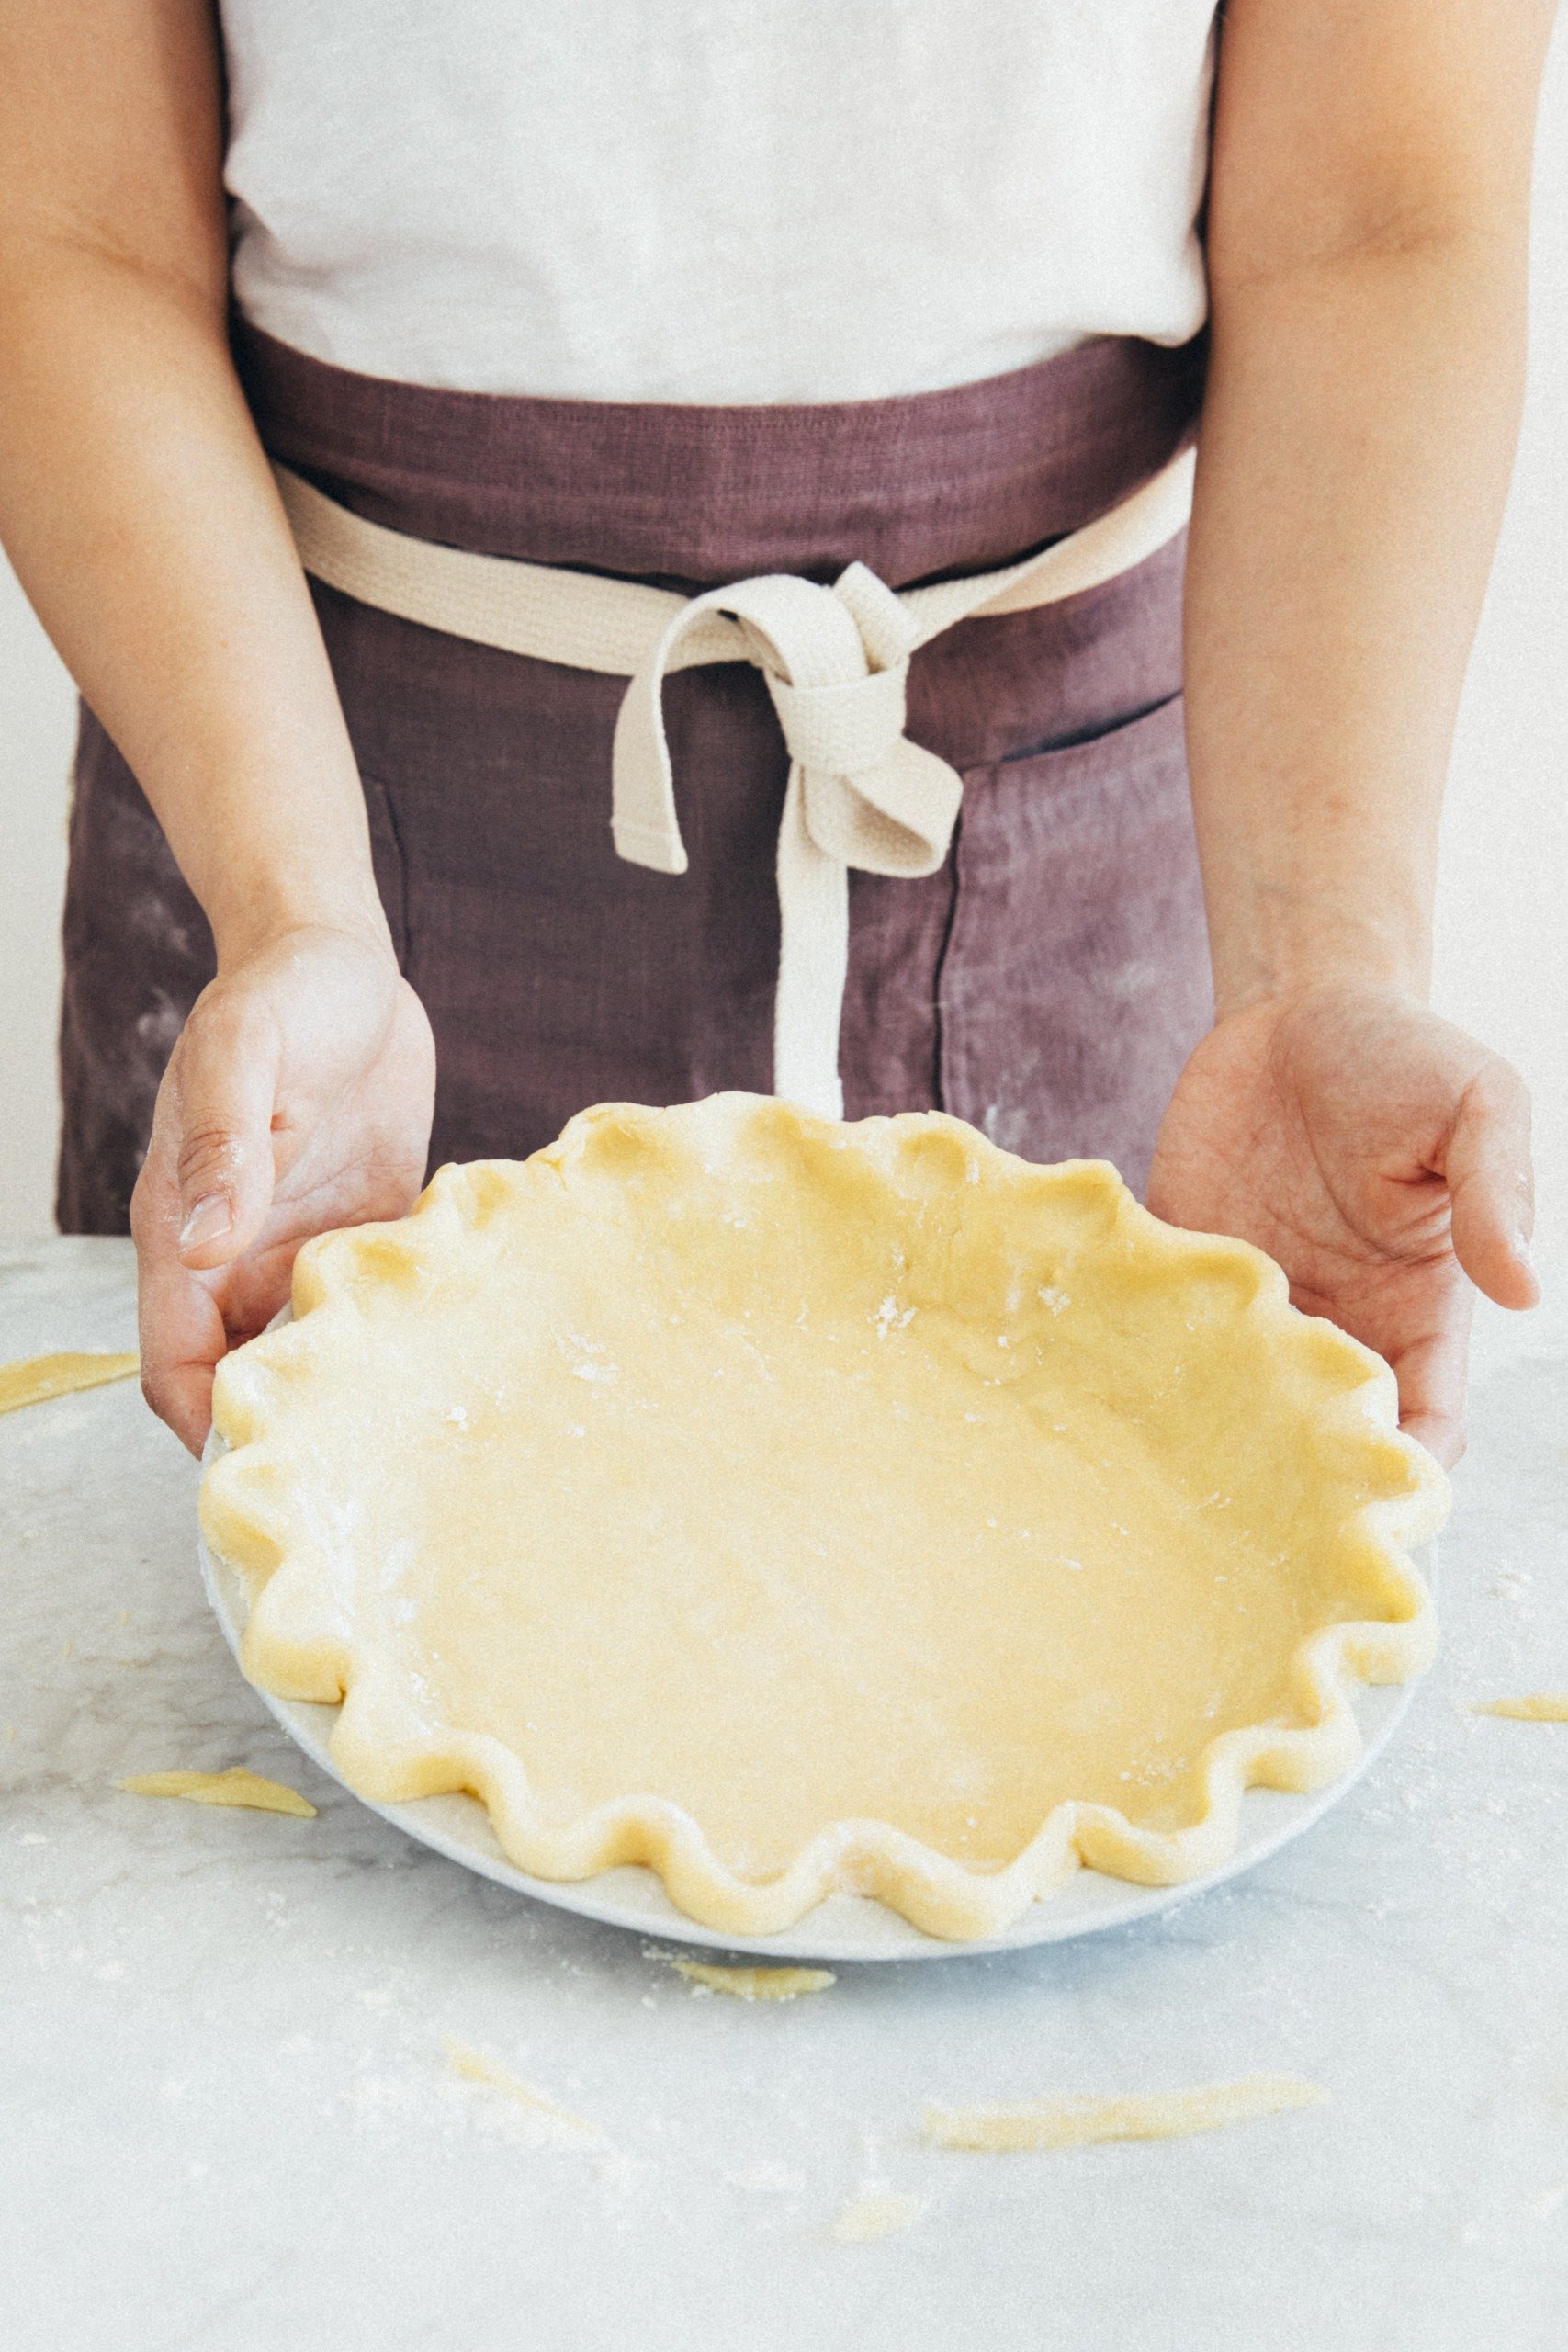
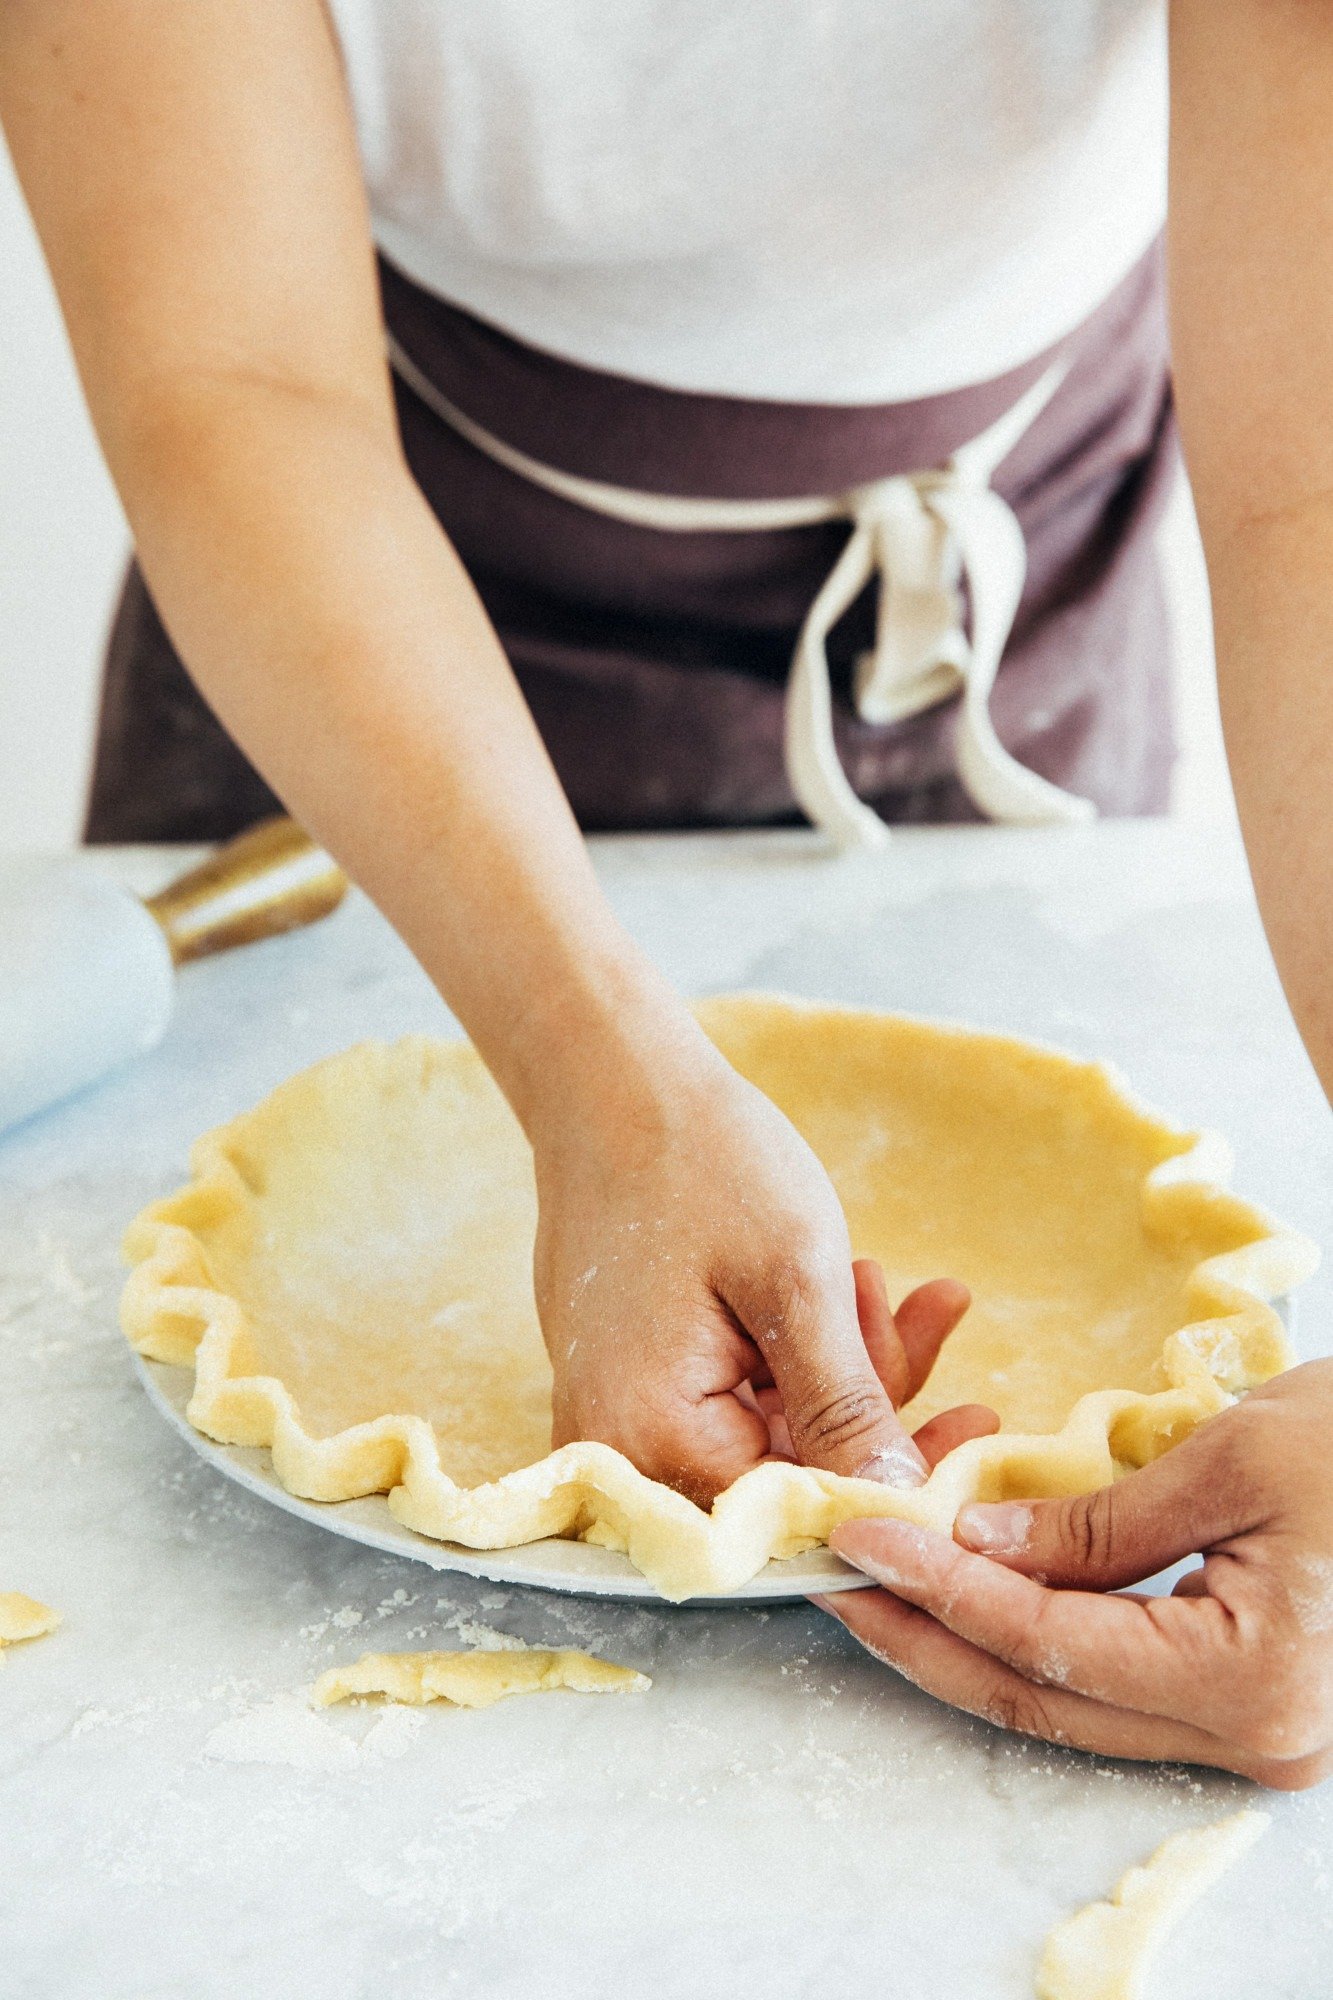
Divide the dough into two even halves, forming them into a flat disc. One of these discs will be for the bottom crust, while the second will be for the top crust of your pie. Wrap each portion tightly in plastic wrap and flatten into a small disc.
The dough needs to chill in the refrigerator for 1 hour before you use it in the pie recipe of your choice. However, at this point, the dough can actually be frozen for up to 3 months. Just make sure to store it properly to prevent it from absorbing weird odors and flavors in the freezer—learn more in the Troubleshooting and FAQ section below.
Ingredients and Substitutions
Here’s everything you need to make pie crust in a stand mixer, let’s talk about some key ingredients and their potential substitutions:
- Apple Cider Vinegar: If you don’t have apple cider vinegar, I found that you can use a neutral tasting vinegar like distilled white vinegar in its place. However, apple cider vinegar adds a unique flavor to the crust that works well with most fruits!
- Unsalted Butter: You can also use salted butter in its place—when testing the recipe, I found that there’s no need to adjust the kosher salt in the recipe, either. Technically, vegan stick butter like Earth Balance or Miyoko’s baking sticks COULD work in this recipe. However, vegan butter melts faster than traditional butter, so work quickly!
- Granulated Sugar: In a pinch, you can other sugars like brown or coconut sugar in this recipe. Just be sure to use a sugar that has a fine grain. Avoid coarse sugars like Demerara, raw, and/or sanding sugar. If you’re making a savory filling, you can also omit the granulated sugar completely.
Can you freeze pie dough?
Yes! To freeze the dough, tightly wrap each portion in a second layer of plastic wrap, followed by a layer of aluminum foil. Doing so will prevent the dough from absorbing any flavors or odors in the freezer.
Freeze for up to 3 months. When ready to use, transfer to the refrigerator to thaw overnight.
Can you use a handheld electric mixer to make this pie crust?
Sadly, no. A hand held electric mixer won’t work for this recipe. Its beaters aren’t strong or fast enough to incorporate the butter into the dry ingredients quickly. Everything gets too melty and you’ll end up with a dense, flat pie dough.
Pie Recipes To Make
Now that I’ve taught you how to make pie crust in a stand mixer, here are some recipes you can use for its filling:
- Black Bottom Chocolate Pecan Pie
- Blueberry Crumble Pie
- Chocolate Chess Pie
- Easy Canned Cherry Pie Recipe
- Rhubarb Custard Pie

Get the Recipe: 15-Minute Stand Mixer Pie Crust Recipe
Ingredients
- 6 Tablespoons (3 ounces or 85 grams) very cold water
- 1 Tablespoon apple cider vinegar
- 1 cup ice
- 1 cup (2 sticks or 8 ounces or 227 grams) very cold unsalted butter
- 2 ½ cups (11.25 ounces or 319 grams) all-purpose flour, plus more for work surface
- 1 Tablespoon granulated sugar
- 1 teaspoon kosher salt
Equipment
- stand mixer with paddle attachment
Instructions
- Make the ice water mixture, then refrigerate it. In a large liquid measuring cup, whisk together the water and vinegar. Add the ice and whisk. Refrigerate while you prep the rest of the ingredients.
- Cut the butter into cubes, then freeze it. Cut the butter into 1-inch cubes and place them in a small bowl. Freeze while you prep the rest of the ingredients.
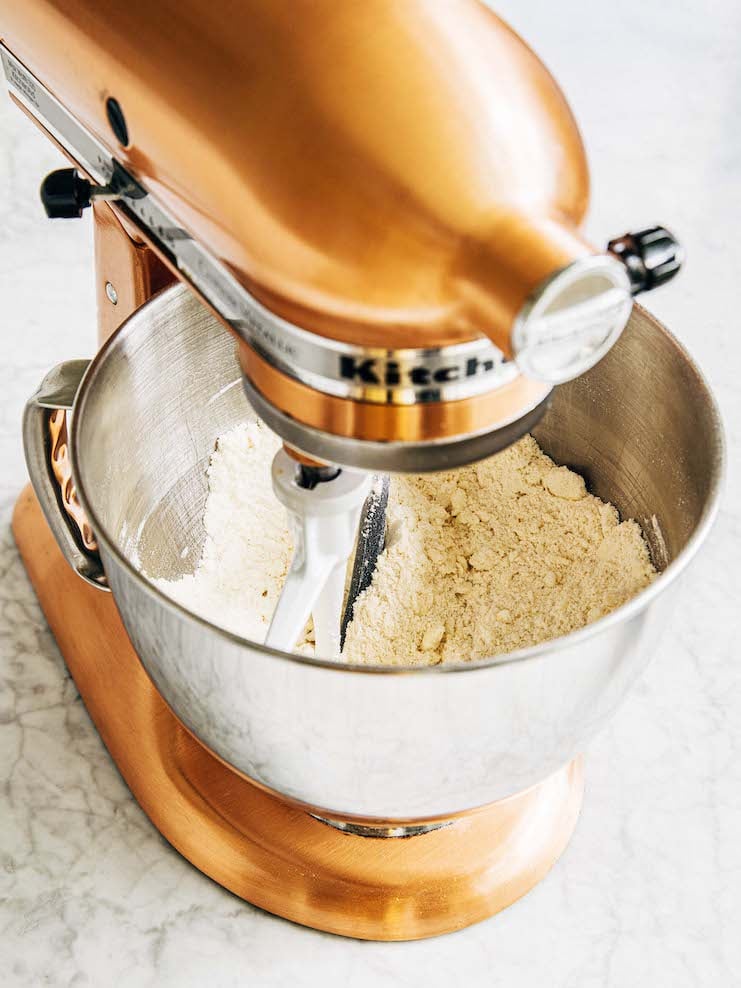
- Mix the dry ingredients. In the bowl of a stand mixer fitted with the paddle attachment, combine the flour, sugar, and salt. Beat on low until just combined, about 15 seconds.
 Add the butter to the dry ingredients and beat into a coarse meal. Add the butter all at once and beat on low until the mixture has the texture of coarse meal, with pea-sized pieces of butter throughout, about 3 minutes.
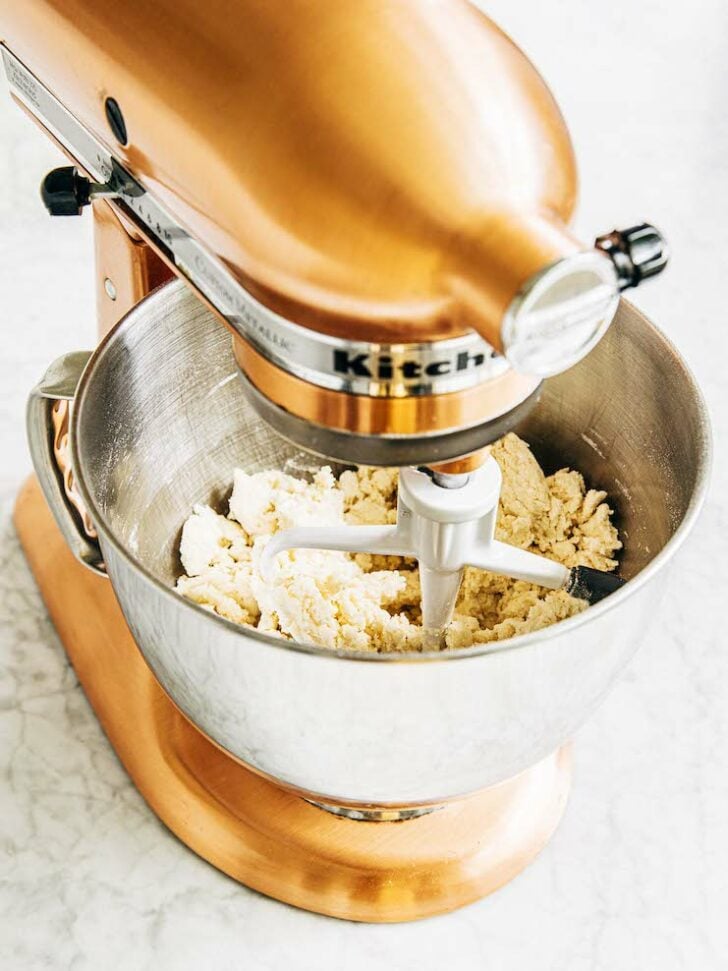
- Add 6 Tablespoons of the ice water mixture, and beat until combined. Remove the ice water mixture from the refrigerator. With the mixer on low, add 6 Tablespoons of liquid from the ice water mixture all at once.Beat on low until the dough clumps around the paddle and/or sides of the bowl, about 2 to 3 minutes. Stop the mixer immediately.If the dough seems too dry, add more liquid from the ice water mixture 1 teaspoon at a time.
- Divide the dough and refrigerate for at least 1 hour before using. Tip the dough out onto a lightly floured counter with a rubber spatula. Quickly knead the dough into a rough ball and divide in half with a bench scraper (each half should weigh around 11 ounces or 312 grams). Shape each half into a rough ball.Wrap each ball tightly in plastic wrap and flatten into a small disc. Refrigerate for at least 1 hour, preferably overnight, before using. The dough will keep in the refrigerator for up to 3 days.


Did you make this recipe?
Please leave a comment and rating for the recipe using the form below!
Your ratings make it easier to find the recipe online, and I’m always looking for ways to improve Hummingbird High.
get new recipes via email:

buy the book
Weeknight Baking:
Recipes to Fit your Schedule
Over the past several years of running Hummingbird High, I kept a crucial aspect of my life hidden from my readers: I had a full-time, extremely demanding job in the tech world. In my debut cookbook, Weeknight Baking, I finally reveal the secrets to baking delicious desserts on a tight schedule.
Thank you so much of this recipe! I’ve made it twice in one week and it has turned out well each time. It is so much easier to use my mixer than making crust by hand (I don’t have a food processor). It comes together quickly and rolls out easily. I did add a pinch more salt the second time I made the crust just as a personal preference but otherwise this recipe is perfect. I used to dread making homemade crusts but no more. Again, Thank You! 😀
Thank you this recipe was super easy and turned out delicious!
If I half this, is that enough for a deep dish pie crust? Or should I use the whole recipe?
You should make the whole recipe for a deep-dish pie crust. In fact, I even suggest multiplying it by 1.5 (so you’re using 1.5 times of everything) for a deep-dish crust.
Thank you! Excited to give this a try!
Thank you, Michelle, for this recipe. I have never been able to make a light, flaky pie crust because I end up overworking the dough (by hand) and it turns out heavy and dense. This stand-mixer method worked out perfectly. I used to dough to make small apple hand pies, and they turned out wonderful! I am looking forward to browsing more of your recipes!
Shelly,
Did you fry or oven bake you hand pies? If you baked in the oven, What was the temperature and timeframe?
Charlette
I’ve used this recipe many times as is with perfect results. All-around fabulous base recipe for a stand mixer. But for things like jam or chocolate / peanut butter tarts, where I add the filling after baking, I use 1/2 cup (8 tablespoons) of ice water, with a teaspoon of fresh lemon instead of vinegar, 2 tablespoons of sugar, and 2 tablespoons of cornstarch replacing 2 tablespoons of the flour. It is then the sweetest and flakiest crust I have ever made. But it’s a super-puffy crust, so not right for every recipe. Love playing with this recipe.
How long would you bake this in the oven and at what temp?
It depends on the pie filling. But if you want to pre bake the pie, here’s the instructions: https://www.hummingbirdhigh.com/2022/06/how-to-pre-bake-pie-crust.html
hey can i use pie hooks instead of the paddle? peepleluvhim2@gmail.com please and thanks!
Do you mean the dough hook?
yes that is what I mean. the two curly dough hooks. can I use those instead of the paddle? Thx!
Because the curly dough hooks are meant for kneading, they might be a little too harsh for the dough!
Thankyou. My stand mixer is a Betty Crocker older version, not sure where to find a paddle that fits unless it is a standard fit for all the Betty Crockers. Happy Holidays!
I have probably tried over 5 recipes for stand mixer pie crusts and this is the first one I managed to make, successfully, without panicking or troubleshooting. Awesome recipe! Thanks a ton.
Easy and with great results
Hi, thank you for sharing this recipe. I love homemade pie crust and I am very excited to try it.
In the past when I have taken the refrigerated disc of dough out of the refrigerator to roll out, it has been to hard that I have a lot of trouble with it. How long do you take it out of the refrigerator before you roll it out, or is there a better way?
paige
Hi!
I really want to make this for Dads birthday! Just one question! Could I make it the night before, refrigerate it over night and add a cold filling the next day and bake?
Does it require a pre bake? and if so for how long 🙂
thank you
This really comes together nicely!
Hi there. I made this for a savory pie. I am used to making a butter crust in food processor, but this time I wanted to use my Kitchen Aid. Turns out I only had a 10 inch pie dish, but I still had enough dough. The main difference in this recipe was the vinegar and freezing (not chilling) the butter and water mixture. Note: I left out the sugar since this was for a savory pie. This made such a nice dough that I decided to roll it out directly after preparing. I encountered no problems with sticking! I refrigerated the rolled out dough overnight and baked the pie the next day. The crust turned out really flaky and did not shrink at all! This will be my go-to crust recipe. Thanks!
Amazingly fast and super delicious perfect pie crust, THANK YOU, and sooo much easier than hand-mixing the bitter and flour
I was so discouraged trying to make pie crust by hand, using butter, using shortening and could not get it to come together. Then I found your recipe and it came together without an issue! I had to add 1-2 more Tbsp of water, but it was magic!! The crust was so flaky, and I had no idea that a stand mixer could help make crust. Thank you so much for great instruction – this will be my go-to recipe forever!
Could you use lard in place of butter?
I don’t recommend it—my lard pie recipe uses a different amount of flour and water since lard contains a different amount of water than butter.
I’ve read this recipe alot but can’t find where the vinegar goes. Pardon me for the stupid question. Where do you add the vinegar???
First step in the instructions! “In a large liquid measuring cup, whisk together the water and vinegar. Add the ice and whisk. Refrigerate while you prep the rest of the ingredients.”
I have a 7 quart kitchen aid. Could this recipe be doubled?
Yes! Doubling the recipe works great.
Can you omit the apple cider vinegar for savory pies like pot pie? Thanks!
Technically yes—but I recommend keep it in there anyway. It’s subtle and will pair well with most savory fillings!
First time making my own pie crust and this recipe turned out perfect!!!! So flakey and perfect!!! Make chicken pot pie and it turned out beautifully. I did 1.5 batch for my 9” deep dish pie pan. Thank you!!!
Made this crust for a Southern tomato pie. It was perfect! First time using my Kitchen-aid Standing Mixer was a success.
Easiest recipe to make! My goodness! I’m a person who has always had trouble with making pastry dough and THIS has made me very happy!
The recipe might be good but after putting the pie dough in the refrigerator it was so hard it was totally unworkable. I am leaving it out on the counter so I can hopefully roll it out once it warms up a bit. I will reserve my star rating once I can get the pie crust rolled out Susan Allen
Is this good pie crust for Chicken Pot Pies? Does it make enough for a lattice top? Does it freeze well before baking?
Yes, pie crust works well for chicken pot pies—you might want to omit the sugar. It will make enough for a lattice top and it freezes well before baking.
When taking the pie dough out of refrigerator it is very cold and hard, how long should I wait to be able to roll out?
It depends on how warm your kitchen is—maybe 10 minutes?
Excellent pie crust i usually can’t make a decent pie crust this one was perfect!
Dough turned out very flaky and good! I was nervous when it smelled like the vinegar as I was rolling it out but I had nothing to worry about! I had to add 2 more tbsp of ice water to form the dough.
Can you use butter flavored Frisco instead of butter? And are amounts the same?
You might need to troubleshoot the amount of water needed for the recipe. Also freeze the Frisco—it tends to get softer faster than butter.
I meant butter flavored Crisco.
I made this today for the second time and while it tasted great, the presentation was a disaster. The first time it went so smoothly and came out perfect. The only different was I couldn’t locate the prebaking instructions I used last time and a gas oven this time. I was making the crust for a chicken pot pie. I poked holes in the bottom and used pie weights but the crust shrunk and puffed up. Any suggestions?
Thank you so much for this recipe! Finally a simple butter crust that doesn’t require a food processor.
I had a hard time incorporating the flour and butter into pea size. The recipe calls for a low speed, but I had to kick it up quite a bit and it still didn’t come together pea size. I had to mix with a fork.