
About These Ube Brownies
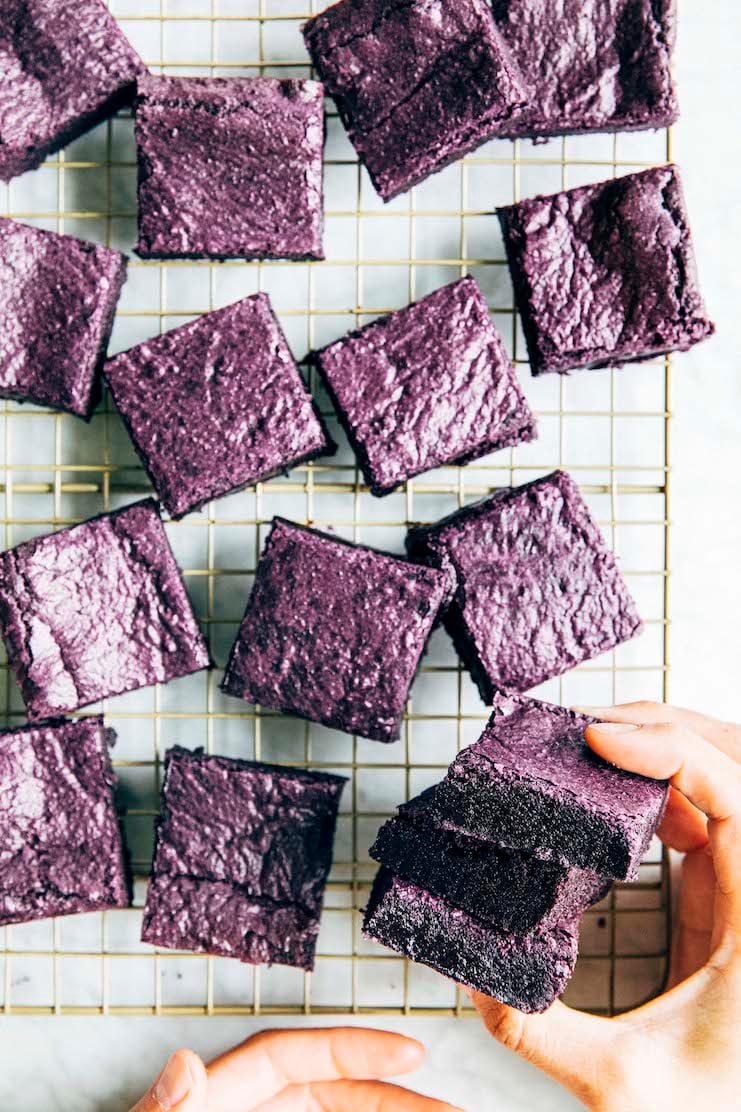
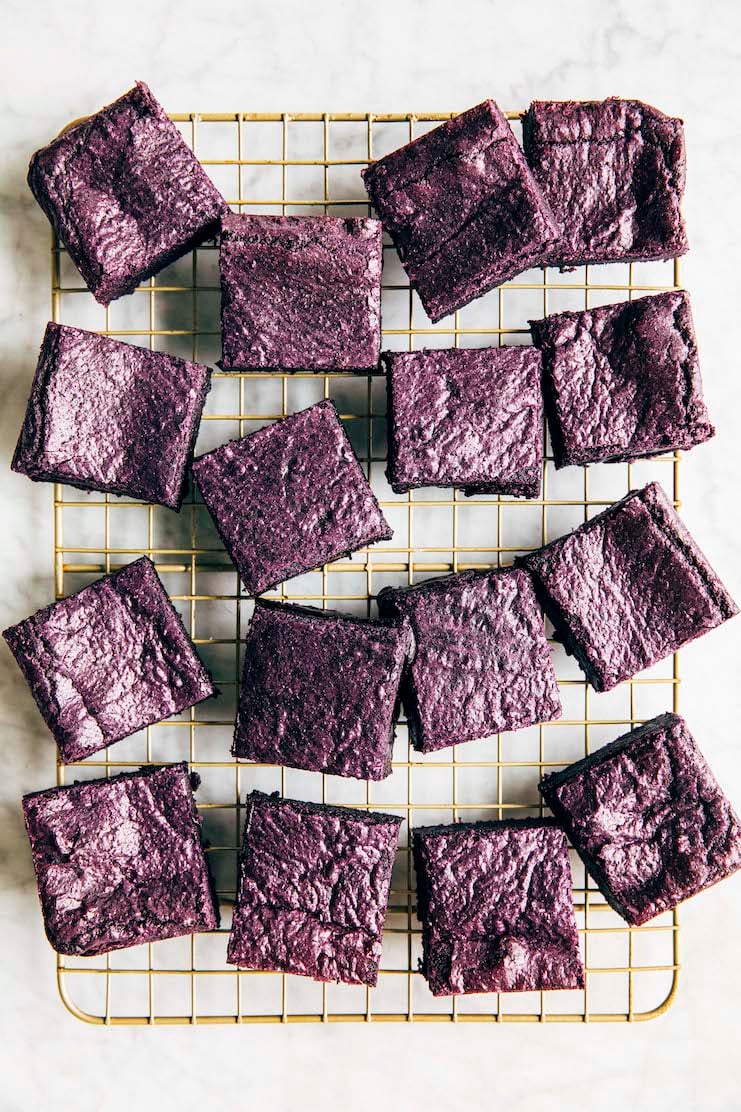
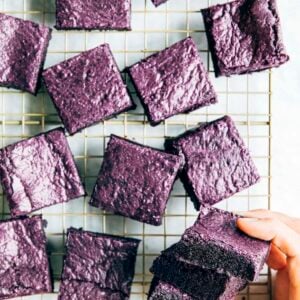
The brownies taste like the naturally vibrant purple ube, a sweet purple Filipino yam used in many Asian desserts, and have a paper thin sugar top that crinkles when sliced. And just like your favorite chocolate brownie recipes, these ube brownies have a paper thin sugar top that crinkles when sliced.
For more ube recipes, check out Hummingbird High‘s full collection of ube recipes including one of the most popular recipes on the blog—ube crinkle cookies! I love baking with ube since it lets me connect with my Filipino heritage.
Ingredients and Substitutions
Now that I’ve convinced you to make these ube brownies, here’s everything you need to make the recipe:
- Unsalted Butter. When developing this recipe, I found that you can substitute the unsalted butter with salted butter without any noticeable difference in taste.
- White Chocolate. Check out this blog post to learn my recommendatios for the best chocolate for baking projects!
- Ube Halaya Jam and Extract. Check out my post on where to buy ube halaya jam and extract. I’ve also included instructions on how to make ube halaya jam at home if you can’t find it/want to make it from scratch!
- Kosher Salt. In my cookbook, I argue that kosher salt is the best salt for baking recipes. But if you don’t have any, you can replace the kosher salt in the recipe with half its amount in table salt.
How To Make Ube Brownies: Process Shots!
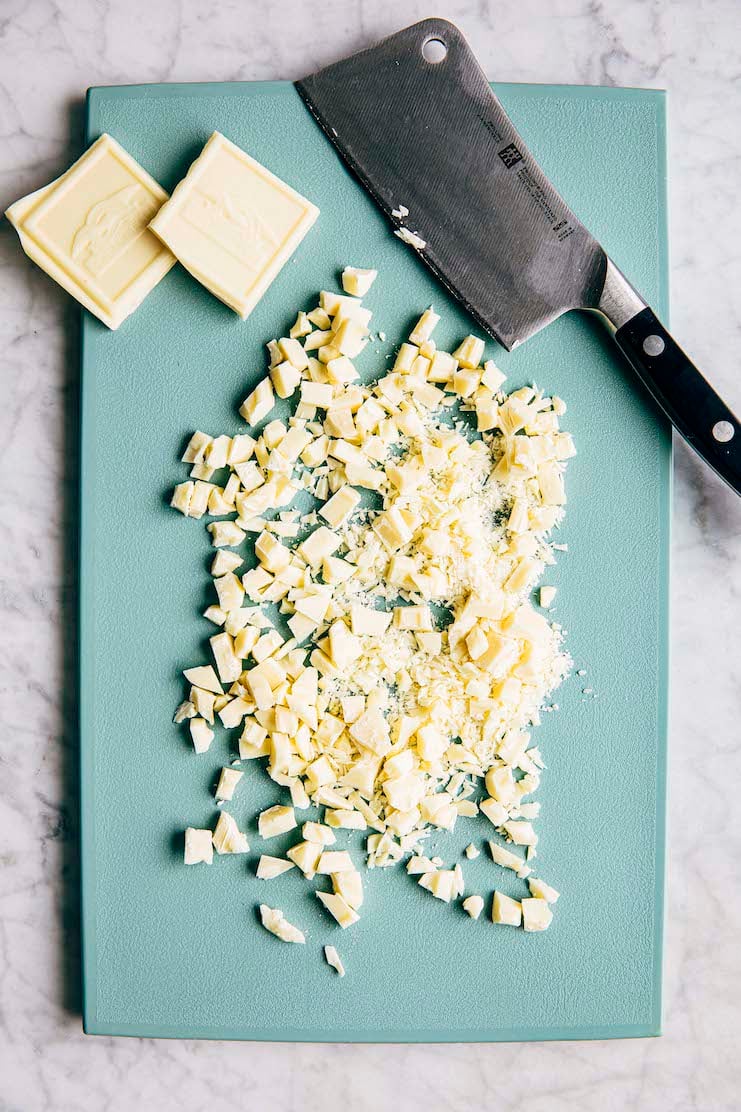
Chopping The White Chocolate
The recipe instructs you to chop your chocolate into smaller ¼- to ½-inch pieces. This is what that looks like:
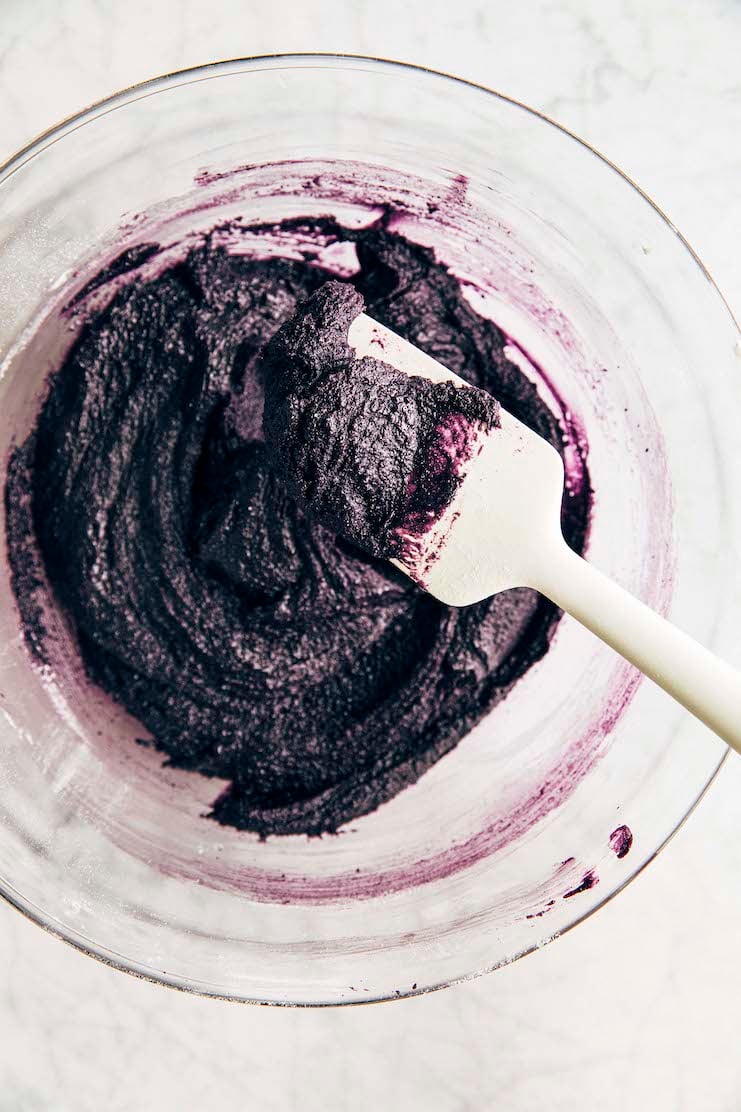
Thick and Gooey Purple Brownie Batter
The brownie batter will be a thick, vibrant purple after you’ve mixed together all the ingredients. It will be a little thicker than cake batter, with a texture more similar to cookie dough:
Best Recipe Tips
Ingredient Tips
- The recipe states that you need 4 ounces (113 grams) of chopped white chocolate to make the brownie batter. If you don’t have a digital kitchen scale, that’s equivalent to ⅔ cup of chopped chocolate. Each piece of chocolate should be roughly the same size and shape of a regular-sized chocolate chip.
- When chopping the white chocolate, make sure to follow the recipe instructions to chop it into smaller ¼- to ½-inch pieces. Any larger than that, and you’ll have a hard time melting the white chocolate. White chocolate tends to scorch easily and seize if the pieces are too large and/or the heat source is set too high. If you’re inexperienced with working with white chocolate, err on the side of caution and cook the chocolate and butter over medium-low heat instead of medium. Although it will take longer to melt the ingredients, the gentler heat will help prevent any potential issues.
Technique Tip
- The white chocolate and butter needs to be melted and cooled slightly before using in the recipe. I recommend melting these ingredients first, then setting it aside while you prep the rest of the ingredients and make the brownie batter. Doing so will give the butter enough time to cool slightly! Check out the FAQ section above for even more tips on how to cool the mixture quickly.
Baking Tip
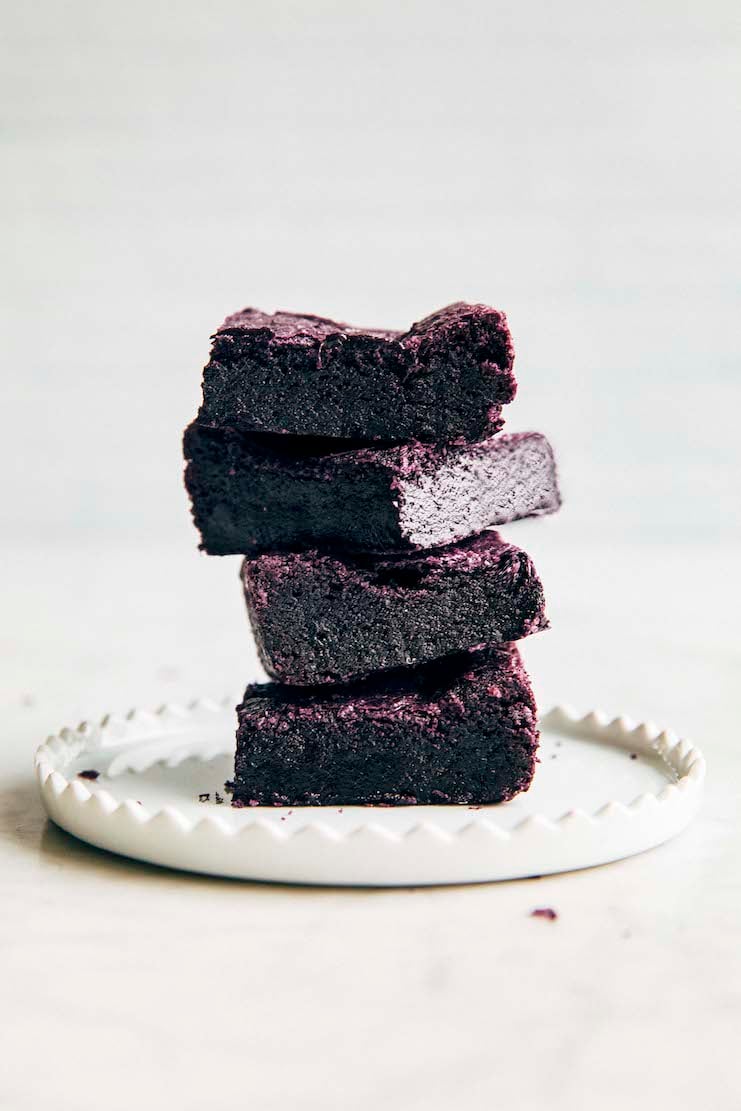
- It’s better to pull the ube brownies out of the oven early than leave them in too long—if you over bake the brownies, they’ll be tough. They might appear underbaked, but I promise that when they’ve cooled, they will be perfect.
Get the Recipe: Chewy and Fudgy Ube Brownies Recipe
Ingredients
- ½ cup (1 stick or 4 ounces or 113 grams) unsalted butter, cut into 1-inch cubes
- 4 ounces (113 grams) white chocolate, finely chopped into ¼- and ½-inch pieces
- ½ cup (4 ounces or 113 grams) ube halaya jam
- 1 large egg, at room temperature
- 2 teaspoons ube extract
- 1 cup (7 ounces or 198 grams) granulated sugar
- ¼ cup tightly packed (1.75 ounces or 50 grams) light brown sugar
- 1 ½ cups (6.75 ounces or 191 grams) all-purpose flour
- 1 teaspoon kosher salt
Instructions
- Prep the oven and baking pan. Position a rack in the center of the oven and preheat the oven to 350°F. Lightly spray an 8-inch square pan with cooking spray and line with parchment paper, leaving a 2-inch overhang on each of the pan's sides. Spray the parchment paper, too.
- Melt the butter and white chocolate for the batter. Place the butter and white chocolate in the top pan of a double boiler or in a heatproof bowl set over a medium, heavy-bottomed saucepan filled with a few inches of simmering water (be sure the bottom of the bowl does not touch the water).Cook over medium heat, using a heatproof rubber spatula to stir the mixture and scrape the sides of the bowl occasionally, until the chocolate and butter have melted and combined, about 5 minutes. Remove the pan or bowl from heat and set on a wire rack to let the chocolate mixture cool slightly while you prep the other ingredients.
- Whisk the ube jam, egg, and extract, then whisk in the sugars and chocolate mixture. In a large bowl, whisk together the ube jam, egg, and extract until combined. Whisk the sugars in one at a time, then slowly pour in the chocolate mixture, whisking continuously while doing so until completely combined.
- Mix in the dry ingredients. Once the chocolate mixture is combined, use the rubber spatula to scrape down the whisk and the bottom and sides of the bowl. Sprinkle the flour and salt over the batter all at once and use a rubber spatula to mix by hand until just combined.
- Assemble the brownies. Pour the batter into the prepared pan and use an offset spatula to spread it evenly across the pan and smooth the top.
- Bake the brownies. Bake for 30 minutes, or until a skewer inserted into the center of the brownies comes out with a few crumbs attached. Cool completely on a wire rack before slicing.
- Serve and store. Run a butter knife or the offset spatula along the edges of the pan and use the overhanging parchment as handles to lift the brownies out of the pan and onto a cutting board. Slice into 2-inch squares and serve.The brownies can be stored in an airtight container or zip-top bag at room temperature for up to 3 days.
Notes
Can you freeze ube brownies?
Yes! You can freeze the baked ube brownies. To freeze the ube brownies, individually wrap any leftover bars in two layers of plastic wrap, then a layer of aluminum foil. The aluminum foil will prevent the bars from absorbing any other flavors or odors in the freezer. Freeze for up to 3 months. When ready to serve, transfer to the refrigerator to thaw overnight. You can eat the brownies straight from the fridge, or rewarmed in the microwave.Did you make this recipe?
Please leave a comment and rating for the recipe using the form below!
Your ratings make it easier to find the recipe online, and I’m always looking for ways to improve Hummingbird High.
get new recipes via email:

buy the book
Weeknight Baking:
Recipes to Fit your Schedule
Over the past several years of running Hummingbird High, I kept a crucial aspect of my life hidden from my readers: I had a full-time, extremely demanding job in the tech world. In my debut cookbook, Weeknight Baking, I finally reveal the secrets to baking delicious desserts on a tight schedule.
I’m pregnant and I’ve been craving for something Filipino. I followed your recipe and it turned out pretty well! It’s soft, a bit gooey and I love the crunchiness on the outside. It’s so delicious. Thank you!
Hi! These look gorgeous and I am looking forward to making this! Can I check how much of the ube halaya jam recipe (that you linked in this post) the brownies use? would like to be able to decide if i should make half the portion of the halaya recipe or the whole. thank you so much!
This recipe uses 1/2 cup jam, whereas the jam recipe I linked to makes around 3 cups!
Where are the quantities for the ingredients? I only see the list of ingredients in your many recipes? I must be missing the link to them… Where are those links to the quantities? Thanks.
right here: https://www.hummingbirdhigh.com/2023/04/chewy-and-fudgy-purple-ube-brownies.html#Get_the_Recipe_Ube_Brownies_Recipe
Can I use semi sweet or bitter sweet chocolate instead of white chocolate?
Hm, no. Semi and bittersweet chocolate have different percentages of fat versus white chocolate. It will dramatically affect the ube brownies!
I have a dairy sensitivity and I was wondering can you use vegan white chocolate in place of the regular white chocolate? I only just learned I can’t have dairy anymore so it’s been a little challenging finding recipes of my favorite baked goods and sweets.
I haven’t tried it personally, but it’s worth a shot! There’s some good vegan white chocolate out there.
Hello!
Just wondering what size pan to use and how to adjust the baking time if I’d like to make a double batch?
Thank you
Use a 9 x 13 inch pan. Baking Time should stay relatively the same, but expect to add an additional 3 to 5 mins to it.
Hi, is there any way to reduce the sugar? I saw a comment where you said omitting the white chocolate may affect the way the brownies come out.
Thank you!
Reducing the sugar in the recipe will lead to brownies that will be less flavorful and chewy, and instead more bland and tough. But if you want to try it, I recommend following the guidelines in this article: https://food52.com/blog/15911-what-experts-know-about-reducing-sugar-in-baking-recipes
Miss Michelle! These are fabulous! I’ve never made blondies or cooked with ube before and they were so fun and exciting to make. The color is so vibrant and the tips you recommended had this recipe coming out perfectly! Chewy, fudgy, and full of UBE flavor just as the title implies!
My only precaution to bakers using a metal, 9×13 pan is to check halfway through baking because mine were done in 15 mins! Which is NOT upsetting at all but I’m sooo glad I didn’t check it any later than that since the recipe says bake for 30mins. So be mindful of that when baking. I’m so excited to see everyone’s reactions at the bbq tomorrow.
Thanks for sharing,
Brittany!
Update: These were a huge hit at the BBQ. Everybody adored them and couldn’t wait to try those “purple brownies”. I just took my second batch of the week out of the oven as we speak. I only had vegan butter on hand this time around and they still came out absolutely perfect. Forever loooove this recipe.
Oh my GOSH, these are incredible! The ube halaya gives them a chewy, fudgy texture and the crinkly top is perfection. Plus, the slightly nutty, vanilla-y flavor of ube is soooo good and the purple color is lovely. Obsessed!! Highly recommend eating warm with a scoop of ice cream…or paired with coffee/tea.
Hi! Am I able to double the recipe and bake it in a 13×9 inch pan? How many minutes would that be baked for? Will it be too wet in the middle?
Thank you!
Yes, doubling the recipe and baking in a 9 x 13 pan works! Bake Time should stay the same, I would check 5 minutes earlier than what the recipe states and go from there.
I used white chocolate chips and mine are too gooey. Not happy with them. I had ube brownies at an ube festival and they were delicious the texture was like a regular brownie. Mine didn’t turn out that way!
Thank you for the metric conversion, but according to my ingredients, 1/2 cup of ube halaya weighed 136 grams, and 1.5 cups of all-purpose flour weighed 180 grams. Also, my brownies were ready at 25 minutes. I wanted to share this comment in case anyone doesn’t get the same results.
Hi there! I’ve made these already exactly as the recipe says and they turned out amazing. Unfortunately I am out of ube extract, don’t live by any grocery stores that carry it and won’t be able to get any before I want to make them again this week. Do you think they’ll still turn out okay without the extract?
Without the extract, the color and flavor of the brownies will be pretty mild! Ube is a pretty subtle flavor; you need extract to make it really pop.
Ok, so I have this person who I really hate named Teagan cause she brags about how she is Asian even tho she isn’t and how she was born in Thailand, so I really want to make these brownies to outdo here. Can I buy ube hayla jam off Amazon? I live here in Colorado and I don’t know if Pacific Ocean has it? Whenever I go there with my mom we never see it. Also how would you keep the brownies chewy the next day? Thanks.
LOL at your comment. Where in CO do you live? There are a couple of Asian supermarkets in Denver (in the Aurora area I think?) that carry ube halaya.
Where would I find Ube hayla I can’t find it in CO
I have a post on how to make it at home and where to potentially find it: https://www.hummingbirdhigh.com/2022/10/best-ube-dessert-recipes.html
I have made these brownies 3 times now. They are so eff-ing good. I can’t stop eating them. Thanks for the recipe.
HI! I don’t have ube halaya but have lots of Ube Powder from the Philippines. Can I just hydrate that and use it to substitute?
Hmmm, I’ve never done that before so I can’t guarantee the results!
These purple brownies looks so delicious!
I brought this ube brownie to work and it was a big hit amongst my coworkers!! It was easy to make and the ingredients are easy to find. I will definitely make this again and will be a part of my holiday baked goods giveaway. Thanks for the recipe.
Made this for our first meet with our son’s girlfriend’s parents, who requested something made with ube. The recipe is super-easy to follow and I love that it didn’t require anything I didn’t already have in my pantry. Needless to say, it was a hit! Thank you for sharing.
I subbed gluten free flour and they still turned out incredible! So delicious and had that amazing chewy fudgey texture.
Just one question, how do you keep the vibrant purple on top? Mine turned slightly brown.
I had these results aswell!
I’m not sure where I went wrong because I followed the recipe, but mine came out a very dull purple on the inside and light brown on the top. I didn’t want to bake it longer because I didn’t want to overcook it. These also came out super sweet!
I made these with King Arthur cup for cup gluten free flour and that worked totally fine. They’re very rich and tasty and PURPLE. I would make them again.
Easy to make and very delicious! Thank you! =
Hello ! Made these today using white chocolate blondie bar ( I didn’t have plain white chocolate at home ) . They turned out so yummy . I was very happy about the shiny crinkly paper top ! My husband and family loved it.
I made these tonight and they’re fantastic in flavor and the crunch. I cooked mine over 30 minutes and they’re still so soft. I’m going to let them cool in the fridge overnight and see if they thicken. They basically fall apart and I’m not sure if they’re supposed to be that texture.
Yum!
I’ve made this recipe twice already. Always a big hit. I don’t have an 8 inch square pan so I bake them in a 9-inch square pan for 27 minutes at 350F. Perfectly rich and chewy.
I’ve made these twice and both times they came out delicious my one question. Is the batter supposed to really thick?
It’s a bit on the thicker side, but should still be pretty similar to brownie batter texture.
I swapped Milk Chocolate Chips for the white chocolate. Baked on 8×8 glass pan on 350 Degrees for 38 min. Just like it says – Chewy Fudgy Purple UBE Brownies – Love it !!
Thanks a million for this recipe! I dazzled my coworkers with these ube brownies at a work cook-off. People were absolutely blown away by the flavor and the purple color. Taken home by coworkers, these brownies have caused mother and child to fight over dessert. Be warned.
I did make a few changes that I wanted to share:
– Replaced 10 g sugar with 10 g flour – this was a risky substitution, but between original recipe and this modification I found no difference in texture but significantly more manageable sweetness
– Used full volume table salt instead of kosher salt, I think this also helped cut down on sweetness
– Ran out of all purpose in my last batch and subbed part with bread flour without note
My bake time for an 8 x 8 dark gray pan was roughly 35 min, and 9 x 13 dark gray pan was roughly 40-45 min. The batch is really wet before it “crumbles”, and even then I found I pulled out the brownies before parts were really solidified. As long as you get one toothpick with some crumbs, you should be pretty good to go. Source: I made 3 9 x13 batches!
One of my coworkers noted that the ube flavor was still not strong enough for him. If I had an excess of ube extract (I did not and ran out after aforementioned batches), I would have tried to add more extract as well.
Hope this helps!
Hello Michelle,
I tried your ube brownies, it was delicious and fudgy but I struggled a bit with the sweetness. I then tries using the proportions of your “My Best Fudgy Brownie” recipe to make my ube brownies (substituting cocoa with 1/2 cup halaya and vanilla with ube essence) and it turned out great.
Very interested in the science behind this: why does your ube brownie recipe have significantly more flour than the fudgy brownies? It has less eggs too even with triple the amount of flour. I hope you don’t mind my question. I just like to analyse ingredients and how they impact each other and the overall results.
Hi — the ube brownies use white chocolate instead of dark chocolate and cocoa powder. I actually used this recipe as a base: https://www.hummingbirdhigh.com/2022/02/white-chocolate-brownies.html instead of My Best Fudgy Brownie to make hte ube brownies. The white chocolate brownie recipe has more flour and eggs to account for the additional milk and cocoa butter found in white chocolate (but not in dark chocolate, which contains less of both). This recipe only uses 1 egg instead of the 3 because the liquid/protein/starches from the ube halaya is replacing some of the binding qualities of the 3 eggs.
I’m glad that substituting the cocoa powder with ube worked for you, but I’m surprised! Cocoa powder tends to be a dehydrating ingredient (it absorbs more liquid than flour) whereas ube halaya is well, kind of a liquid. You replaced something that absorbed a lot of the recipe’s liquid with well, more liquid. So I’m surprised it didn’t come out mushy or cakey.
I have made this many times now, and it’s a big hit every time. Everyone from my most adventures food friends to the little church ladies love them. Everyone always asks for the recipe.
Delicious recipe!
This is the only ube brownie recipe you should make.. I find that plain ube jam with only the yam and sugar ( not condensed milk, buttermilk etc) is th best ube product to use. I had to use an ube halaya with multiple additives once, and the brownies came out dry!
I have made this many different times and it always comes out incredibly delicious.
One of our friends made them and I fell in love! Qq: Can you make these without ube jam?
No, they’re defs a key ingredient in the recipe!
Can I use ube powder and flavoring instead of ube jam?
For this recipe, I wouldn’t recommend it. Ube jam contains a lot of moisture that ube powder does not—you’d probably need to add extra eggs and butter to the recipe to get the same results if using ube powder.
This recipe is delicious! I’ve made it 4 times now and have served it at a party and they were a hit! Multiple people asked for the recipe. I used an ube halaya jam purchased on Amazon but for one batch I tried making ube jam from the linked recipe and this batch did not taste very good. So I’d recommend buying the jam if you can find it. It tastes totally different when you use that.
Hi! I’m curious why do you use both Ube Halaya and ube extract in the recipe? Is Ube Halaya not flavorful enough on its own?
And a second question: can you make all recipes using only Ube Halaya, or are there certain preparations where it’s better to use ube purée or a more concentrated ube extract?
Correct, IMO ube halaya is not flavorful or colorful enough on its own. Ube is quite a mild flavor. But realistically, you can probably get away with not using the extract—just know that tradeoff is that your brownies will be less flavorful and less vibrant.
Not sure what happened. The batter was is all runny and isn’t cooking. These have been in the oven for fifty-four minutes and are all lumpy and wet.
Why aren’t mine purple? I was assigned a purple themed charcuterie board and was hoping it would be purple like the photo on the recipe. Tastes amazing tho!
Hi there,
Did you use ube extract?
Wish i could upload a photo! My little bottle says: Taro Ube flavoring essence! (It’s dark purple too). That could be the problem! I’ll try and find Ube extract only.
These are SO tasty and everyone enjoyed them so it’s still a WIN!
HAPPY NEWEST YEAR 2️⃣❤️🔥2️⃣6️⃣
i’m making this recipe 2nd time today and it was a hit to my family and friends!! love the chewy fudgy texture of the brownie, and yes the crinkly shiny top did not disappoint!! thanks a lot!!
This recipe is FANTASTIC. I was a little concerned when I noticed there isn’t any baking powder or soda, but I’m so glad I trusted the process. These are unbelievably fudge and delicious. Vibrant in color, but the ube flavor is subtle, as ube typically is, and these almost remind me of the most delicious sugar cookie ever.
I did notice that by the end of the 30 minute bake time, it was still very jiggly and undercooked, so I left them in for about 6 more minutes before I pulled them. They are slightly undercooked, but that is my preference! Absolute 10/10, I will be making these again!
hi can the ube halaya be reduced?
Do you want to use less ube halaya or reduce the ube halaya from a larger quantity so that the smaller amount is more flavorful?
These are the best brownies! There’s never a crumb left, no matter how many times I make them. Recipe is easy to follow. No notes!
The family loved them.
Like a few others have commented, my brownies did not turn out purple at all – they are tan on top and tannish with a hint of lavender inside. I used both the ube jam and ube extract; however, my extract was clear! Is that why my brownies aren’t purple?! I haven’t tasted them yet – they’re still cooling, but they smell marvelous!
Most ube extract also has food coloring in it to give a purple hue—if your extract was clear, this is likely why they came out tan!