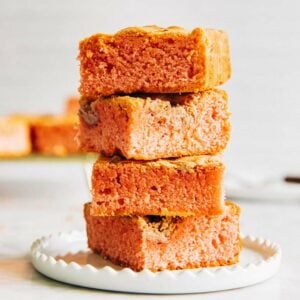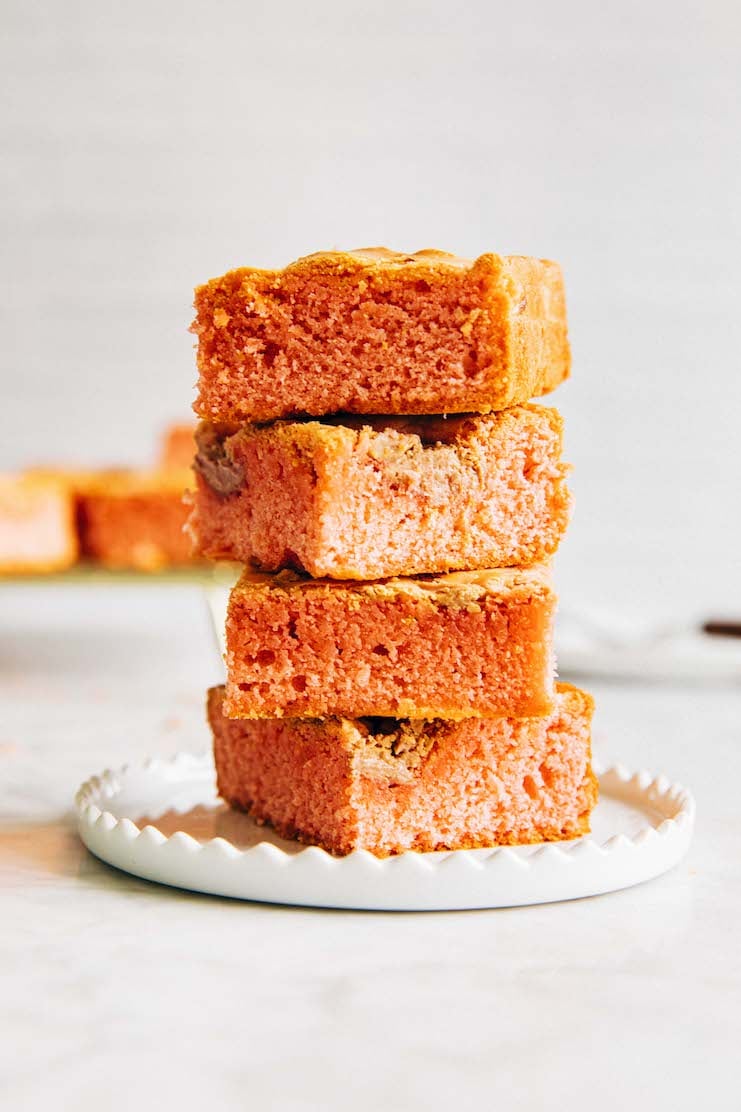
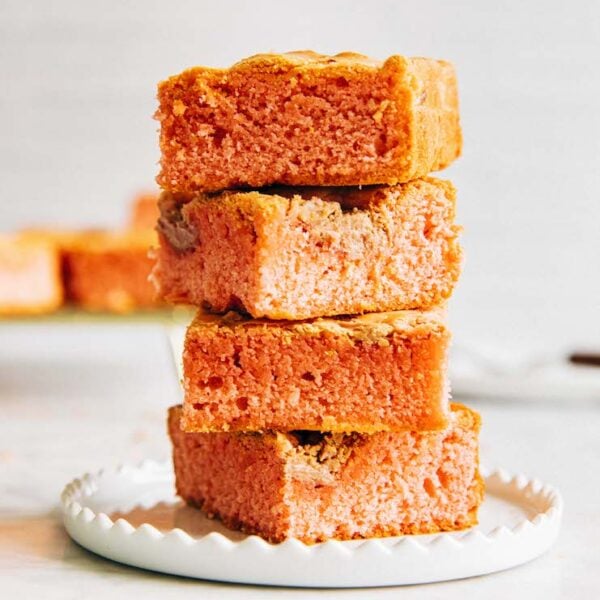
A photo of pink blondie bars stacked on a plate.

About These Ruby Chocolate Blondies

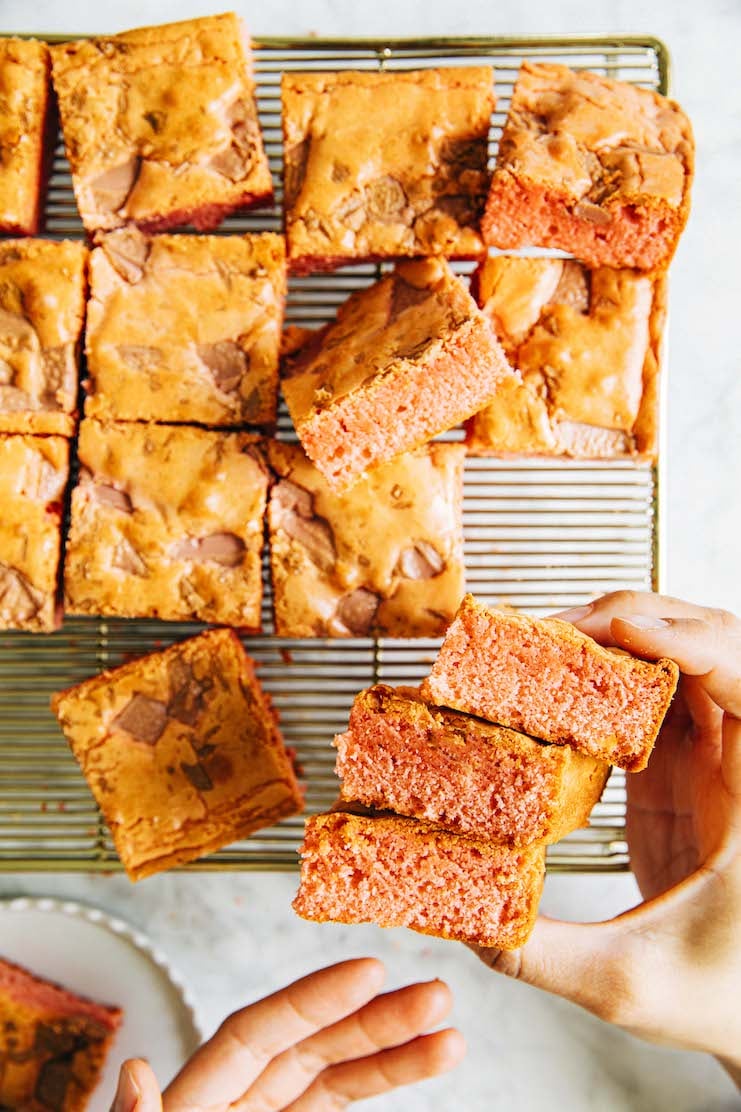
These blondies are made with ruby chocolate, giving them their unique pink color and distinctive, raspberry-like flavor! Because of the ruby chocolate, they taste like white chocolate with a strong hint of a tart, raspberry-like fruit. And similar to the traditional blondies, these ruby chocolate blondies are tender-yet-chewy, with a sugar top that crinkles and flakes when sliced.
What is ruby chocolate?

Ruby chocolate is a relatively new variety of chocolate. It was first introduced by Belgian chocolate company, Barry Callebaut, in 2017. It has a natural light pink color because it is made from cocoa beans with a natural-red pink color.

What does ruby chocolate taste like?

Ruby chocolate has its own distinct taste. It tastes slightly sweet, sour, and acidic. I personally think that it tastes similar to raspberries.

According to standards set by the Food and Drug Administration in the United States, ruby chocolate must contain a minimum of 1.5% nonfat cocoa solids and at least 20% cacao fat. These percentages make it similar in makeup to white chocolate.

As a result, I think that ruby chocolate tastes like a combination of milky white chocolate and tart raspberries.

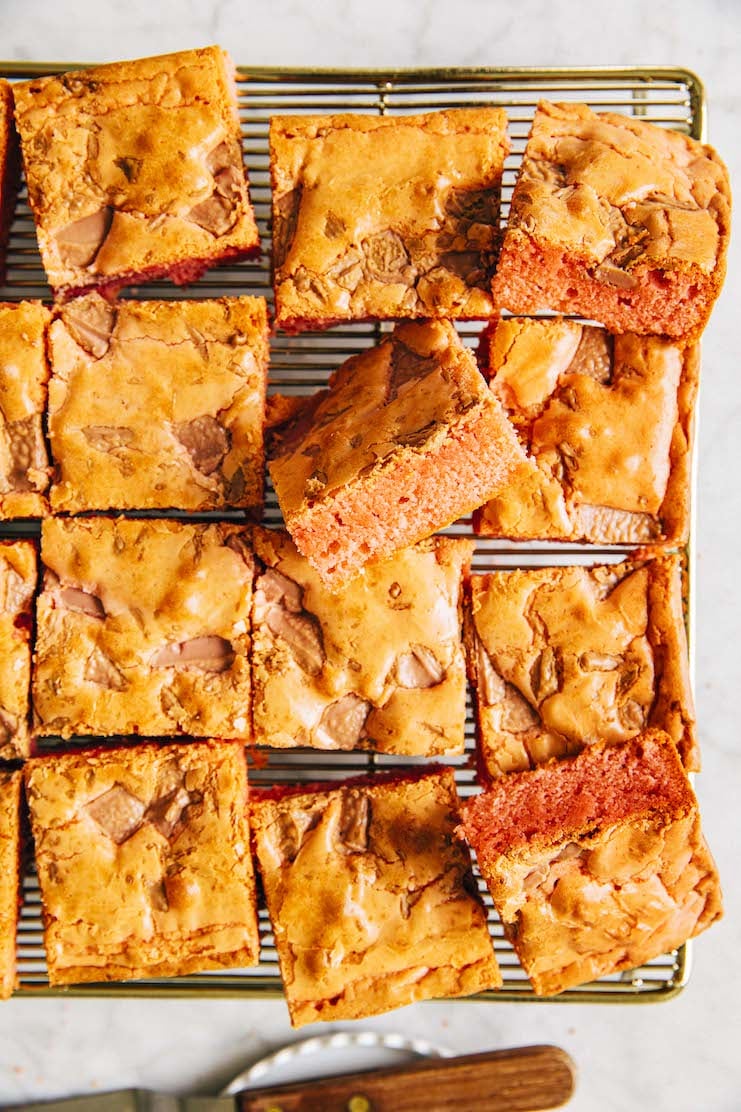
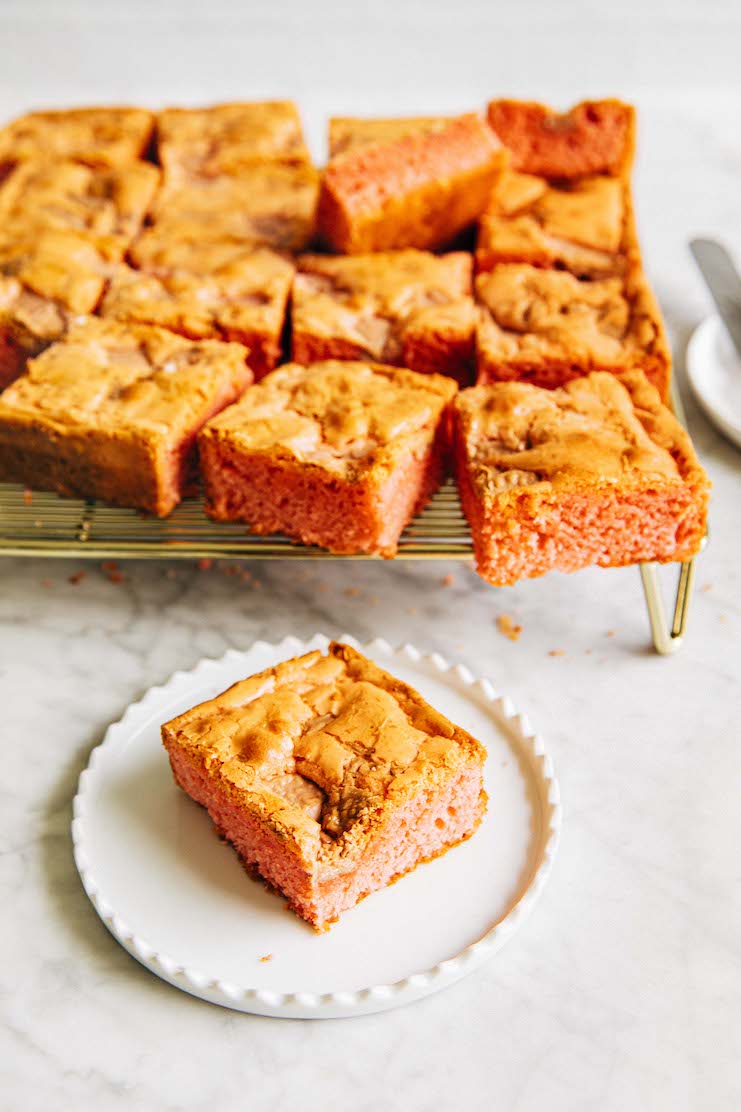
A photo of pink blondies on a wire rack.

Why You Should Make The Recipe

Here are all the reasons to make this ruby chocolate brownie recipe:

These blondies use a fun, unique ingredient: ruby chocolate.

I’ve already talked about what ruby chocolate is, and what it tastes like. So I’ll just say this: because of ruby chocolate’s unique flavor, these blondies will be like no other brownie and blondie recipes you’ve previously tried.

These ruby chocolate blondies store well.

Because these blondies are so rich and flavorful, they store well. I found that they were still fresh, moist, and flavorful even 3 days after making. In fact, I liked them best the day after they were baked. I found that the brownies developed in flavor overnight. The ruby chocolate became less sweet and intense, and took on more fruity, tart flavors. Pretty cool!

Hands holding blondies showing off their pink crumb.

Ingredients and Substitutions

Now that I’ve convinced you to make these ruby chocolate blondies, here’s everything you need:

Shopping List for Ruby Chocolate Blondies

  • all-purpose flour
  • kosher salt
  • unsalted butter
  • ruby chocolate
  • granulated sugar
  • light brown sugar
  • large eggs
  • clear imitation vanilla extract

And let’s talk about some key ingredients and their potential substitutions:

Kosher Salt

You need 1 teaspoon kosher salt to make these ruby chocolate blondies.

Why You Should Use Kosher Salt When Baking

I like to use kosher salt (as opposed to table salt) when baking. Its larger crystals make it difficult to confuse with granulated sugar. However, not all kosher salts are created equal. Some kosher salts have smaller granules than others, which will result in saltier tasting baked goods.

For consistency, I recommend sticking to one brand, and one brand only: Diamond Crystal kosher salt. It’s the only brand of salt I use when I develop recipes for Hummingbird High. Why? Diamond Crystal kosher salt is one of the few 100% pure salts in the grocery store. Other brands have additives that can add unexpected flavors to your desserts.

I can’t find Diamond Crystal kosher salt. Is Morton’s Coarse kosher salt okay?

Yes, with reservations. Morton’s Coarse kosher salt granules are much smaller, denser, and crunchier than Diamond Crystal. According to this Food52 article, the two are different shapes and sizes because of how they’re made. Morton’s is made by flattening salt granules into large thin flakes by pressing them through high-pressure rollers, whereas Diamond Crystal is formed by a patented method in which “upside-down pyramids [are] stacked one over the next to form a crystal.” You can even see a visualization of the different sizes in this Cook’s Illustrated article.

Okay, but what does that mean, exactly? 1 teaspoon of Morton’s will taste saltier than 1 teaspoon of Diamond Crystal. Wild, right? So if you follow my recipes exactly as they are written but use Morton’s instead of Diamond Crystal, the results will come out saltier. In fact, sometimes they will come out TOO salty. So if you’re using Morton’s instead of Diamond Crystal, reduce the salt in the recipe by half.

Want to learn more about Diamond Crystal versus Morton’s Coarse kosher salt? Definitely check out the Food52 and Cook’s Illustrated articles I linked to above, as well as this Taste article.

I can’t find Diamond Crystal OR Morton’s Coarse kosher salt. Can I just use table salt?

Yes, with reservations. If you use table salt, you’ll need to reduce the recipe’s salt quantity by half.

If you read my little essay about Diamond Crystal and Morton’s, you learned that Diamond Crystal kosher salt granules are larger than Morton’s kosher salt granules. The same principle applies to table salt versus kosher salt. Table salt granules are much smaller than kosher salt granules. As a result, 1 teaspoon of table salt tastes much saltier than 1 teaspoon of kosher salt… simply because it can hold more granules! Wild, right?

So if you follow my recipes exactly as they are written but use table salt instead of kosher salt, the results will come out saltier. If you’re using table salt instead of kosher salt, I recommend reducing the salt in the recipe by half. 

Ruby Chocolate

You need 6 ounces (170 grams) ruby chocolate to make these ruby chocolate blondies.

What is ruby chocolate?

I mentioned this earlier, but uby chocolate is a relatively new variety of chocolate. It was first introduced by Belgian chocolate company, Barry Callebaut, in 2017. It has a natural light pink color because it is made from cocoa beans with a natural-red pink color.

What does ruby chocolate taste like?

Ruby chocolate has its own distinct taste. It tastes slightly sweet, sour, and acidic. I personally think that it tastes similar to raspberries.

According to standards set by the Food and Drug Administration in the United States, ruby chocolate must contain a minimum of 1.5% nonfat cocoa solids and at least 20% cacao fat. These percentages make it similar in makeup to white chocolate.

As a result, I think that ruby chocolate tastes like a combination of milky white chocolate and tart raspberries.

Where To Buy Ruby Chocolate

Barry Callebaut is the exclusive manufacturer of ruby chocolate. You can buy their ruby chocolate callets (a product similar to chocolate chips) online at various sources like Amazon, Bake Supply Plus, and more.

However, ruby chocolate is often sold in big, expensive bags that are too much for the average home baker. Instead, I recommend you find these ruby chocolate bars by Chocolove for this recipe. A 3-ounce bar retails for $2.99 to $3.99 at grocery and specialty stores like Walmart and World Market. If you’re a Portlander like me, I found mine at New Seasons Market.

And don’t worry! Chocolove also has an exclusive partnership with Barry Callebaut that enables them to make these bars. You’re getting the real thing.

I can’t find ruby chocolate. What can I use instead?

Ruby chocolate has a similar makeup to white chocolate. You could theoretically use white chocolate instead of ruby chocolate to make these blondies. However, I don’t recommend it.

I wrote earlier that ruby chocolate has a distinct sour, acidic taste similar to raspberries. White chocolate does not have this flavor. If you make these bars with white chocolate, you won’t be getting that unique sour, acidic taste. I’ve also adjusted the sugar levels in the recipe to account for this acidity. Without the ruby chocolate, I worry these blondies would be too sweet.

So if white chocolate is all you have, I highly recommend checking out my recipe for White Chocolate Brownies instead. It’s VERY similar to these ruby chocolate blondies. It just has sugar levels that are more suitable to the taste of regular white chocolate.

Can I use milk or dark chocolate instead of ruby chocolate to make these blondies?

No, please don’t. Ruby chocolate has different levels of cocoa solids and cocoa fat than milk and dark chocolate. You need to adjust the butter and sugar levels in the recipe to adjust for the differences in those ingredients in milk and dark chocolate.

If milk chocolate is all you have, I highly suggest checking out this recipe for Milk Chocolate Brownies instead. And if dark chocolate is all you have, check out this recipe for My Best Fudgy Brownie Recipe (as well as all these other amazing blondie and brownie recipes on my site, too).

Clear Imitation Vanilla Extract

You need 1 ½ teaspoons clear imitation vanilla extract to make these ruby chocolate blondies.

What is clear imitation vanilla extract?

Most vanilla extracts are “pure”, meaning that they are made with real vanilla bean pods and are brown in color.

Clear vanilla extract, on the other hand, is artificially made in a lab (hence the “imitation” in its name). Although it is vanilla in flavor, it’s not flavored by any actual vanilla beans. However, itts clear color keeps the blondie crumb a lighter color that allows the pink of the ruby chocolate to really pop!

Where can I buy clear imitation vanilla extract?

You can find clear imitation vanilla extract in the baking aisles of any major grocery store like Kroger, Safeway, and more. My favorite brands include the McCormick brand, Kroger’s generic version, and the Watkins brand of clear imitation vanilla extract.

If you’re a Portlander like me, Fred Meyer typically carries a variety of clear vanilla extracts. It is usually by the pure vanilla extracts (although it is much cheaper than the real stuff).
Can I use pure vanilla extract instead?

Yes, with reservations. Your blondies will definitely taste great. However, your crumb won’t be as pink as mine.

Pink OR Red Food Coloring

You need a few drops of pink OR red food coloring to make these ruby chocolate blondies.

Ew, food coloring. Do I really need to use food coloring to make these blondies?

Technically, no. But your blondies probably won’t look as cute as mine. 

You can make these blondies without food coloring. However, let me warn you now that the ruby chocolate on its own won’t give the blondies a bright, pink hue. It’ll instead turn out a light brown, tannish color (similar to that of regular blondies).

Why? Ruby chocolate on its own doesn’t have any artificial food coloring. As a result, its natural pink color often gets overwhelmed by the other ingredients in the recipe.

Okay, you’ve convinced me to use food coloring. What food coloring did you use to make these Neapolitan cookies?

I used this Americolor Soft Gel Paste in Deep Pink. This color is a part of this Americolor Nifty-Fifty kit that I also own. Although it’s a little on the spendy side, I cannot say enough good things about my set. However, if you’re on a budget, I also recommend this Wilton 8-Count Gel Icing Color Set.

That being said, the most commonly available food coloring set in American grocery stores is this small McCormick set. Its red color will do just fine in these ruby chocolate blondies.

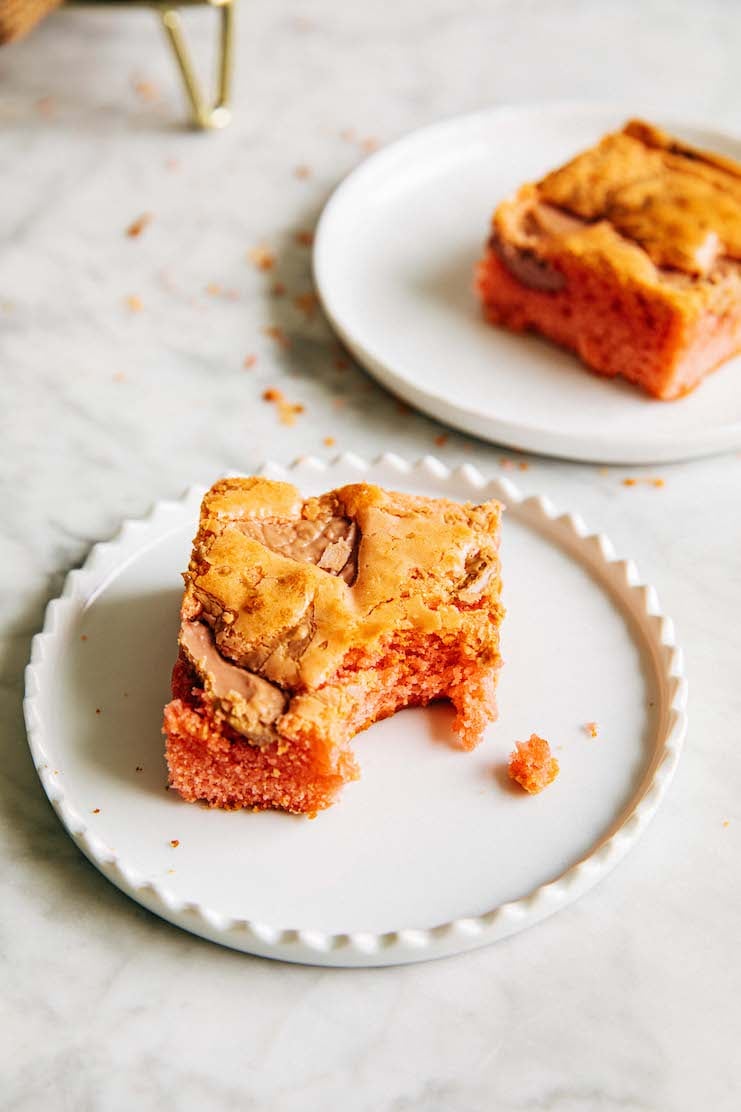
Photo of one blondie on a white plate with rack of blondies in the background.

How To Make Ruby Chocolate Blondies

Here are the basic steps to make ruby chocolate blondies from scratch:

First, prep the ingredients for the ruby chocolate blondies.

  1. Prep the ingredients. (Prep Time: 5 to 10 minutes)
    It usually takes 5 minutes to prep—that is, measure out all the ingredients needed for the recipe itself—for most of the recipes on this blog.

    If you’re using ruby chocolate callets or chips, your Prep Time will take around 5 minutes. However, if you’re using chocolate bars to make these brownies, you need to chop up the chocolate. Doing so usually takes around 5 minutes.

Next, make the ruby chocolate blondie batter.

  1. Start making the blondie batter by melting the chocolate and butter together. (Work Time: 10 minutes)
    Combine the chopped chocolate and butter in the top of a double boiler (or a homemade one—see FAQ for more info!). Melt over medium heat until smooth. Once melted, set aside to cool slightly while you work with the rest of the ingredients.

  2. Whisk the sugars, eggs, vanilla, food coloring, then add the chocolate mixture and dry ingredients. (Work Time: 15 minutes)
    In the bowl of a stand mixer fitted with the whisk attachment, combine the sugars, eggs, vanilla, and food coloring. Whisk on medium-high speed for 8 minutes; you’re basically making a fluffy meringue with these ingredients! Once cloudlike, add the warm chocolate-butter mixture and the dry ingredients.

Finally, assemble and bake the ruby chocolate blondies.

  1. Assemble the blondies. (Work Time: <5 minutes)
    Scrape the blondie batter into an 8-inch square pan lined with parchment paper. Smooth the top with a rubber spatula if necessary, then sprinkle with the remaining ruby chocolate for the topping.

    
  2. Bake the blondies. (Bake Time: 30 minutes)
    This recipe bakes for around 30 minutes. When baking blondies, it’s always better to pull them out of the oven early. Leaving them in too long means that they’ll turn out tough! Check out the recipe and FAQ below for more tips.
photo of two blondies on a white plate

Recipe Troubleshooting and FAQ

FAQ: All About The Baking Equipment You Need To Make The Recipe

I don’t have an 8-inch square pan. However, I *DO* have a 9-inch square pan. Can I use that instead?

Yes, with reservations. In a pinch, you can use a 9-inch square pan to make these brownies instead. However, doing so will result in slightly thinner blondies since a 9-inch square pan has slightly more surface area than an 8-inch square pan, causing the batter to spread more. This might also cause the blondies to bake slightly faster. If you’re using a 9-inch square pan, I highly suggest checking for doneness 5 minutes before the recipe’s original Bake Time.

Is it better to use a glass or metal pan when baking blondies?

Alright, here we go—when you google the answer to this question, the first few search results will tell you that it is better to use a glass pan when baking blondies. THEY ARE 100% INCORRECT. It is my *FIRM* opinion that it is always, ALWAYS better to use a metal pan when baking blondies.

Why? Glass pans are slow to heat up; however, when hot, they retain heat for much longer. This quality often results in uneven baking. By the time the interior of whatever you’re baking is done, the exterior of it is often overcooked, dry, and overly dark.

What does that mean for these blondies? If you’re baking the blondies in a glass pan, they’ll continue to bake LONG after being pulled out of the oven because the pan continues to retain so much heat. That usually means dense, dry, and overcooked blondies that are not chewy at all.

Metal, on the other hand, conducts heat. Because metal heats up faster than glass, it leads to brownies with a better rise (but without being cake) with crispier edges. And because metal pans lose heat quickly after being pulled out of the oven, your blondies will too. That means the blondies will cool faster, and they won’t be overdone. Instead, they will instead be perfectly chewy and set. So please use a metal pan for this recipe!

Finally, if you want to be a perfectionist, choose a light colored metal pan over a dark metal pan. Dark pans absorb more heat, which, like glass, can cause the exterior of the brownies to bake too quickly. I always use pans from Williams-Sonoma’s Goldtouch Pro Nonstick line for my baking.

What’s a double boiler and why do I need one for baking?

A double boiler is a special type of sauce pot that looks like two pans stacked on top of each other. Typically, you fill the bottom pot with 2 to 3 inches of water, and place what you want to cook in the top pot.

Why? Typically, if a recipe instructs you to cook something in a double boiler, that means it’s sensitive to heat. It might burn or scorch if cooked in a traditional pot. But in a double boiler, the water in the bottom pot will transfer a gentle, steady heat to the top pot, avoiding these issues.

I don’t have a double boiler. What can I use instead?

Good news! There’s no need to buy a double boiler specifically for this brownie recipe. You can use a homemade double boiler instead. In fact, it’s what I do—I’ve even included instructions on how to do so in the recipe below.

But to do so, simply set a heatproof bowl—I like the glass bowls by Pyrex—on top of a medium, heavy-bottomed sauce pan filled with a few inches of water. Make sure the bottom of the bowl doesn’t touch the water. That’s it!

I don’t have a stand mixer. Can I use a hand held electric mixer to make this recipe instead?

Absolutely! Just note that hand held electric mixers are less powerful than stand mixers. This recipe instructs you to whisk the sugars and eggs on high speed for 8 minutes. I would add an additional 2 minutes to that whisking time to compensate for the hand held electric mixer.

FAQ: Customizing This Ruby Chocolate Blondie Recipe

Can I double the recipe and bake it in a 9 x 13-inch pan instead?

Yes! Simply double the ingredients in the recipe below and bake in a 9 x 13-inch pan instead of an 8-inch square pan. Bake Time should stay relatively the same. I would still check for doneness at the 30 minute mark. However, it’s likely that the bigger pan will need an additional 5 minutes to bake the center.

FAQ: Troubleshooting Common Mistakes and Cooking Errors

Help! My blondie batter came out lumpy. What did I do wrong?

This recipe instructs you to pour melted ruby chocolate and butter into a mixture of eggs and sugar. If the melted chocolate and butter is too hot, it can potentially scramble the eggs, causing a lumpy batter and bad blondies!

To prevent this from happening, melt the ruby chocolate and butter first. Set it aside on a wire rack to cool slightly while you prep the rest of the ingredients. This will give the melted chocolate and butter enough time to cool slightly. If you want to be extra safe, pour the melted chocolate and butter into a separate bowl than the pan or bowl it was melted in, too. Doing so will help the mixture cool faster!

The ideal temperature of the melted chocolate and butter will be similar to that of a warm bath. Dip your finger in it—it should feel warm and comfortable like a hot bath. It should not burn or scald you!

Help! My blondies don’t have the shiny paper crinkle top like yours do. What did I do wrong?

It’s likely that you either:

a) used too much flour
b) used too little sugar
c) baked the brownies for too long and/or used the wrong type of pan to make them
d) didn’t whip the sugar and eggs together long enough.

First, let’s talk about measuring ingredients. A lot of people don’t have the right technique when using measuring cups. It’s easy to use too much flour when using volume measures. Don’t use the measuring cup to scoop the flour in the bag and pack it down into the cup. Instead, set the measuring cup on the counter and then spoon the dry ingredients into it. Once it’s formed a small mound, don’t pack it down. Use a butter knife or bench scraper to level it off.

While this technique works best for ingredients like flour, you’ll need to do the exact opposite for measuring brown sugar. Spoon the brown sugar into the measuring cup or tablespoon. Once it’s formed a small mound, pack it down, then add more brown sugar until it is level with the top of the measuring cup.

Next, if you used the techniques above OR used weight measures (which I always recommend, since you won’t need to fuss with the techniques I just outlined) and are STILL experiencing issues, it’s likely that the blondies were overbaked. Check out the FAQ above on why you should always use a metal pan when baking blondies, as well as the baker’s notes below on how to test blondies for doneness.

Finally, the recipe instructs you to whip the sugar and eggs together at high speed for a long time. It’s annoying, but it’s the secret to shiny paper crinkle tops! If you skipped or slacked during this step, your blondies won’t have the crinkle top.

Help! My blondies came out tough. What did I do wrong?

It’s likely that you either a) overmixed the batter or b) baked the blondies for too long and/or used the wrong type of pan to make them.

When mixing the dry ingredients into the rest of the batter, simply mix just until the flour disappears! If you mix beyond that, your blondies will come out dense and tough. I will legit cry for you.

If you’re convinced you didn’t overmix the batter, it’s likely that you overbaked them. First, make sure to use a metal pan when baking blondies. I’ve already explained why it’s important to do so in the FAQ above. But the TL/DR is that glass pans tend to overbake blondies!

Finally, when testing for doneness, stick a skewer in the dead center of the blondies. Pull it out—it should still have a few crumbs attached. If it’s wet with batter, the blondies still need more time. If the skewer is completely dry, uh-oh! You’ve overbaked the blondies.

FAQ: How To Store The Blondies

How To Store Ruby Chocolate Blondies

The blondies can be stored in an airtight container or zip-top bag at room temperature for up to 3 days.

Can you freeze this blondie recipe?

Yes! You can freeze the baked blondies.

To freeze the blondies, individually wrap any leftover bars in two layers of plastic wrap, then a layer of aluminum foil. The aluminum foil will prevent the bars from absorbing any other flavors or odors in the freezer. Freeze for up to 3 months.

When ready to serve, transfer to the refrigerator to thaw overnight. You can eat the blondies straight from the fridge, or rewarmed in the microwave.

Best Recipe Tips

Best Ingredient Tips

  • The recipe states that you need 4 ounces (113 grams) of chopped chocolate to make the blondie batter. If you don’t have a digital kitchen scale, that’s equivalent to ⅔ cup of chopped chocolate. Each piece of chocolate should be roughly the same size and shape of a mini- or regular-sized chocolate chip.

    I mentioned this earlier, but I used two 3-ounce Chocolove bars for my ruby chocolate. I measured the 4 ounces (113 grams) I needed for the batter, then chopped up the rest to save for topping the batter in the latter half of the recipe.

  • When chopping the ruby chocolate, make sure to follow the recipe instructions to chop it into smaller ¼- to ½-inch pieces. Any larger than that, and you’ll have a hard time melting the ruby chocolate. Similar to regular white chocolate, it tends to scorch easily and seize if the pieces are too large and/or the heat source is set too high.

    If you’re inexperienced with working with ruby or white chocolate, err on the side of caution and cook the chocolate and butter over medium-low heat instead of medium. Although it will take longer to melt the ingredients, the gentler heat will help prevent any potential issues.

  • The ruby chocolate and butter needs to be melted and cooled slightly before using in the recipe. I recommend melting these ingredients first, then setting it aside while you prep the rest of the ingredients and make the brownie batter. Doing so will give the butter enough time to cool slightly!

Best Technique Tip

  • It’s better to pull the blondies out of the oven early than leave them in too long—if you over bake the blondies, they’ll be tough. They might appear underbaked, but I promise that when they’ve cooled, they will be perfect.

Best Styling Tip

  • When you first pull the blondies out of the oven, it’s possible that the ruby chocolate will look a little grayish. Don’t panic! It’ll turn back into its pale pink color as it cools.

More Brownies and Blondie Recipes on Hummingbird High

More Ruby Chocolate Dessert Recipes

Get the Recipe: Ruby Chocolate Blondies Recipe

These ruby chocolate blondies are made with ruby chocolate, a naturally pink chocolate that tastes like a mix of white chocolate and raspberries. They are moist and chewy, with a crinkly sugar top that is studded with chunks of ruby chocolate.
No ratings yet
Leave a Review

Ingredients

For the Ruby Chocolate Blondie Batter

  • 1 ½ cups (6.75 ounces or 191 grams) all-purpose flour
  • 1 teaspoon kosher salt
  • ½ cup (4 ounces or 113 grams) unsalted butter, cut into 1-inch cubes
  • 4 ounces (113 grams) ruby chocolate, finely chopped into ¼- to ½-inch pieces
  • 1 cup plus 2 Tablespoons (7.85 ounces or 223 grams) granulated sugar
  • 2 Tablespoons tightly packed light brown sugar
  • 3 large eggs, at room temperature
  • 1 ½ teaspoons clear imitation vanilla extract
  • 3 drops pink or red food coloring

For Assembly

  • 2 ounces (57 grams) ruby chocolate, roughly chopped into ½- to 1-inch pieces

Instructions
 

  • Prep the oven and baking pan. Position a rack in the center of the oven and preheat the oven to 350°F. Lightly spray an 8-inch square pan with cooking spray and line with parchment paper, leaving a 2-inch overhang on each of the pan's sides. Spray the parchment paper, too.
  • Mix the dry ingredients. In a medium bowl, whisk together the flour and salt.
  • Melt the butter and ruby chocolate for the batter. Place the butter and white chocolate in the top pan of a double boiler or in a heatproof bowl set over a medium, heavy-bottomed saucepan filled with a few inches of simmering water (be sure the bottom of the bowl does not touch the water).
    Cook over medium heat, using a heatproof rubber spatula to stir the mixture and scrape the sides of the bowl occasionally, until the chocolate and butter have melted and combined, about 5 minutes. Remove the pan or bowl from heat and set on a wire rack to Let the chocolate mixture cool slightly while you prep the other ingredients.
  • Whisk the sugars, eggs, vanilla, and food coloring, then add the chocolate mixture. In the bowl of a stand mixer fitted with the whisk attachment, combine the sugars, eggs, vanilla, and food coloring. Whisk on medium-high speed for 8 minutes, or until thick, fluffy, and doubled in volume. Reduce to low and slowly pour in the warm chocolate mixture, whisking on low speed until just combined.
  • Mix in the dry ingredients. Once the chocolate mixture is combined, use the rubber spatula to scrape down the whisk and the bottom and sides of the bowl. Sprinkle the dry ingredients over the batter all at once and use a rubber spatula to mix by hand until just combined.
  • Assemble the blondies. Pour the batter into the prepared pan and use an offset spatula to spread it evenly across the pan and smooth the top. Sprinkle the batter with the remaining ruby chocolate for assembly.
  • Bake the blondies. Bake for 30 minutes, or until a skewer inserted into the center of the blondies comes out with a few crumbs attached. Cool completely on a wire rack before slicing.
  • Serve and store. Run a butter knife or the offset spatula along the edges of the pan and use the overhanging parchment as handles to lift the blondies out of the pan and onto a cutting board. Slice into 2-inch squares and serve.
    The blondies can be stored in an airtight container or zip-top bag at room temperature for up to 3 days.
Did you make this recipe?Please leave a star rating and review in the form below. I appreciate your feedback, and it helps others, too!

Did you make this recipe?

Please leave a comment and rating for the recipe using the form below!

Your ratings make it easier to find the recipe online, and I’m always looking for ways to improve Hummingbird High.

Michelle holding Weeknight Baking cookbook covering her face.

buy the book
Weeknight Baking:
Recipes to Fit your Schedule

Over the past several years of running Hummingbird High, I kept a crucial aspect of my life hidden from my readers: I had a full-time, extremely demanding job in the tech world. In my debut cookbook, Weeknight Baking, I finally reveal the secrets to baking delicious desserts on a tight schedule.