
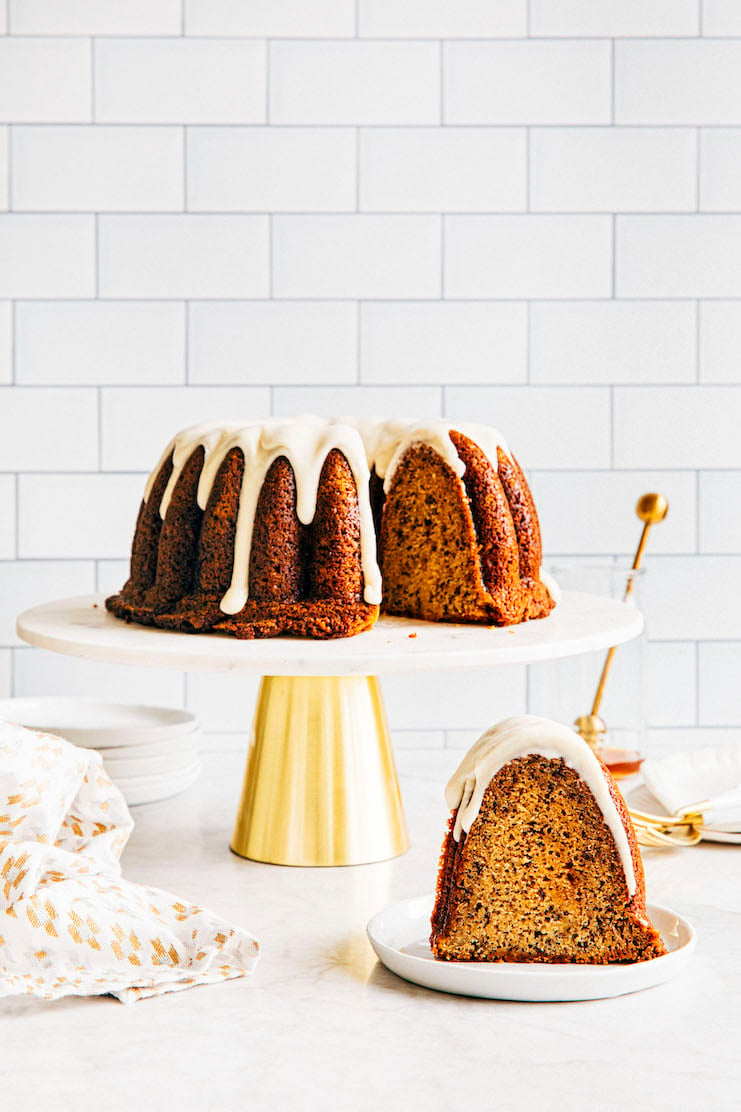
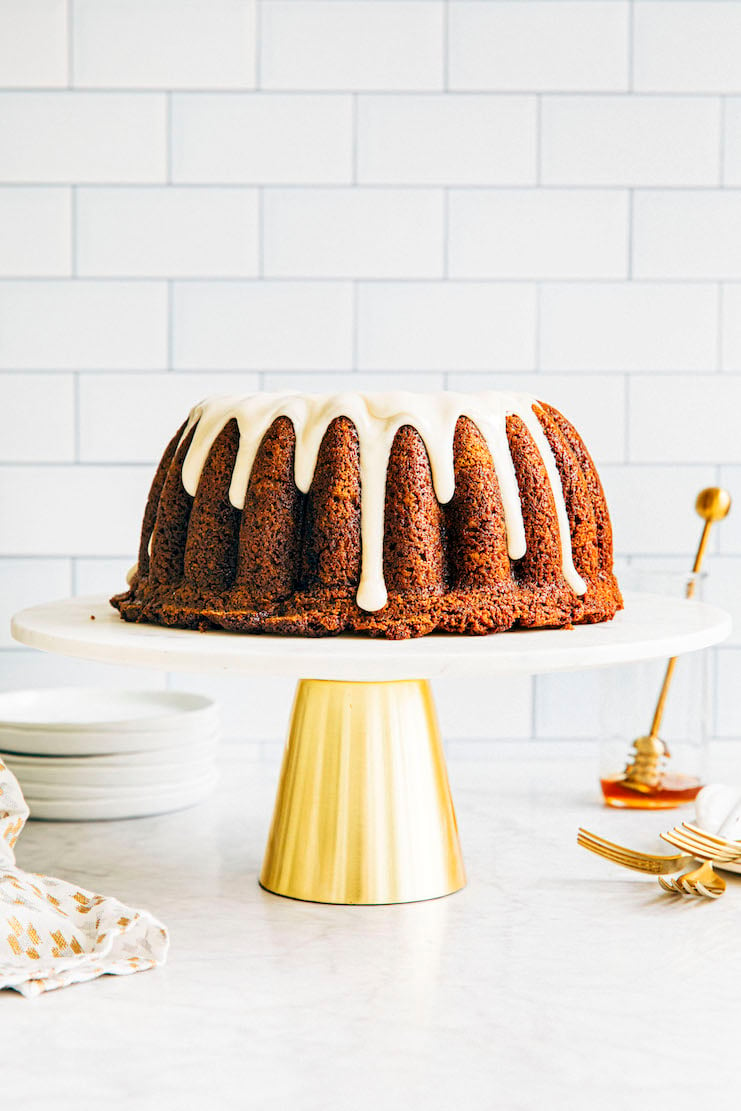
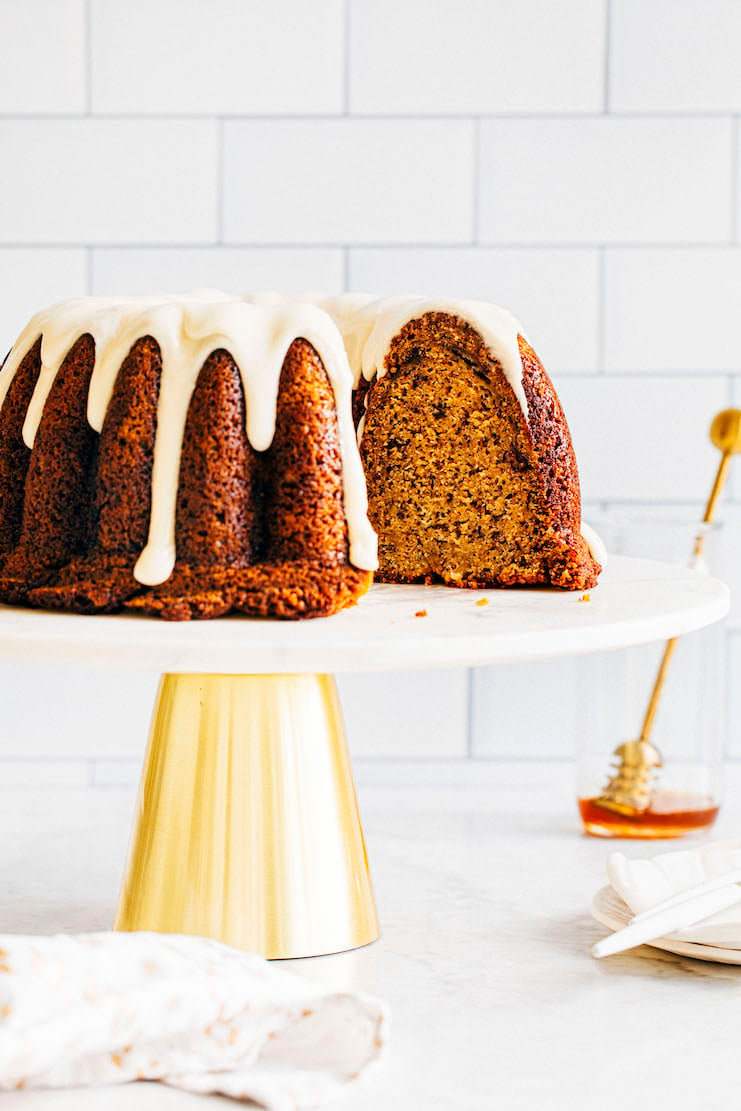
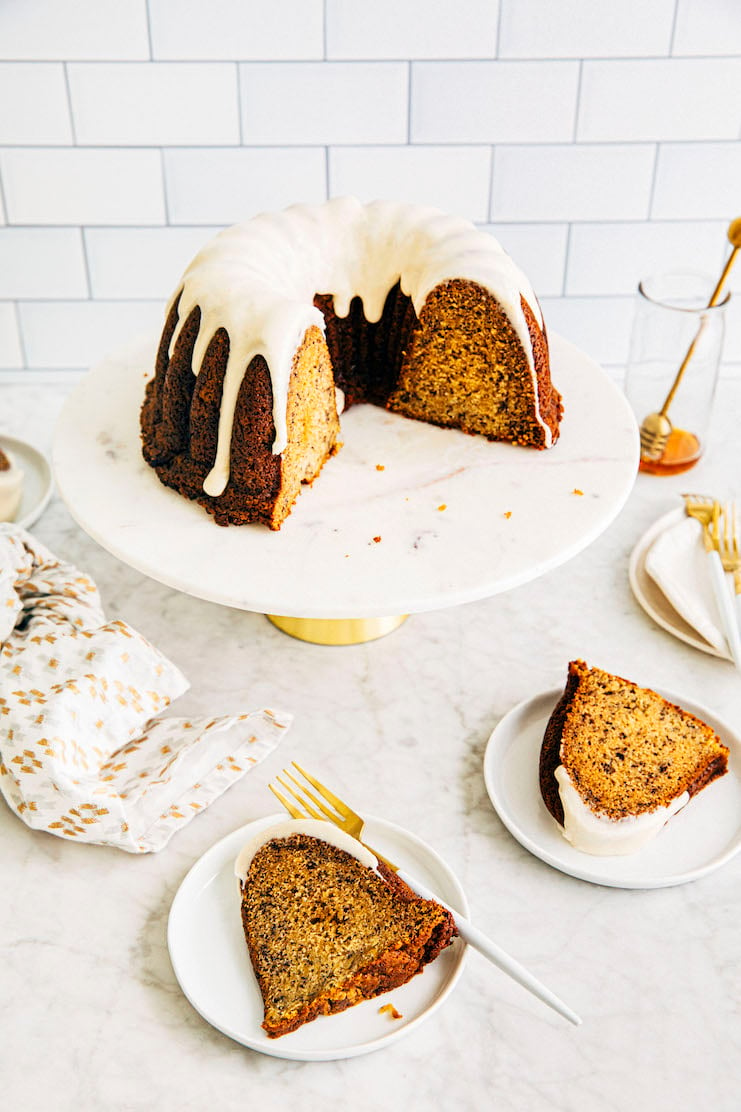
About My Best Banana Bundt Cake
My best banana bundt cake recipe makes a super moist bundt cake that is full of banana flavor! The bundt cake uses both brown sugar and sour cream for moisture and flavor. The brown sugar gives the cake butterscotch flavors, while the sour cream provides a wonderful, contrasting tang.
For more unique and delicious bundt cake recipes on Hummingbird High, check out my Bundt Cake recipe collection! Popular recipes include the famous Tom Cruise Coconut Bundt Cake and this beautifully layered Chocoflan Recipe.
Ingredients and Substitutions
Now that I’ve convinced you to make my best banana bundt cake, let’s talk about some key ingredients and their potential substitutions:
- Nonstick Baking Spray: Nonstick baking spray is similar to nonstick cooking spray. However, it typically includes flour mixed into the fat/oil of the spray. The flour helps prevents baked goods from sticking in detailed bundt pans. I use Bak-Klene ZT All Purpose Release Spray. When developing this recipe, I found it best to avoid using a baking spray made with butter, coconut oil, or shortening—these don’t release bundt cakes as easily!
- Kosher Salt: In my cookbook, I argue that kosher salt is the best salt for baking recipes. But you can replace the kosher salt in the recipe with table salt. Just use half the amount listed in the recipe when you do!
- Brown Sugar: Brown sugar is available in two varieties: light or dark. Dark brown sugar is my personal preference; because it contains more molasses, I find it to be more flavorful. However, you can use either in my best banana bundt cake recipe without altering its flavor too much.
- Bananas: My advice is to use incredibly ripe, spotted, and almost black bananas. The spottier they are, the sweeter and more flavorful your mini banana chocolate chip muffins will be.
- Sour Cream: When testing this recipe, I found that the sour cream can be substituted with plain, unsweetened full-fat regular OR Greek yogurt. You can also use fancy creamy dairy products like crème fraîche or mascarpone instead.
- Whole Milk: I also discovered that whole milk can be substituted with 2% or skim milk. But using whole milk makes the glaze more flavorful. You can also substitute the whole milk with the plant-based milk of your choice. But note that it will make the glaze taste like the milk you choose. I recommend picking something that will complement the banana flavor well (like almond, coconut, or oat milk).
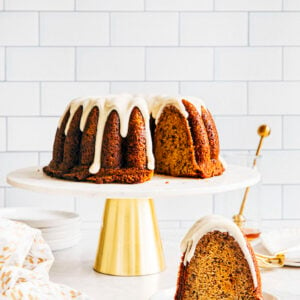
Let’s Talk Bundt Pans, Baby
I used this Nordic Ware Elegant Party Bundt pan. It’s pretty, but I’m not sure I recommend it. I tried making this Kentucky Bourbon Butter Cake recipe in the pan FOUR times—it got stuck in the pan every. single. time! Even despite following all my tips and techniques above! I really don’t know why. I suspect that the pan is too small, even despite its claims of being a 10-cup capacity pan.
Luckily, this banana bundt cake recipe has never gotten stuck in the pan (I’ve made it twice in the pan). But still. I’m hesitant to recommend it to y’all.
If you’re nervous about this bundt cake getting stuck in its pan, I highly recommend checking out my post on how to grease your bundt cake pan to prevent sticking. The guide properly explains exactly my foolproof technique—and how to fix any stuck cakes.
Best Recipe Tips
Equipment Tips
- The recipe for the honey glaze instructs you to use 1 ½ Tablespoons of both honey and whole milk. Most measuring spoon sets only come with four measures: ¼-teaspoon, ½-teaspoon, 1-teaspoon, and 1 Tablespoon. You can buy a 1 ½-Tablespoon measuring spoon online by itself. But no worries! If you don’t own one and/or don’t want to invest in one, 1 ½ Tablespoons is also equivalent to 4 ½ teaspoons.
- Most cake recipes instruct you to prep their baking pans first. However, it’s better to grease a bundt pan right before filling with batter. That’s because bundt pans require a LOT more grease than traditional cake pans. And all that grease has a tendency to slide down the sides of the pan and pool at the bottom. But by greasing the bundt pan immediately before filling it, you avoid that issue entirely!
Ingredient Tips
- Bananas are listed in the recipe by weight, not volume or size. Why? It’s risky not to include exact measures for banana bread. Too little banana, and your banana bread will turn out dry, flavorless, and maybe even soapy tasting. Banana’s natural acidity helps neutralize the baking soda in the recipe, so without enough fruit, the banana bread will taste like baking soda! But go the other way and use too much banana, your bread will take forever to bake or collapse in the center. For best results, first peel the bananas, then use a digital scale to weigh the naked fruit. But for those of you who insist on volume measurements, use 1 ¾ cups mashed bananas (from around 3 large bananas or 4 medium ones).
- This recipe works best if you use incredibly ripe, spotted, and almost black bananas. The unpeeled bananas should feel soft to the touch and give easily when gently pressed. That means that they’ll mash easily in the stand mixer. If the bananas feel firm, you may need to mash them before using them in the recipe. Set the bananas on a firm surface and use the twines of a fork to press down on the fruit until mashed.
Baking Tip
- The Bake Time for this recipe is listed at a range between 65 to 75 minutes. That being said, if you’re using extremely ripe bananas, you’ll likely need to bake it for 10 to 15 minutes longer than what’s listed in the recipe. The same goes for bananas that were frozen, then thawed for use in the recipe. Extremely ripe and previously frozen bananas contain more moisture and will need longer to cook in the oven.
The best way to test for doneness is to use a wooden skewer and stick it in the center of the cake, between the bundt pan middle and its sides. The skewer should come out with few crumbs. If you find that the skewer is plenty wet with batter but the top of the cake looks too browned, don’t panic! Simply cover the top of the cake with a loose sheet of aluminum foil. This will help prevent the top of the cake from browning further.
Get the Recipe: My Best Banana Bundt Cake Recipe
Ingredients
For the Banana Bundt Cake
- 3 cups (13.5 ounces or 383 grams) all-purpose flour
- 2 teaspoons baking soda
- 1 teaspoon kosher salt
- 1 cup (8 ounces or 227 grams) sour cream, at room temperature
- 1 Tablespoon pure vanilla extract
- 1 cup (2 sticks or 8 ounces or 227 grams) unsalted butter, at room temperature
- 2 cups tightly packed (15 ounces or 425 grams) light OR dark brown sugar
- 2 large eggs, at room temperature
- 14 ounces (or 397 grams) very ripe peeled bananas (see baker's notes for cup measures)
For the Honey Glaze
- 1 ½ cup (6 ounces or 170 grams) confectioners' sugar, sifted
- 1 ½ Tablespoons honey
- 1 ½ Tablespoons whole milk
- ¼ teaspoon kosher salt
Equipment
- a 10-cup capacity bundt pan
- cooking spray
- a 1 ½-Tablespoon measuring spoon
Instructions
For My Best Banana Bundt Cake
- First, make the banana bundt cake. Position a rack in the center of the oven and preheat the oven to 350°F. Line a half sheet pan with parchment paper.
- Mix the dry ingredients, then the wet ingredients. In a medium bowl, whisk together the flour, baking soda, and salt. In a liquid measuring cup, whisk together the sour cream and the vanilla.
- Cream the butter and sugar, then add the eggs. In the bowl of a stand mixer fitted with the paddle attachment, combine the butter and sugar. Beat on medium-high until light, fluffy, and doubled in volume, 3 to 5 minutes, using a rubber spatula to scrape down the bottom and sides of the bowl as necessary. Reduce the mixer to low and add the eggs one at a time, adding the next egg only after the previous one has been fully incorporated, scraping down the bottom and sides of the bowl after each addition.
- Add the dry and wet ingredients, then the bananas. With the mixer still on low, add the the dry ingredients in three parts, alternating with the wet ingredients in two parts, beginning and ending with the dry ingredients. Beat until just combined, then scrape down the bottom and sides of the bowl once more, then beat on low for an additional 30 seconds. Add the bananas a handful at a time and beat until broken into pieces and distributed evenly throughout the batter, about 1 minute. Scrape down the bottom and sides of the bowl once more, and beat on low for an additional 30 seconds.
- Prep and fill the bundt pan. Generously spray a 10-cup capacity bundt pan with cooking spray. Immediately pour the batter into the prepared bundt pan. Set the filled bundt pan on the sheet pan.
- Bake the bundt cake. Bake for 65 to 75 minutes, or until a skewer inserted into the cake comes out with a few crumbs attached. Cool on a wire rack for 10 minutes.
- Cool the bundt cake. After 10 minutes, place a serving plate or second wire rack over the bundt cake and flip the cake to turn it out of its pan. Cool completely before glazing.
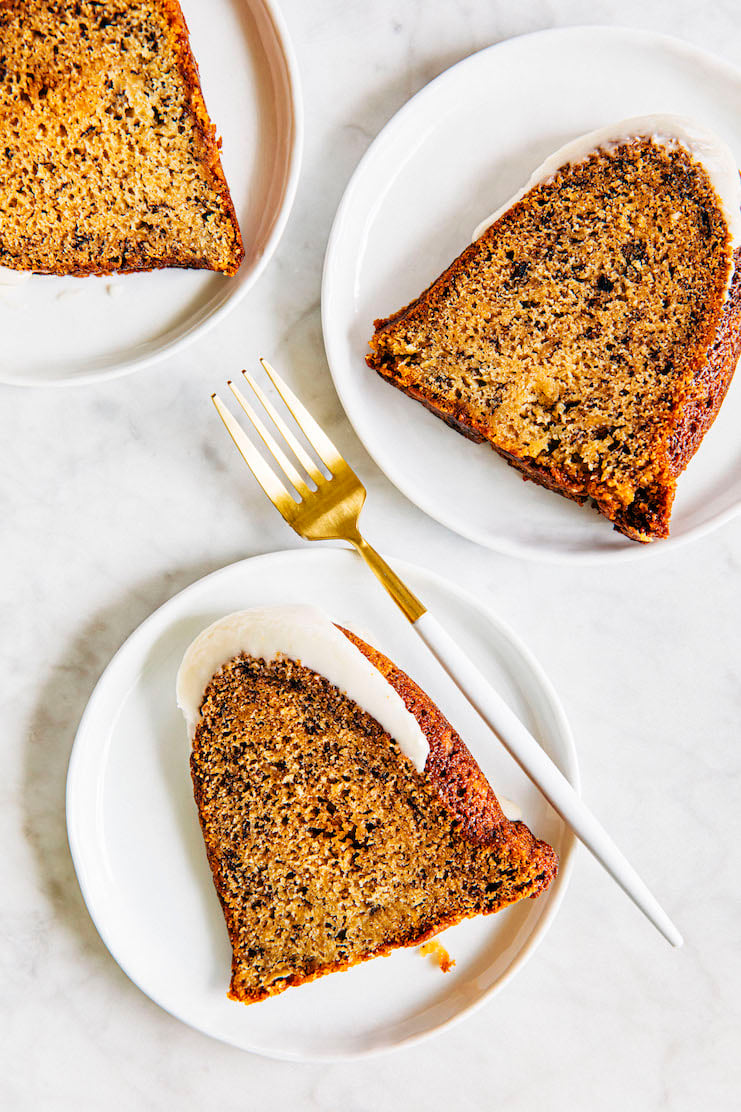
- Make the honey glaze. Once the cake is cool, make the honey glaze. In a medium bowl, whisk together the confectioners’ sugar, honey, milk, and salt for the glaze until smooth. Pour the glaze over the top of the cake and use an offset spatula to spread it into a thin layer on top of the cake. Let any excess glaze drip off and transfer to a wire rack to dry for 1 to 2 hours.
- Serve and store. Serve at room temperature. The assembled banana bundt cake can be stored at room temperature, under a cake dome or a large bowl turned upside down, for up to 3 days. Press a sheet of plastic wrap against any cut surfaces to prevent the cake from drying out.
Notes
Can you freeze banana bundt cake?
Yes, with reservations. You can freeze the banana bundt cake after it’s been baked, but before glazing it. Tightly wrap the entire cake in two layers of plastic wrap and freeze for up to 3 months. To serve, thaw overnight in the refrigerator, and then for 1 to 2 hours at room temperature before glazing and serving.get new recipes via email:

buy the book
Weeknight Baking:
Recipes to Fit your Schedule
Over the past several years of running Hummingbird High, I kept a crucial aspect of my life hidden from my readers: I had a full-time, extremely demanding job in the tech world. In my debut cookbook, Weeknight Baking, I finally reveal the secrets to baking delicious desserts on a tight schedule.
Did you make this recipe?
Please leave a comment and rating for the recipe using the form below!
Your ratings make it easier to find the recipe online, and I’m always looking for ways to improve Hummingbird High.
The ingredients don’t list baking powder but the instructions say to add baking powder (step 2). How much baking powder is to be added?
Oh sorry, that was my mistake! I’d copied and pasted the instructions from another similar recipe. No baking powder in this recipe, just 2 teaspoons of baking soda. I’ve updated it accordingly.
Thank you so much for your reply. I made this cake this week (without the baking powder 🤪) and it was amazing. I received so many compliments and my mother even asked for the recipe. Delicious!
Hi Michelle!
This is Luciana from Argentina.
I’ve baked this Banana Bundt and taste reallllyyyyy gooodddd.
Even though I’ve made some changes, was great (use coconut sugar and honey replacing a little bit the brown sugar. Also use plain yogurt instead of sour cream)
The glaze add the honey savory, intensifying the flavour =)
I made this cake today for my family and they loved it. It was moist and flavourful. The recipe is easy to follow and precise. I liked the additional notes on ingredients and substitutions. Thank you.
I found the brown sugar to be overpowering and my family was asking if it was gingerbread or what was in it. I would reduce the brown sugar by half and use regular sugar.
I know this would alter the taste, but is it ok to use one cup oil in place of the one cup butter? If so, how would I add it?
Can OIL be used instead of butter?
If yes, how do we incorporate it?
Yes, but it will affect the taste and texture. It might also be harder to get out of the bundt pan. Cream the oil and sugar, then add the eggs one at a time, dry ingredients, then the bananas.
While I knew this cake would be good, I was totally surprised by how VERY good it was for a Banana. I have made numerous banana bundt type cakes and this was definitely the best. Enough to make me say I had to comment. I was originally not going to use this glaze because I thought I would not like the honey in it, but it complimented the cake perfectly. Michele, you really are an amazing recipe developer!
The best banana cake I’ve ever had. I’ve been baking for 55 years. It stays moist, it cuts beautifully. I sliced it in thinner slices for a bake sale and it was fabulous. I did do one change I added a tablespoon of molasses to it because I had to use white sugar and I Google the weight of a cup of brown sugar and compared it to a cup of white sugar so I had the right weight of sugar.
I have made this cake several times and it is always delicious! I bake a lot and this is a recipe I come back to time and time again. Fool proof and delicious. Thank you!