
About My Best Fudgy Brownies Recipe
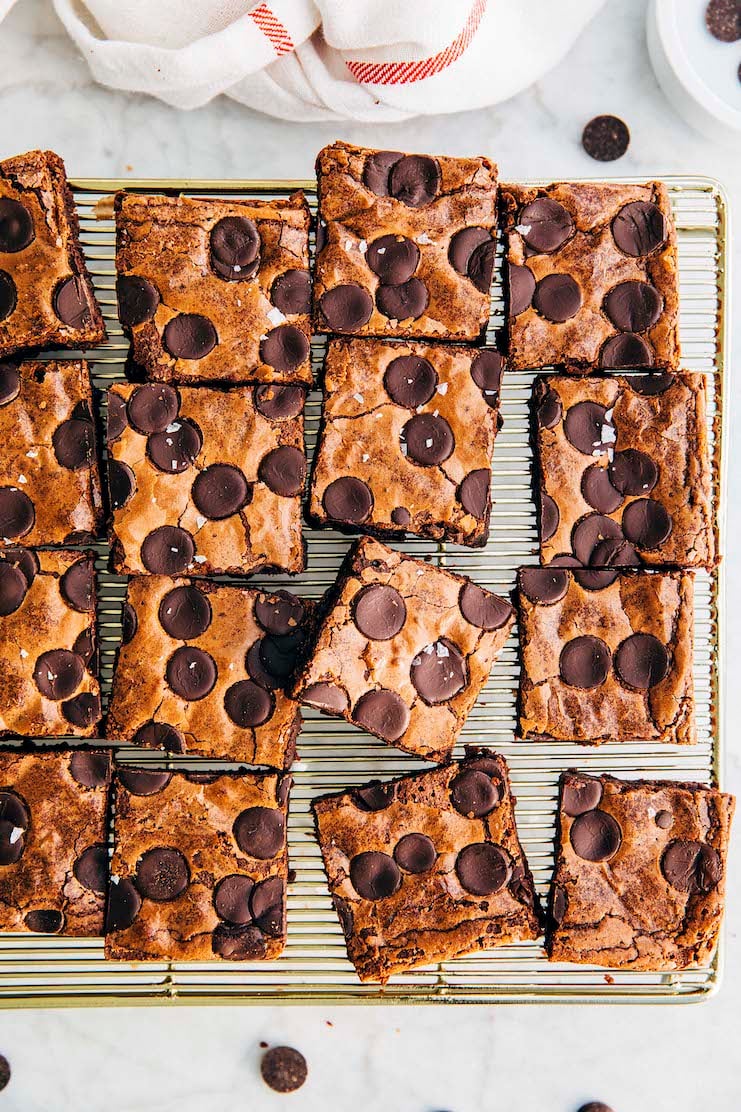
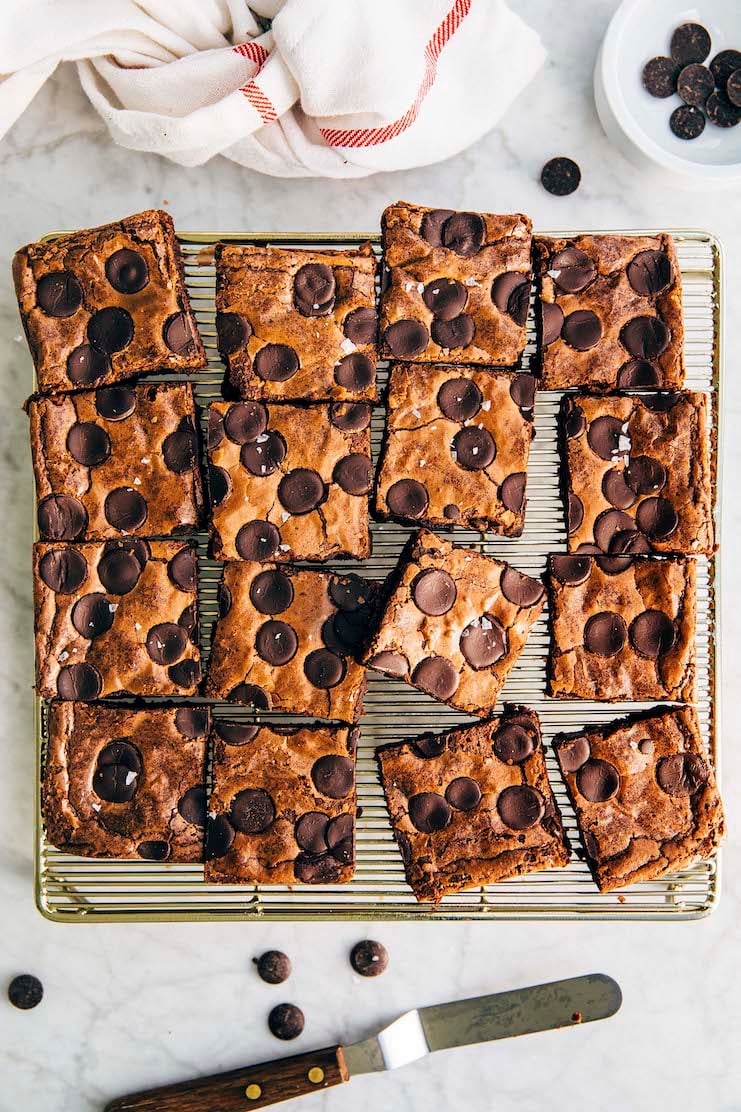
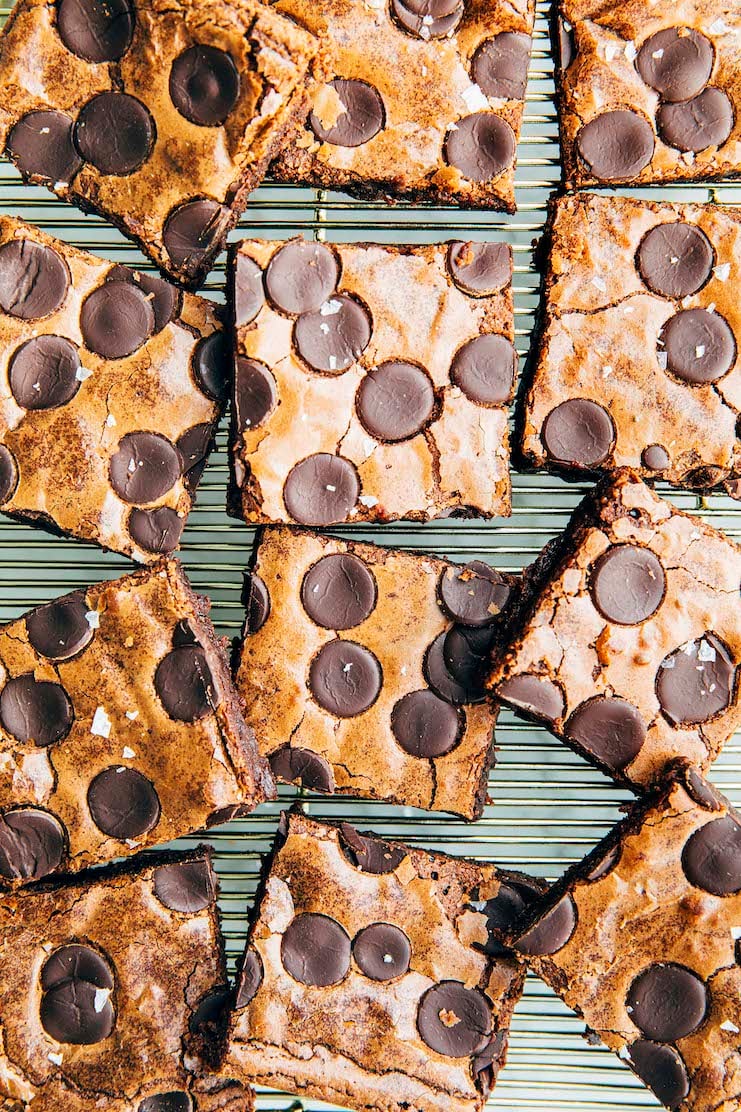
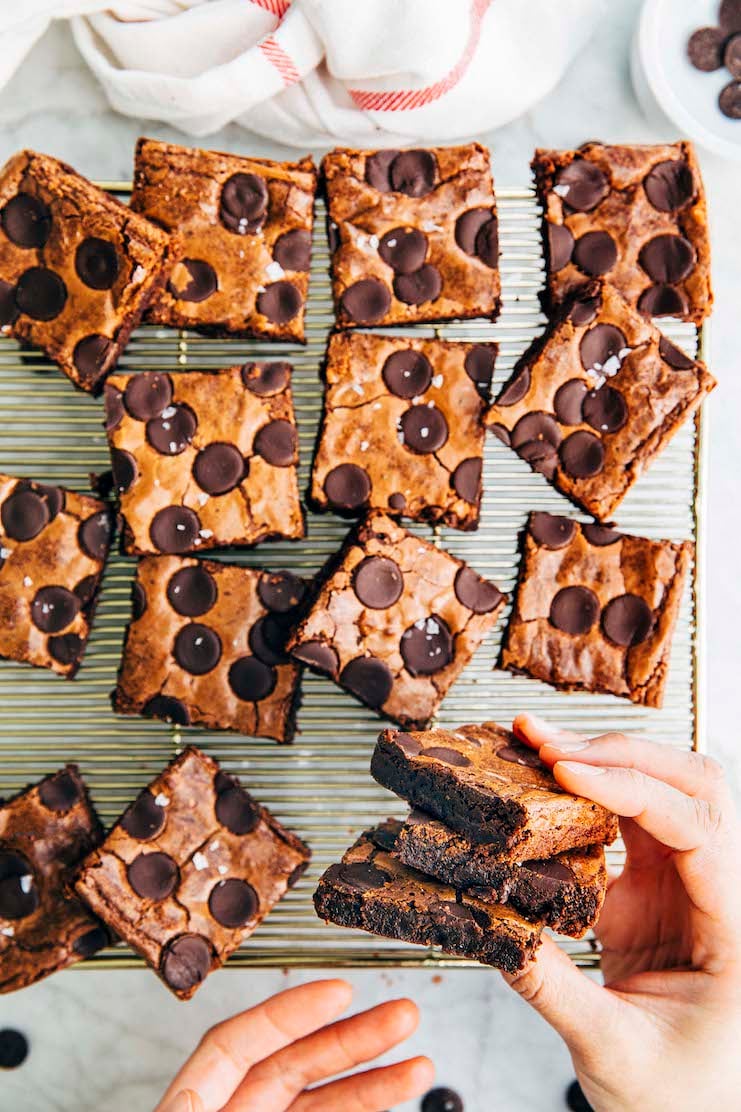
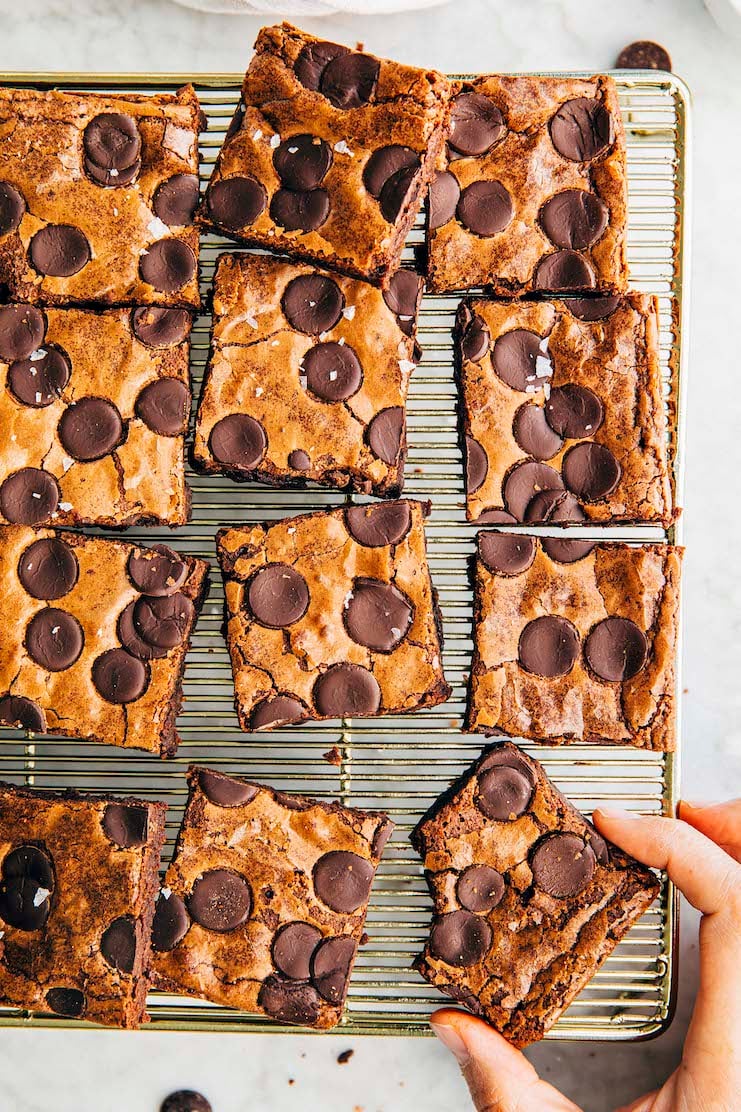
My best fudgy brownies are made with melted chocolate and a hint of cocoa powder, resulting in incredibly fudgy brownies with just a touch of chewiness! To top it all off, the brownies have a paper thin sugar top that flakes when sliced—to me, this is the hallmark of any good brownie recipe. Best of all? The recipe comes together quickly, with a batter that is mixed by hand.
For more delicious homemade brownie recipes, check out Hummingbird High’s Brownies, Blondies, & Bars Recipe Archive! Popular recipes include these Chewy and Fudgy Purple Ube Brownies and Small Batch Almond Flour Brownies.
Ingredients and Substitutions
Shopping List for My Best Fudgy Brownies Recipe
Be sure to scroll down to the recipe card for the exact ingredient quantities—hit the “Jump to The Recipe” button on the page for a quick shortcut!
- dark chocolate (between 60% to 70% cacao), from whole fèves or a high-quality chocolate bar
- unsalted butter
- Dutch-processed cocoa powder
- large eggs
- dark OR light brown sugar
- granulated sugar
- pure vanilla extract
- all-purpose flour
- kosher salt
- chocolate chips
- flaky salt
The Best Chocolate For Making Brownies
Bittersweet versus Semisweet versus Dark Chocolate
Whenever I share a recipe that uses dark chocolate, many of you ask if you can use bittersweet or semisweet chocolate. Many manufacturers make chocolate bars that are specifically for baking; these are often labeled “bittersweet”, “semisweet”, or “unsweetened”. You’ll notice that “bittersweet” and “semisweet” typically don’t include cocoa percentages. That’s because there’s no official benchmark for each designation. Specifically: it’s up to the manufacturers to determine how much cocoa to use, and cacao percentages for each type will vary greatly between brands.
That’s why in my cookbook, I advise folks to ignore these bars and instead stick with the ones that list their cocoa percentages. That’s truly the only way to know what you’re getting! In a pinch, however, you can use either bittersweet or semisweet chocolate for these fudgy brownies without too much consequence.
Do I really need to chop chocolate for this brownie recipe? Can I just melt chocolate chips instead?
Honestly, yes, you can get away with melting chocolate chips in this recipe. However, I don’t recommend it.
Why?
Most grocery store brands—even the ones that offer products specifically made for baking—contain all sorts of additives like paraffin wax and palm oil. These ingredients compromise the flavor and texture of your results. I’ve stopped using chocolate chips in 90 percent of my recipes, and my baked goods have tasted so much better as a result.
That being said, there are some brands that sell high-quality chocolate chips perfect for this recipe. Chocolate chips made by Guittard, Nestle Artisan Collection, and Valrhona use minimal stabilizers and preservatives. Those are the only chocolate chips I recommend for this recipe.
Wait, you’ve scared me off chocolate chips. But I *HATE* chopping up chocolate bars. Is there a halfway point between chocolate bars and chips?
Absolutely! If you want the convenience of chocolate chips but the quality of chocolate bars, I recommend buying chocolate discs or fèves instead.
Discs and fèves are used by fancy chocolatiers to make their own bars and bon bons. They typically don’t use the same preservatives and stabilizers as chocolate chips.
Wait, what are chocolate fèves?
Chocolate fèves are a fancy pastry school term for a flat, bean-shaped disc of chocolate. The most prominent maker of chocolate fèves is one of my favorite chocolate makers, Valrhona Chocolate. For these brownies, I used Valrhona’s Caraibe 66% chococlate fèves You can buy them online and/or at select Whole Foods Market locations.
Wait, I also need chocolate chips? But I thought you said NOT to use chocolate chips in this recipe?!
It’s true—just a few paragraphs ago, I was waxing poetic about why you should use chopped chocolate in this recipe. I wrote that chocolate chips are made with additional cocoa solids and stabilizers like paraffin wax to help prevent the chocolate from melting when heated. These solids and stabilizers create a weird, gritty texture in the melted chocolate and lead to inferior baked goods.
However, there’s an exception to my rule. I like using chocolate chips as a decoration or garnish. The very qualities that make them bad for baking—those pesky stabilizers—are great for decorating. In this recipe, I instruct you to garnish the brownie batter with chocolate chips before baking. After baking, those chocolate chips will still be in tact.
Natural Unsweetened Cocoa Powder versus Dutch-Processed Cocoa Powder
Cocoa powder, when used in baking recipes, often comes in two varieties: natural unsweetened, and Dutch-processed.
Natural unsweetened cocoa powder is more typical and is cocoa powder in its purest form. It is slightly reddish brown in color and results in deeply flavored chocolate goods. Because it is slightly acidic, it is often paired with baking soda in baking recipes to help create a chemical reaction that will cause the baked good to rise in the oven.
Dutch-processed cocoa powder is natural unsweetened cocoa powder that’s been treated with alkaline to neutralize its acidity, giving it a darker color and milder flavor. It is the cocoa powder that is used for making midnight-black baked goods like Oreos.
I only have natural unsweetened cocoa powder. Can I use that instead to make these fudgy brownies?
Yes! You can substitute natural unsweetened cocoa powder for the Dutch-processed cocoa powder in this recipe, no problem. Just a head’s up—your brownies will look and taste just ever-so-slightly different than mine. They will have a more reddish-brown color instead of a blackish-brown one. They’ll also taste a little bit sharper from the acidity of the cocoa powder.
How To Make The Recipe
Here are the basic steps to make my best fudgy brownie recipe from scratch:
- Prep the ingredients for the fudgy brownies. (Prep Time: 5 to 10 minutes)
It usually takes 5 minutes to prep—that is, measure out all the ingredients needed for the recipe itself—for most of the recipes on Hummingbird High. However, if you’re using chocolate bars to make these brownies, you need to chop up the chocolate. Doing so usually takes around 5 minutes.
To save yourself time, buy thin chocolate bars that are easier to slice. You can also use a food processor to chop the chocolate. But my personal recommendation is to use chocolate discs or fèves for the recipe! You won’t need to chop them before melting. - Start making the brownie batter by melting the chocolate and butter together. (Work Time: 10 minutes)
Combine the chopped chocolate and butter in the top of a double boiler (or a homemade one—see FAQ for more info!). Melt over medium heat until smooth. Whisk in the cocoa powder, then set aside to cool slightly while you work with the rest of the ingredients. - Make the rest of the brownie batter. (Work Time: 5 minutes)
The rest of the recipe goes by in a breeze. Whisk together the eggs, sugars, and vanilla. Add the melted chocolate, whisking to combine. Then, mix in the flour and salt by hand with a rubber spatula. That’s it! - Assemble the brownies. (Work Time: <5 minutes)
Pour the brownie batter into an 8-inch square pan lined with parchment paper. Smooth the top with a rubber spatula if necessary, then sprinkle with chocolate chips and flaky sea salt. - Bake the brownies. (Bake Time: 25 minutes)
This recipe bakes for between 25 and 30 minutes. When baking brownies, it’s always better to pull them out of the oven early. Leaving them in too long means that they’ll turn out tough! Check out the recipe and FAQ below for more tips.
Recipe Troubleshooting and FAQ
Is it better to use a glass or metal pan when baking brownies?
Alright, here we go—when you google the answer to this question, the first few search results will tell you that it is better to use a glass pan when baking brownies. THEY ARE 100% INCORRECT. It is my *FIRM* opinion that it is always, ALWAYS better to use a metal pan when baking brownies.
Why? Glass pans are slow to heat up; however, when hot, they retain heat for much longer. This quality often results in uneven baking. By the time the interior of whatever you’re baking is done, the exterior of it is often overcooked, dry, and overly dark.
What does that mean for these fudgy brownies? If you’re baking the brownies in a glass pan, they’ll continue to bake LONG after being pulled out of the oven because the pan continues to retain so much heat. That usually means dense, dry, and overcooked brownies that are not fudgy at all.
Metal, on the other hand, conducts heat. Because metal heats up faster than glass, it leads to brownies with a better rise (but without being cake) with crispier edges. And because metal pans lose heat quickly after being pulled out of the oven, your brownies will too. That means the brownies will cool faster, and they won’t be overdone. Instead, they will instead be perfectly fudgy and set. So please use a metal pan for this recipe!
Finally, if you want to be a perfectionist, choose a light colored metal pan over a dark metal pan. Dark pans absorb more heat, which, like glass, can cause the exterior of the brownies to bake too quickly. I always use pans from Williams-Sonoma’s Goldtouch Pro Nonstick line for my baking.
Help! My brownies don’t have the shiny paper crinkle top like yours do. What did I do wrong?
It’s likely that you either:
a) used too much flour
b) used too little sugar
c) baked the brownies for too long and/or used the wrong type of pan to make them.
First, let’s talk about measuring ingredients. A lot of people don’t have the right technique when using measuring cups. It’s easy to use too much flour when using volume measures. Don’t use the measuring cup to scoop the flour in the bag and pack it down into the cup. Instead, set the measuring cup on the counter and then spoon the dry ingredients into it. Once it’s formed a small mound, don’t pack it down. Use a butter knife or bench scraper to level it off.
While this technique works best for ingredients like flour, you’ll need to do the exact opposite for measuring brown sugar. Spoon the brown sugar into the measuring cup. Once it’s formed a small mound, pack it down, then add more brown sugar until it is level with the top of the measuring cup.
Finally, if you used the techniques above OR used weight measures (which I always recommend, since you won’t need to fuss with the techniques I just outlined) and are STILL experiencing issues, it’s likely that the brownies were overbaked. Check out the FAQ above on why you should always use a metal pan when baking brownies, as well as the baker’s notes below on how to test brownies for doneness.
Can you freeze this brownie recipe?
Yes! You can freeze the baked brownies.
To freeze the brownies, individually wrap any leftover bars in two layers of plastic wrap, then a layer of aluminum foil. The aluminum foil will prevent the bars from absorbing any other flavors or odors in the freezer. Freeze for up to 3 months.
When ready to serve, transfer to the refrigerator to thaw overnight. You can eat the brownies straight from the fridge, or rewarmed in the microwave.
Best Fudgy Brownie Recipe Tips
Ingredient Tip
- The recipe states that you need 4 ounces (113 grams) of chopped chocolate to make the brownie batter. If you don’t have a digital kitchen scale, that’s equivalent to ⅔ cup of chopped chocolate. Each piece of chocolate should be roughly the same size and shape of a regular-sized chocolate chip.
Technique Tip
- The chocolate and butter needs to be melted and cooled slightly before using in the recipe. I recommend melting these ingredients first, then setting it aside while you prep the rest of the ingredients and make the brownie batter. Doing so will give the butter enough time to cool slightly! Check out the FAQ section above for even more tips on how to cool the mixture quickly.
Baking Tip
- It’s better to pull the brownies out of the oven early than leave them in too long—if you over bake the brownies, they’ll be tough. They might appear underbaked, but I promise that when they’ve cooled, they will be perfect.
Get the Recipe: My Best Fudgy Brownies Recipe
Ingredients
- 4 ounces (113 grams) dark chocolate (between 63% and 73% cocoa), from whole fèves or a high-quality chocolate bar, chopped into ½- to 1-inch pieces
- ½ cup (1 stick or 4 ounces or 113 grams) unsalted butter, chopped into 1- to 2-inch pieces
- 1 Tablespoon Dutch-processed cocoa powder, sifted if lumpy
- 2 large eggs
- ½ cup tightly packed (3.75 ounces or 106 grams) dark OR light brown sugar
- ½ cup (3.5 ounces or 99 grams) granulated sugar
- 1 teaspoon pure vanilla extract
- ½ cup (2.25 ounces or 64 grams) all-purpose flour
- ¼ teaspoon kosher salt
- ⅓ cup (2 ounces or 57 grams) chocolate chips
- flaky salt, for garnish
Instructions
- Prep your oven and pan. Position a rack in the center of the oven and preheat the oven to 350°F. Lightly spray an 8-inch square pan with cooking spray and line with parchment paper, leaving a 2-inch overhang on each of the pan's sides. Spray the parchment, too.
- Melt the chocolate and butter, then add the cocoa powder. Place the chocolate and butter in the top pan of a double boiler or in a heatproof bowl set over a medium, heavy-bottomed saucepan filled with a few inches of simmering water (be sure the bottom of the bowl does not touch the water). Cook over medium heat, using a heatproof rubber spatula to stir the mixture and scrape the sides of the bowl occasionally, until the chocolate and butter have melted and combined, about 5 minutes. Remove the pan or bowl from heat, set on a wire rack, and stir in the cocoa powder. Let the chocolate mixture cool slightly while you prep the other ingredients.
- Whisk the eggs, sugars, and vanilla, then add the chocolate mixture and the flour and salt. In a medium bowl, whisk together the eggs, sugars, and vanilla. Slowly pour in the chocolate mixture while whisking. Sprinkle the flour and salt over the batter all at once and use a rubber spatula to mix until just combined.
- Assemble the brownies. Pour the batter into the prepared pan and use an offset spatula to smooth the top. Sprinkle the batter with chocolate chips.
- Bake the brownies. Bake for 25 to 30 minutes, or until a skewer inserted into the center of the brownies comes out with a few crumbs attached. Cool completely on a wire rack before slicing.
- Serve and store. Run a butter knife or offset spatula along the edges of the pan and use the overhanging parchment as handles to lift the brownies out of the pan and onto a cutting board. Slice into 2-inch squares, garnish with flaky salt, and serve. The brownies can be stored in an airtight container or zip-top bag at room temperature for up to 3 days.
Did you make this recipe?
Please leave a comment and rating for the recipe using the form below!
Your ratings make it easier to find the recipe online, and I’m always looking for ways to improve Hummingbird High.
get new recipes via email:

buy the book
Weeknight Baking:
Recipes to Fit your Schedule
Over the past several years of running Hummingbird High, I kept a crucial aspect of my life hidden from my readers: I had a full-time, extremely demanding job in the tech world. In my debut cookbook, Weeknight Baking, I finally reveal the secrets to baking delicious desserts on a tight schedule.
I had to use 7×7 pan for this recipe, but it still worked! These are the best brownies that I have ever had! Glad I picked up this recipe and gave it a try. It came out right after my first attempt. Very chocolaty and fudgy. Will make more for sure 🙂
Hi Michelle! I have a 9inch pan, how would I scale up this recipe? I’m thinking instead of 16 portions it would be 20?
These are incredibly delicious and so easy to make! My new favorite fudgy brownie recipe!
I absolutely loved this recipe! So easy to make! Everyone loved it!
Thanks for sharing!