
About These White Chocolate Brownies
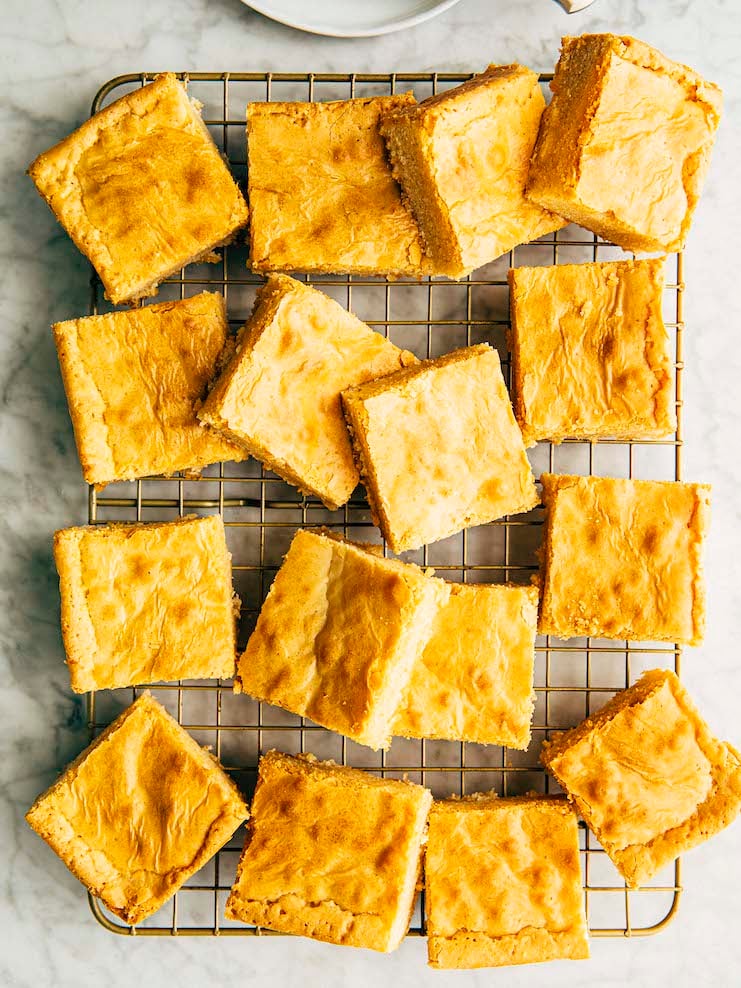
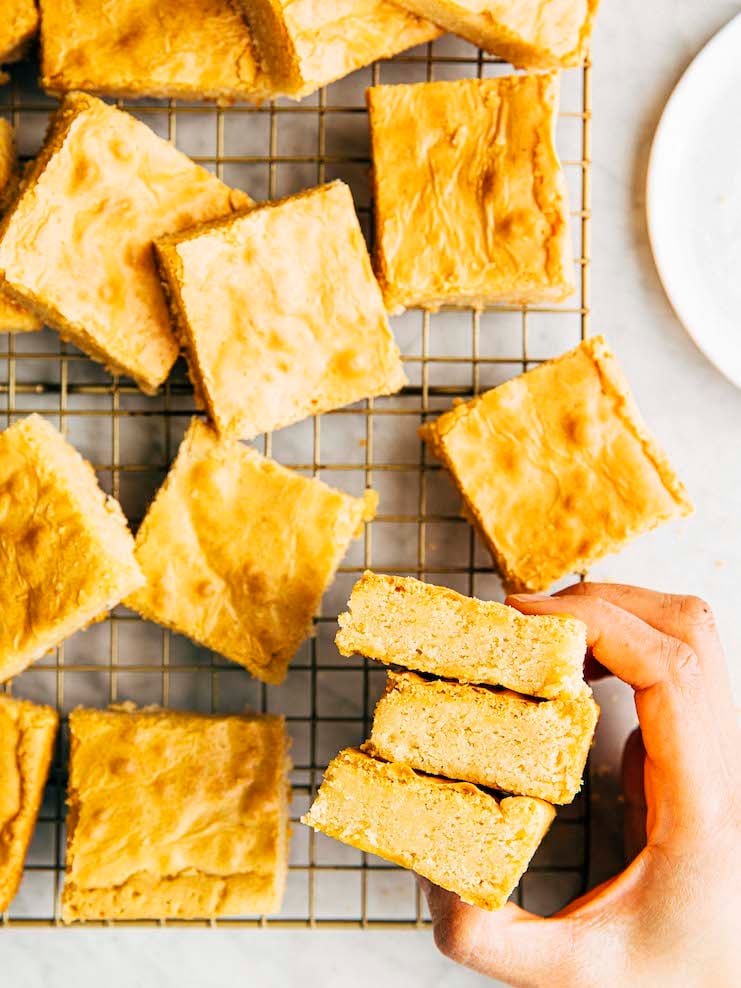
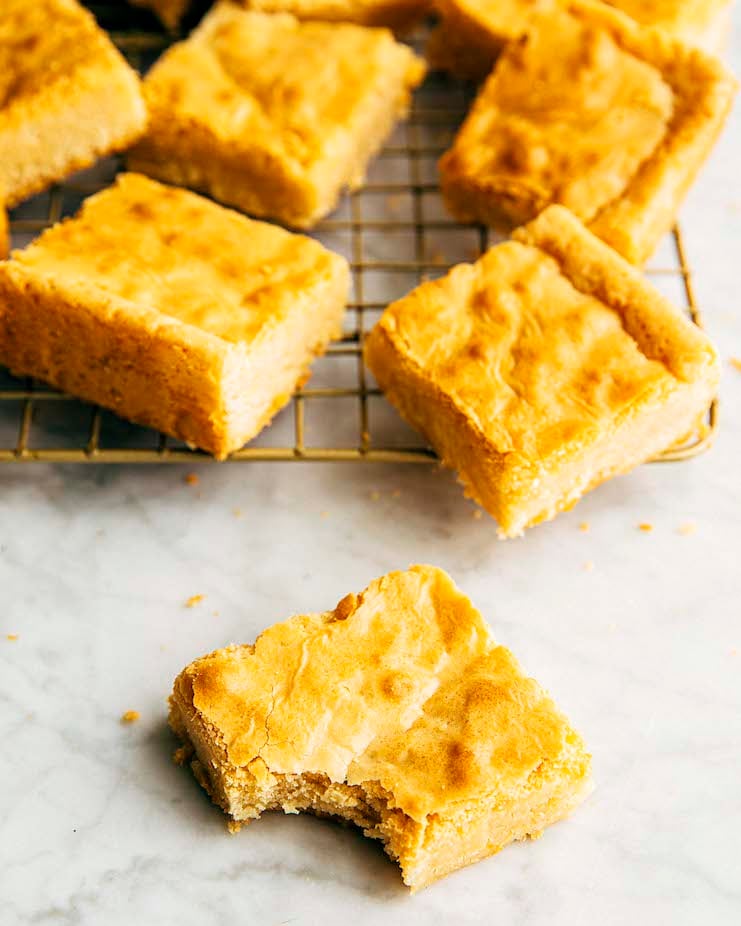
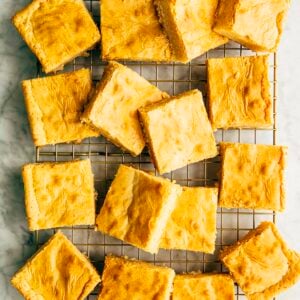
These white chocolate brownies are a fun twist on classic chocolate fudge brownies! Similar to the traditional version, they are tender-yet-chewy, with a sugar top that crinkles and flakes when sliced. These brownies have the sweet taste of white chocolate, which you can easily temper with tart mix-ins like dried cranberries and freeze-dried strawberries and/or raspberries, along with more umami flavors like matcha tea powder, pink peppercorn, and macadamia nuts.
For more delicious homemade brownie recipes, check out Hummingbird High’s Brownies, Blondies, & Bars Recipe Archive! Popular recipes include these Chewy and Fudgy Purple Ube Brownies and Small Batch Almond Flour Brownies.
Wait, are white chocolate brownies different from blondies?
Yes! Blondie bars are typically made with chocolate chip cookie dough. Instead of baking the dough as individual cookies, recipes instruct you to spread or press the dough into a baking pan to make a slab that you slice into bars. Often times, no white chocolate is used to make the dough. If white chocolate is used, it is typically used as a mix-in.
White chocolate brownies, on the other hand, are made with brownie batter. Brownie batter is typically made with a combination of melted butter, dark chocolate, and/or cocoa powder. In this white chocolate brownie recipe, I instruct you to melt butter and white chocolate together to make the brownie batter.
What does this mean in terms of flavor? A blondie will taste like a chocolate chip cookie, just in a bar format. A white chocolate brownie will taste more like white chocolate. It will have a tender-and-slightly-chewy texture similar to typical dark chocolate fudge brownies.
Ingredients and Substitutions
Now that I’ve convinced you to make these white chocolate brownies, here’s everything you need:
Ingredient Recommendations and Substitutions For The Recipe
- All-Purpose Flour. Substitute the all-purpose flour with your favorite 1-1 Gluten Free All Purpose Flour (I like the ones by Bob’s Red Mill and King Arthur Baking Company) to make the brownies gluten-free!
- Kosher Salt. Replace the 1 teaspoon kosher salt in the recipe with half its amount in table salt.
- Unsalted Butter. You can substitute the unsalted butter with salted butter without any noticeable difference in taste. You can also use vegan butter sticks to make it dairy-free—just make sure your white chocolate doesn’t have milk powder in it!
- Brown Sugar. Either light or dark brown sugar works in the recipe.
How To Make White Chocolate Brownies
Here are the basic steps to make these white chocolate brownies from scratch:
- Prep the ingredients. (Prep Time: 10 minutes)
The most time consuming part of the recipe involves chopping the white chocolate. Follow the recipe instructions to chop the chocolate into small ¼- to ½-inch pieces. Any larger, and you’ll have a hard time melting the white chocolate! - Mix the dry ingredients. (Work Time: <5 minutes)
- Melt the butter and white chocolate. (Work Time: 10 minutes)
Unfortunately, it takes time to melt white chocolate. Use a low heat, and cook them slowly to melt them. If your heat is too high, the white chocolate will seize, refusing to melt and scorching instead! - Whisk the sugars, eggs, vanilla, then add the melted chocolate mixture and dry ingredients. (Work Time: 10 minutes)
The recipe instructs you to whisk the sugar, eggs, and vanilla on high speed for at least 8 minutes. This technique is the secret to the shiny, flaky top of these white chocolate brownies! - Assemble the brownies. (Work Time: <5 minutes)
- Bake the brownies. (Bake Time: 30 minutes)
Best Recipe Tips
Tips About Ingredients
- The recipe states that you need 4 ounces (113 grams) of chopped chocolate to make the brownie batter. If you don’t have a digital kitchen scale, that’s equivalent to ⅔ cup of chopped chocolate. Each piece of chocolate should be roughly the same size and shape of a mini- or regular-sized chocolate chip.
- When chopping the white chocolate, make sure to follow the recipe instructions to chop it into smaller ¼- to ½-inch pieces. Any larger than that, and you’ll have a hard time melting the white chocolate. It tends to scorch easily and seize if the pieces are too large and/or the heat source is set too high. If you’re inexperienced with working with white chocolate, err on the side of caution and cook the white chocolate and butter over medium-low heat instead of medium. Although it will take longer to melt the ingredients, the gentler heat will help prevent any potential issues.
Foolproof Recipe Techniques
- The white chocolate and butter needs to be melted and cooled slightly before using in the recipe. I recommend melting these ingredients first, then setting it aside while you prep the rest of the ingredients and make the brownie batter. Doing so will give the butter enough time to cool slightly!
- It’s better to pull the brownies out of the oven early than leave them in too long—if you over bake the brownies, they’ll be tough. They might appear underbaked, but I promise that when they’ve cooled, they will be perfect.
Customizing The Recipe
Here are all the ways you can customize this recipe to truly make it your own:
- Use a unique white chocolate. Swap out the white chocolate with a white chocolate variation like dulcey white chocolate (this will give the brownies a more butterscotch-y, dulce de leche-y flavor) or ruby chocolate (this will give the brownies a unique, tart, and citrusy flavor as well as make the brownies a pale pink color that you can enhance with a few drops of pink or red coloring).
- Add tart fruit. Adding a tart, fruity mix-in will help tame the white chocolate brownies’ sweetness. If that’s what you’re looking for, I recommend adding 1 cup of a tart, dried fruit like dried cherries, cranberries, apricot, and more after mixing in the dry ingredients. If you want to go the freeze-dried fruit route, I recommend adding ½ cup of freeze-dried strawberries or raspberries.
- Add spices. Similarly, adding a spice or an umami ingredient can help temper the white chocolate brownies’ sweetness. Consider adding 1 Tablespoon of matcha green powder (doing so will make the brownies a pale green color, which you can enhance with a few drops of green food coloring) or 1 ½ teaspoons pink peppercorn or freshly ground black pepper for some unexpected heat.
- Add nuts. Finally, 1 cup of a fatty, salty nut like macadamia nuts, cashews, or pistachios would work wonders in this recipe. If you’re into textures and chunks in your brownies, I recommend doing 1 cup of the chopped nuts of your choice along with another 1 cup of white chocolate chips.
Get the Recipe: White Chocolate Brownies Recipe
Ingredients
- 1 ½ cups (6.75 ounces or 191 grams) all-purpose flour
- 1 teaspoon kosher salt
- ½ cup (1 stick or 4 ounces or 113 grams) unsalted butter, cut into 1-inch cubes
- 4 ounces (113 grams) white chocolate, finely chopped into ¼- to ½-inch pieces
- 1 cup (7 ounces or 198 grams) granulated sugar
- ¼ cup tightly packed (1.75 ounces or 50 grams) light OR dark brown sugar
- 3 large eggs
- 1 ½ teaspoons pure vanilla extract
Instructions
- Prep the oven and baking pan. Position a rack in the center of the oven and preheat the oven to 350°F. Lightly spray an 8-inch square pan with cooking spray and line with parchment paper, leaving a 2-inch overhang on each of the pan's sides. Spray the parchment paper, too.
- Mix the dry ingredients. In a medium bowl, whisk together the flour and salt.
- Melt butter and white chocolate. Place the butter and white chocolate in the top pan of a double boiler or in a heatproof bowl set over a medium, heavy-bottomed saucepan filled with a few inches of simmering water (be sure the bottom of the bowl does not touch the water).Cook over medium heat, using a heatproof rubber spatula to stir the mixture and scrape the sides of the bowl occasionally, until the chocolate and butter have melted and combined, about 5 minutes. Remove the pan or bowl from heat and set on a wire rack to Let the chocolate mixture cool slightly while you prep the other ingredients.
- Whisk the sugars, eggs, vanilla, then add the chocolate mixture. In the bowl of a stand mixer fitted with the whisk attachment, combine the sugars, eggs, and vanilla. Whisk on medium-high speed for 8 minutes, or until thick, fluffy, and doubled in volume. Reduce to low and slowly pour in the warm chocolate mixture, whisking on low speed until just combined.
- Mix in the dry ingredients. Once the chocolate mixture is combined, use the rubber spatula to scrape down the whisk and the bottom and sides of the bowl. Sprinkle the dry ingredients over the batter all at once and use the rubber spatula to mix by hand until just combined.
- Assemble the brownies. Pour the batter into the prepared pan and use an offset spatula to spread it evenly across the pan and smooth the top.
- Bake the brownies. Bake for 30 minutes, or until a skewer inserted into the center of the brownies comes out with a few crumbs attached. Cool completely on a wire rack before slicing.
- Serve and store. Run a butter knife or an offset spatula along the edges of the pan and use the overhanging foil as handles to lift the brownies out of the pan and onto a cutting board. Slice into 2-inch squares and serve.The brownies can be stored in an airtight container or zip-top bag at room temperature for up to 3 days.
Did you make this recipe?
Please leave a comment and rating for the recipe using the form below!
Your ratings make it easier to find the recipe online, and I’m always looking for ways to improve Hummingbird High.
get new recipes via email:

buy the book
Weeknight Baking:
Recipes to Fit your Schedule
Over the past several years of running Hummingbird High, I kept a crucial aspect of my life hidden from my readers: I had a full-time, extremely demanding job in the tech world. In my debut cookbook, Weeknight Baking, I finally reveal the secrets to baking delicious desserts on a tight schedule.