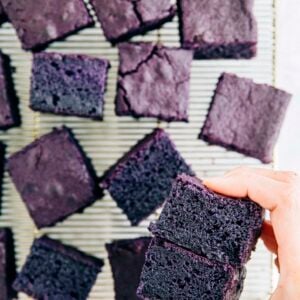
Get the Recipe: Bouncy Chewy Gluten Free Ube Mochi Cake
This ube mochi cake has a unique flavor and color, as well as a bouncy, chewy texture. It's 100% gluten free, comes together in just 10 minutes—no stand mixer required!
Ingredients
- 2 cups (10.60 ounces or 300 grams) mochiko sweet rice flour
- 2 teaspoons baking powder
- ½ teaspoon kosher salt
- ½ cup (1 stick or 4 ounces or 113 grams) unsalted butter, melted and cooled slightly
- 1 cup (7 ounces or 198 grams) granulated sugar
- 2 large eggs, at room temperature
- 2 Tablespoons (1 ounce or 28 grams) ube halaya jam
- 2 teaspoons ube extract
- 2 teaspoons purple food coloring
- 1 (13.5-ounce) can coconut milk, well shaken
Instructions
- Prep the oven and baking pan. Position a rack in the center of the oven and preheat the oven to 350°F. Lightly spray an 8-inch square pan with cooking spray and line with parchment paper, leaving a 2-inch overhang on each of the pan's sides. Spray the parchment paper, too.
- Mix the dry ingredients. In a small bowl, whisk together the mochiko sweet rice flour, baking powder, and kosher salt.
- Mix the wet ingredients. In a medium bowl, whisk together the butter and sugar until combined. Whisk in the eggs, one at a time, only adding the next egg when the previous one is fully incorporated.Add the ube jam, ube extract, and purple food coloring and whisk until combined. Gradually whisk in the coconut milk until just combined.
- Add the dry ingredients to the wet ingredients. Gradually mix in the dry ingredients into the wet ingredients until just combined.
- Assemble the mochi cake. Pour the batter into the prepared pan and use an offset spatula to spread it evenly across the pan and smooth the top.
- Bake the mochi cake. Bake for 48 to 50 minutes, or until a skewer inserted into the center of the mochi cake comes out with a few crumbs attached. Cool completely on a wire rack before slicing.
- Serve and store. Run a butter knife or the offset spatula along the edges of the pan and use the overhanging parchment as handles to lift the cake out of the pan and onto a cutting board. Slice into 2-inch squares and serve.The mochi cake is best the day it's made, but can be stored in an airtight container or zip-top bag at room temperature for up to 3 days.
Notes
- Make sure to shake the can of coconut milk vigorously before opening! Coconut milk likes to separate when stored; shaking it before opening the can will make your life easier.
- To save yourself a dish, melt the butter in a large bowl. This bowl will eventually become your batter bowl! You add the sugars, eggs, and remaining ingredients directly to the melted butter in this bowl. I like to melt the butter first, then measure out all the ingredients for the recipe. Doing so gives the butter time to cool to the perfect warm-yet-not-too-hot temperature needed for this recipe!
- Don’t panic if the butter and sugar turns lumpy once you mix them together! This is normal, I promise. Add the eggs one at a time—doing so will smoothen out the mixture. I add the sugar first to the melted butter first to bring its temperature down and ensure that it doesn’t accidentally scramble the eggs.
Did you make this recipe?Please leave a star rating and review in the form below. I appreciate your feedback, and it helps others, too!