About This Guava Chiffon Cake
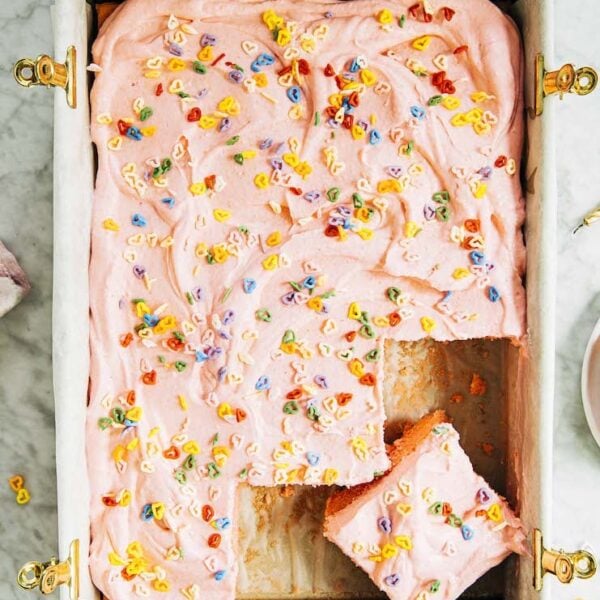
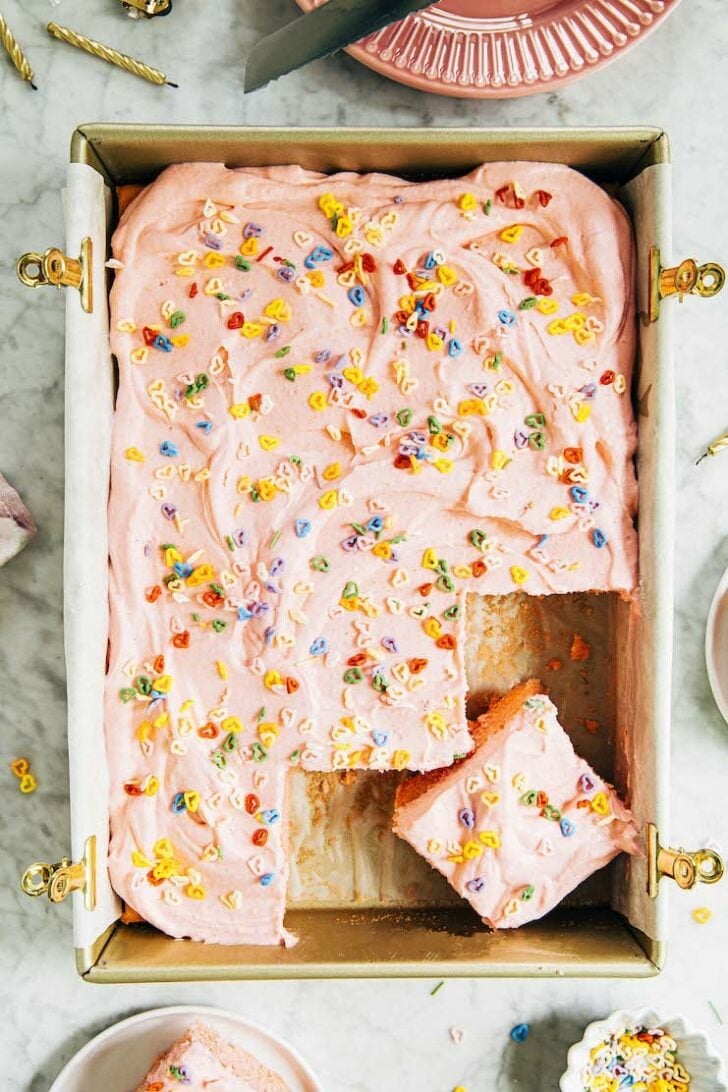
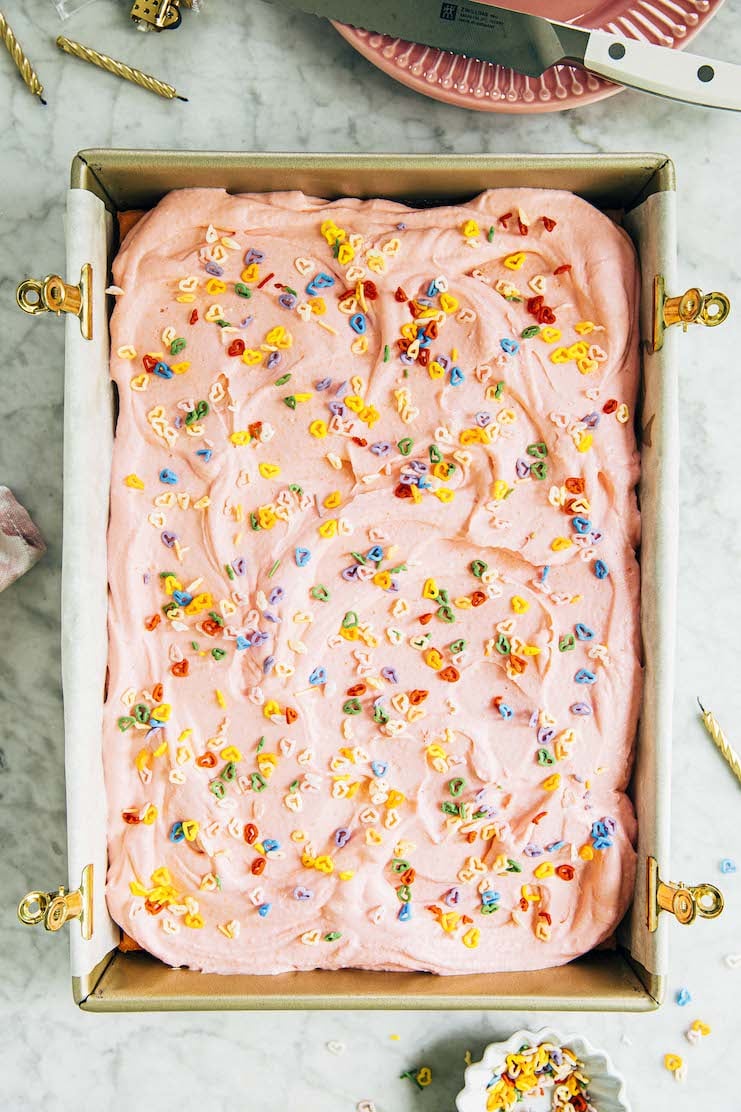
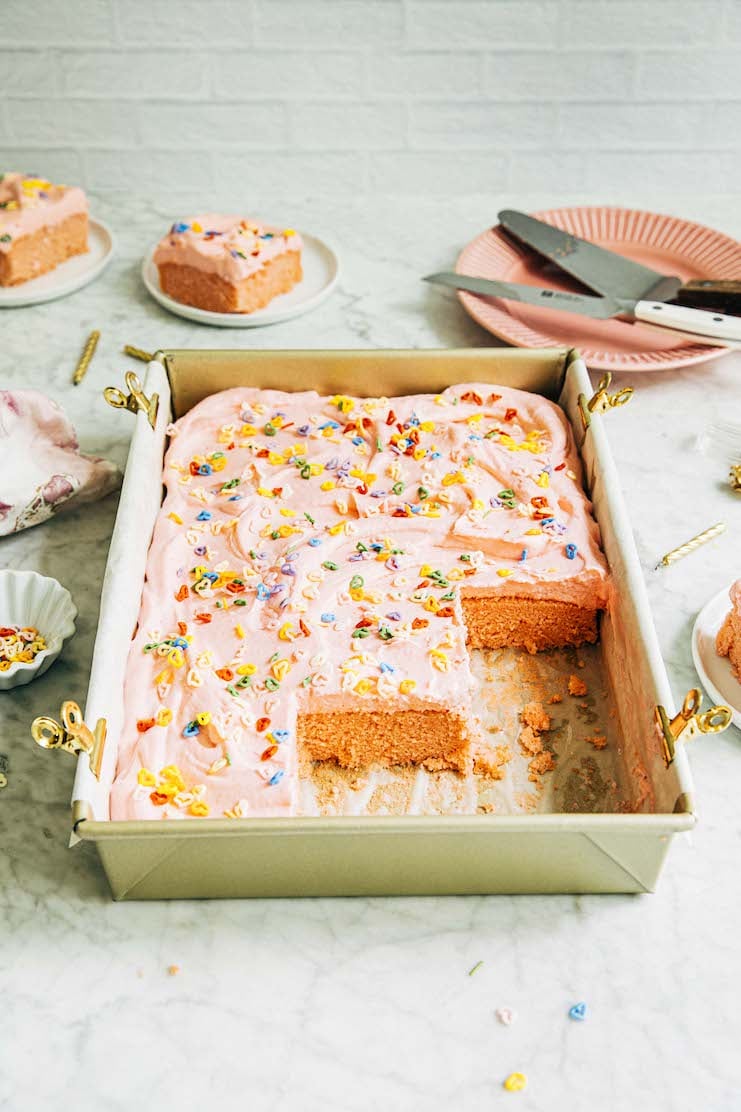
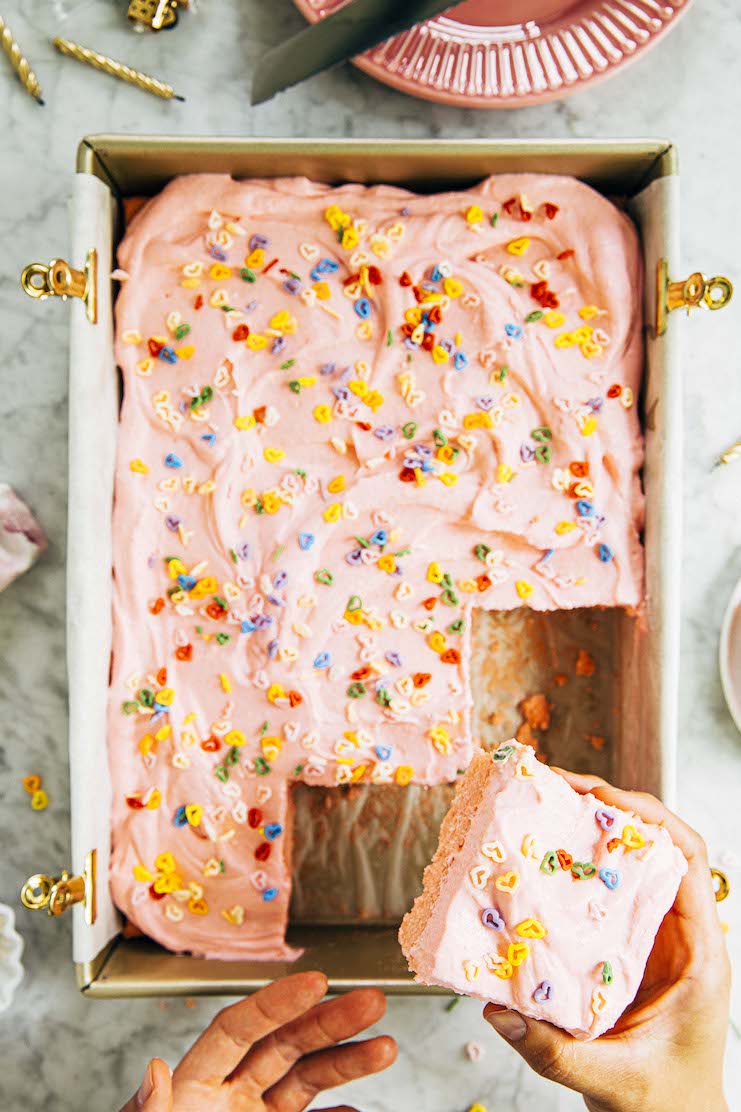
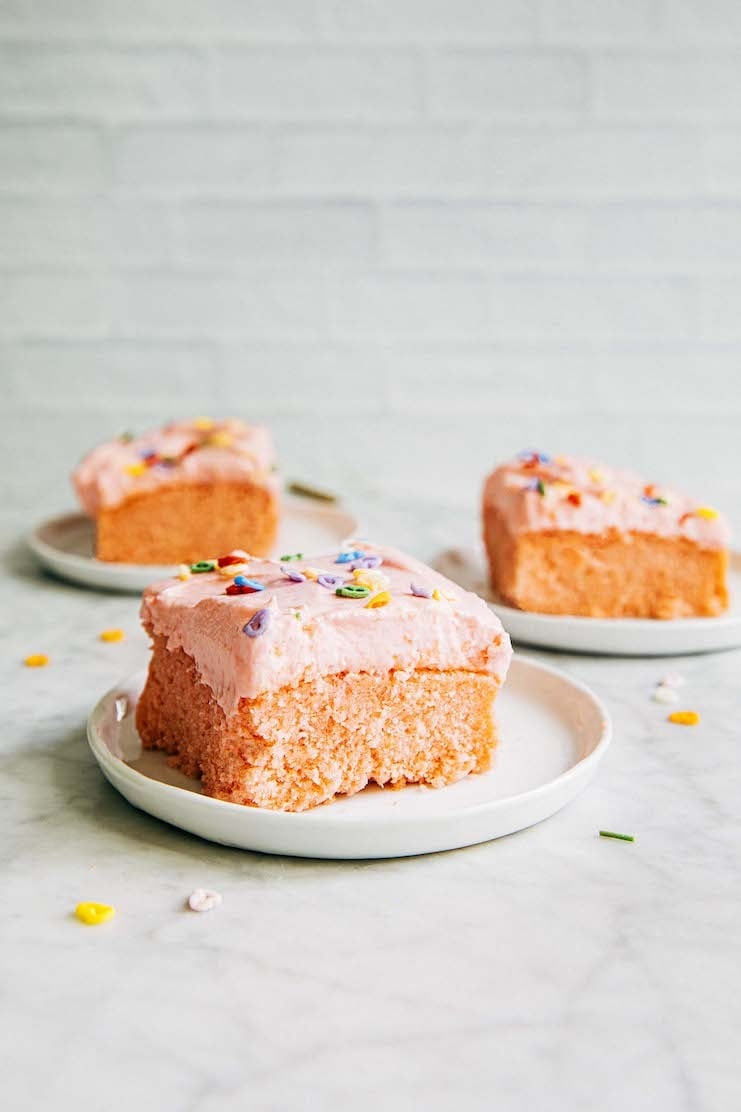
This vibrant pink guava cake is a fun and unique sheet cake recipe! It is made with a moist and flavorful guava chiffon cake, that is then topped with a tangy, creamy, light-as-air guava cream cheese frosting! The best part?
The recipe makes an extra fruity and flavorful guava cake since it uses guava puree in both the cake AND frosting.
This authentic Hawaiian guava sheet cake recipe is adapted from Hawaiian food blogger and cookbook author, Alana Kysar of Fix Feast Flair. Learn more below!
For more fun and delicious sheet cake recipes, check out Hummingbird High‘s collection of sheet cake recipes! I especially recommend this White Texas Sheet Cake Recipe For A 9 x 13 Inch Pan and this Coffee Tres Leches Cake.
@hummingbirdhigh 💖 all pink everything cake 💖#bakingrecipe #bakingtiktok #hawaiianfood ♬ Aloha Oe – Hawaiian Music Group
Ingredients and Substitutions
Now that I’ve convinced you to make this tropical guava cake, let’s talk about some key ingredients and their potential substitutions:
- Cake Flour. My favorite brand of cake flour is Swans Down. But if you don’t want to go to the store, you can use my recipe for Homemade Cake Flour! My recipe is made with all-purpose flour and cornstarch.
- Guava Puree. Truthfully, guava puree can be hard to find. I found my guava puree (Goya Guava Fruit Pulp) in the frozen fruit aisle of a Mexican supermarket in Portland (El Campesino, for you fellow Portlanders!). If you live in a city with a large Hispanic population, definitely check out their fruits and frozen fruits section!
You can also purchase guava puree online on Amazon, but you’ll need to do some digging to find a kind without any added sugars or flavors. I know many French pastry schools use this kind by Les Vergers Boiron. Let me warn you now though—it’s way pricier than the Goya Guava Fruit Pulp than I used! - Kosher Salt. In my cookbook, I argue that kosher salt is the best salt for baking recipes—learn more!
Recipe Troubleshooting and FAQ
Can I make this as a layer cake instead?
Yes! If you want to make this recipe as a layer cake, you have two options. You can bake the batter in two 8-inch OR 9-inch round cake pans to make a 2-layer cake. Follow the recipe instructions to make the batter, then divide it in half between the two cake pans.
If you’re baking the batter in 8-inch cake pans, Bake Time will stay the same at 25 minutes. But if you’re baking the batter in 9-inch cake pans, I would start checking for doneness earlier at 20 minutes.
Can you freeze guava cake?
Yes, you can freeze the guava cake for frosting later.
Follow the recipe instructions to make and bake the guava cake. However, don’t make the frosting! Instead, cool completely on a wire rack. Once cool, tightly wrap the cake, still in its sheet pan, in plastic wrap. Freeze for up to 3 months.
When ready to serve, thaw in the refrigerator overnight. Then, thaw at room temperature for 5 t0 10 minutes while you prep and make the frosting. Doing so will prevent condensation from the cake from bleeding through the frosting. Follow the recipe instructions to assemble and decorate the cake.
Best Recipe Tips
Tips To Make This Recipe Fit In Your Schedule
- If you don’t have time to bake the cake, make the frosting, and assemble and decorate it all in one day, no worries! What I recommend instead is baking the cake a day ahead, and then making the frosting and assembling the entire cake the next day.
The cake will keep well tightly wrapped in plastic wrap, just on your countertop (there’s no need to refrigerate the baked cake).Then, whenever you’re ready to serve the cake, make the frosting and assemble everything right before serving!
Tips About The Recipe’s Techniques
- You’ll notice that the recipe instructs you to whip the whipped cream to “stiff peaks”. The best way to determine this texture is to do a test with the whisk attachment. Dip the tip of the whisk into the cream, remove it, and quickly turn it upside down.
If the cream is too soft, it will slide off the whisk, and you’ll need to keep whisking. If the cream has a cloud-like structure but with peaks that lose their shape, you’re at the “soft peaks” stage. Continue whisking, then test again. If, the next time you turn the whisk upside down, the peaks hold, you’re at the “stiff peaks” stage.

Get the Recipe: Guava Chiffon Cake with Guava Cream Cheese Frosting
Ingredients
For the Guava Cake
- 2 ½ cups (10 ounces or 284 grams) cake flour
- 2 ½ teaspoons baking powder
- ¾ teaspoon kosher salt
- 1 cup (8.5 ounces or 241 grams) guava puree, at room temperature
- 1 cup (8 ounces or 227 grams) whole milk, at room temperature
- 2 teaspoons pure vanilla extract
- 2 to 3 drops pink OR red food coloring
- 1 ¼ cups (8.75 ounces or 248 grams) granulated sugar
- ½ cup (1 stick or 4 ounces or 113 grams) unsalted butter, at room temperature
- ¼ cup (2 ounces or 57 grams) canola oil
- 6 large egg whites, at room temperature
For the Guava Cream Cheese Frosting
- 1 cup (8 ounces or 227 grams) cold heavy whipping cream
- 1 (8-ounce) box cream cheese, at room temperature
- ½ cup (3.5 ounces or 99 grams) granulated sugar
- 1 to 2 drops pink OR red food coloring
- pinch of kosher salt
- ½ cup (4.25 ounces or 120 grams) guava puree, at room temperature
- sprinkles, for garnish
Instructions
- First, make the guava cake. Position a rack in the center of the oven and preheat the oven to 350°F. Generously spray an 9 x 13-inch pan with cooking spray and line the bottom with parchment paper. Spray the parchment, too.
- Mix the dry ingredients. In a medium bowl, whisk together the flour, baking powder, and salt.
- Mix the wet ingredients. In a large liquid measuring cup, whisk together the guava, milk, vanilla, and food coloring.
- Cream the butter, sugar, and oil, then add the egg whites. In the bowl of a stand mixer fitted with the paddle attachment, combine the butter, sugar, and oil. Beat on medium until light, fluffy, and doubled in volume, 3 to 4 minutes, using a rubber spatula to scrape down the bottom and sides of the bowl as necessary. Reduce the mixer to low and add the egg whites in 3 additions, adding the next addition only after the previous one has been fully incorporated and scraping down the bottom and sides of the bowl after each addition.
- Alternate adding the dry and wet ingredients. With the mixer still on low, add the the dry ingredients in three parts, alternating with the wet ingredients in two parts, beginning and ending with the dry ingredients. Beat until just combined, then scrape down the bottom and sides of the bowl once more, then beat on low for an additional 30 seconds.
- Assemble the cake for baking. Pour the batter into the prepared pan and use an offset spatula to smooth its top if necessary.
- Bake the cake. Bake for 25 to 30 minutes. When done, the top of the cake should bounce back when gently pressed and a skewer inserted into the center of the cake should come out with a few crumbs attached. Cool completely in the pans on a wire rack before frosting.
- Once the cake is cool, make the guava cream cheese frosting. In the bowl of a stand mixer fitted with the whisk attachment, whisk the cream on medium-high speed until stiff peaks form, 4 to 5 minutes.Transfer the whipped cream to a medium bowl.
- Beat the cream cheese, sugar, food coloring, and salt for the frosting, then add the guava puree. Replace the whisk attachment with the paddle attachment. Combine the cream cheese, sugar, food coloring and salt in the stand mixer bowl (there's no need to clean the bowl!). Beat on medium-low until soft and creamy, 2 to 3 minutes.Reduce the mixer to low and add the guava puree in 4 additions, adding the next addition only after the previous one has been fully incorporated and scraping down the bottom and sides of the bowl after each addition. Once incorporated, scrape down the bottom and sides of the bowl once more, then beat on medium-high until the frosting is creamy and smooth, 2 to 3 minutes.
- Fold the whipped cream into the frosting. Scoop half of the whipped cream over the frosting and fold it in with a rubber spatula. Repeat with the remaining whipped cream and fold them in until just combined. At this point, it will be a very light and fluffy frosting.
- Assemble the guava sheet cake. Use an offset spatula to cover the top of the cake with the frosting completely. Garnish with sprinkles.
- Serve and store. Serve immediately at room temperature. If serving and storing for later, refrigerate for at least 2 hours to keep the frosting cool and fluffy. Thaw at room temperature for 30 minutes before serving.The cake will keep, loosely covered in plastic wrap, in the refrigerator for up to 3 days.
Did you make this recipe?
Please leave a comment and rating for the recipe using the form below!
Your ratings make it easier to find the recipe online, and I’m always looking for ways to improve Hummingbird High.
Hi.
I was wondering, is it possible to substitute the sugar in this recipe with honey, or will it effect the stiff peaks and not form?
I don’t think that’s a good idea—the cake already has a ton of liquid in it thanks to the combo of milk and guava puree. If you look at the NYTimes version of the recipe, some folks already complained that it is too claggy! Honey would add even more dense and claggy. You’d have to adjust the dry ingredients to make up for all that additional liquid, or scale back on the milk and guava (which I don’t recommend doing). A cup of honey also tends to be sweeter than a cup of sugar.
Do you think Goya Guava “Paste” will work for this recipe? the first ingredient listed on it is guava pulp.
I’m sorry, I don’t know! I’ve never used their paste before so I have no idea what its texture is… but if it’s a paste, it might be too concentrated for this recipe?
I made this with a guava paste but before baking I turned the paste into a puree by mixing it with hot water then letting it cool to room temperature before making the cake. It turn out really well, I love the cake and thought this was such a nice recipe. I’ll be making it again!
I made this recipe yesterday. To be honest, I am a well seasoned cook and I thought the cake would flop. 12 egg whites and just adding them to the batter without beating them? I could only find Kerns Nector so used the Guava Nector. I only used 1 1/2, as the recipe calls for 2 cups puree and for the frosting 1/2 cup instead of 1 cup. I will say the cakes took a little longer than what is listed to bake but the cake and frosting turned out great. I made the cakes last night and let them cool before covering them with plastic wrap and leaving them on the counter. This am I made the frosting and assembled the cakes. To my surprise the cake was light, delicious and not overly sweet. The frosting was fluffy, light and delicious. Not at all like typical frosting that can be dense and too sweet.
Are the directions the same for high-altitude? Im at 7,000 feet and I’m not seeing any high altitude adjustment. Is it safe to assume all recipes are high-altitude unless otherwise noted?
No, the instructions are different for high altitude. All my recipes are developed for sea-level; I only have a handful that are high altitude. You can find these recipes here: https://www.hummingbirdhigh.com/recipes?fwp_technique=high-altitude-baking
This is an excellent recipe. We have an abundance of fresh guavas here in Hawai’i on our property and I needed to make a birthday cake. The cake is so light and flavorful as well as the icing. I like that there is a moderate amount of butter, oil and sugar in the recipe. As well as no egg yolks, which makes the cake lighter and healthier too.
I used a large Nordicware bundt pan that I greased and floured generously and the cake came out of the pan easily. The recipe fills the large bundt pan perfectly. I have a convection oven and reduced temp to 325 degrees and cooking time was about 50 minutes. I poke tested at 35 and 45 minutes and cake center was still wet. Just don’t let this cake overcook since it can dry out easily. The cake will continue to cook after removing from oven if you use a heavyweight bundt pan. I removed the cake from the pan after 15 minutes of cooling.
The icing is also light and you can taste the guava. I iced the bundt cake and if I had made half the recipe of icing it still would have been enough for a thin coat of icing.
Thanks for this recipe. It’s a keeper!
Hi Michelle,
This recipe looks incredible. Any chance this willl work with mango? I am trying to find a mango chiffon style cake recipe without having to whip up egg whites seperately 🙂
Hoping to hear from you
Can this recipe be made into cupcakes?
Yes!
Can this be made into cupcakes, and how long should it be baked for?
Made this for my dads 70th—it is the best cake I’ve had in ages. He’s an island guy. Not too sweet and wonderfully balanced guava flavor. Will definitely make again!
Made this for Mother’s Day celebration — delicious! And appreciate the tip on finding guava purée in Portland — thanks!
Hello, can I get clarification on step #5. I don’t quite understand how to mix the dry into wet etc. Can I just mix the dry ingredients and wet at once?
Thanks,
Hi, I believe the recipe step also says this: “With the mixer still on low, add the the dry ingredients in three parts, alternating with the wet ingredients in two parts, beginning and ending with the dry ingredients. Beat until just combined, then scrape down the bottom and sides of the bowl once more, then beat on low for an additional 30 seconds.”
Let me know if that’s enough clarification! In general the first sentence of each recipe step is a summary of the step, with further details right after.
To have baked the cake twice and it has not risen. Do you think adding baking soda would help?
Hi, the cake is too dense. What can I use less of the guava or the milk? It did not rise, I believe the recipe has too much liquid. Do you think baking soda would help?
Thank you for this recipe! Just for interest, I used fresh strawberry guavas ( 1 and a half cup of pulp) and no colouring, one table spoon of strawberry jam for colour instead. The cake cooked golden brown perfectly and the top was a rich dark brandy colour. Unfortunately the taste was just that of a plain cake but yoghurt icing brought out a bit more flavour. Thank you, I made it for my husband’s bday!
I’m not great at baking but I am pretty sure I followed all the steps correctly! The only thing I changed was using a little more whipping cream to make the frosting.
This turned out a little denser than I thought a “chiffon” cake would be. The taste of the cake could be a smidge more guava-y but I did like that it wasn’t overly sweet. The frosting was perfect!!
Easily most requested cake I’ve made! Delicious moist unique and so special! Crowdpleaser all around
Excellent recipe and instructions. I split it in half and used an 8” pan.
I never leave reviews on recipes but this deserves one truly. Cake was light, sweet, and a crowd pleaser. For reference, I doubled the recipe (which usually causes baking issues), used guava paste instead of puree by blending it, and I measured out the flour with a scale (game changer). Also, if you want a good mix of flavors I highly recommend subbing passion fruit for guava in the frosting & adding some sort of strawberry/guava compote in the middle. Amazing, thank you.