
Holiday Sweater Cake
This holiday sweater cake is a a fun cake design to try over the holidays. Made with an almost one-bowl chocolate sour cream cake base and a classic Swiss meringue buttercream frosting, this cake comes together surprisingly quickly thanks to the help of a few tools.
What is a holiday sweater cake?
A few weeks ago, two of my friends Tessa (of Style Sweet fame) and Lyndsay (of Coco Cake Land cuteness), reached out to me and some of my favorite cake makers on Instagram to ask if we wanted to work together on a themed cake idea to celebrate the holidays. We all decided to make a “sweater weather” cake; specifically, decorating all our cakes with woven piping and shag frosting to give them a texture and look similar to a cozy holiday sweater. They all came out pretty amazing—be sure to check out the hashtag #sweaterweathercakes on Instagram to see them all!
I was especially stoked about this project because literally 90% of my wardrobe is comprised of thick, heavy sweaters. It’s definitely a problem come summertime, but works well for the rest of the year since my house runs cold, lollll. But for my sweater, I decided to just wing it and pipe a bunch of random patterns to look like one of the handwoven white sweater in my closet.
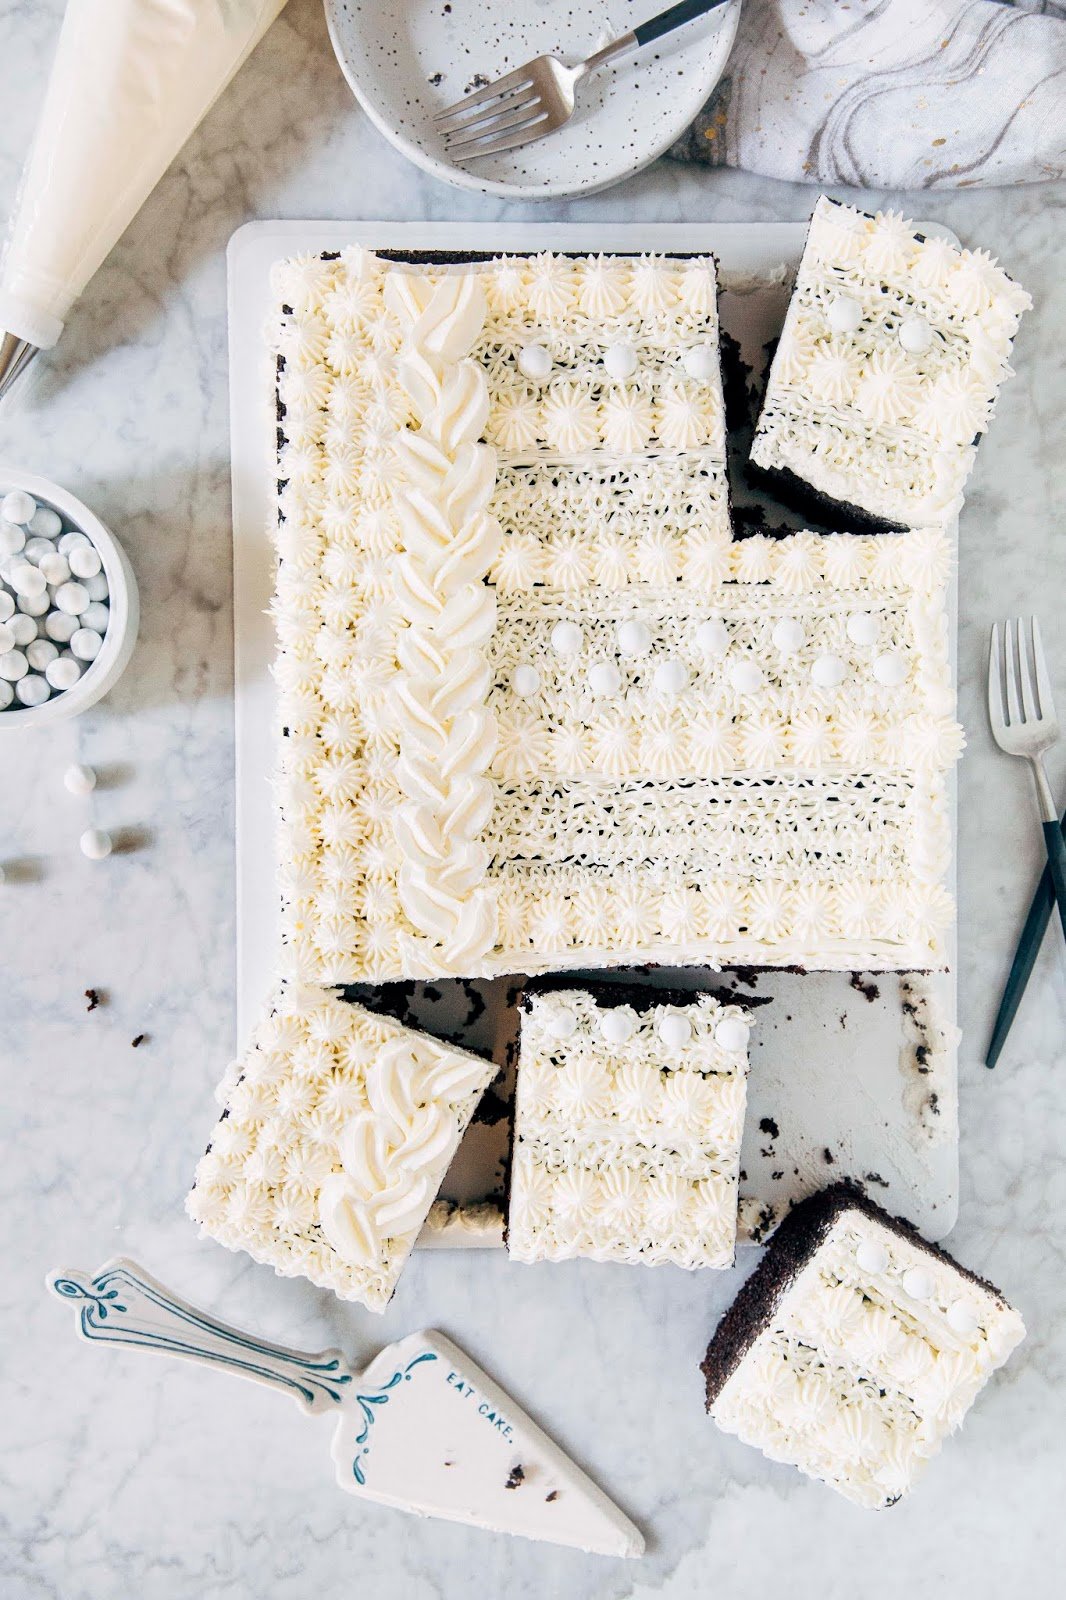
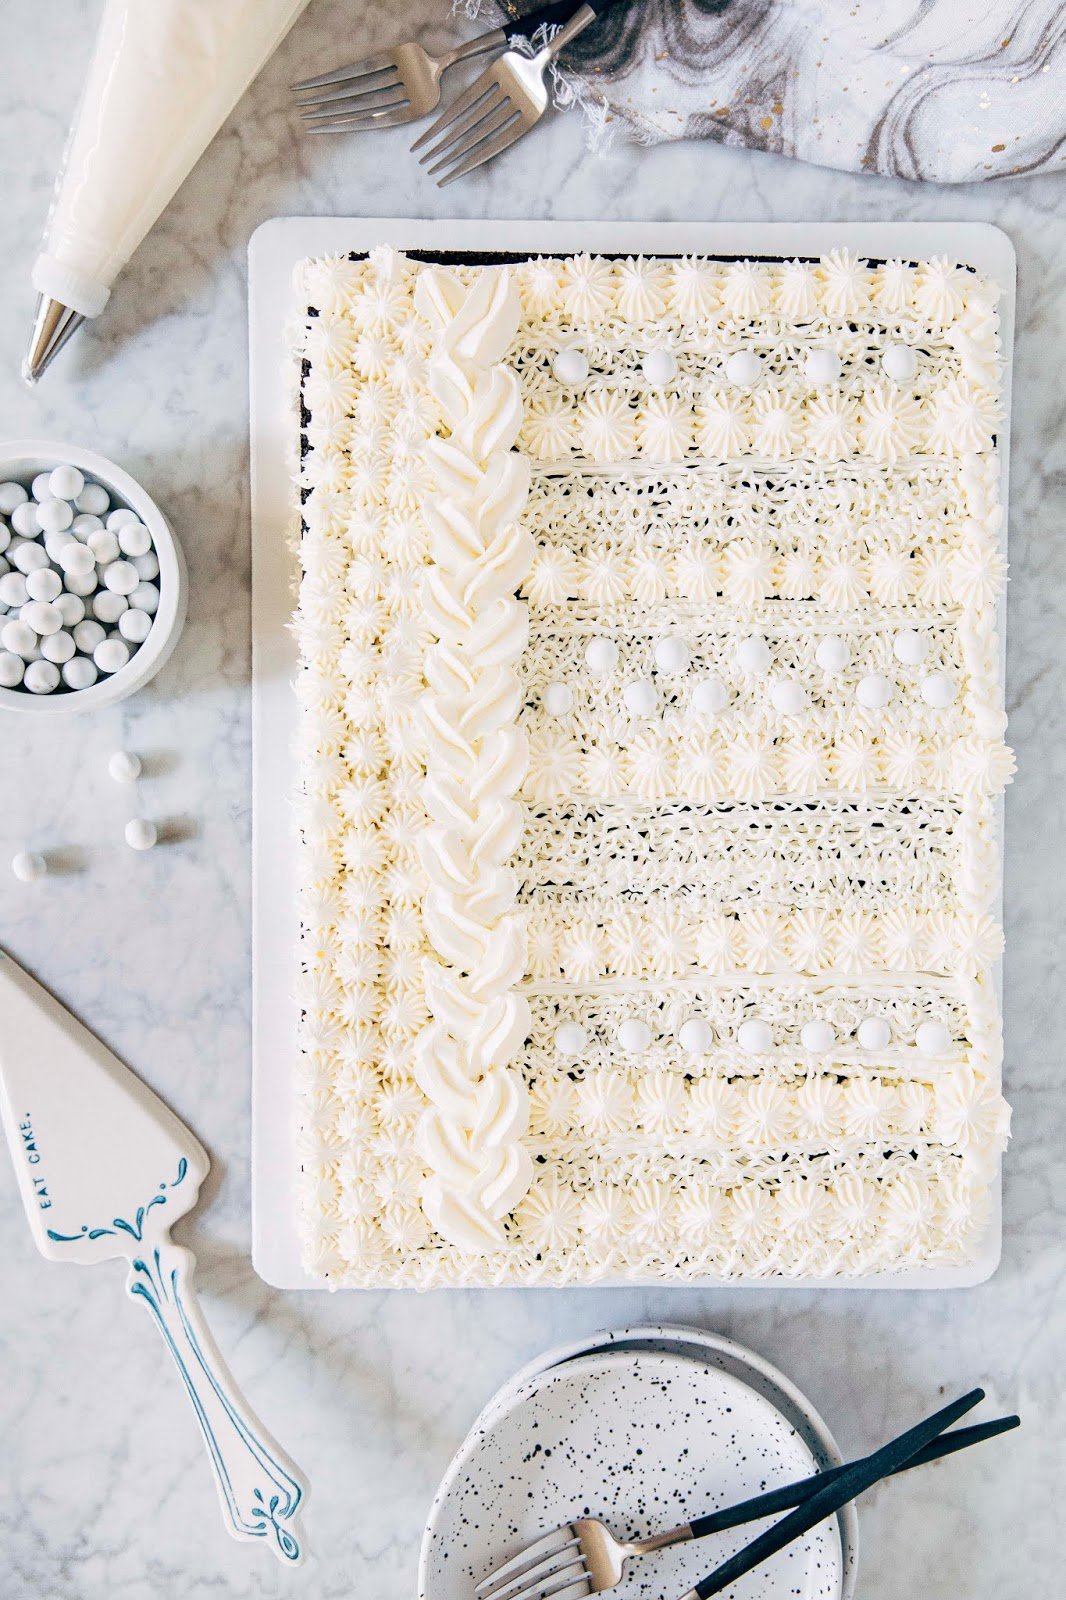
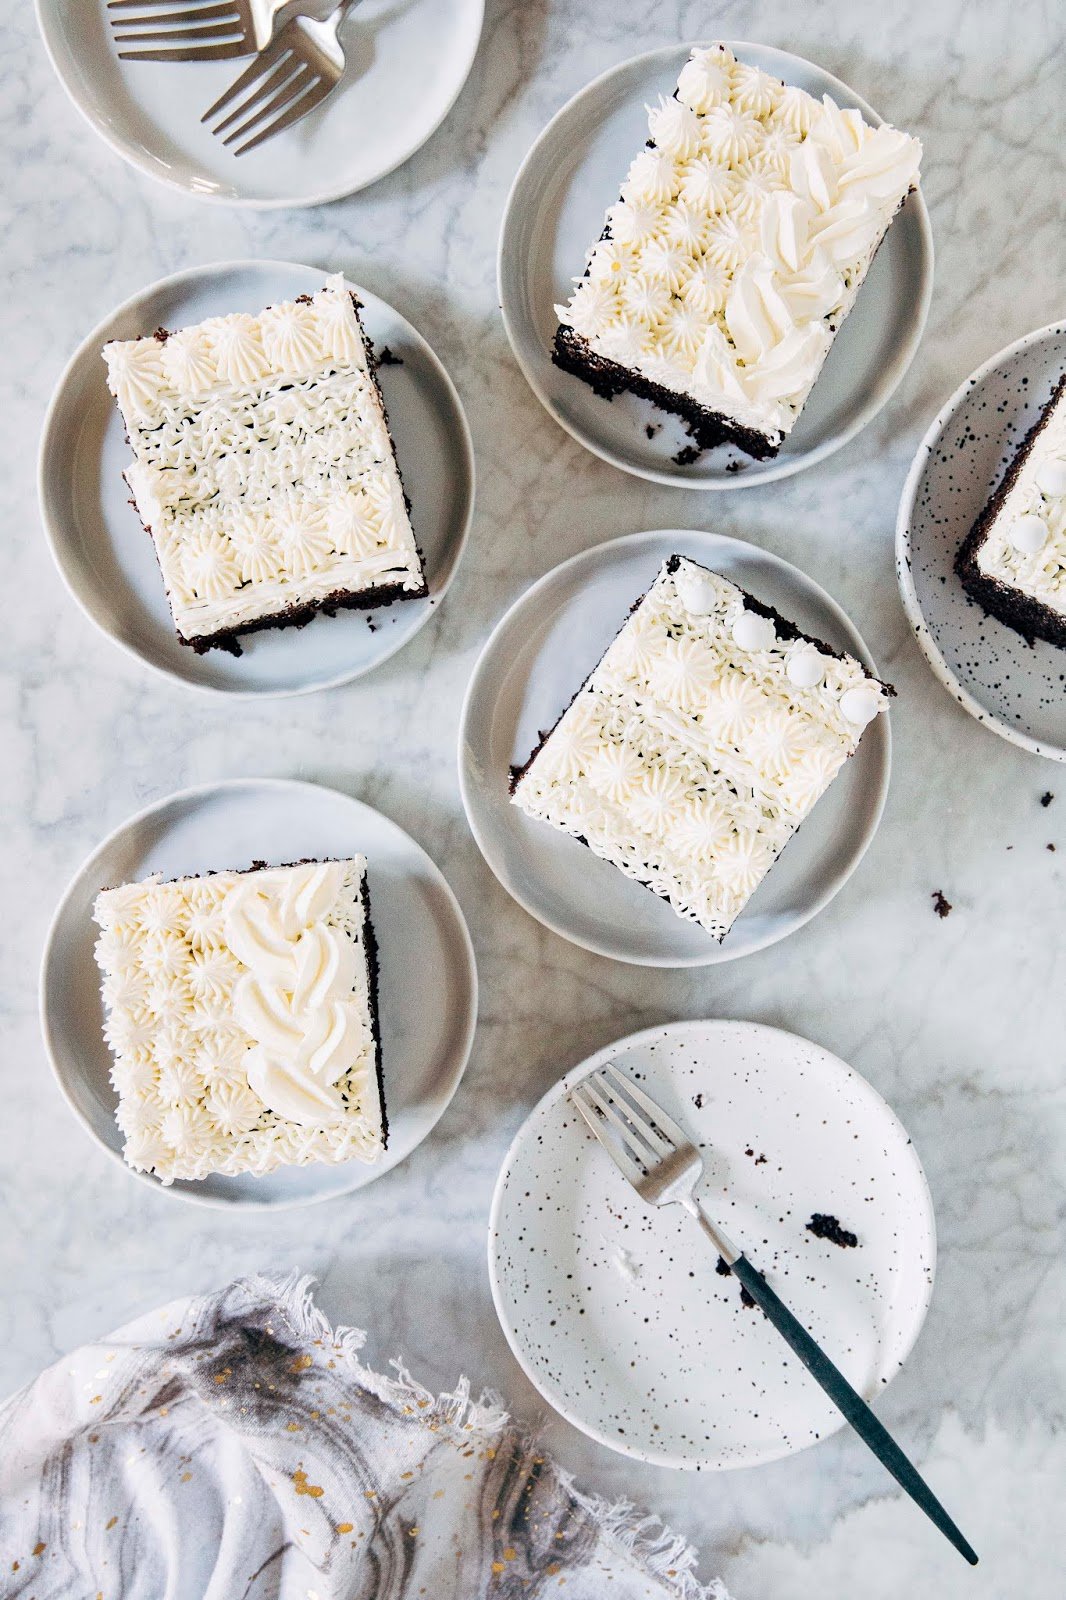
My only twist was that I decided to go the sheet cake route—many of the bakers chose to make a classic layer cake, so I thought it would be fun to branch out from the group and do a sheet cake instead. Plus, I’m not gonna lie. It’s definitely a lot easier to frost a flat sheet cake than a three-dimensional layer one, lol.
How to Make A Holiday Sweater Cake
To make a holiday sweater cake, you definitely need to start with both a reliable cake base and an even MORE trustworthy buttercream frosting:
Chocolate Sour Cream Sheet Cake
Anytime I make an elaborately decorated cake (see: this Christmas wreath cake, or this blackberry almond one), I always make sure to bake a quick cake recipe so that I don’t end up spending too much time on both decorating AND baking the cake. I like to use a low-maintenance recipe that comes together in a flash—that means a recipe that doesn’t have any complicated or fussy techniques.
In this case, I used a variation of the chocolate cake recipe in my cookbook, Weeknight Baking. Unlike the other cake recipes in the book that use a stand mixer, the chocolate cake recipe comes together with just two bowls (one to hold the dry ingredients, another for the wet) and a spatula. The original cake recipe is based on Ina Garten’s chocolate cake recipe and results in a really soft and loose crumb. The crumb is really tasty, but can be hard to work with when piping elaborate designs since it’s so soft and delicate. To remedy this, I swapped out the buttermilk for sour cream—sour cream doesn’t have quite as much water as buttermilk, and it gave the cake a sturdier crumb without sacrificing any flavor.
Swiss Meringue Buttercream Frosting
When making a holiday sweater cake, you’ll also need a frosting that pipes easily and holds its shape once out of the bag. For elaborate piping jobs, I rely on Swiss meringue buttercream frosting. It pipes like silk and has a clean, not-too-sweet flavor that pairs well with most cakes.
I’m not going to lie—it’s a bit of a pain to make. You’ll first need to cook egg whites and sugar and whip it into a meringue, and then beat a TON of butter into the meringue to make the buttercream itself. The entire cooking and whipping process takes at least 20 minutes; anybody who says otherwise is a liar, lol. It gets worse, too. If the butter you use is too cold, the buttercream will curdle and have a bad mouthfeel. If the butter you use is too hot, the buttercream will be too loose, soupy, and impossible to pipe.
If that happens to you, don’t panic! Be sure to check out my tips in the baker’s notes to troubleshoot your Swiss meringue buttercream frosting.

Tools to Make a Holiday Sweater Cake
For elaborate cake designs like this holiday sweater cake, it’s all about the decorating tools—specifically, you’ll need a piping bag and a handful of piping tops. Although you can use a number of different piping tips and get a similar-yet-still unique effect, I’ve listed the tips I used for my holiday sweater cake below. I also listed them in the order I used them so you can attempt to replicate my pattern:
Wilton #233 Tip
This is one of the Wilton decorating tips to replicate grass and fur textures. I used this tip to cover the cake in a basic fuzzy texture. My friend Amy from Constellation Inspiration told me that it looked like moldy ramen noodles, lol—thanks Amy, thanks.
Wilton #4B Tip
This is the piping tip that I used to get the little puffs (bloops? stars?) that you see on the left side of the cake and in rows across the cake.
Wilton #1M Tip
I used this piping tip to get the “braid” that runs down the left side of the cake.
Wilton #5 Tip
I’m not sure you guys can even see this in the pictures, but on there’s a teeny, tiny braid on the right vertical edge of the cake. For that design, I used the Wilton #5 Tip.
White Sixlets
Okay this isn’t technically a tool but do you see those little white balls on the cake? Those are actually little malt ball Sixlet candies. They are sometimes included in those fancy sprinkle mixes that are all over Instagram. They’re actually pretty tasty too! I found myself snacking on them a lot when I was decorating this cake, lol.
And that’s it! Most of the tips I used were actually a part of this Wilton tip decorating set; you can also buy them individually with the links above if you don’t want to make the investment. I also should stress that you don’t need to use the exact same tips that I did to create a holiday sweater cake—other grass, round, and star tips will do the job just fine!
Best Holiday Sweater Cake Recipe Tips
- {Make it Weeknight Baking Tip} When making an elaborate cake design like this holiday sweater cake, I also like to split up the work over a few days so I’m not in the kitchen for hours and hours at a time. For this cake, I made the cake a day ahead and then made the frosting and frosted it the following day. FYI—if you’re into this idea, splitting up recipes this way is totally the premise of my cookbook, Weeknight Baking.
- {Troubleshooting Tip} Like I said—Swiss meringue buttercream can be finicky. Make sure your butter is completely at room temperature (that is, between 65°F to 70°F) before adding it to the meringue. If it’s too melty, your Swiss buttercream will turn out like soup—but no worries, we can fix this! Simply stick it in the fridge for 15 minutes, before beating again. Alternatively, if your butter is too cold, the buttercream can curdle. If you find this happening, scoop out ¼ cup of the frosting (there’s no need to be precise—you can just eyeball it), microwave it for 15 seconds, then add it back to the frosting while beating it on medium-high speed. That should help bring the rest of the buttercream down in temperature and prevent any further curdling!
- {Equipment Tip} When working with a frosting design that requires more than one tip, I recommend using a coupler. Couplers are little plastic contraptions that you stick at the end of your piping bag and allow you to switch out the piping tip easily. Because the tips I used came in two sizes, I ended up filling two piping bags with the same frosting and sticking a big coupler in one and a small coupler from this set in the other.
More Chocolate Cake Recipes
- 30th Birthday Chocolate Cake with Lavender Ruffle Frosting
- Chocolate Brownie Cake
- Chocolate Crème Fraîche Cake
- Hot Chocolate Cake with Marshmallow Fluff Frosting
- Potluck Chocolate Sheet Cake
More Fun Cake Decorating Ideas
- Buttercream Flower Tutorial
- Christmas Wreath Cake Tutorial
- Geode Cake Tutorial
- Fault Line Cake Tutorial
- Mint Chocolate Kintsugi Cake

Get the Recipe: Holiday Sweater Cake Recipe
Ingredients
For the Chocolate Sour Cream Cake
- 2 cups (8 ounces or 227 grams) cake flour
- 2 cups (14 ounces or 397 grams) granulated sugar
- ¾ cup (2.25 ounces or 64 grams) natural unsweetened cocoa powder, sifted if lumpy
- 2 teaspoons baking soda
- 1 teaspoons baking powder
- 1 teaspoons kosher salt
- 1 cup (8 ounces or 227 grams) coffee, slightly cooled (make the coffee first then set it aside while you prep the rest of the ingredients and make the recipe)
- 1 cup (8 ounces or 227 grams) sour cream
- ½ cup (4 ounces or 113 grams) canola oil
- 2 large eggs
- 2 teaspoons pure vanilla extract
For the Swiss Meringue Buttercream Frosting
- ⅔ cup (6 ounces or 170 grams) egg whites (from about 5 to 6 large eggs)
- 1 ½ cups (10.5 ounces or 298 grams) granulated sugar
- ¼ teaspoon cream of tartar
- ¼ teaspoon kosher salt
- 2 cups (16 ounces or 454 grams) unsalted butter, at room temperature
- 2 teaspoons pure vanilla extract
Instructions
For the Chocolate Sour Cream Cake
- Position a rack in the center of the oven and preheat the oven to 350°F. Generously spray three 8-inch cake pans with cooking spray and line the bottom of each with a parchment paper circle. Spray the parchment, too.
- In a medium bowl, whisk together the flour, sugar, cocoa powder, baking soda, baking powder, and salt.
- In a large bowl, whisk together the coffee, sour cream oil, eggs, and vanilla. Gradually whisk in the dry ingredients until just combined. Slowly pour in the coffee. The batter will be fairly runny; use a rubber spatula to scrape down the bottom and sides of the bowl. Use the rubber spatula to finish mixing until smooth and well combined, 2 to 3 minutes more.
- Pour the batter into the prepared pan. Bake for 35 to 40 minutes. When done, the top of the cake should bounce back when gently pressed and a skewer inserted into the center of the cake should come out with a few crumbs attached. Cool completely in the pan on a wire rack before frosting.
For the Swiss Meringue Buttercream Frosting
- Whisk together the egg whites, sugar, cream of tartar, and salt in the top pan of a double boiler (or, make a homemade version by placing a heatproof bowl over a sauce pan filled with 2 to 3 inches of simmering water, ensuring that the bottom of the bowl does not touch the water). Cook over medium-high heat, whisking intermittently, until the mixture registers 160°F on a digital candy thermometer.
- Once the mixture reaches 160°F, immediately pour into the bowl of a stand mixer fitted with a whisk attachment. Whisk on high speed for 8 to 10 minutes, or until the mixture has turned into a meringue that holds medium-stiff peaks. When done, the outside of the mixer bowl should be at room temperature and no residual heat should be escaping the meringue out of the top of the bowl. Stop the mixer and use a rubber spatula to scrape down the whisk and the bottom and sides of the bowl. Replace the whisk attachment with the paddle attachment.
- With the mixer on low speed, add the butter, a few tablespoons at a time. Once incorporated, add the vanilla and increase the mixer speed to medium-high and beat until the buttercream is silky smooth, 3 to 5 minutes. Use a rubber spatula to scrape down the paddle and bottom and sides of the bowl and beat on medium for 1 minute more.
- Use immediately per the decoration instructions in the blog post. Buttercream can be stored in the refrigerator in an airtight container for up to 5 days; if storing for longer, transfer to a ziptop bag and freeze for up to 3 months. To reuse, scrape the chilled buttercream in the top pan of a double boiler (or, make a homemade version by placing a heatproof bowl over a sauce pan filled with 2 to 3 inches of simmering water, ensuring that the bottom of the bowl does not touch the water) and cook over medium-low heat until the frosting has melted all around the edges, with most of it still in a cold and solid mass in the center. Transfer to a stand mixer fitted with the whisk attachment, and whisk on low speed to prevent splashing for 1 minute. Gradually increase to high and whip until homogeneous, about 4 minutes.
This post was last updated on 4/21/2020.
get new recipes via email:

buy the book
Weeknight Baking:
Recipes to Fit your Schedule
Over the past several years of running Hummingbird High, I kept a crucial aspect of my life hidden from my readers: I had a full-time, extremely demanding job in the tech world. In my debut cookbook, Weeknight Baking, I finally reveal the secrets to baking delicious desserts on a tight schedule.