
About This 6 Inch Cheesecake Recipe
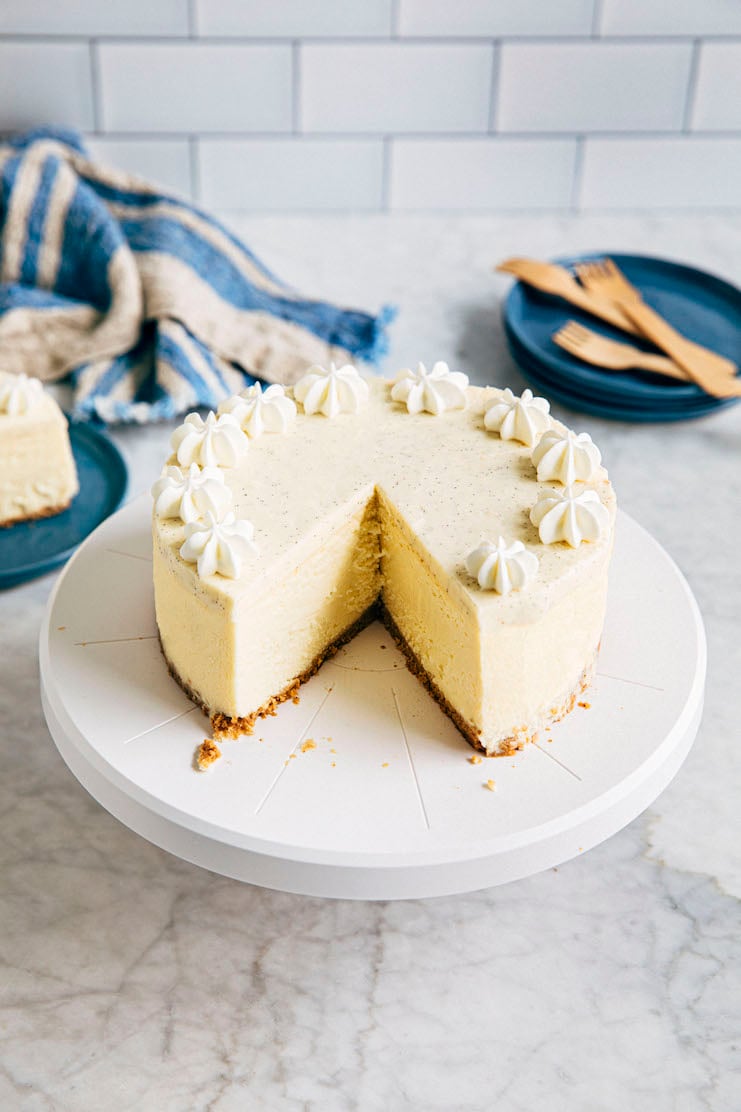
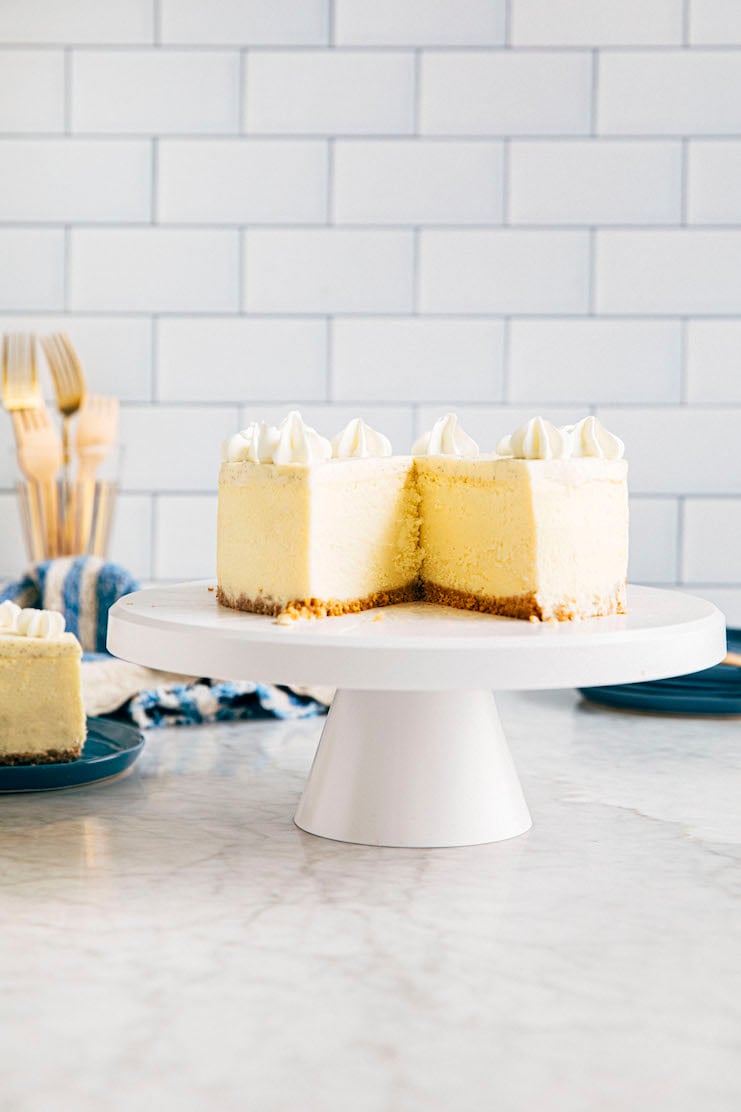
This 6 inch cheesecake recipe makes a mini version of classic, New York style cheesecake! 6 inches is the perfect size for small gatherings and special occasions. Why? 6 inch cheesecake cheesecake only serves 8 to 12 people!
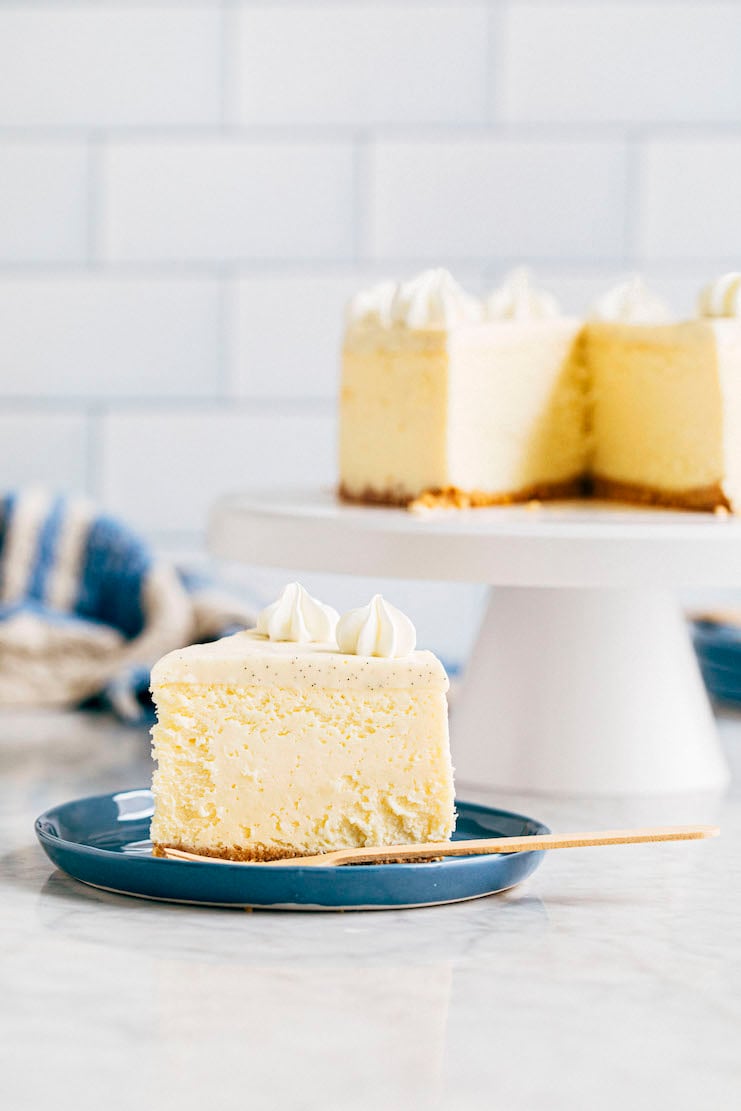
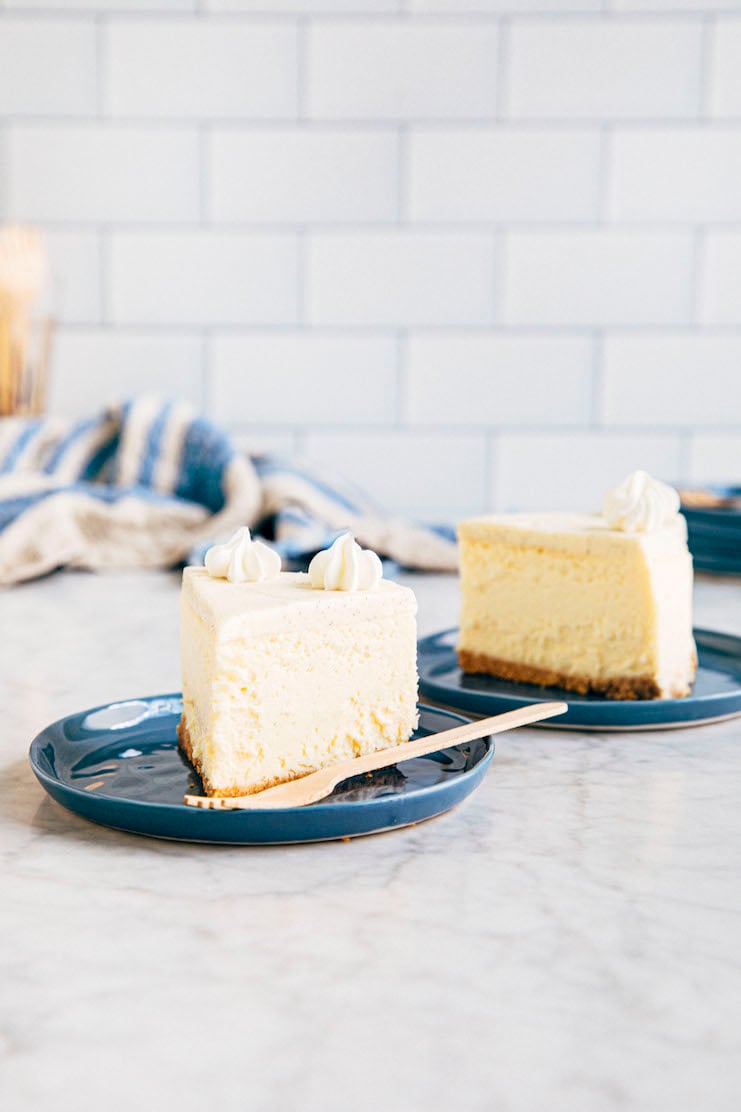
But despite its smaller size, this recipe still makes a classic cheesecake. It has three dekicious layers: buttery graham cracker crust, dense and creamy cream cheese filling, and tart and tangy sour cream topping.
The recipe is adapted from San Francisco’s famed Miette Bakery, which specializes in small batch, 6-inch celebration cakes like this one. The only change? I included all my best cheesecake making techniques! My tips ensure that your 6 inch cheesecake comes out perfectly, with a silky smooth texture and a crack-free top.
Looking for other small batch dessert recipes that feed 4 to 6 people? Check out Hummingbird High‘s small batch baking recipe collection!

Ingredients and Substitutions
Now that I’ve convinced you to make this 6 inch cheesecake, let’s talk about some key ingredients:
Graham Cracker Crumbs
How do I make graham cracker crumbs?
To make graham cracker crumbs, use a digital scale to weigh out as many crackers as needed to match the weight listed in the recipe. Use a food processor to pulse the crackers into fine crumbs.
If you don’t have a food processor, you can place the graham crackers in a zip top bag and crush them manually. Smash them in the bag with a rolling pin or heavy object.
And if all of this sounds like too much work, you can always source pre-ground graham cracker crumbs at the grocery store.
Can I use a gluten free graham cracker instead?
Yes! If you’re using gluten free graham crackers, it makes the ENTIRE cheesecake gluten free. Why? The cheesecake batter and sour cream topping contains no gluten!
Cream Cheese
Can I use low-fat cream cheese instead of regular cream cheese in this 6 inch cheesecake recipe?
Technically yes, but I don’t recommend it. Using low-fat cream cheese leads to a less flavorful cheesecake.
Recipe Troubleshooting and FAQ
Help! My cheesecake cracked. What did I do wrong?
Okay, so you skipped the majority of this blog post and missed out all the info I shared about why your cheesecake cracked. Let me summarize everything below:
Your cheesecake cracked because you didn’t use room temperature ingredients.
Ingredients like cream cheese, eggs, and cream mix together better when they’re at room temperature. This is especially important for cheesecake—you don’t want any lumps of unmixed cream cheese or eggs in the batter. These lumps could potentially cause cracks in the cheesecake. So make sure that all your ingredients are at the temperature listed in the recipe before beginning any of the recipe steps.
Your cheesecake cracked because you overmixed the cheesecake filling.
Incorporating too much air into cheesecake batter also causes cracks in the cheesecake. If using a KitchenAid stand mixer, only mix the cheesecake batter on speed “2” or lower after adding the eggs to the batter. Doing so prevents overbeating and/or overmixing the cheesecake batter.
Your cheesecake cracked because you didn’t bake it in a water bath.
Baking the cheesecake in a water bath ensures that it bakes evenly and gently. Cheesecakes are prone to cracking when parts of the cheesecake bake faster than others. Unless you’re an immediate or advanced baker, find a cheesecake recipe that bakes the cheesecake in a water bath (like this recipe!).
Your cheesecake cracked because you didn’t cool it slowly after baking.
Cheesecakes crack when they are exposed to sudden temperature changes. One of the most common causes of cracking comes from moving the hot cheesecake into a cold room. Don’t skip the recipe’s instructions to cool the cheesecake slowly in the oven.
Can you freeze this 6 inch cheesecake recipe?
Yes! This 6 inch cheesecake recipe freezes really well. After chilling the cheesecake overnight, unlatch the springform pan and lift the sides of the pan away from the bottom of the pan. Place the cheesecake on a plate, uncovered, and freeze until solid, 1 to 2 hours.
Once solid, tightly wrap the cheesecake in two layers of plastic wrap. If storing long term (that is, for longer than 1 month), wrap in a layer of aluminum foil. The aluminum foil helps prevent the cake from absorbing flavors and odors in the freezer. Freeze for up to 6 months.
When ready to serve, transfer the cheesecake to the refrigerator to thaw overnight. Before serving, unwrap the cheesecake and thaw at room temperature for 30 minutes before slicing.
Best Recipe Tips
On Making The Water Bath For The Cheesecake
- This cheesecake recipe instructs you to bake the cheesecake in a homemade water bath. To make the water bath, place the springform pan with the cheesecake in the center of a large baking pan. Fill the baking pan with water until it reaches halfway up the sides of the springform pan. Be sure to use warm, preferably boiling, water. Cold water affects the temperature of the oven, increasing the recipe’s Bake Time. I recommend boiling a large kettle of water before starting any of the recipe’s steps.
For Prepping The Ingredients You Need
- To make graham cracker crumbs, use a digital scale to weigh out as many crackers as needed to match the weight listed in the recipe. Use a food processor to pulse the crackers into fine crumbs.
- For this recipe, it’s INCREDIBLY important that the ingredients are at the temperatures described in the recipe. That means bringing your cream cheese, eggs, and heavy cream to room temperature. Cold ingredients don’t mix as well, resulting in a lumpy cheesecake batter prone to cracking. If you’re wondering how to bring these ingredients to room temperature quickly, I recommend checking out my cookbook. I have a whole section outlining my tricks on how to bring ingredients to room temperature fast!
For Making The Perfect Cheesecake
- Be careful not to overbeat the mixture after adding the eggs—doing so will result in your cheesecake cracking! If you have a KitchenAid mixer, do not increase the mixer speed past speed 2.
- It’s better to pull the cheesecake out of the oven early than to leave it in too long. If you over bake the cheesecake, it will be tough and grainy. Follow the recipe instructions to bake only until the cheesecake sides are set—the center should still wobble and jiggle. Despite the Bake Time of 90 minutes, I recommend checking for doneness at 60 minutes.
- Most recipes neglect to tell you that cooling a cheesecake properly is the secret to preventing your cheesecake from cracking. Why? Cheesecakes are very sensitive to temperature changes. If the cheesecake is cooled too quickly—that is, it goes from a hot oven to a cold room—it cracks.
So how do you prevent this without cranking the heat up the heat in your house? Simple! Turn your oven heat off and leave the cheesecake in the oven. However, we still want the oven to cool faster than it otherwise would. So we encourage it to do so by cracking the oven door ever so slightly. If your oven door insists on snapping shut, hold it open with a heatproof cooking utensil like a wooden spoon.
Finally, How To Slice The Cheesecake So Clean and So Pretty
- To get straight edges and smooth sides when you slice the cheesecake, use a hot serrated knife. Fill a tall, heatproof glass with VERY hot water. Place the blade of the serrated knife in the water for 20 seconds. Use a kitchen towel to dry the knife. Use it to slice the cheesecake, dipping the knife into the water and drying it ever so often, especially if the filling starts sticking to the blade.

Get the Recipe: 6 Inch Cheesecake Recipe
Ingredients
For the 6 inch Cheesecake Crust
- ¾ cup (2.65 ounces or 75 grams) graham cracker crumbs
- 3 Tablespoons (1.5 ounces or 43 grams) unsalted butter, melted
- pinch of kosher salt
For the 6 inch Cheesecake Filling
- 2 (8-ounce) boxes cream cheese (16 ounces or 454 grams), at room temperature
- ½ cup (3.5 ounces or 99 grams) granulated sugar
- ¼ teaspoon kosher salt
- 2 large eggs, at room temperature
- ¼ cup (2 ounces or 57 grams) heavy cream, at room temperature
- ¾ teaspoon vanilla extract
For the Sour Cream Topping
- ½ cup (4 ounces or 113 grams) sour cream
- 1 Tablespoon granulated sugar
Equipment
- a 6-inch round springform pan
- a 9 x 13-inch cake pan OR a roasting pan
Instructions
For the 6 Inch Cheesecake
- Prep the oven. Position a rack in the center of the oven and preheat the oven to 350°F.
- Make the crust. In a medium bowl, combine the graham cracker crumbs, melted butter, and salt. Toss with your fingers until the mixture looks like wet sand. Pour the mixture into the springform pan and use a tart tamper or your hands to press it evenly over the bottom of the pan, all the way to the edges. (You can use the bottom of a coffee mug or heavy glass to pound the crumbs in place—you want to apply some pressure here so that the crust holds its shape.)
- Bake the crust. Bake for 8 minutes. The crust will look underbaked and feel soft to the touch when you remove it from the oven, but will firm up as it cools. Set on a wire rack to cool slightly while you make the filling.
- Make the filling. In the bowl of a stand mixer fitted with the paddle attachment, beat the cream cheese on medium until soft and creamy, about 4 minutes. Add the sugar and salt and beat until light and fluffy, about 1 minute, using a rubber spatula to scrape down the bottom and sides of the bowl as necessary. Reduce the mixer to low and add the eggs one at a time, adding the next egg only after the previous one is fully incorporated, scraping down the bottom and sides of the bowl after each addition. With the mixer on low, add the cream and vanilla all at once and beat until combined, about 1 minute. Scrape down the bottom and sides of the bowl once more, and beat on medium for an additional 30 seconds.
- Assemble for baking. Pour the filling over the crust and use an offset spatula to smooth the top. Tightly wrap the bottom of the springform pan with two layers of aluminum foil. Place in the center of a 9 x 13-inch cake pan or roasting pan. Pour boiling water into the pan until water reaches halfway up the sides of the springform pan.
- Bake the cheesecake. Bake for 90 minutes, or until the edges of the cheesecake are set but the center still wobbles slightly. Check the cheesecake at 60 minutes. The outer edges of the cheesecake should be starting to set. If the edges are completely set, check for doneness again in 5 or 10 minutes. If the top of the cheesecake is starting to brown too much, tent the top of the springform pan with a loose sheet of aluminum foil.
- Cool the cheesecake. Once the cheesecake is done, turn off the oven's heat. Open the oven door just a crack, propping it open with a heatproof cooking utensil like a wooden spoon. Leave the cheesecake in the water bath in the oven for 30 minutes. After 30 minutes, remove the cheesecake from the oven and place on a wire rack. Run a butter knife or offset spatula around the edge of the pan to loosen the cheesecake. Cool the cheesecake completely in the springform pan on the wire rack.
- Make the sour cream topping. Once the cheesecake is completely cool, make the sour cream glaze. In a small bowl, whisk together the sour cream and sugar for the topping.
- Finish assembling the cheesecake. Pour the topping over the cheesecake and use an offset spatula to smooth it across the cheesecake's top.
- Chill the cheesecake. Cover the top of the springform pan loosely with plastic wrap and refrigerate until the cheesecake is firm, at least 4 hours, preferably overnight.
- Serve and store. To serve, unlatch the springform pan and lift the sides of the pan away from the bottom of the pan. Use a hot knife to slice and serve. Serve chilled from the refrigerator. Leftover cheesecake slices can be stored in an airtight container in the refrigerator for up to 5 days.
Notes
get new recipes via email:

buy the book
Weeknight Baking:
Recipes to Fit your Schedule
Over the past several years of running Hummingbird High, I kept a crucial aspect of my life hidden from my readers: I had a full-time, extremely demanding job in the tech world. In my debut cookbook, Weeknight Baking, I finally reveal the secrets to baking delicious desserts on a tight schedule.
Did you make this recipe?
Please leave a comment and rating for the recipe using the form below!
Your ratings make it easier to find the recipe online, and I’m always looking for ways to improve Hummingbird High.
2 questions! 1 may i ask did you put vanilla bean paste in the sour cream topping as I see brown specks?! And 2 what did you pipe ontop?! I love it! Thanks in advance!
I did use vanilla bean paste—it was delicious! I didn’t include it in the recipe though because sometimes I get yelled at for using inaccessible ingredients. I pipped whipped cream on top!
Hi can I ask if you know the weight of the completed cheesecake mix? Eg: 800?
Based on the ingredient weights (which are included in the recipe), I estimate it to be between 705-710grams.
I found this recipe looking for something small but special to make in my 6” springform pan for my mom’s birthday. It was a hit! The baking instructions were terrific and 1 hour 10 minutes cooking time resulted in a perfect, creamy texture. I added cherry pie filling to the top after plating for sentimental reasons. I bake at high altitude and appreciate all of the science-of-baking explanations. Can’t wait to make this again!
This makes the 2nd time I’ve made this cheesecake and it is absolutely perfect in my opinion!! Today it’s for my son in law’s birthday party.🥳
This is my second time making this cheesecake. First time made exactly according to recipe and was very delicious, this time I am using vanilla wafers and added a bit of citrus zest to the filling. Directions make this recipe pretty foolproof!
Question. How brown should the top be at 60 minutes? Both of my cakes have browned quite quickly. I am using the foil on the second one. Will see how brown it gets. Might just be my oven or maybe I should start with the rack a little lower than center. Thank you for the recipe!
Hmm, it shouldn’t get that browned… I think the foil is a great idea!
Can I add lemon juice inside the cream cheese filling. If yes, how much do I add?
Yes! I would add up to 1 Tablespoon (anything more might cause the cheesecake to crack) but add lots of lemon zest (maybe all the zest from 1 large lemon?) for the aromatic flavor.
I really like this recipe. The only thing I disagree with is 90 minutes in the oven. I’ve made over 700 cheesecakes and supplied them to restaurants. I have never baked a cheesecake for 90 minutes, not a 9 inch.i baked this cheesecake at 325° for 40 min turned off the oven for 20 minutes and opened the door slightly for 30 minutes. No water bath. It turned out beautiful. I tried to send a photo, but couldn’t figure out how. Great cheesecake recipe.
What are the speckles in the cheesecake top layer? The instructions don’t mention anything in it?
I added some vanilla bean to the sour cream topping! I didn’t include it in the final recipe because 1) it wasn’t that noticeable flavorwise and 2) was trying to keep the recipe accessible for the folks who didn’t want to splurge on a vanilla bean, which is quite pricey these days.
I figured it was cinnamon but I wanted to make sure.
Thank you for getting back to me. 😀
My first try didn’t turn out too well, although it tasted good. I’m at high altitude which sometimes requires adjustments, but I did the same temp and thought I would let it cook longer. But at 60 minutes, it was already overly-browned on the top, so I turned off the stove and let it sit there for 30 minutes with oven door open 2 inches. It was high and puffy at 60 minutes, but after the additional 30 minutes when I removed it from oven, the entire thing had sunk down to 1 1/2 inches high. Why does it look like it is about to burn? Is it the whipping cream that does that? I’ve never had a cheesecake do that. Any suggestions?
I used this recipe for my first homemade cheesecake. It was absolutely delicious and so easy to follow instructions. I dud not make the sour cream topping as it was perfect without it.
I just made your 6 inch cheesecake recipe. I’m waiting for it to cool now bit so far so good. I have a very hot oven so had to keep an eye on it but it’s came out looking great. Hoping it doesn’t c
I just made your 6 inch cheesecake recipe. I’m waiting for it to cool now bit so far so good. I have a very hot oven so had to keep an eye on it but it’s come out looking great. Hoping it doesn’t crack on drying. It was brown after 60 mins as per other comments but covering worked.
Great recipe and would love to leave a photo as it looked lovely. Concur with other posters that cook time was too long. And needed to check every so often to ensure top didn’t burn (it was a beautiful golden brown). No cracks, and I didn’t make the sour cream topping (and it didn’t need it as it was perfect on its own), had it with sour cherries and juice reduced with a littoe sugar. The crust was hard to remove from the base which was non-stick so will line the tin next time. Exactly as a NY cheesecake should both look and taste. Well done and thank you for the recipe 👍
This cheesecake is delicious. The texture is great. I took a suggestion from a review and added 1/4 teaspoon of lemon zest and 3/4 teaspoon of fresh lemon juice. I’m very glad I did not add more, as the lemon flavor is just right – subtle and didn’t take over the cheesecake. The suggestion was up to a tablespoon of lemon juice, which would have been overwhelming to my taste buds. I added a 1/4 teaspoon of cinamon to the graham cracker crust – but it didn’t really affect the taste. Thank you for this excellent recipe.
I made this about a month ago and realized in the middle of mixing it that my heave cream had turned so I used sour cream. My husband said it was the best I’ve ever made. Making it again today with the correct ingredients!
This is the 2nd time I have made this cheesecake. #2is baking now. It is perfect as a dessert for me and my 2 sons as none of us are heavy into sweets. This is 2025 Thanksgiving dessert and I expect it’s going to be as good as the first time
This cheesecake is amazing! Can I double for a 9 inch springform?
I think so, but I’m not sure what the Bake Time would be since I’ve never done it myself.
Ive made this adorable delicious cheesecake probably 5 times now and it comes out perfect everything, thank you!
Made this cheese cake for Christmas for my grand niece, gluten free. Looked at the cake [using oven light] at 60 minutes, looked great, by 75 minutes it was beginning to crack; it was completely cracked at 80 minutes and I took it out…looked like a flower had bloomed. The cake began to recede back into itself; by the time it was ready to eat, the cake looked normal, cracks were barely visible. My niece said that the cake was delicious and she enjoyed it, but I do not know why it split open during the cooking process. My oven was set at 350 and I had a temp. monitor in the oven to be sure of the heat. So I was disappointed, I’ve made a lot of cheese cakes, but never a 6″ cake and none of the ones that I have made ever cracked. So that was disappointing to me.
I only have a 6.5-7″ springform pan – will that work or should I increase the ingredients slightly?
I plan on making this tomorrow, thanks!
Yes, a slightly bigger pan should work with no adjustments. Some caveats: your cheesecake will come out shorter, and you probably should start checking for doneness 10 minutes ahead of the recipe’s Bake Time.
Hi, im planning on making this recipe very soon. Is it possible you could tell me what the sour cream topping taste like? Does it taste exactly like sour cream? Also, is it optional? Thank you.
It tastes like very mildly sweetened sour cream, almost like vanilla yogurt. But yes, feel free to skip it if it’s not your jam!
How can I make this a key lime cheesecake?
Somebody in the comments said they added lemon juice into the recipe—I’d add whatever amount they recommended but lime juice instead. I’d also add some lime zest.
I made this for my daughter’s wedding as the top tier of her wedding cake. She was married in our backyard during Covid. I wasn’t able to find a baker, so Momma to the rescue!
I made two other tiers with other recipes for larger cakes. This was really delicious and was actually the cake that my daughter and her husband ate!
I’m making it for them again as they and our now 2 year old grandson will be here for Easter.
I did add a blueberry compte to the top as opposed to the sour cream topping.
This cheesecake is absolutely amazing! Easy to make if you follow directions exactly!
Wonderful recipe. Inspite of not having enough full fat cream cheese i was able to produce a wonderful cake. If you follow all the steps just like how the author suggests the results will be top notch. This is the first time I made it and the patience was rewarded. Please read all yhe instructions well and then bake. Thanks for the wonderful recipe.
can I double the recipe?
It depends—what pan are you planning to bake it in?
I don’t have a stand mixer. Should I let the cream cheese come to room temp and then cream it with a big wooden spoon. After that, proceed with a hand mixer? Thank you.
Hand mixer should work just fine! You might need to add 1-2 minutes to the mixing times listed in the recipes. And make sure all the ingredients are at room temp!