When Erlend and I were trying to figure out where to go on our upcoming vacation in May, we used Google Flight Explorer. If you’ve never used Google Flight Explorer, it’s worth checking out: you type in the dates you want for your travel, and a map pops up for you to “explore”. Scrolling around the map shows you how much tickets are to that city or country for your date of choice — it’s a great way to find cheap tickets (which is honestly how we pick most of our international travel destinations, lol — why spend most of your money before you’ve even gotten there, ya know?).
With Google Flight Explorer (lol at all the links to Google; honestly, this isn’t even sponsored— I just love it so much and want you to use it), we discovered that tickets to London were insanely cheap—like $500 roundtrip from Portland and back—and literally half the price of most other tickets to Europe. It seemed too good of a deal to miss, but also recognized that it was likely risky due to the shitshow ambiguity of Brexit. Besides — we’d both just been to England last September. We’d had the time of our lives, hanging with some of my good friends and eating delicious meals at Rovi (Ottolenghi’s latest restaurant dedicated to fire and fermentation), Brigadiers, St. John Bread and Wine, Polpo, and more. But was it really worth a second trip in less than a year?
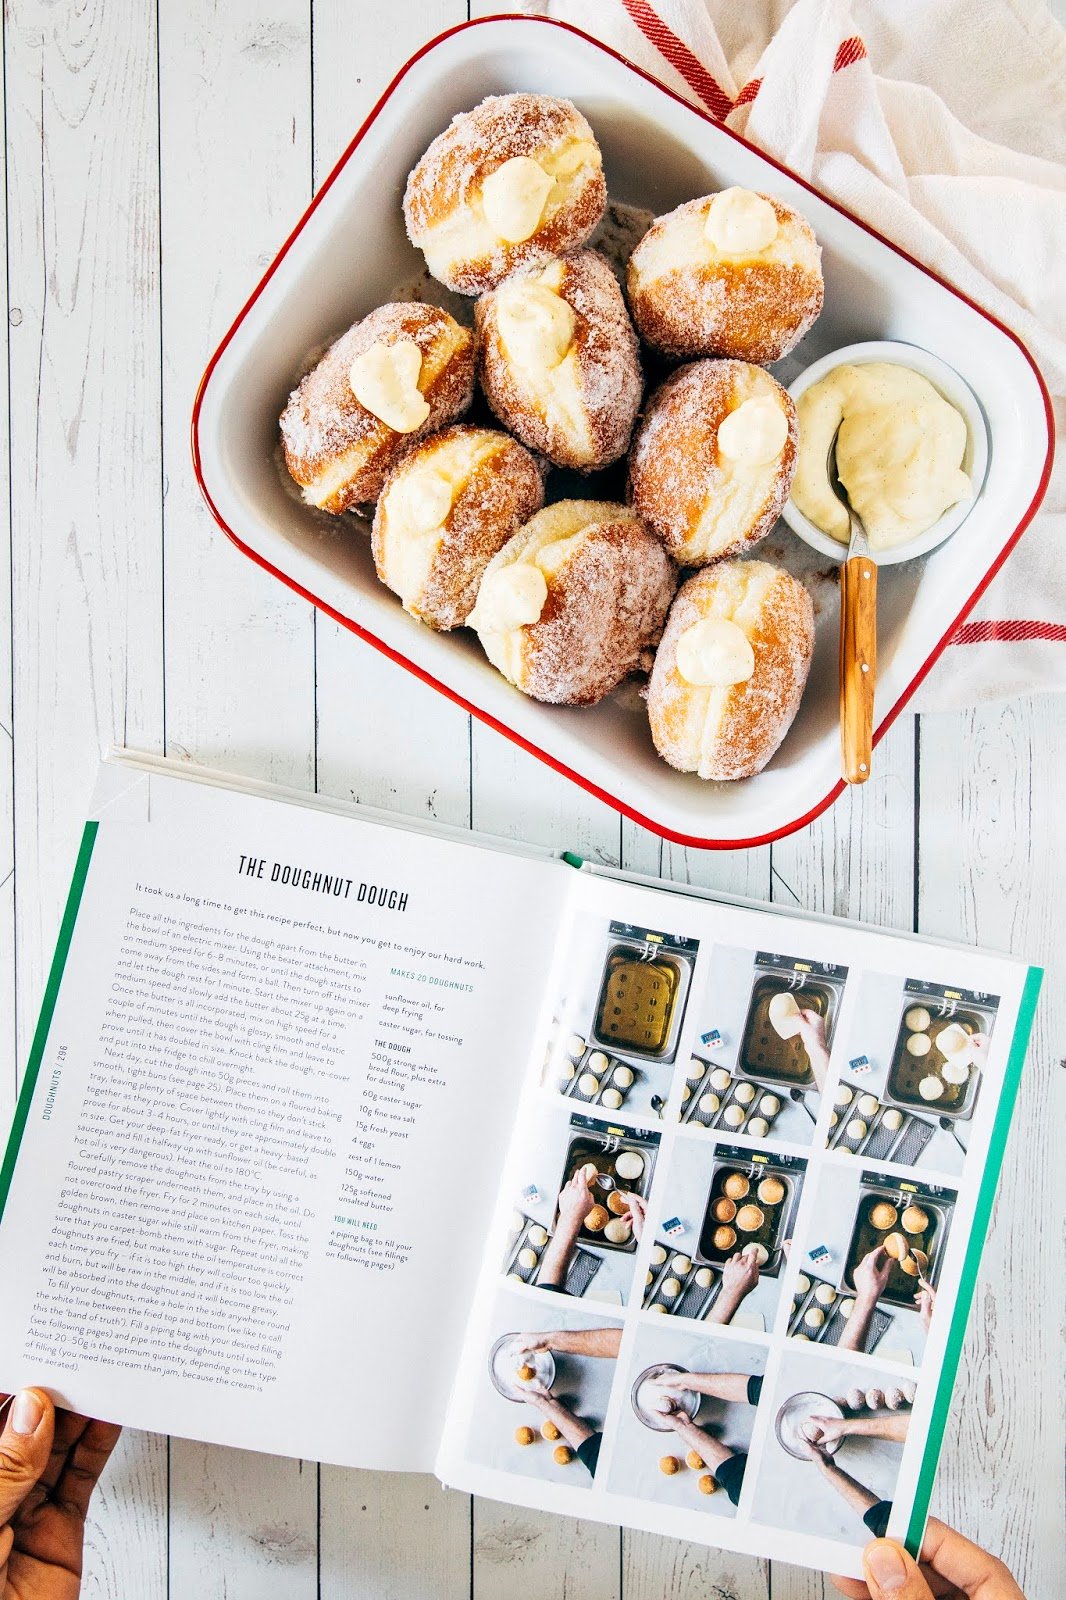
Looking at my photos, I was undecided — until I saw this photo of Bread Ahead donuts from our last trip to London. Bread Ahead is a bakery and baking school known for their donuts, whose reputation is well-earned, to say the least. Their donuts are incredibly light and fluffy, rolled in sugar and plump with custards flavored with passionfruit meringue, orange and cardamom, honeycomb, and more. I legit made Erlend go back to Borough Market three times just so I could keep eating their donuts. It was their donuts that sealed the deal; I bought our tickets to London without any more thought.
In retrospect, it was probably more sensible to just make the donuts at home. I’d picked up a copy of Bread Ahead’s Baking School cookbook when I was last in town, and had forgotten that it actually contained the recipe for their famed donuts. I’ve recreated it today for you guys in celebration of Mardi Gras/Fat Tuesday (where you’re supposed to eat all the fried things, right?), and to spare you the $500 ticket to London (lol). While the recipe stays pretty true to their vanilla custard donut recipe, I made some changes and adaptations to make it more friendly for American kitchens and the home baker — be sure to check out the baker’s notes below, and enjoy!
- I’m not going to lie, this recipe is a motherfreaking JOURNEY. According to Bread Ahead’s cookbook, the secret to their donuts is letting the dough rise THREE times throughout the baking process, first for an hour, then overnight, then another 3 to 4 hours after that. It’s INTENSE, and honestly, it’s probably just easer to book a damn ticket to London at this point, ha. To help you manage the time better and make sure you’re not in the kitchen for giant blocks of time, I’ve broken up the recipe over the course of 3 days — you’ll make the custard first, then the dough, and fry and assemble the donuts on the third and final day. A lot of it is passive time (you’re really just waiting for the dough to rise), but it’s still a lot, I know. If you want to make the donuts a 2 day affair, I suggest making the custard cream and dough on the same day. For those who want to visually see the process, I suggest checking out this video of Justin (the head baker of Bread Ahead) making salted honeycomb donuts at home.
- The recipe calls for a few special pieces of equipment: a piping bag with a Bismark pastry tip, and a deep fryer. A Bismark tip is typically used in professional pastry kitchens to pipe stuffings and fillings into pastries; I got mine online via Amazon, but in a pinch, you can use a regular piping bag (or even a homemade version via a Ziploc bag with the corner snipped off) with a small round tip. Just use a chopstick or clean pen to poke a deep hole in the donut, then jam your piping bag in there and squeeze away. As for a deep fryer, I recently got the Breville deep fryer which I love, love, LOVE — it makes deep frying so much cleaner and safer. But in the past, I’ve just used my trusty Staub cocotte (but really, any cast iron Dutch oven will do) and a deep fryer thermometer for the job. Just remember that you’ll need to fill the pot about halfway up with oil.
- The original recipe uses fresh yeast, which is really hard to find in the United States for the average home baker. I’ve adapted the recipe to use instant yeast instead — in a pinch, you can use active dry yeast in its place instead, but you’ll need to change the temperature of the water and the way it’s mixed into the dough instead. Read more about the science of why and how in my recipe for ube babka.
Get the Recipe: Vanilla Custard Bread Ahead Donuts
Ingredients
For the Classic Vanilla Custard Filling
- ½ cup (3.5 ounces or 99 grams) granulated sugar
- 2 cup plus 2 Tablespoons (17 ounces or 482 grams) whole milk
- 1 vanilla bean pod
- 6 large egg yolks
- ⅓ cup (1.5 ounces or 43 grams) all-purpose flour
For the Donut Dough
- 2 cups (9 ounces or 255 grams) bread flour
- zest of 1 medium lemon
- 2 ½ Tablespoons (1 ounce or 28 grams) granulated sugar
- ¾ teaspoon instant yeast
- ½ teaspoon kosher salt
- ⅓ cup (2.65 oz or 75 grams) water, warmed to between 120°F to 130°F
- 2 large eggs, at room temperature
- ¼ cup (2 ounces or 57 grams) unsalted butter, at room temperature and cut into 1-inch cubes
Assembly
- ½ cup (4 ounces or 113 grams) heavy cream
- ½ cup (3.5 ounces or 99 grams) granulated sugar
- canola oil, for frying
Equipment
- a deep fryer (see baker’s notes)
Instructions
Day 1: Make the Vanilla Custard!
- Reserve 1 tablespoon of the ½ cup granulated sugar in a small airtight container with a lid and seal. You'll need this sugar for Day 3.
- Pour 2 cups plus 2 Tablespoons whole milk in a heavy-bottomed saucepan over medium-low heat. Use a sharp knife to slit 1 vanilla bean pod lengthwise and scrape out the seeds into the milk. Place pod in the milk. Cook to a boil over medium heat, about 10 minutes.
- Meanwhile, place 6 large egg yolks and the rest of the granulated sugar in a medium bowl. Whisk to combine. Sprinkle ⅓ cup flour over the mixture and whisk to combine.
- Once the milk reaches a boil, immediately pour over the yolk mixture, whisking constantly to prevent curdling. Pour back into the saucepan and cook over medium heat, whisking constantly, for 3 minutes or until thick. The whisk should leave a trail in the custard. Place a fine mesh sieve over a medium bowl and pour the custard into the sieve, discarding any lumps and the leftover vanilla bean pod. Immediately press a sheet of plastic wrap directly on the surface of the custard to prevent a skin from forming. Cool the custard in its bowl on a wire rack for 1 hour; once at room temperature, refrigerate until cool, around 4 hours but preferably overnight.
Day 2: Make the Donut Dough!
- Combine 2 cups bread flour, zest of 1 medium lemon, 2 ½ Tablespoons granulated sugar, ¾ teaspoon instant yeast, and ½ teaspoon kosher salt in the bowl of a stand mixer fitted with a dough hook. Mix to combine, and use a measuring cup or tall glass to create a small "well" in the center of the dry ingredients. Pour ⅓ cup warm water into the well, and mix until shaggy and moist. Add 2 large eggs and mix to break up the yolks. Nestle into the stand mixer and knead on medium speed for 6 to 8 minutes, or until the dough starts to come away from the sides of the bowl and form a ball. Turn off mixer and let the dough rest for 1 minute.
- After a minute, turn the mixer back on to medium and add ¼ cup cubed butter, 1 to 2 pieces at a time, only adding more when the previous pieces are incorporated. Once all the butter has been added, increase mixer to medium-high and knead until the dough is glossy, smooth, and elastic when pulled, around 2 to 3 minutes. Cover the bowl with plastic wrap and let rise at room temperature until doubled in size, around 1 to 2 hours.
- Once doubled in size, tip the dough out onto a lightly floured counter. Knead with your hands until deflated, about 1 to 2 minutes, and place back in the bowl. Cover with plastic wrap and refrigerate overnight until doubled in size once more, about 8 hours.
Day 3: Let rise AGAIN, Fry, and Assemble the Donuts!
- After their overnight proof, tip the dough out onto a lightly floured counter. Use a bench scraper to divide the dough into 10 pieces, about 50 grams (or slightly less than 2 ounces — 1.80 ounces) each. Roll each dough piece into a ball between your hands, similar to how you would roll a piece of PlayDoh or clay into a ball when you were a kid. Keep rolling until each piece is a smooth, tight, round ball.
- Place the dough balls on lightly floured sheet pans, leaving plenty of space between each to allow them to double in size. Cover with a loose sheet of plastic wrap and let rise at room temperature until doubled in size, around 3 to 4 hours.
- In the last hour of the donuts' final proof, prep your assembly station and deep fryer. Combine ½ cup heavy cream and the reserved 1 tablespoon granulated sugar in the bowl of a stand mixer fitted with a whisk attachment. Whisk on medium-high until light, fluffy, with medium peaks, about 3 minutes. Fold into the chilled vanilla custard and transfer to a piping bag fitted with a Bismark pastry tip. Refrigerate until ready to use. Place 1/2 cup granulated sugar in a large, shallow bowl and set aside. Line a wire rack with two sheets of paper towels and fill a deep fryer halfway up with canola oil. Heat the oil to 355 (F).
- Carefully remove the donuts by wedging a floured bench scraper underneath each one. Working in batches of 3 to 4 donuts at a time, fry for 2 minutes on each side, or until the donuts are puffy and golden brown. Once done, use a slotted spoon to move the donuts to the prepared wire rack. Repeat until all the donuts are fried, making sure that the oil temperature is correct every time you start a new batch — if the oil is too hot, they will burn on the outside but stay raw in the middle, and if the oil is too cool, the donuts will be greasy.
- Toss each donut in the shallow bowl of sugar while still warm from the fryer. To fill each donut, wait 15 minutes to allow the donuts to cool slightly and then use a chopstick or a Bismark pastry tip to poke a hole in the side of each donut. Pipe vanilla custard into the holes until each donut is plump and swollen, around 20 grams (or 0.75 ounces of custard) each. The donut should be stretched thin to the point of bursting. Consume immediately — you deserve it.
This post was last updated 10/11/2020.


My custard and whipped cream was very runny. Do you stir the custard at all before you fold in the whipping cream?
I think I did once just to loosen it from the bowl, but mostly left it untouched since I figured folding the cream in would aerate/loosen it accordingly. Does that make sense?
I finished making these last nights, and they were fantastic!
I ended up doing the rises in 1 day. I made the dough super early in the morning, let it rise for 2 hours, then put it in the fridge for approximately 8 hours. Shaped them, then they were ready to fry by 8:30 pm. Our donuts were done on one side before the 2 minutes Michelle suggests. Husband had 3 that night. This morning, he ate 2 more (donuts taht I didn’t fill) that we had left sitting out overnight, he said they were a little bit more dense, but still delicious!
Amazing recipe, very close to the originals 😋😋😋
Just made them today, I also made the dough in one day and to fasten the rise I just placed in the oven with the light on at 50 degrees just the same as I help my pizza dough rise, they were amazing thanks for the recipe!
Do you have nutrition information power doughnut?
*per
No, sorry! Have you checked Bread Ahead’s website? They might have nutrition info!
HI , Thank you for the wonderful recipe and details.. can we make these donuts in advance for a get together ?
Thank you
Unfortunately, they are best the day they’re made!
Hi I wanted to ask is it still necessary to use warm water when I know my instant yeast is working fine?
Also can please tell me the amount of instant yeast in grams?🥲🙌
Yes! The instant yeast still needs to be at a certain temperature to have its properties activated. I don’t recommend using grams for the instant yeast measure—it’s such a small amount that it’s actually more accurate to use teaspoons in this case!
I’m a huge fan of Bread Ahead doughnuts! I actually attended their doughnut class when I was in London and it was totally worth it. This recipe is exactly what I needed as it’s been tricky to find fresh yeast or store it, so having an instant yeast substitute is way more convenient. Thanks a bunch Michelle!
Made this last weekend and they were a huge hit! Brioche dough texture was on point and the custard was heavenly.
I do have a question in regards to a little hiccup I encountered – when I put the doughnuts into the deep fryer some of them would have 1 or 2 air bubbles which ballooned up causing the doughnuts to tilt undesirably. I wasn’t able to get a nice uniform ring around those ones and had to manually keep them submerged. Do you know why this could happen?
Hmmm, did all the donuts have air pockets, or just a couple? If all of them had it, it’s a sign that the gluten was underdeveloped and the dough needed a little bit more kneading…
Thanks for your reply and insight! I did a bit more research and read about how air bubbles will form if the gluten mesh isn’t fully developed.
I tried making this recipe again but halved it and actually tried using the beater attachment this time as someone else used it in their video. Also made sure the dough was kneaded longer. This batch turned out better as there were less air bubbles but some of the doughnuts still get a bit lopsided when being deep fried so they lose the ring on one edge! Good progress though 🙂
I made these and they were delicious! The only problem is that only some of the doughnuts turned out round shaped, the others looked misshapen. The dough didn’t seem taut enough to form perfectly round dough shapes. Any suggestions?
For some reason “I follow the receipe” dough it’s way too runny and too sticky, i didnt even add butter yeat …won’t even form a ball..
I used 00 flour
Any advice ?
00 flour is less absorbent than bread flour, meaning less water is required when using 00 flour. You can’t easily substitute one for the other without changing the amount of water.
Hello,
Thank you for the recipe, I wanted to know if it’s ok to leave the dough in the fridge longer like two days.
Thanks
Yep, 2 days should be okay!