
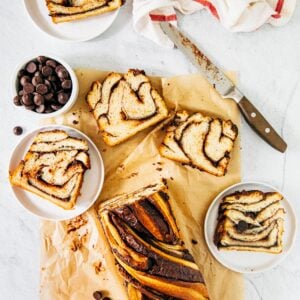
What is babka? Also known as krantz cake or yeast cake, babka is an Ashkenazi Jewish cake made with yeast-risen dough that is then filled with chocolate, cinnamon, or marzipan; the dough is then twisted around in a braid or wreath, and, when immediately after done baking, drenched with a generous simple syrup glaze. Here’s how to make it at home—jump to the recipe.

What is Babka?
When I was living in New York, I made it my mission to taste every sweet, dessert, and specialty treat the city had to offer. Every weekend, I would take the subway to reach a far-off bakery offering something for me to try. My mission knew no bounds—I sampled classics like Junior’s cheesecake, Dominique Ansel’s Cronuts, and Levain Bakery’s chocolate chip cookies (though apparently the blueberry muffins are where it’s at), as well as newer desserts like Black Tap’s Made-for-Instagram milkshakes (Remember those? How very 2017, right?), DO’s raw cookie dough scoops, and Mister Dips’ soft serve magic shell creations.
One of my favorites, however, was a babka from a very famous bakery near Union Square. I’d never heard of babka before moving to the city, but as I researched places for my “Great Desserts of New York City Tour”, this babka came up over and over again as something not to miss. Indeed, when I finally shelled out for a loaf, I was instantly obsessed. Babka, it turns out, is what I like to think of as a cross between cake, morning buns, and cinnamon swirl bread. A brioche dough is rolled with toppings and fillings like cinnamon and chocolate, then braided to bake into its signature swirled and twisted appearance. But that’s not all! The resulting bread is then soaked in a generous amount of simply syrup, leaving it glazed, moist, and delicious.


Babka Origin
Although it’s unclear where exactly babka originated from (it appears to have originated from Eastern European Jewish communities), today’s most prominent babka maker is Uri Scheft, owner of Lehamim Bakery in Tel Aviv, Israel. Uri is credited for popularizing babka in New York in 2013, mostly thanks to the use of Nutella in his chocolate babka loaves.
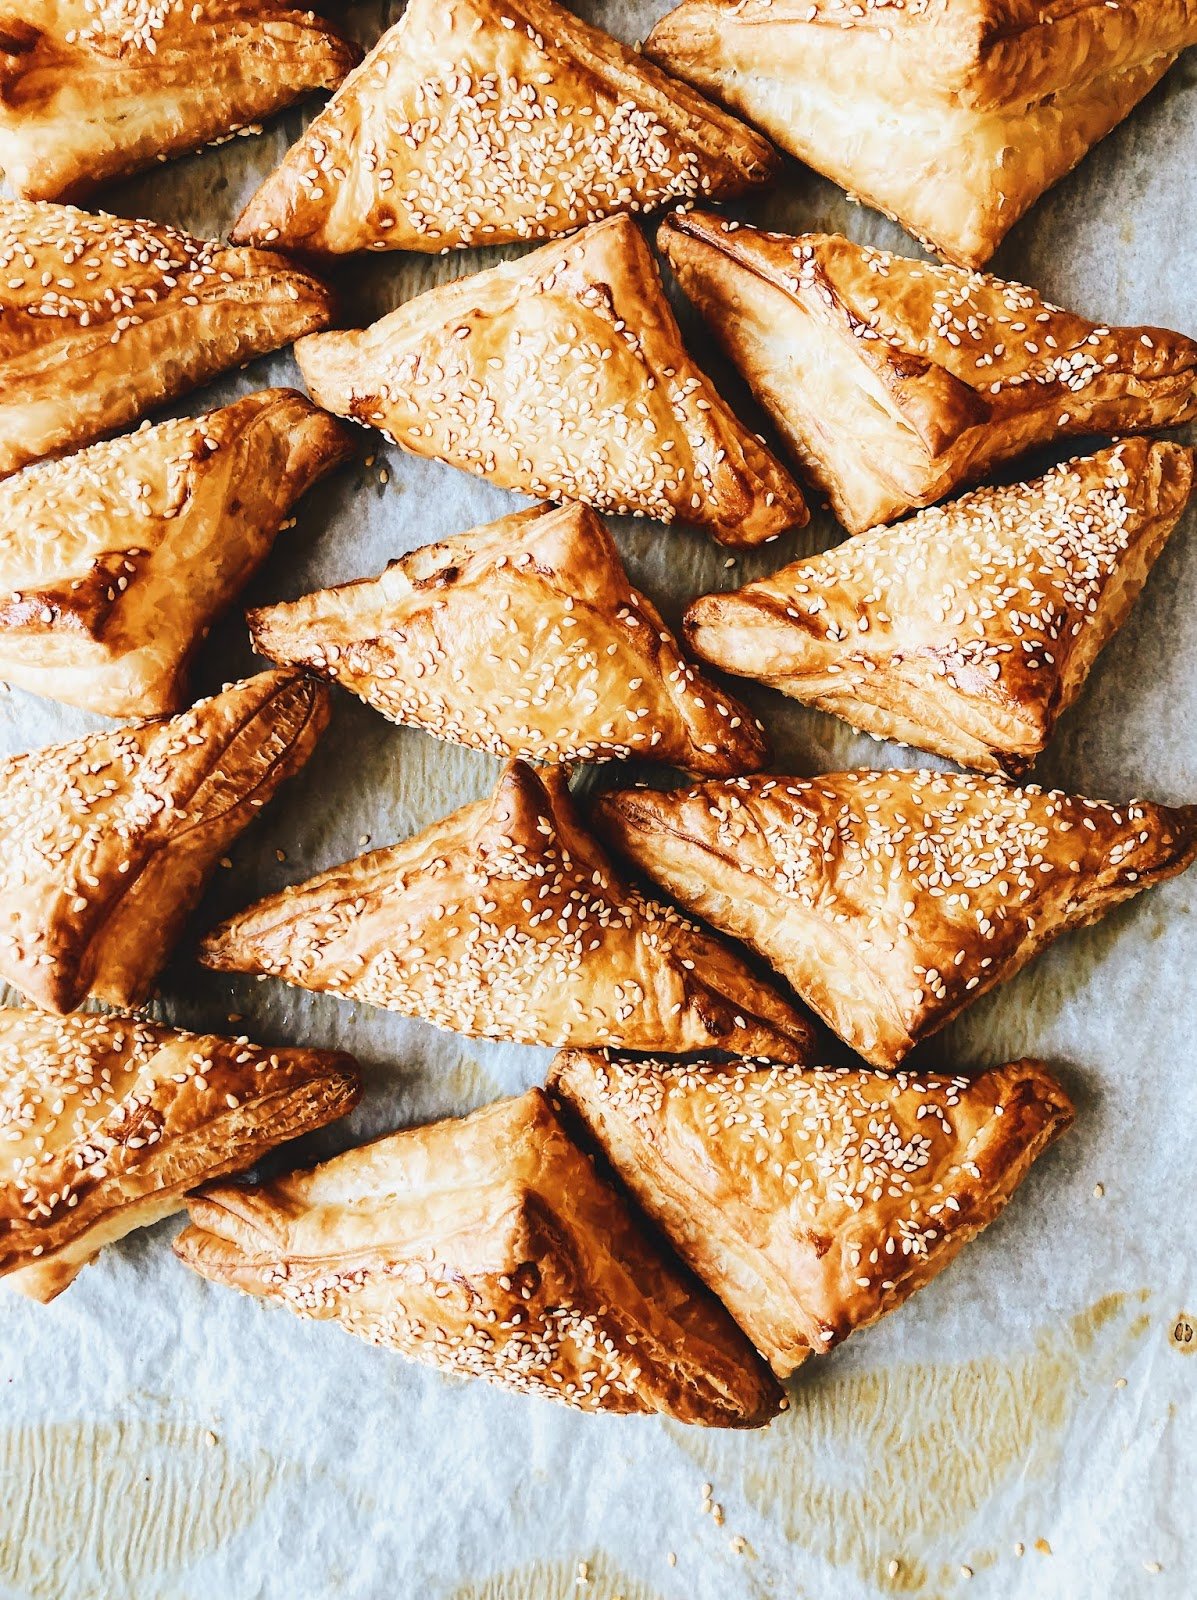
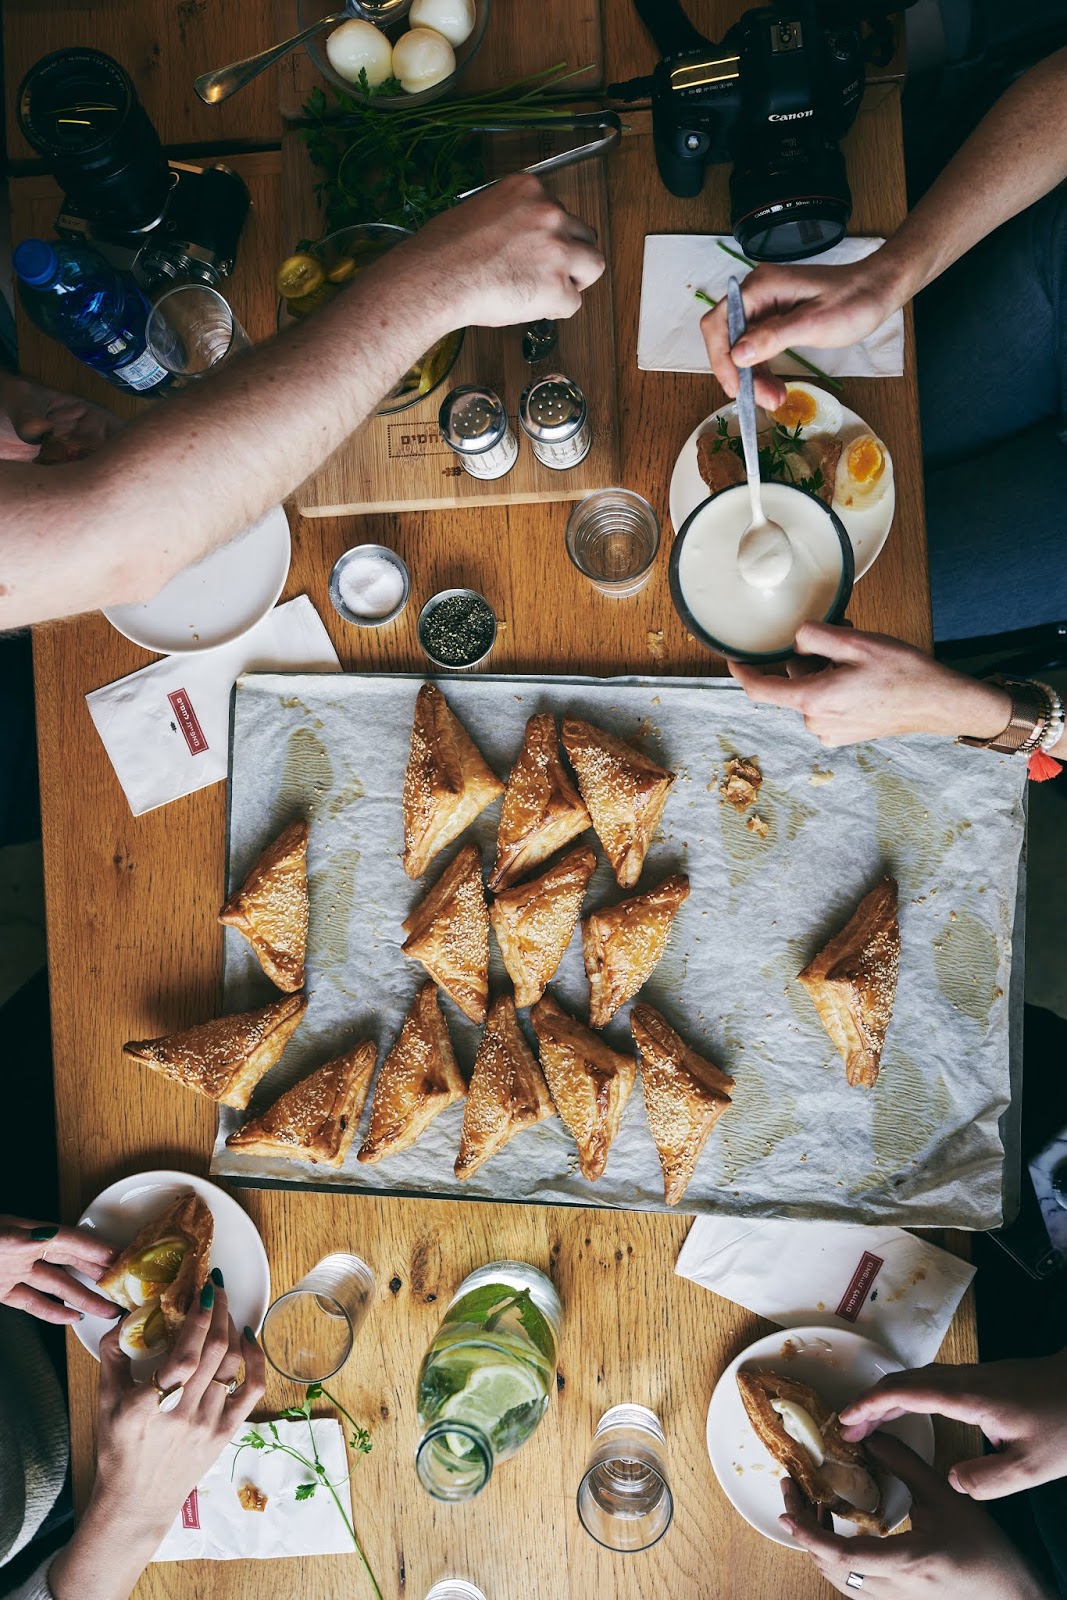
When I was in Israel back in May, we were lucky to meet Uri and take a bread making workshop with him. We started the workshop with a wonderful meal of bourekas, flaky puff pastries that you fill yourself with eggs, pickles, tomato sauce, tahini, and more:


Afterwards, we all donned some sexy looking hair nets, did a quick tour of the bakery, and then headed to the workshop where Uri taught us how to make a variety of different breads:


It was really cool to watch Uri work. He taught us how to braid challah in crazy ways (challah is typically braided with a simple three strand braid, but you can really go crazy and make loaves from as many as six different strands!), showed us how to shape the braids around bowls (that you then later fill with dipping sauces for the challah), and different ways to slice and shape rolled babka dough.
Although we took many wonderful workshops during my trip (specifically, check out our other workshop with the super talented Alon Shabo, who taught us how to make this beautiful pistachio cream tart!), I learned the most during Uri’s workshop since I am not the world’s most confident bread baker. But Uri was just SO wonderful. He really encouraged us to experiment and not worry too much about any mishaps. Check out the babka recipe below from his book, Breaking Breads, as well as some of my tips on how to make chocolate babka!
A big thank you to Vibe Israel; although I wasn’t given compensation for this post, Vibe Israel organized our entire pastry-focused trip to Israel, including airfare, transport, accommodation, workshops, and tours. The photos at Lehamim Bakery were taken by our talented group photographer, Amir Menahem.

Best Chocolate Babka Recipe Tips
-
- Uri actually has two babka dough recipes in Breaking Breads; there’s the “Advanced Babka Dough”, which uses a laminated pastry technique and results in a babka more similar to what they sell in the bakery, and this one, the “Basic Babka Dough” that is more friendly towards home bakers. Although his recipe skips the lamination technique, I did a simple lamination that I learned from my friend Izy at Top With Cinnamon. Instead of working with chilled butter, you simply brush the rolled out dough with melted butter (similar to how you would when making cinnamon rolls), and then fold it like a letter and roll it out again before proceeding. It adds a few more flakes to the bread without too much extra work—check out her blog post to learn more!
-
- This particular recipe makes two 9 x 5-inch babka loaves; alternatively, you can do what they do at the professional bakery and bake it in a longer, 13 x 4-inch pullman loaf pan (this is the one I have). Baking them in the 9 x 5-inch pans will result in shorter squat loaves, whereas using the pullman pan will result in a super tall loaf like you see in my pictures. But there’s a lot of flexibility here too—if you only have one 9 x 5-inch pan, you can easily halve the recipe and just make one 9 x 5-inch babka. If you do so, you may need to scrape down the bottom and sides of the bowl more frequently since it will take more work to mix the dough with a lesser quantity of ingredients.
-
- Because the ingredients are converted from weight, some of the volume measurements are going to be a bit odd—in particular, this recipe calls for 2 cups minus 1 tablespoon of cake flour. You’ll measure out the cake flour into a bowl, then scoop out 1 tablespoon. It’s a lot easier to just use a digital scale to weigh out the ingredients.
- Plan ahead for this one! The dough is easiest to work with if it’s been chilled. I actually make the dough the night before rolling it out and braiding it into the babka. If you want to make it all in one day, you’ll need to let the dough rise at room temperature for 30 minutes, then chill for at least 1 hour before rolling it out and braiding it into the babka. If you need visual step-by-step photos on how to roll out, slice, and braid the challah, check out this chocolate and pumpkin babka post of mine from yesteryear—it has everything you need!
Get the Recipe: Nutella Babka Recipe
Ingredients
For the Basic Babka Dough
- ½ cup (4 ounces or 113 grams) whole milk, warmed to between 110℉ to 115℉
- ½ teaspoon pure vanilla extract
- 2 teaspoons active dry yeast
- 2 cups plus 3 tablespoons (9.85 ounces or 279 grams) all-purpose flour, plus more for dusting and kneading
- 2 cups minus 1 tablespoon (7.75 ounces or 220 grams) cake flour (see baker's notes)
- 2 large eggs, at room temperature
- ⅓ cup (2.35 ounces or 67 grams) granulated sugar
- a large pinch of kosher salt
- 6 tablespoons (3 ounces or 85 grams) unsalted butter, at room temperature and sliced into 1-inch cubes
For the Nutella Babka
- ¼ cup (2 ounces or 57 grams) unsalted butter, melted and cooled
- ¼ cup (1.75 ounces or 50 grams) granulated sugar
- 1 ½ cups (15 ounces or 425 grams) Nutella
- 1 cup (6 ounces or 170 grams) semisweet chocolate chips
For the Simple Syrup
- ½ cup (3.5 ounces or 99 grams) granulated sugar
- ½ cup (4 ounces or 113 grams) water
Equipment
- a 13 x 4-inch pullman pan (see baker's notes for substitutions)
Instructions
Day 1: Make the Dough
- Whisk together the milk and vanilla in the bowl of a stand mixer fitted with the dough hook. Sprinkle the yeast over the mixture and whisk. Set aside for 5 minutes, or until the mixture is foamy and bubbly and smells like yeast.
- Once the mixture is foamy, add the flours, eggs, sugar, and salt. Knead on the lowest speed for 1 to 2 minutes, until a shaggy dough forms. With the mixer on low speed, add the butter, one or two cubes at a time. Once all the butter is added, continue kneading on the mixer's lowest speed for 2 minutes, stopping the mixer to use a rubber spatula to scrape down the bottom and sides of the bowl as needed, and to pull the dough off the hook. If the dough is very dry, add more milk, 1 tablespoon at a time; if the dough looks wet, add more all-purpose flour, 1 tablespoon at a time, until the dough comes together. Increase the mixer speed to medium and knead until the dough is smooth and elastic, about 4 minutes.
- Lightly dust a counter with flour and scrape the dough out into its center. Lightly dust the top of the dough and the inside of the mixer bowl with flour. Grab the top portion of the dough and stretch it away from you, tearing the dough, then fold it on top of the middle of the dough. Give the dough a quarter turn and repeat the stretching, tearing, and folding. Continue to do this until you can stretch a small piece of dough very thinly without tearing, about 5 minutes.
- Once the dough can be stretched very thinly, use your hands to push and pull the dough against the work surface in a circular motion to form a ball with the dough. Place the ball back in the floured stand mixer bowl, cover the top with plastic wrap, and set aside to rise at room temperature for 30 minutes. After 30 minutes, transfer the bowl to the refrigerator and chill overnight.
Day 2: Assemble and Bake the Babka
- Prepare a 13 x 4-inch pullman pan or two 9 x 5-inch loaf pans by spraying the bottom and sides generously with cooking spray. Line with parchment paper, leaving a 2-inch overhang on the long sides. Spray the parchment, too.
- Turn the chilled babka dough out onto the center of a lightly floured counter. Use a rolling pin to roll the dough into a 9 by 24-inch rectangle. Use an offset spatula to brush the rectangle with the melted butter and sprinkle the granulated sugar over the butter. Starting from a short side of the rectangle, fold the dough into thirds like a rectangle (see this link for a visual). Roll the dough out once more—if using a 13 x 4-inch pullman pan, roll the dough into a 13 x 24-inch rectangle; if using two 9 x 5-inch loaf pans, roll the dough into a 9 x 24-inch rectangle.
- Spread the Nutella in an even layer over the dough, all the way to the edges. Sprinkle the chocolate chips in an even layer over the Nutella. Starting from a short side of the rectangle, roll the dough into a tight cylinder like you would if making cinnamon rolls.
- If using two 9 x 5-inch loaf pans, use a serrated knife to slice the cylinder in half crosswise. Use a serrated knife to slice the cylinder(s) in half lengthwise so that you have 2 (or 4, if making two 9 x 5-inch loaf pans) long pieces with chocolate layers exposed. Position the pieces so that the exposed layers are facing upwards and are parallel next to each other.
- Gently press together one end of each half, and then lift the right half over the left half. Repeat this process, but this time, lift the left half over the right to create a simple, two-pronged plait. Repeat this process until there is no longer any dough left to braid — I think I was only able to cross the dough around 3 times or so since it’s fairly thick but and short. Squeeze together the ends. If using two 9 x 5-inch loaf pans, you’ll need to do this braiding process twice and place each twist in its own pan.
- Place the braid(s) in the prepared pan(s) and cover the top of the pan(s) with plastic wrap. Set the loaf pans aside in a warm, draft-free spot until the dough is very sift and jiggly to the touch, 2 to 3 hours.
- Once the babka(s) are jiggly and risen, center a rack in the oven and preheat to 350℉. Bake for 40 minutes, or until an instant read thermometer inserted into the very center of the babka(s) reads 190℉. Check the babka(s) 25 minutes into the bake time—if the top of the babka(s) look like they're getting browned too quickly, tent them loosely with aluminum foil.
- While the babka(s) is in the oven, make the simple syrup. Combine the sugar and the water in a small saucepan and bring to a boil over high-heat, whisking to dissolve the sugar. Set the syrup on a wire rack to cool as the babka(s) finish baking.
- Once the babka(s) are done, place on a wire rack. Immediately use a pastry brush to brush the top of the babka(s) with the cooled syrup, waiting until the babka(s) absorb the syrup before using more syrup—it will seem like there's too much syrup, but the syrup will lock in the moisture of the cake so the babka(s) don't dry out. Allow the babka(s) to cool in their pans on the wire rack for 1 hour. Slice and serve while warm, or cool completely in the pans before unmolding and serving.
This post was last updated 9/2/2020.
get new recipes via email:

buy the book
Weeknight Baking:
Recipes to Fit your Schedule
Over the past several years of running Hummingbird High, I kept a crucial aspect of my life hidden from my readers: I had a full-time, extremely demanding job in the tech world. In my debut cookbook, Weeknight Baking, I finally reveal the secrets to baking delicious desserts on a tight schedule.
The melted butter and fold technique I have adopted from this recipe has made my babka great with visible layers….