

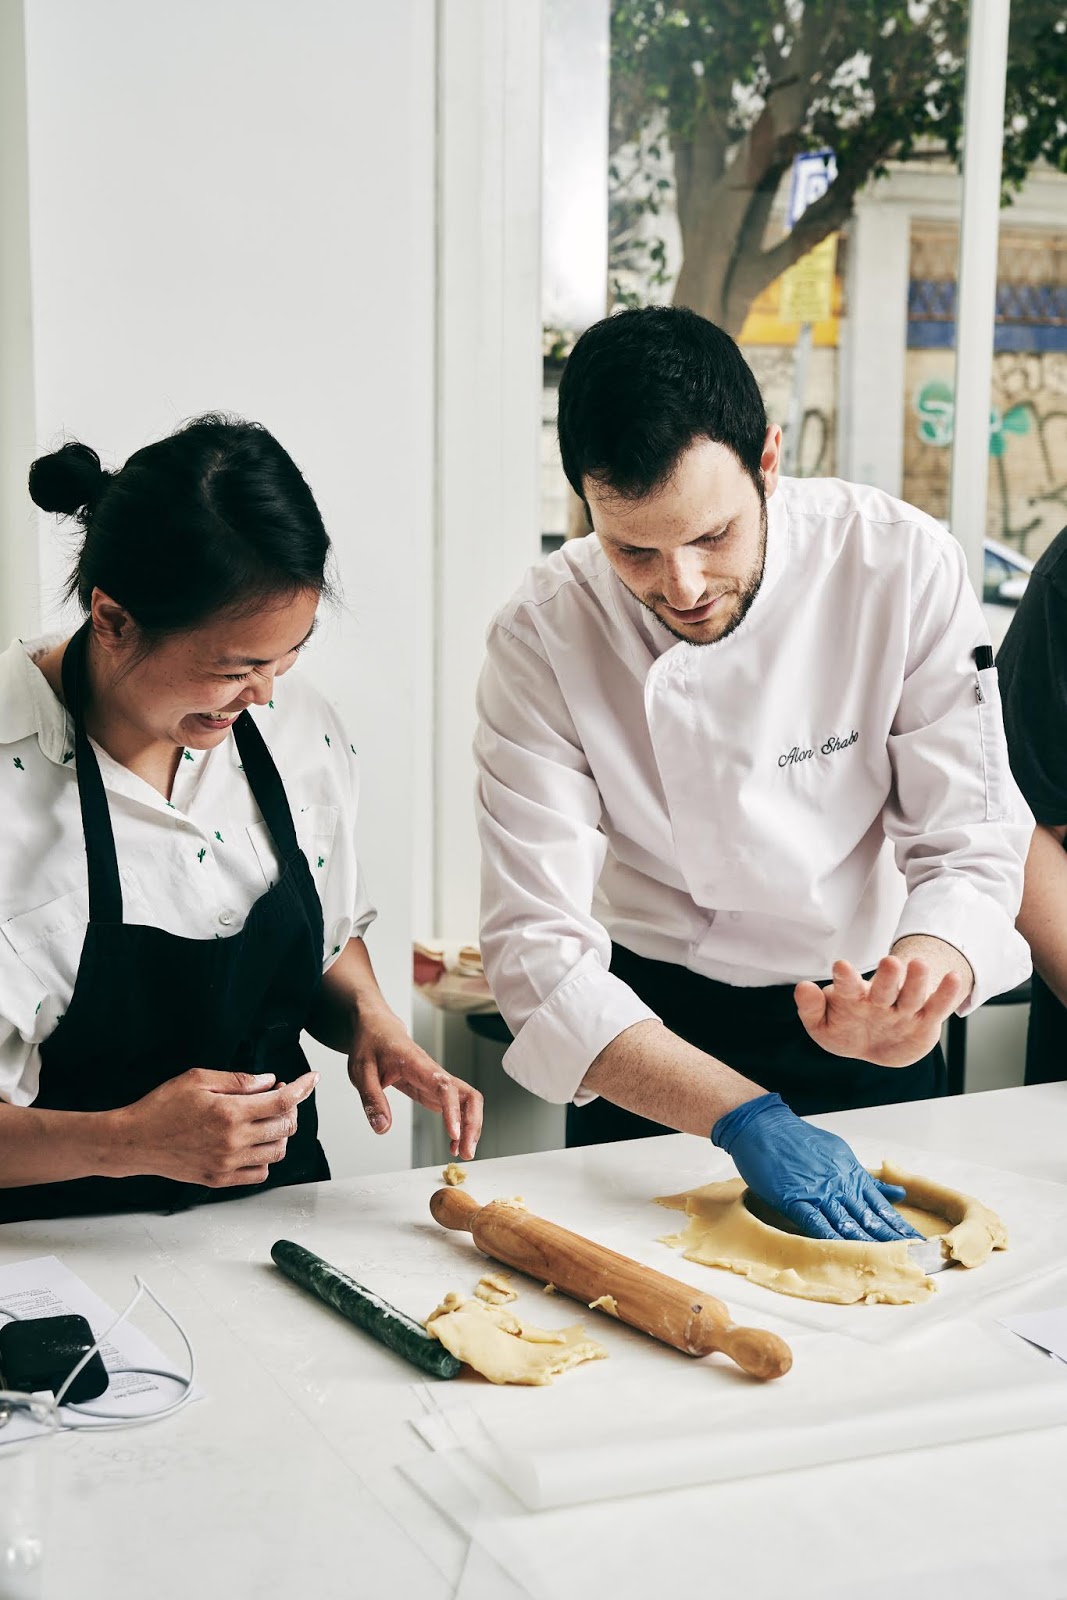
Although it’s been months since my trip to Israel and I still find myself inspired by everything I learned and ate in Tel Aviv and Jerusalem. And although I’ve already told you about the traditional Israeli sweets like babka, halva, and malabi, I wanted to spend some time today talking about modern Israeli desserts. One of my favorite workshops that we participated in was held by Alon Shabo, a star pastry chef in Tel Aviv and honestly, the world too. In his beautiful atelier, he showed us how to make desserts like the Paris-Brest and the pistachio cream tart recipe I’m sharing with you guys today. Traditionally, the recipes for these pastries originated from France. And while Alon stays true to the classic European methods of making such pastries, he infuses them with flavors that are traditionally more Middle Eastern like pistachios, sesame, and tahini.

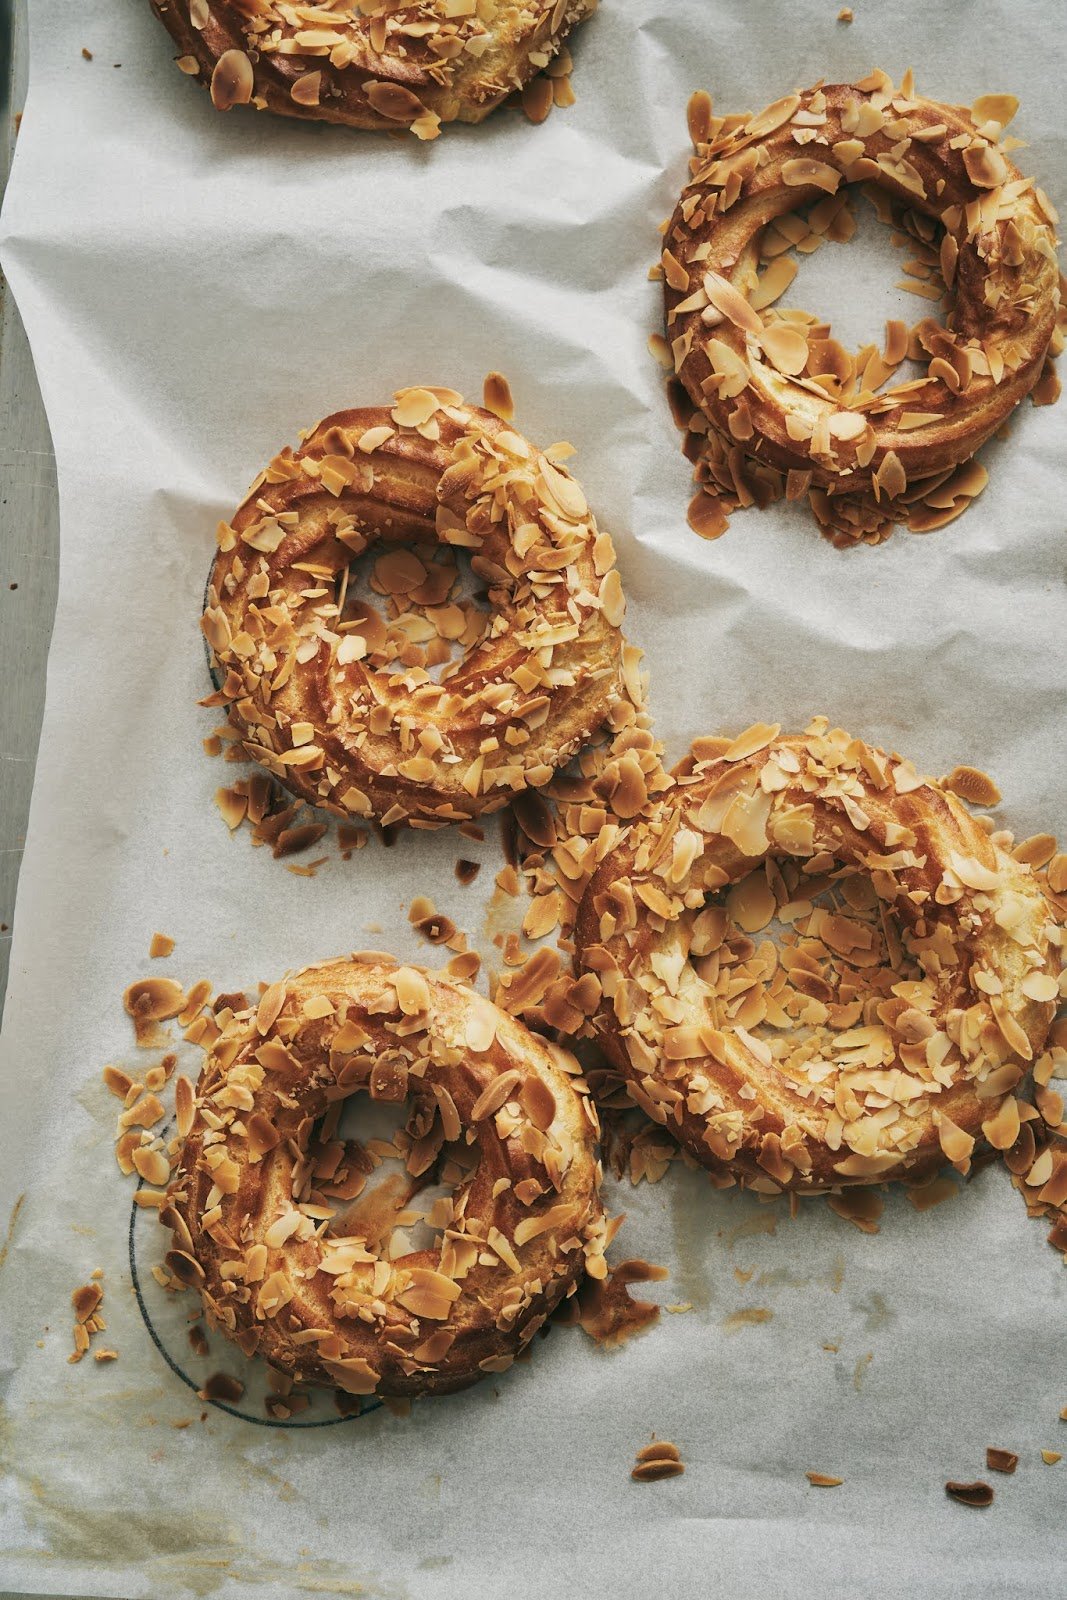
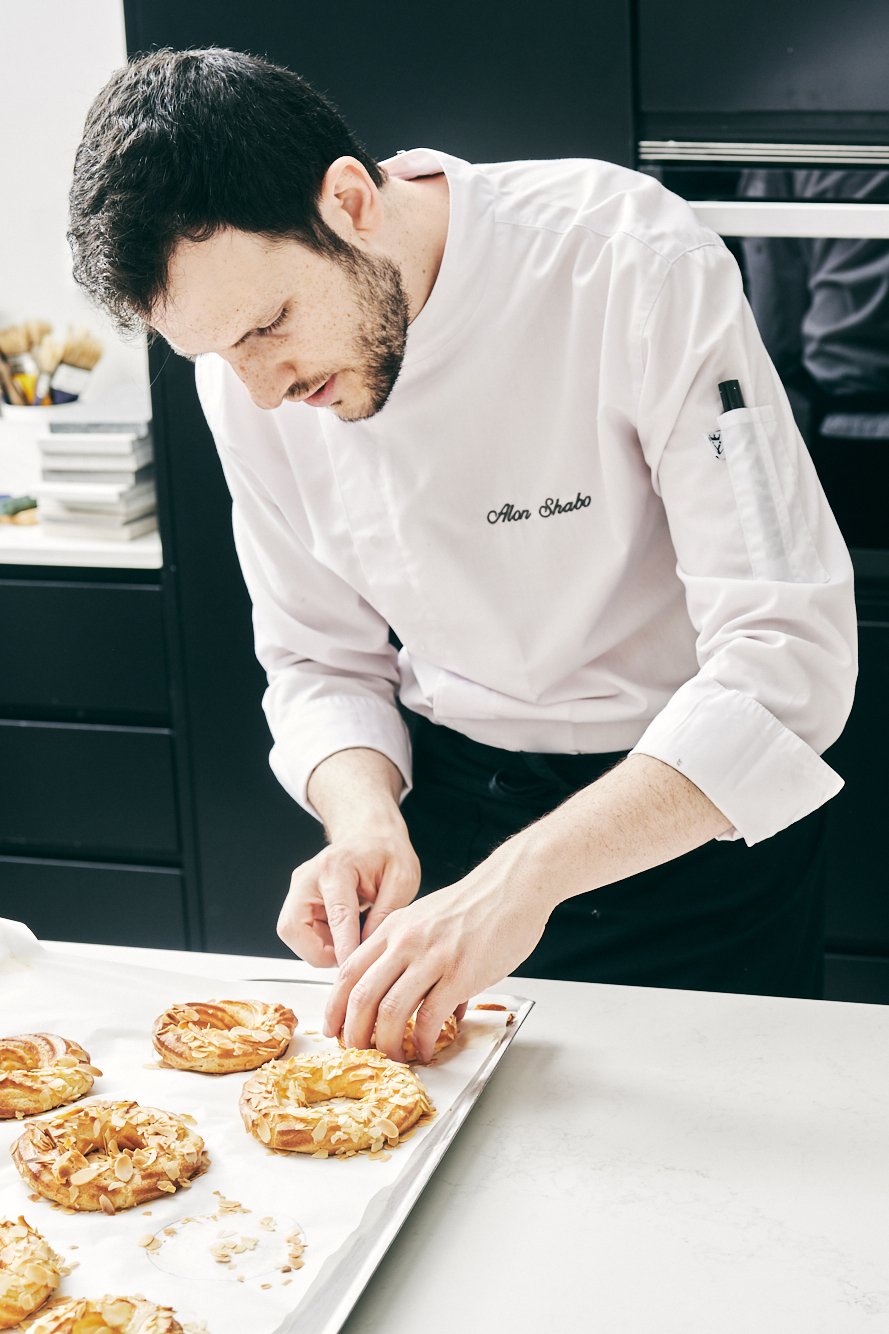
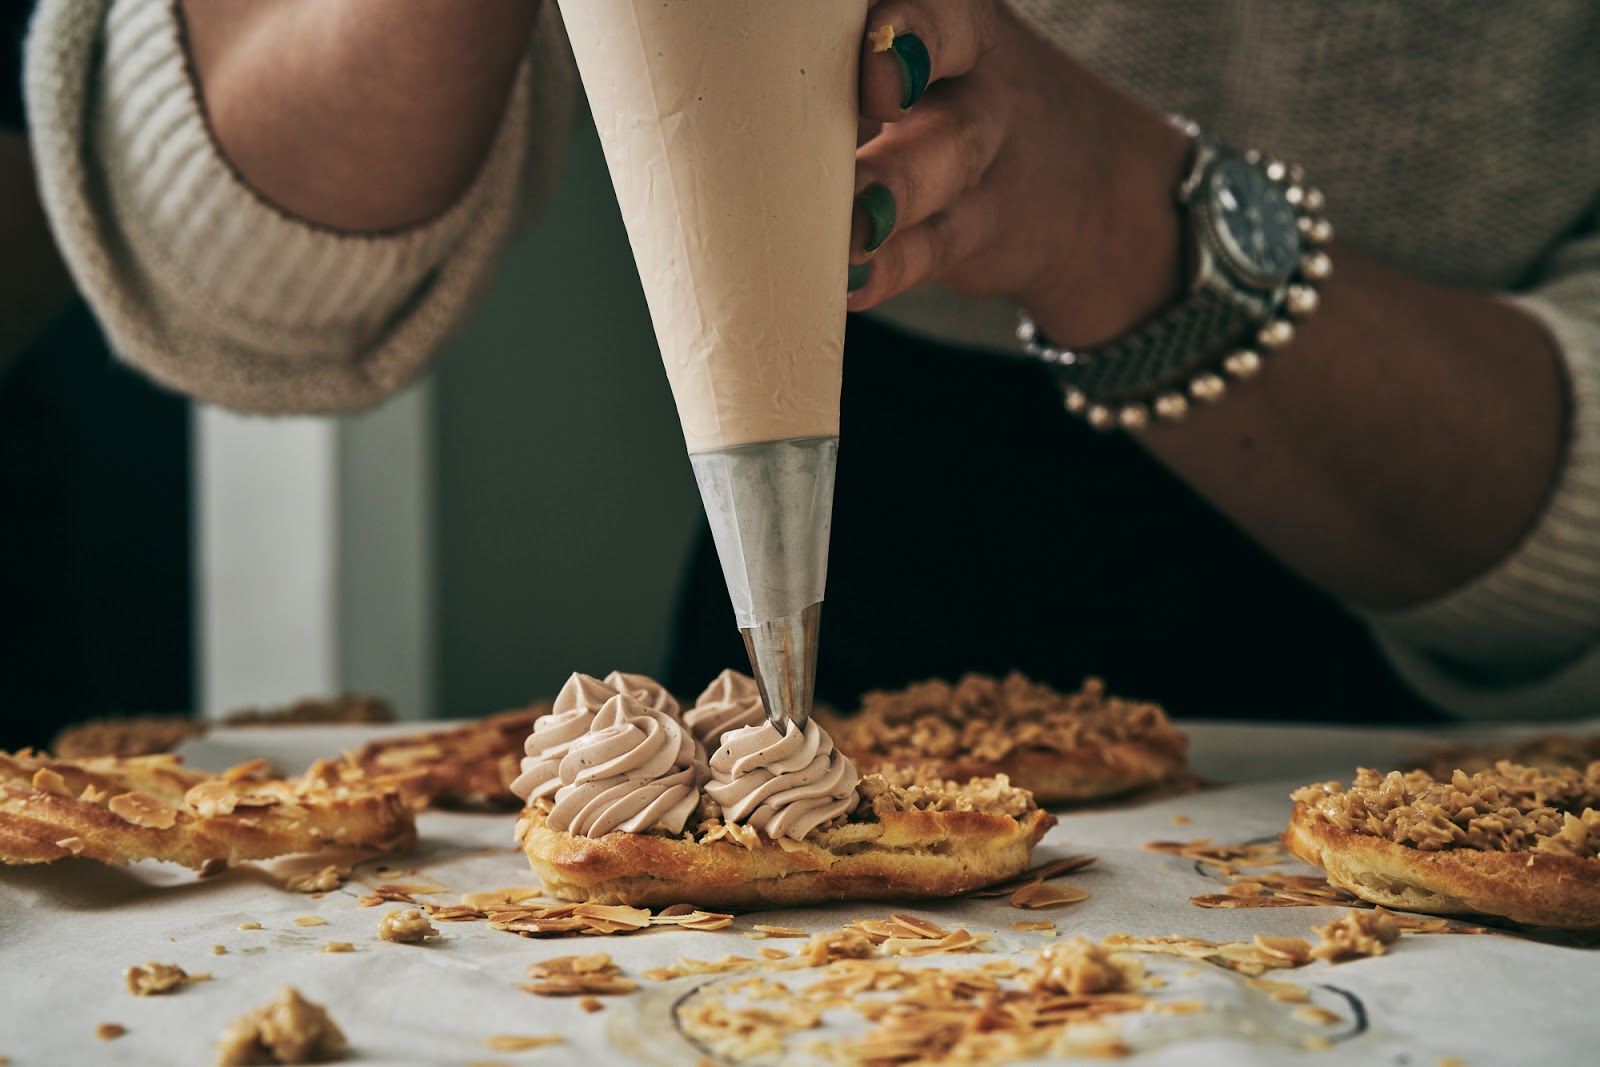
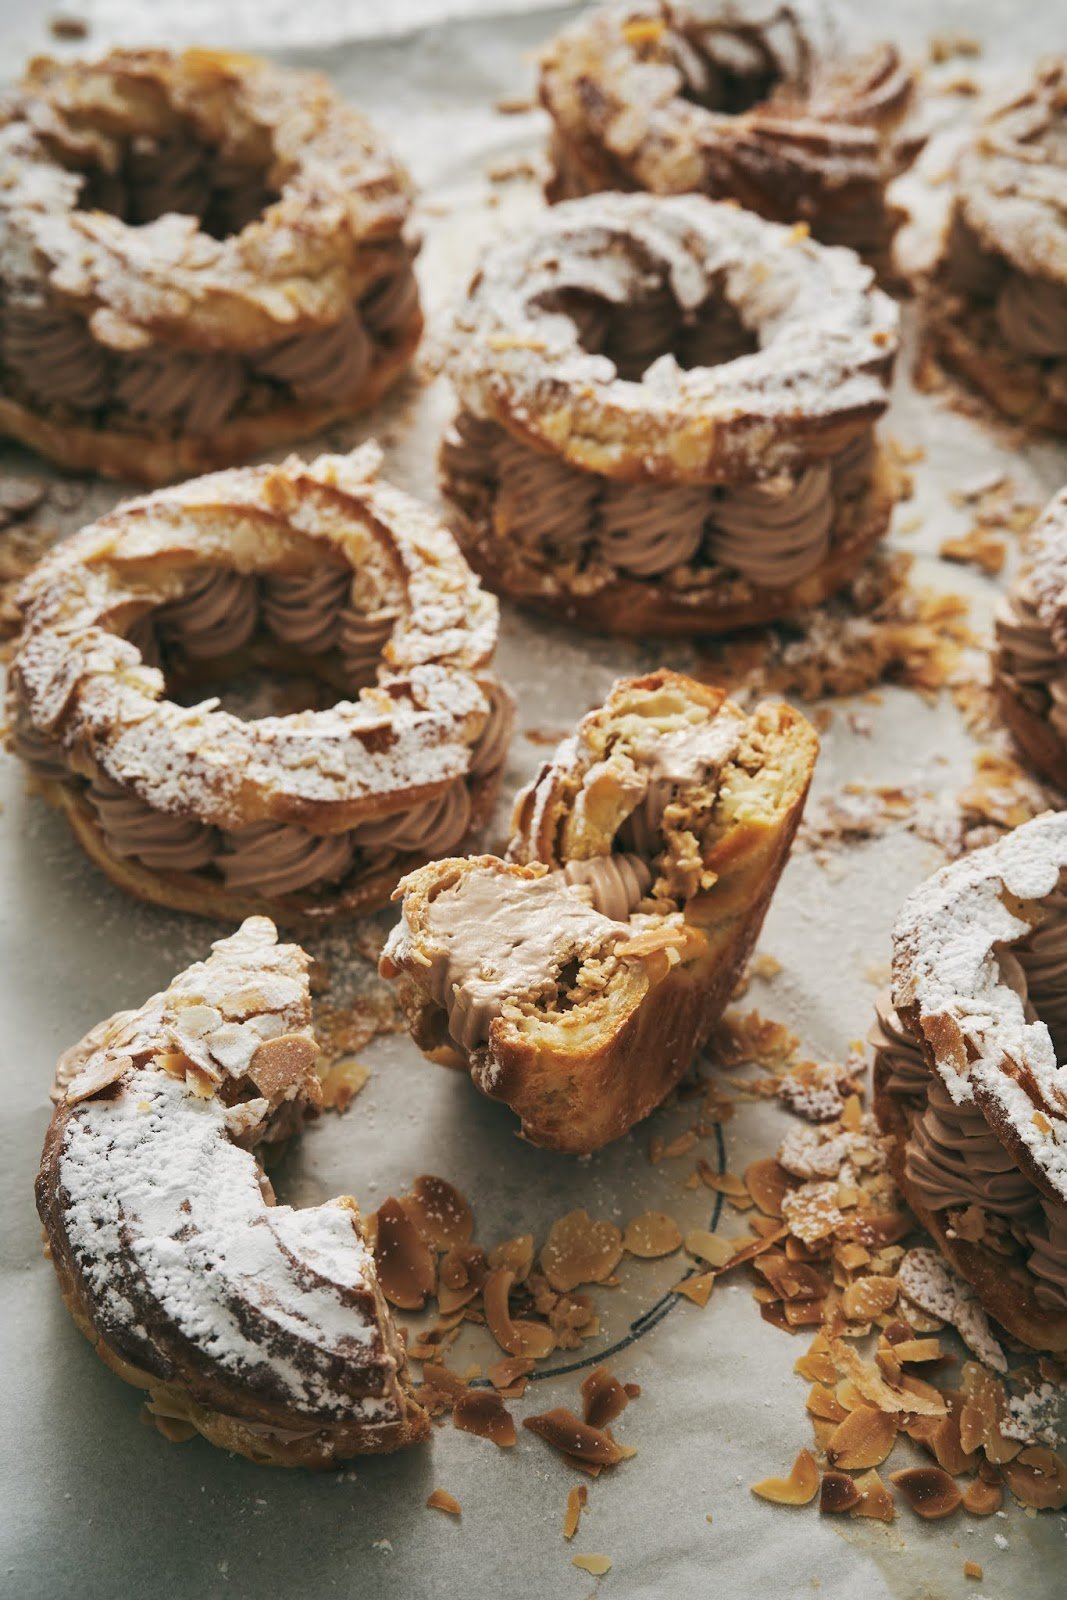
To wit—the Paris-Brest is a choux pastry ring traditionally filled with praline and cream. But at Alon’s studio, we filled them with a mix of tahini, white chocolate, feuilletine (the fancy pastry term for “crispy wafer crumbs”, lol) and a milk chocolate ganache cream. It was so tasty that I had to stop myself from eating the entire bucket with a spoon.
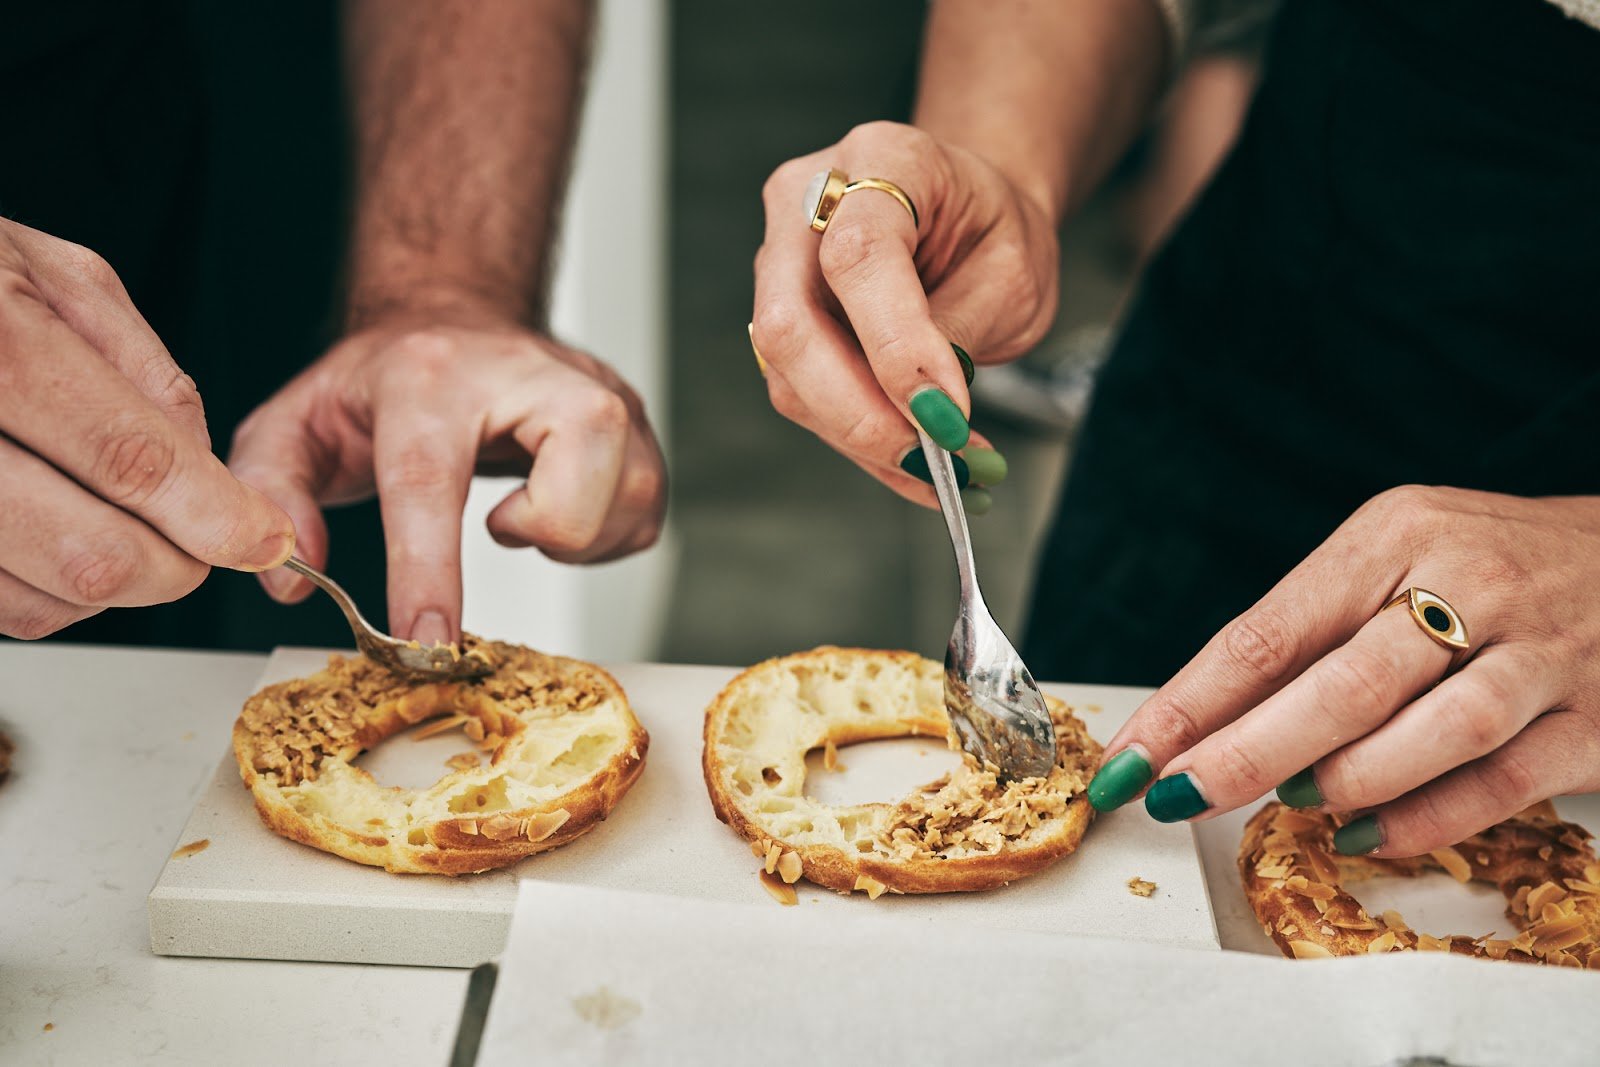
For our tarts, we first picked up the freshest, greenest pistachios I’ve ever seen from nearby Levinsky Market (which you may remember as the place where I went hog wild and bought pounds of halva) to use in a frangipane-like tart. Although frangipane is usually made with almonds, Alon’s recipe uses pistachios to take advantage of the fresh and local ingredients from the market. It was absolutely delicious:

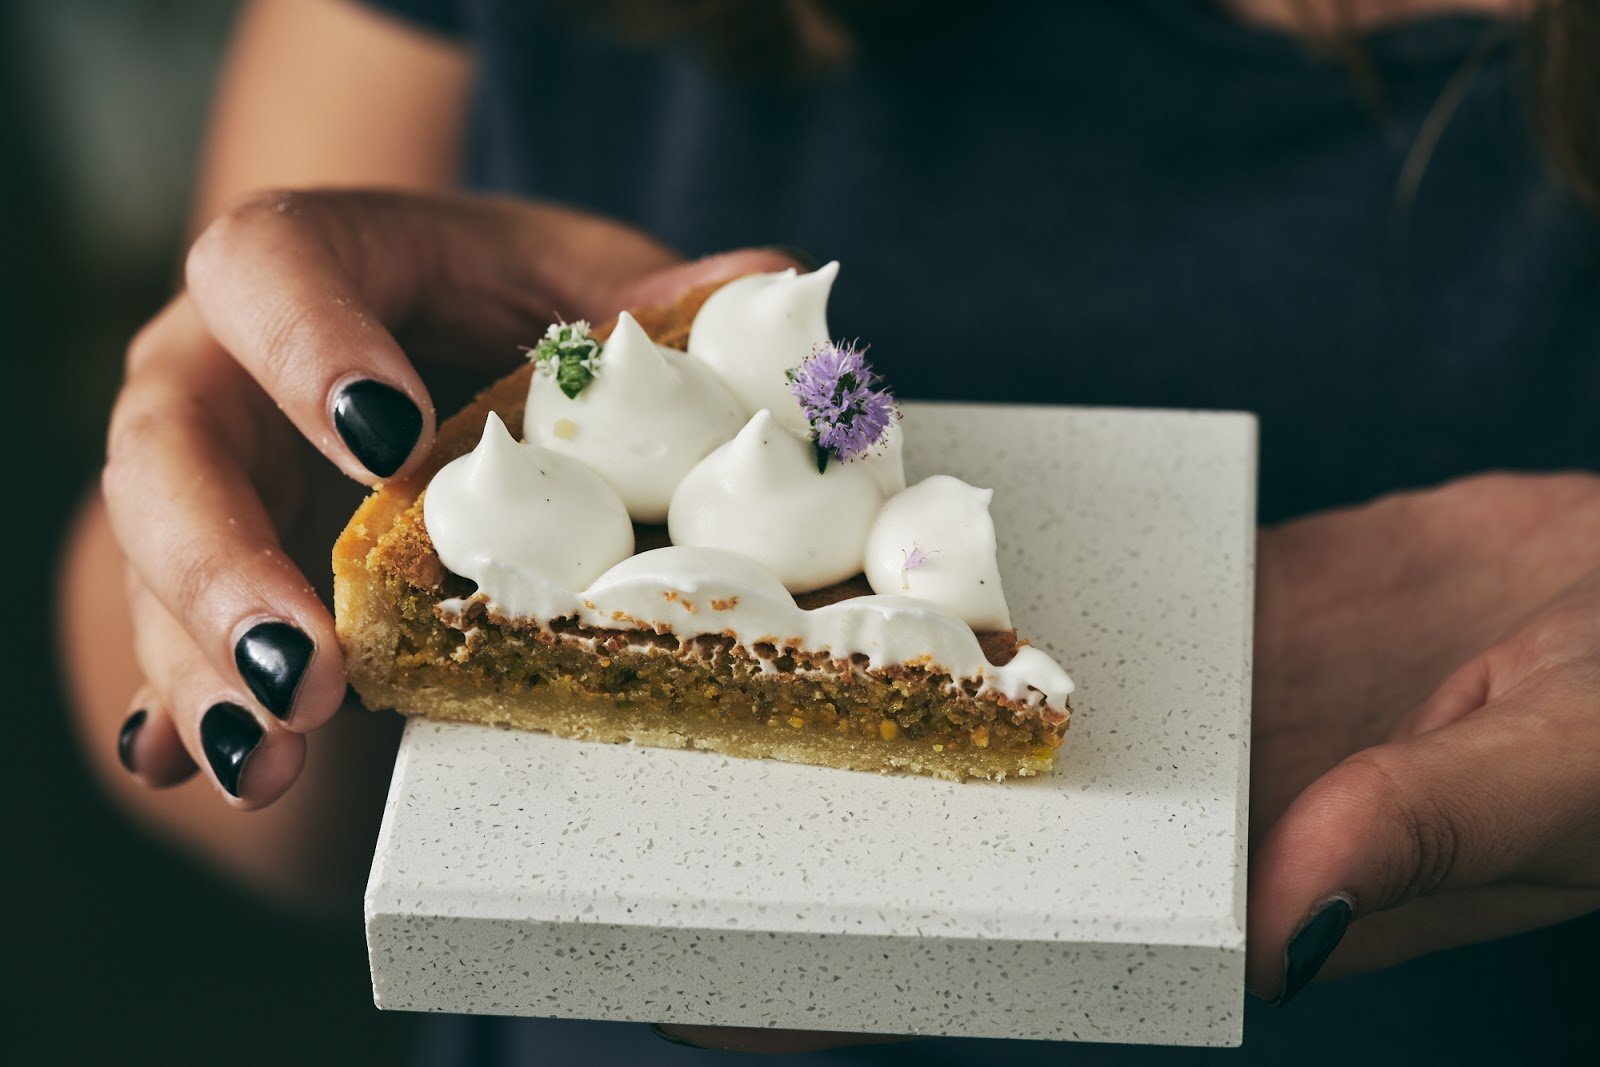
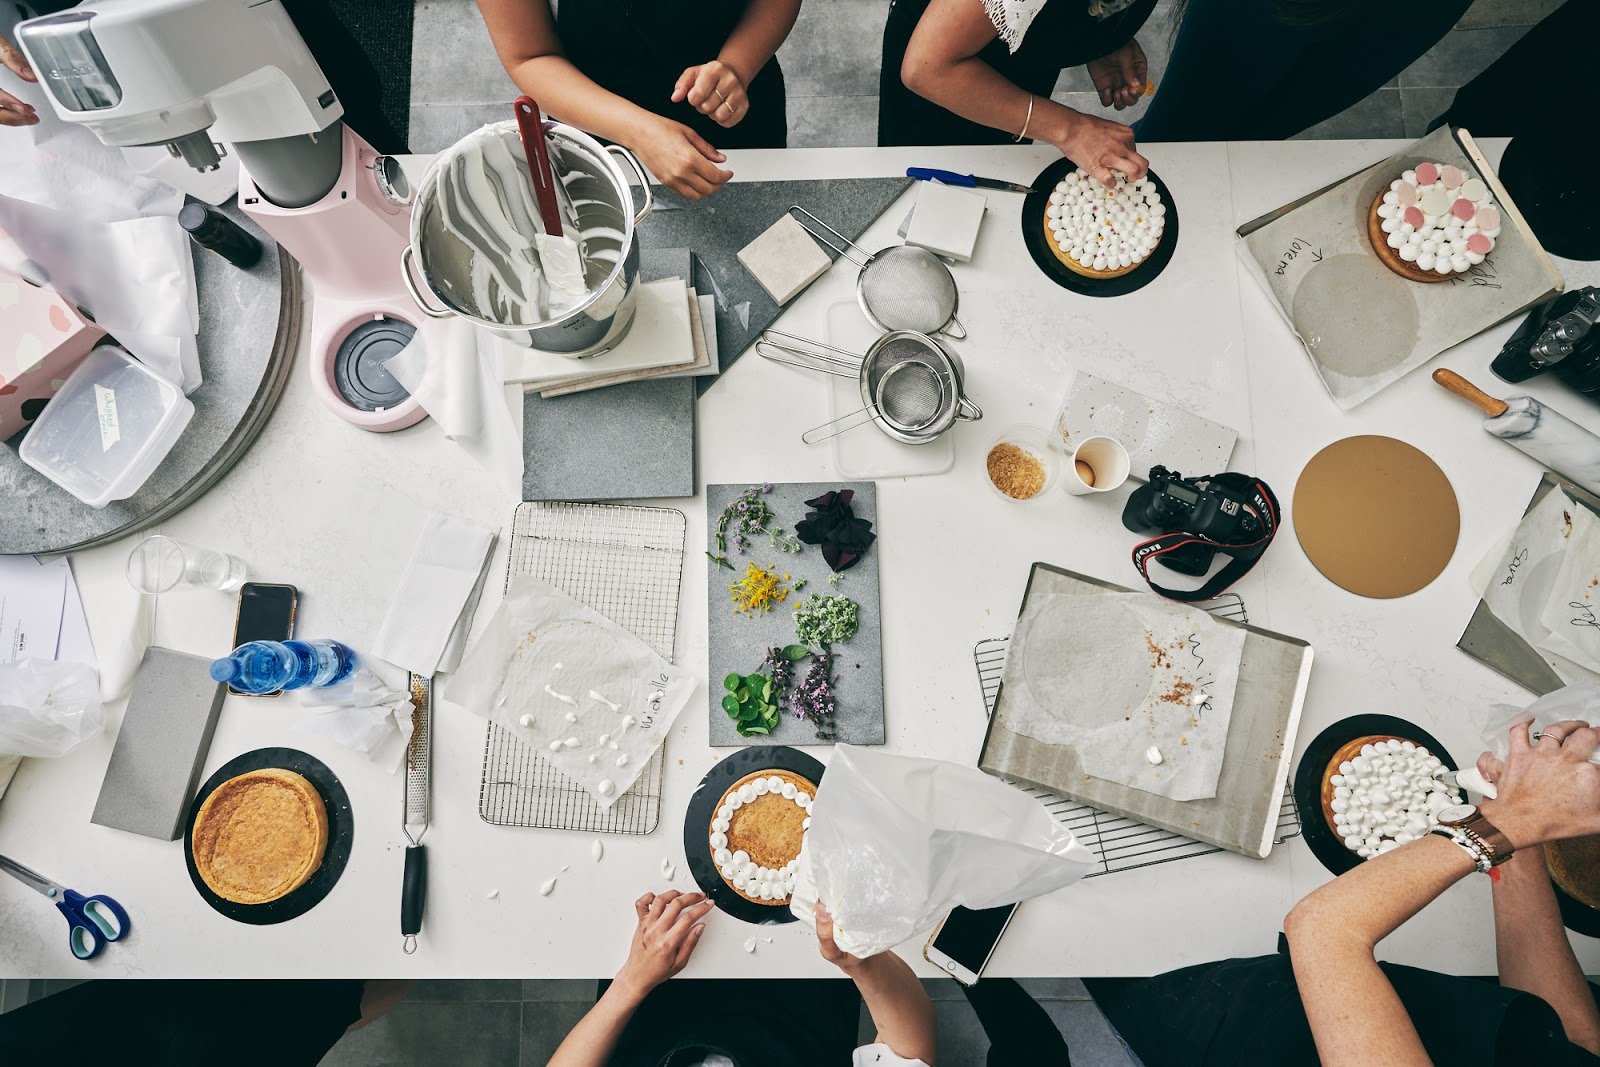
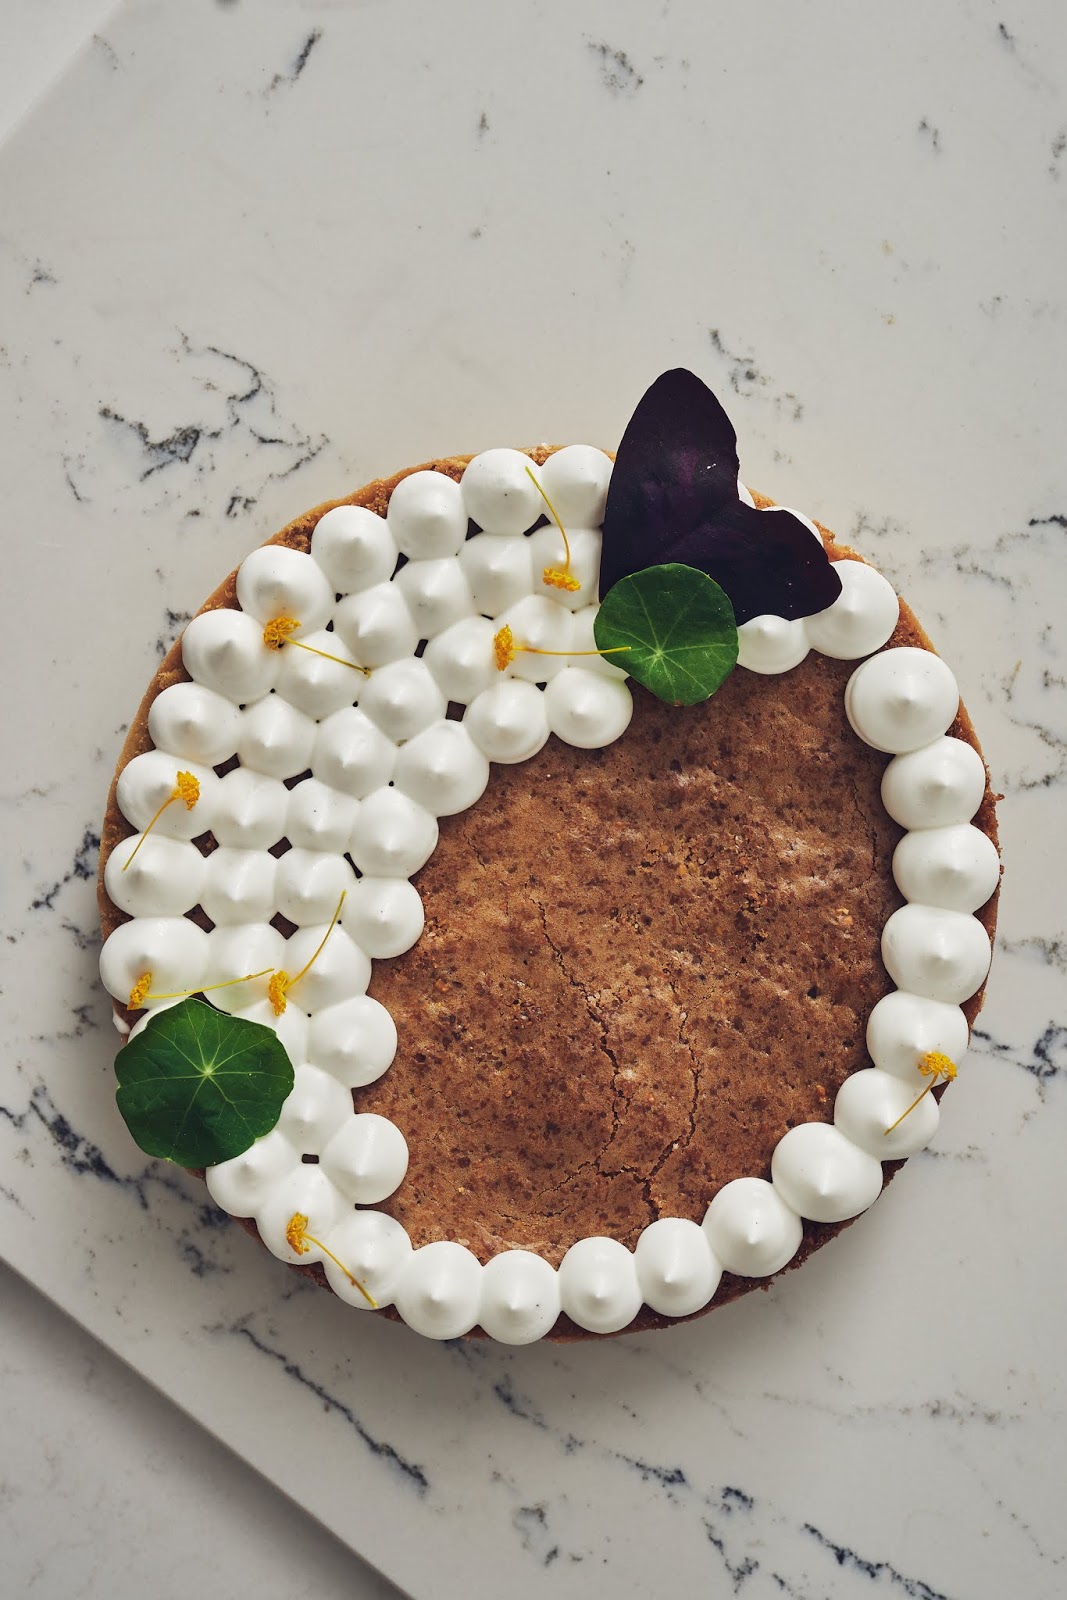
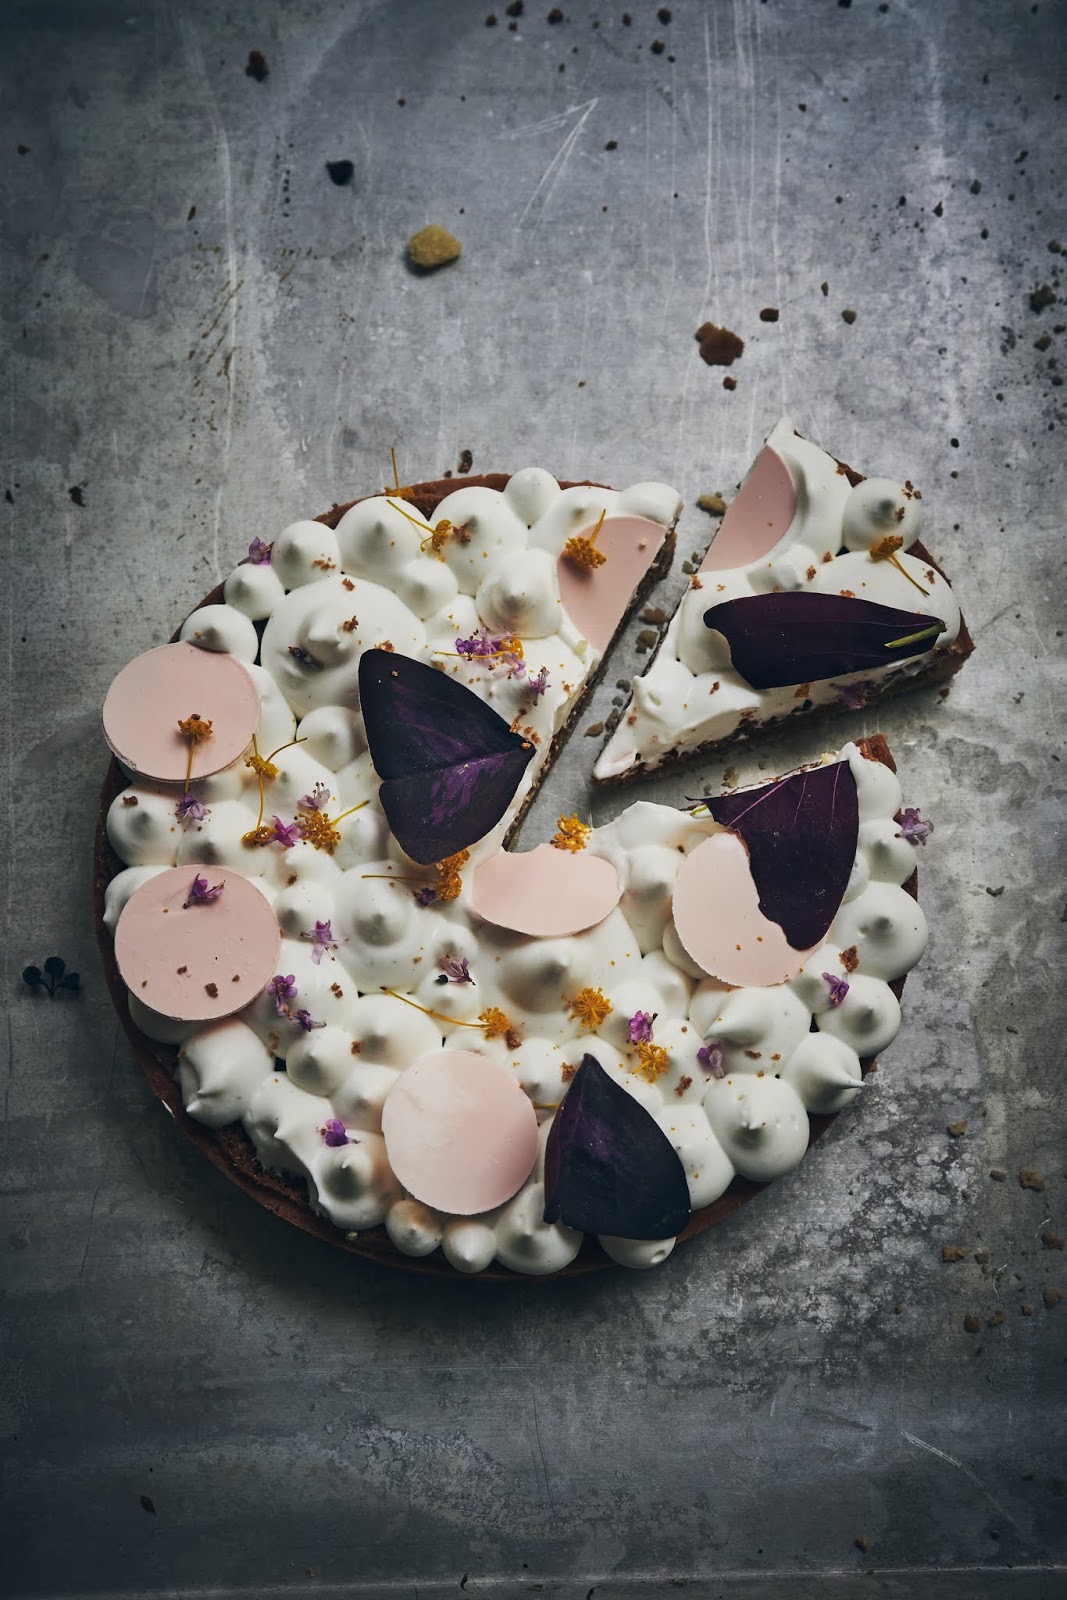
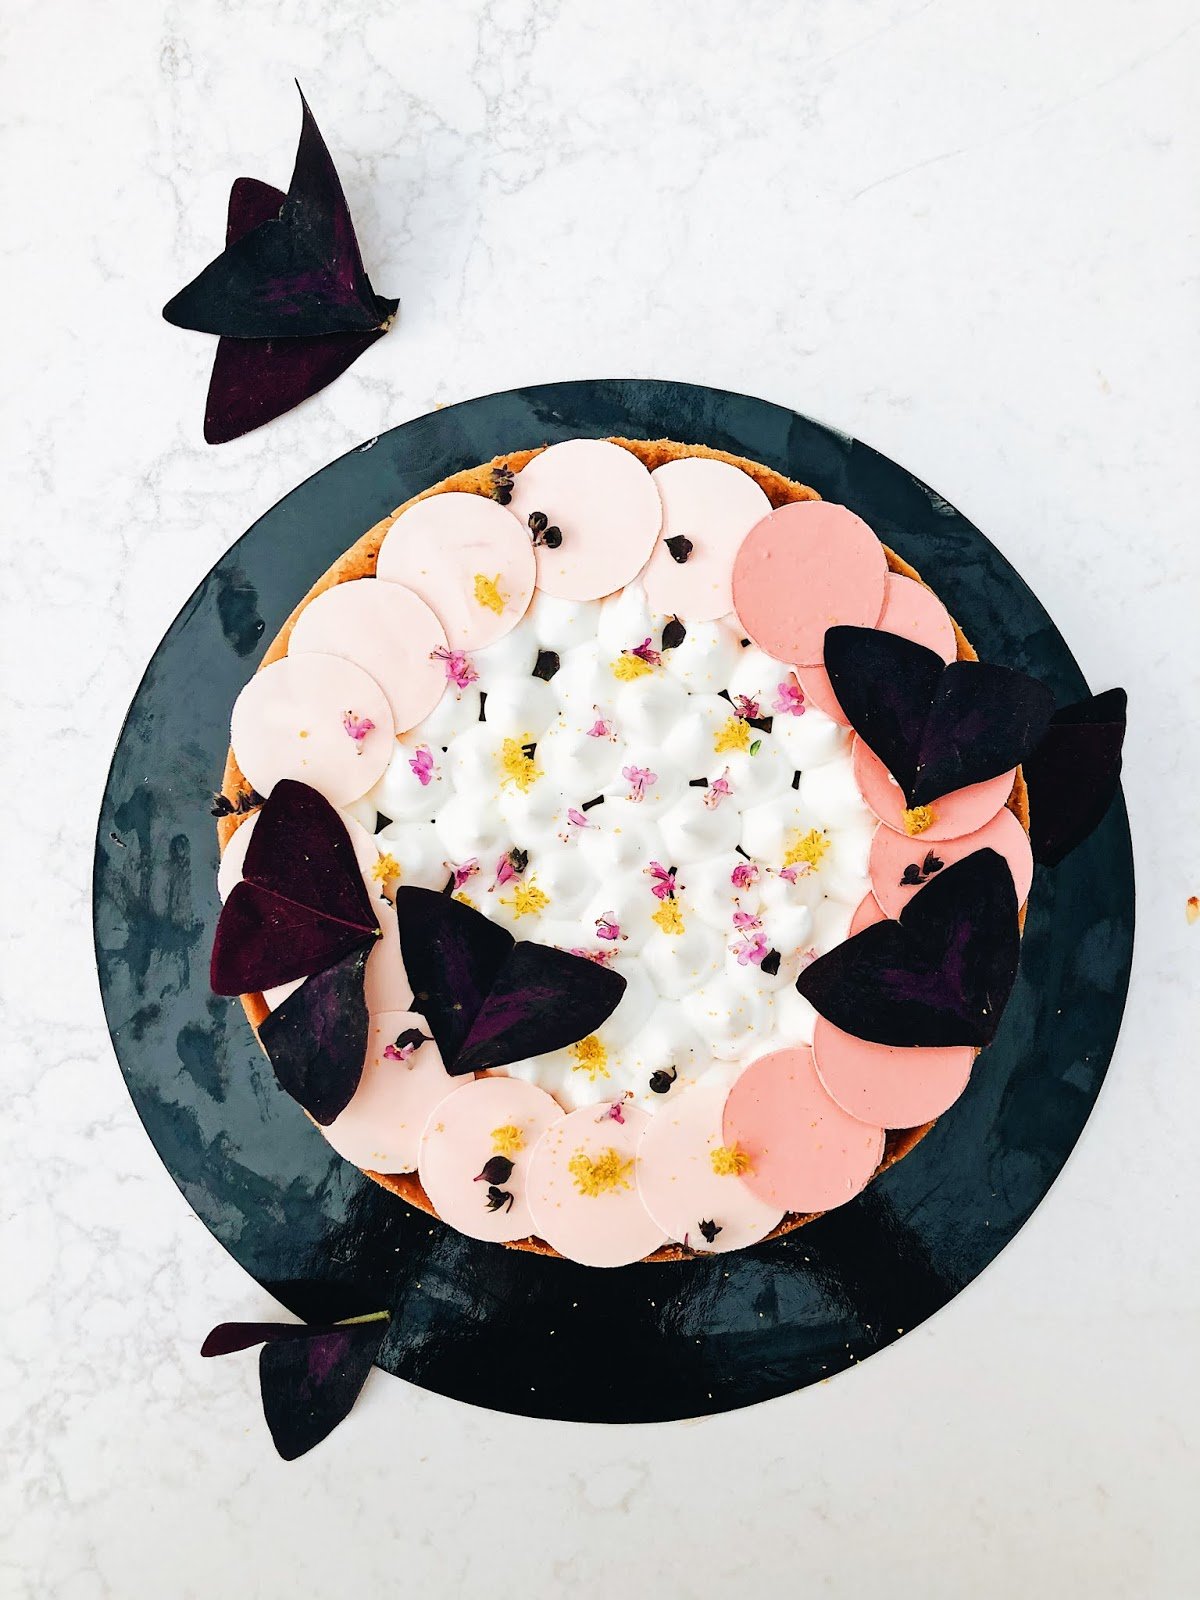
Making the tarts was my favorite part of the workshop—it was amazing to see all the different tart designs that our entire group came up with. Real talk: I wasn’t the best at piping the whipped cream, so I tried to cover up my shoddy piping with as many toppings as possible. Can you guess which one is mine? Oh, I’ll just tell you. The top one is Joy’s, the middle one is Sarah’s (I think), and the last one is mine (with the pink wafers in a border around the tart):
During the workshop, I learned a bunch of new tips and techniques. Specifically, it was my first time ever working with a pastry ring. I’d seen them before, while sitting at the chef’s counter at fancy restaurants and at the famed E. Dehillerin cookshop in Paris. But I’d always been intimidated and too scared to commit to buying one for use at home—life was easy with a fluted tart pan with a removable bottom, why shake it up?
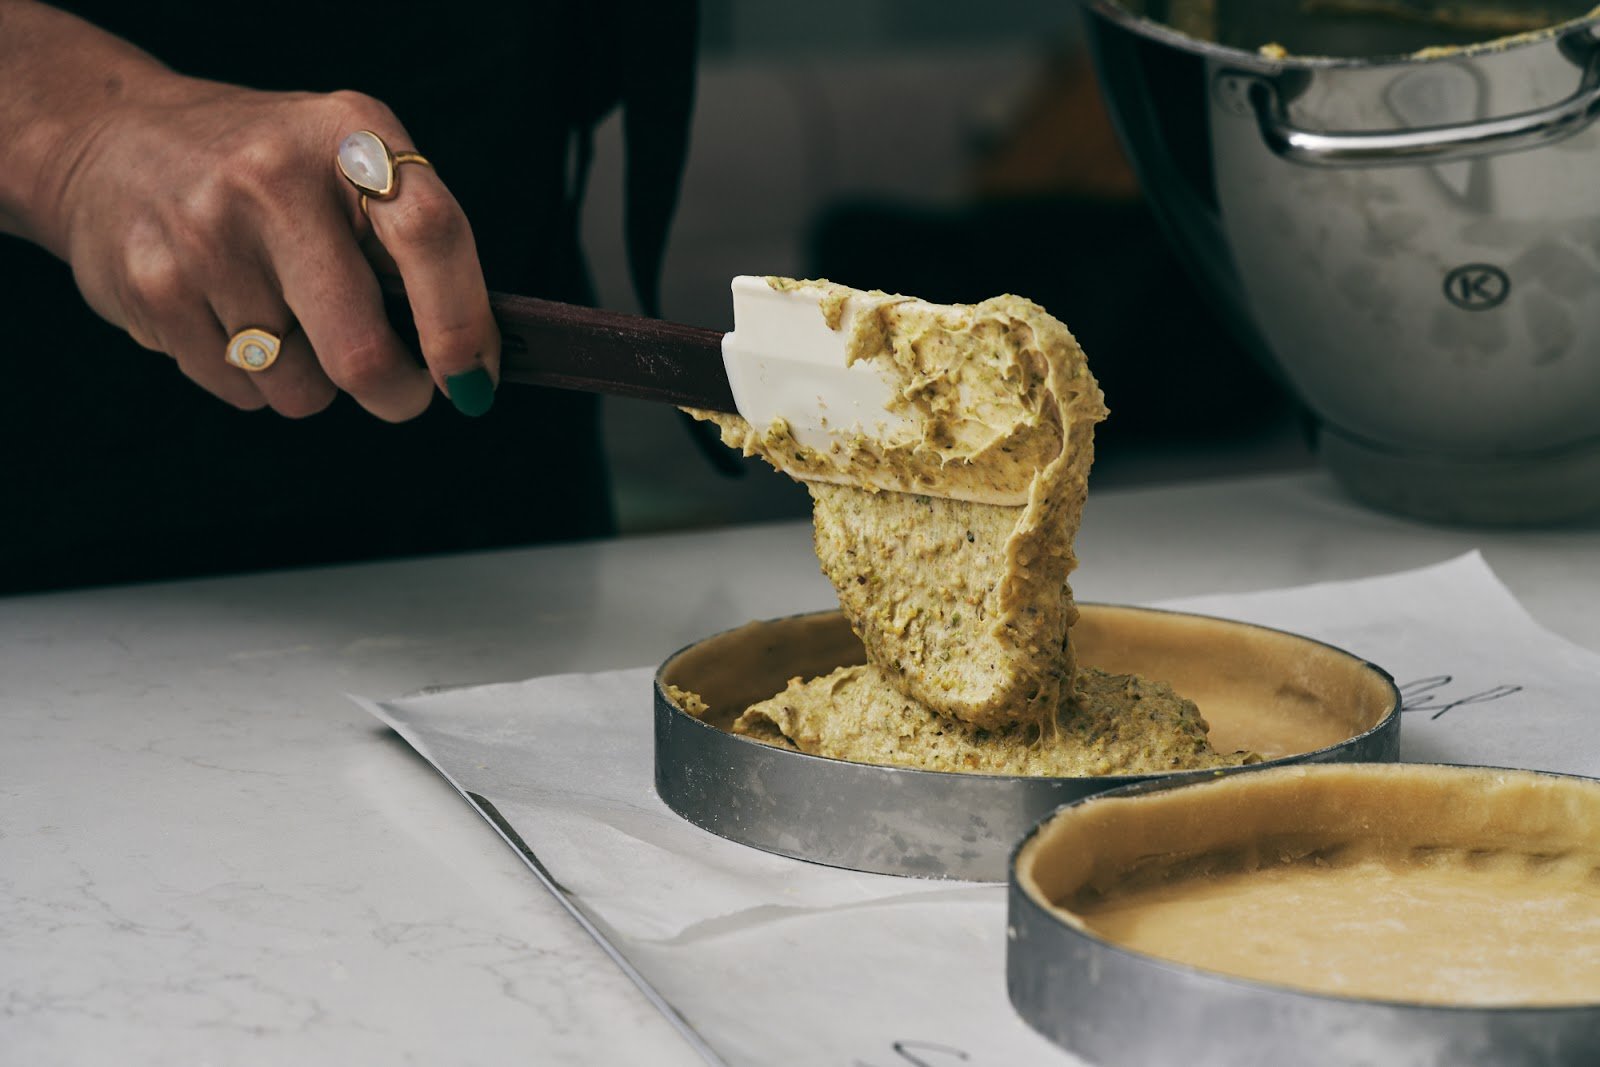
Alon, however, taught us that they were just as easy to use (and resulted in prettier and more professional-looking tarts too)! Start by generously buttering the inside of the tart ring. Place the prepared ring on a sheet pan lined with parchment paper. Next, generously flour your counter and roll the tart dough out to a thin—roughly 1/8-inches thick—sheet larger than the 8-inch tart ring. The thickness of the sheet is more important; its shape and size sheet doesn’t need to be precise. Use the rolling pin to transfer the slab of dough to the top of the tart ring, laying it over the ring similar to how you would lay pie dough over a pie plate:
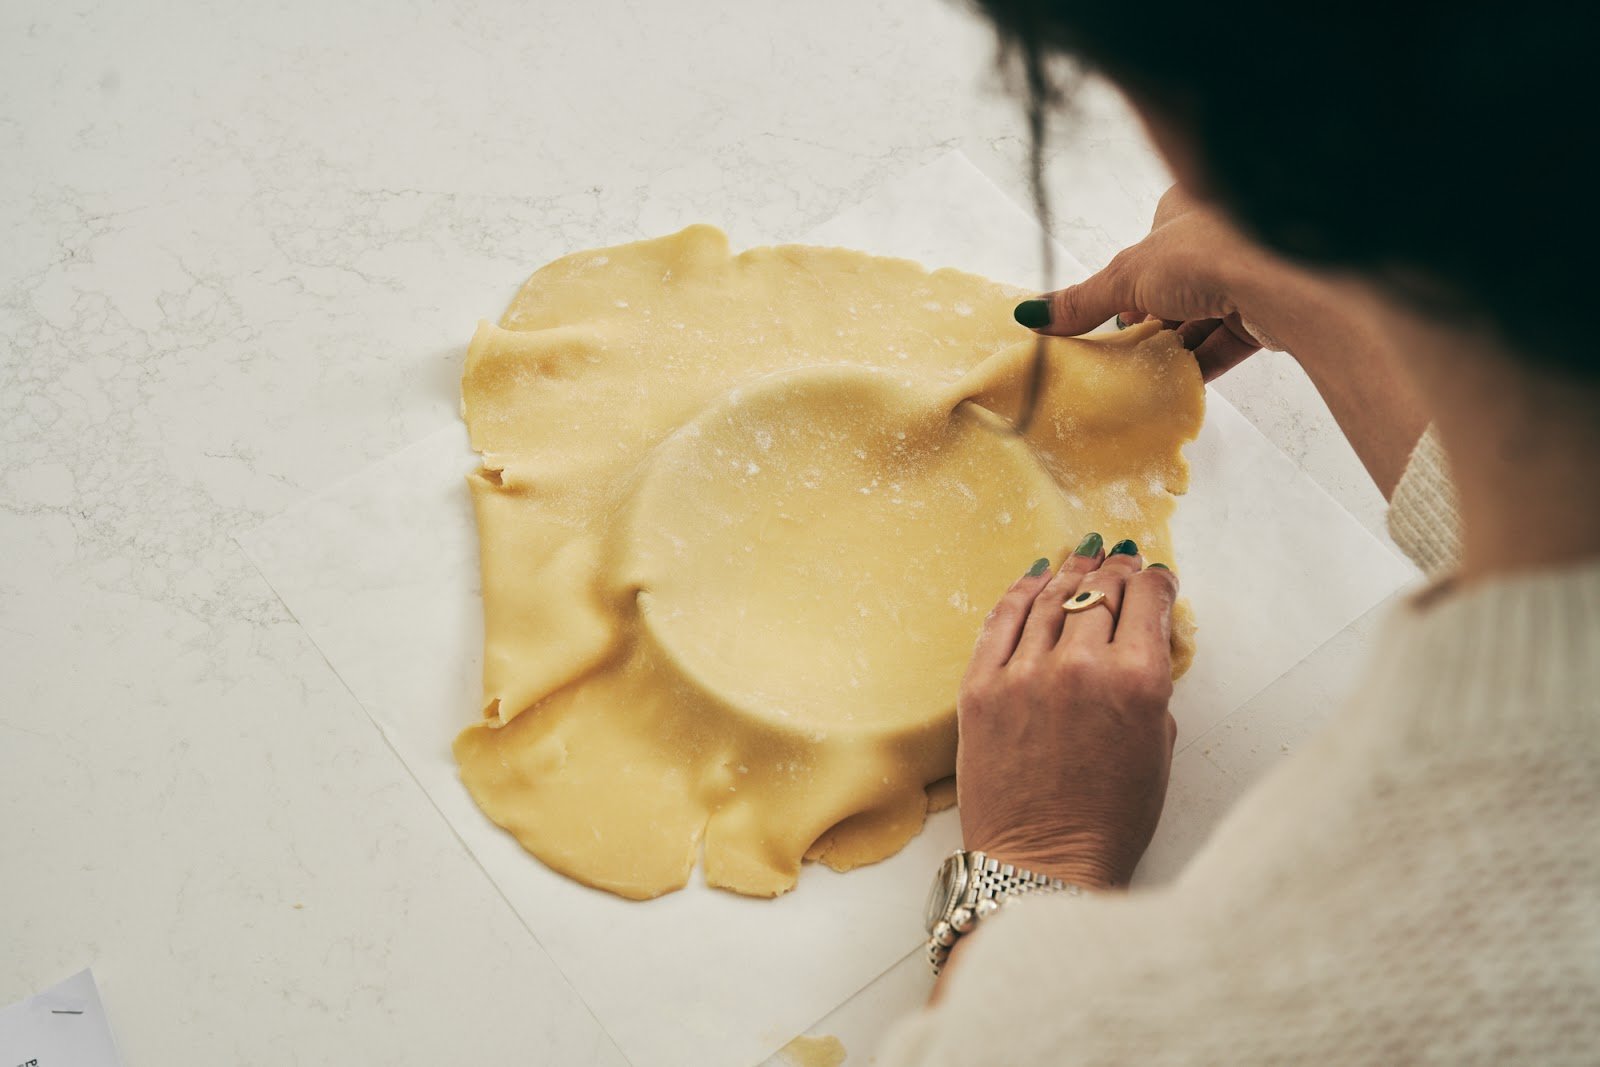
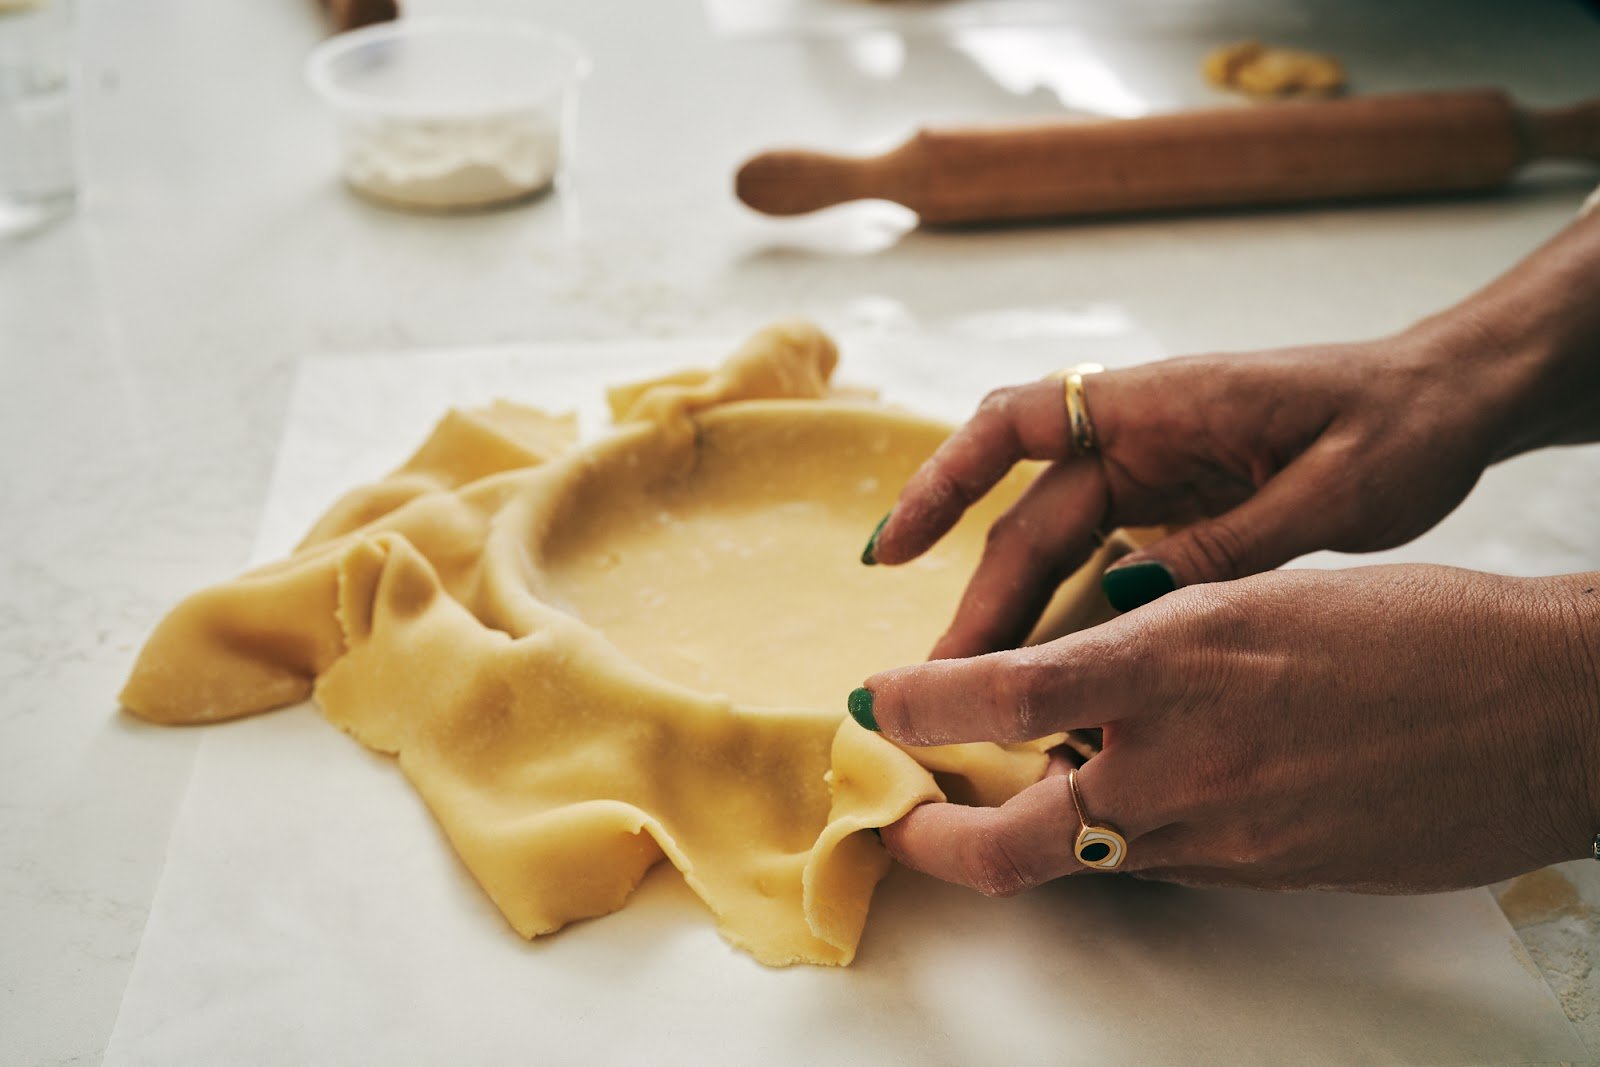
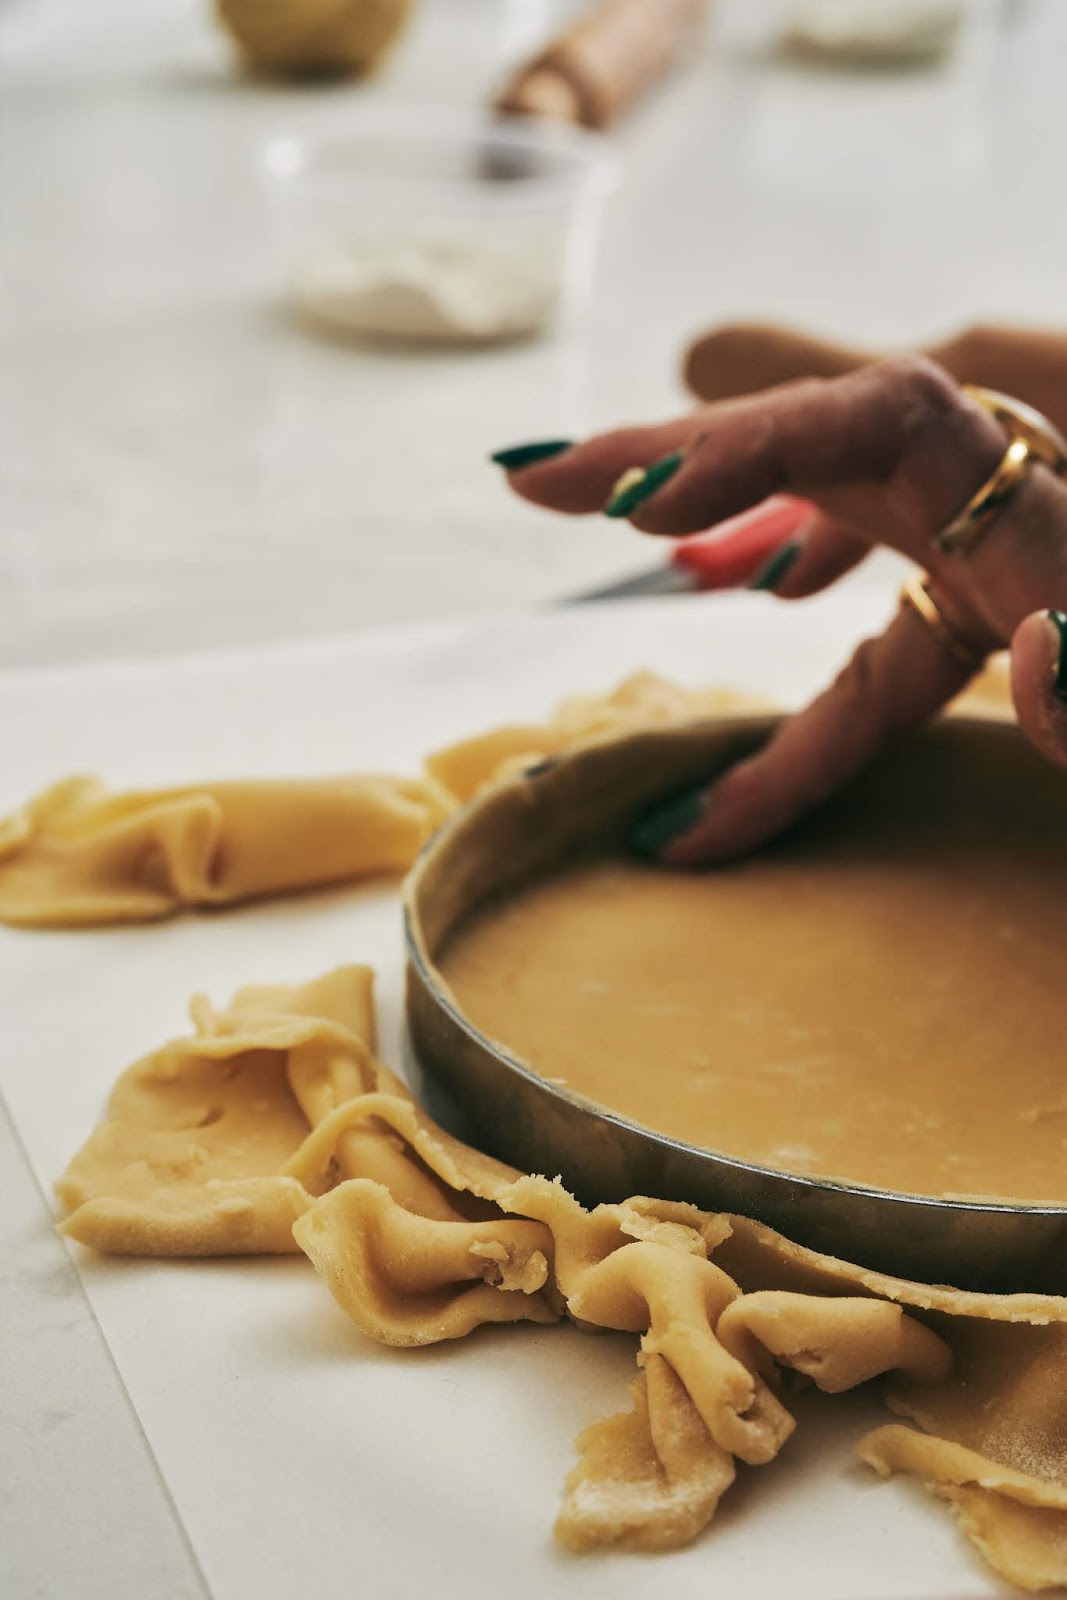
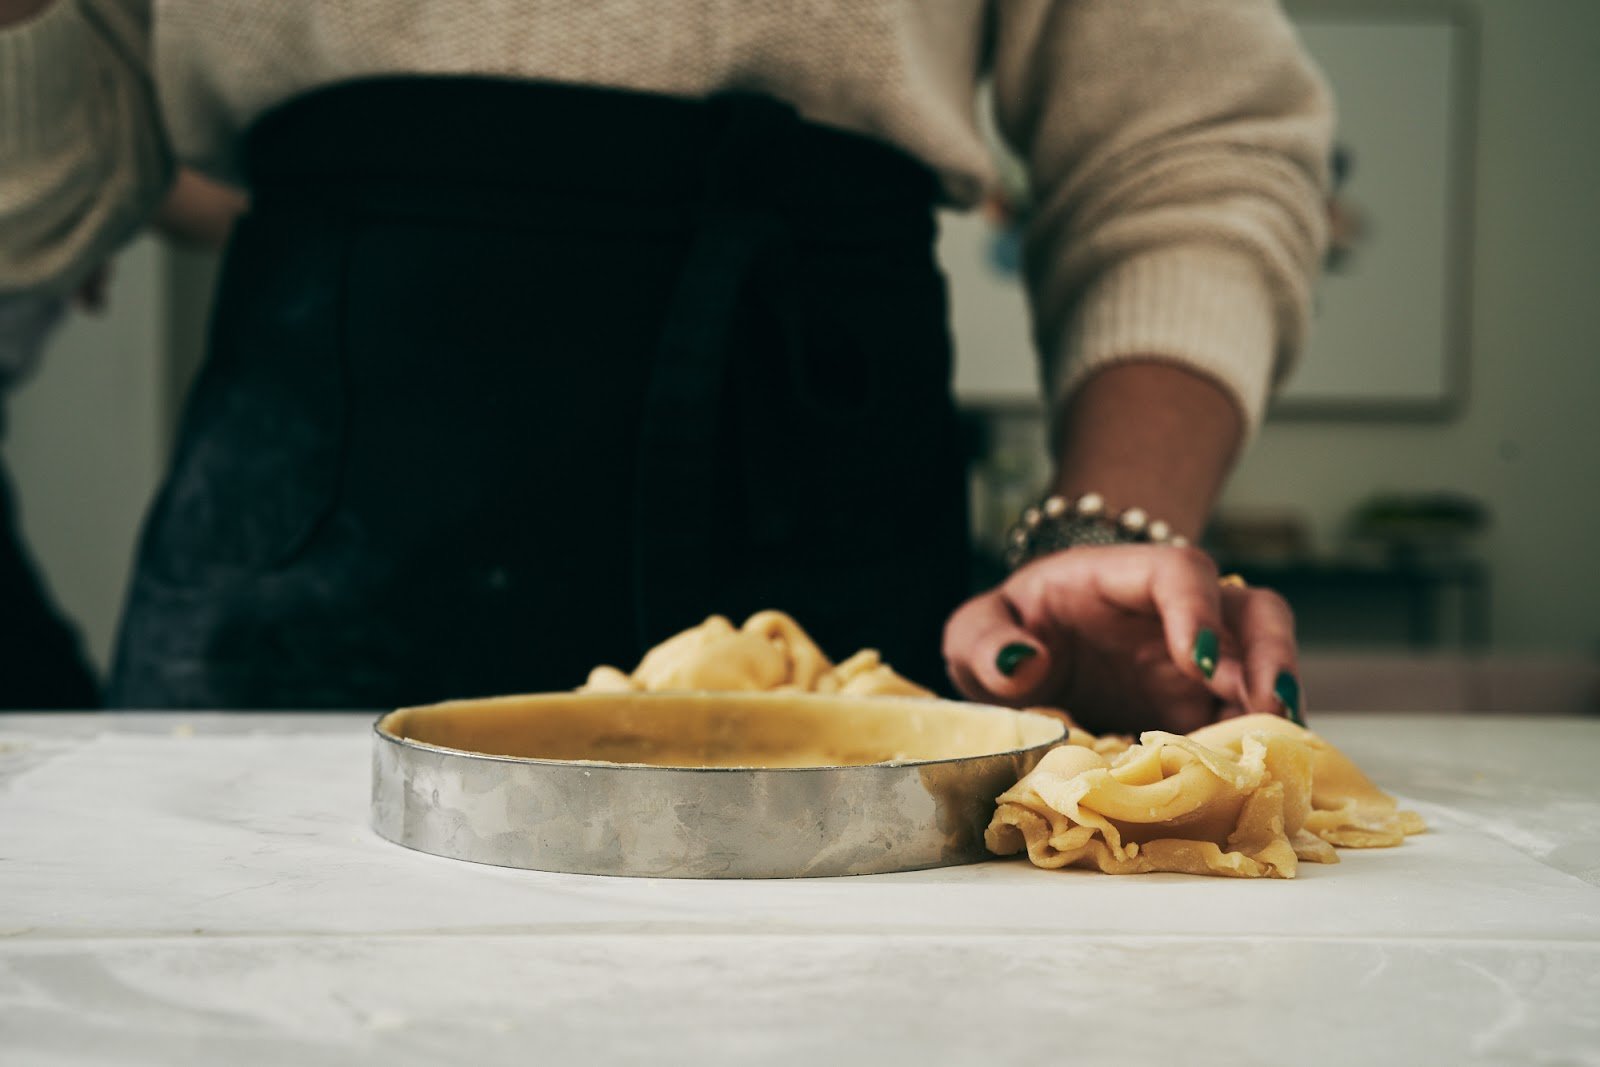
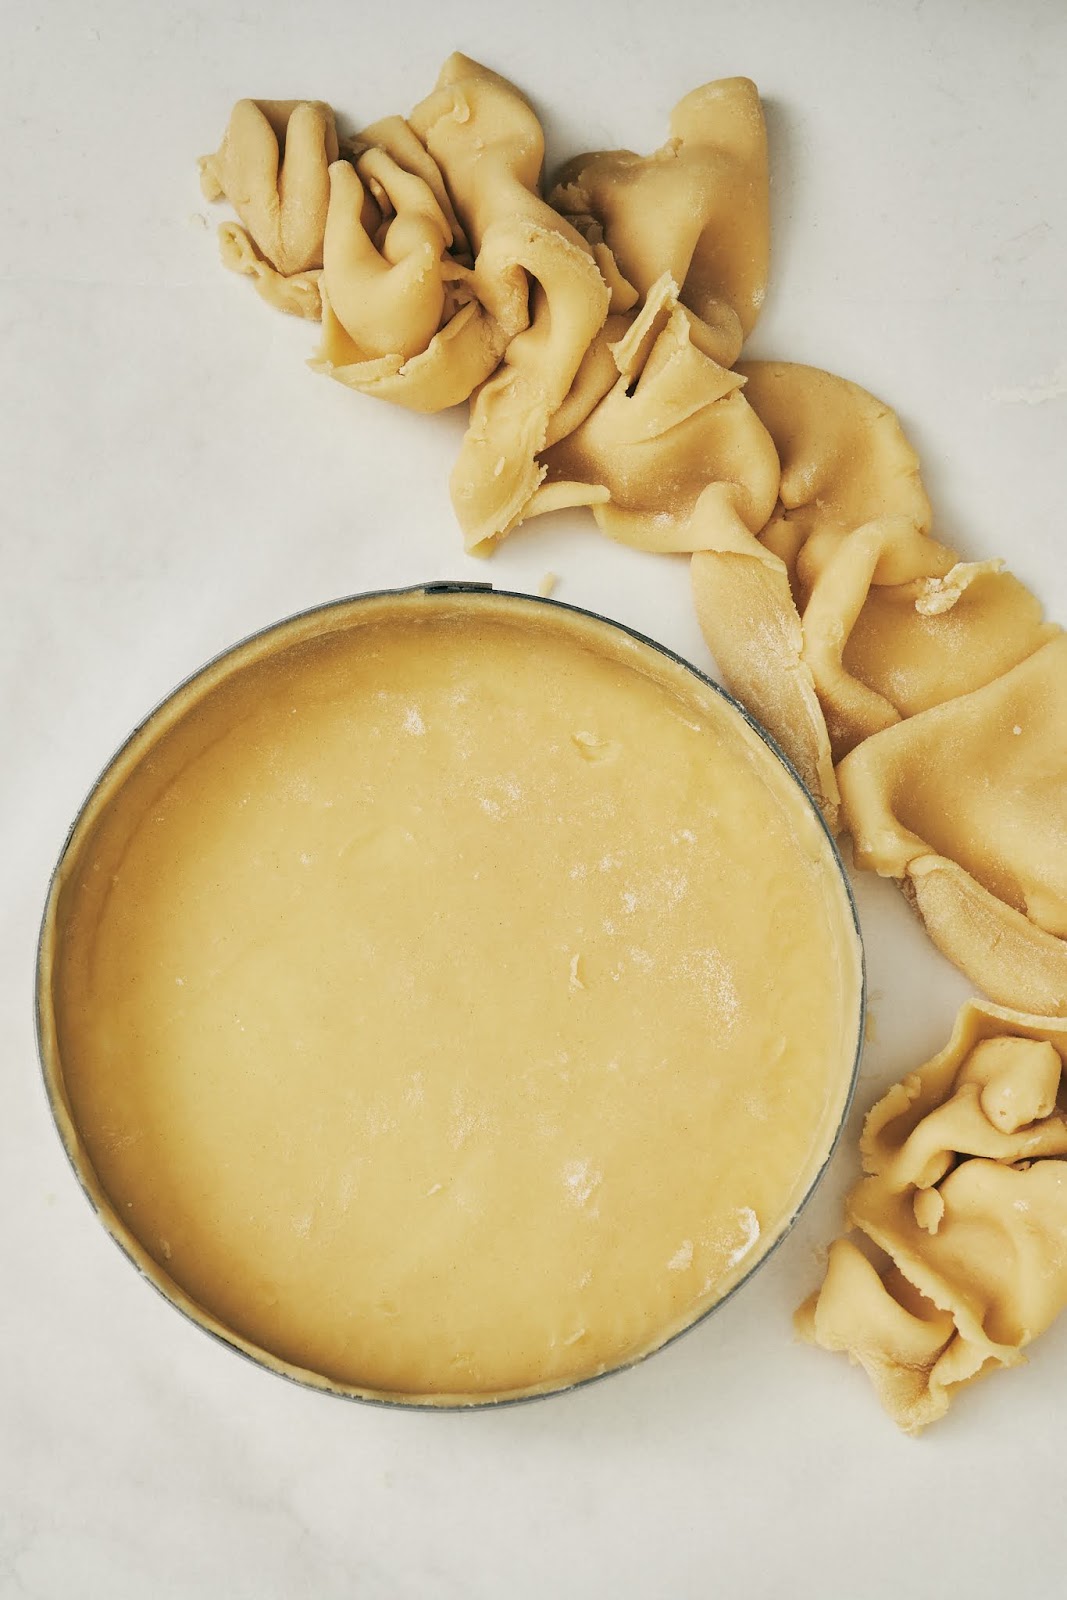
Use kitchen shears (or use a sharp paring knife) to trim the excess overhanging dough around the tart ring. Be careful not to trim off too much—you want the dough in the inside of the ring to be perfectly flush with the top of the ring:
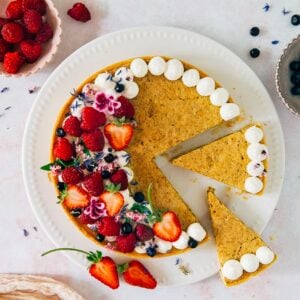
And that’s it! When filling the tart, it’s especially important to fill it only two-thirds of the way full—the filling will actually rise and puff in the oven to reach (or even exceed) the sides of the tart ring:

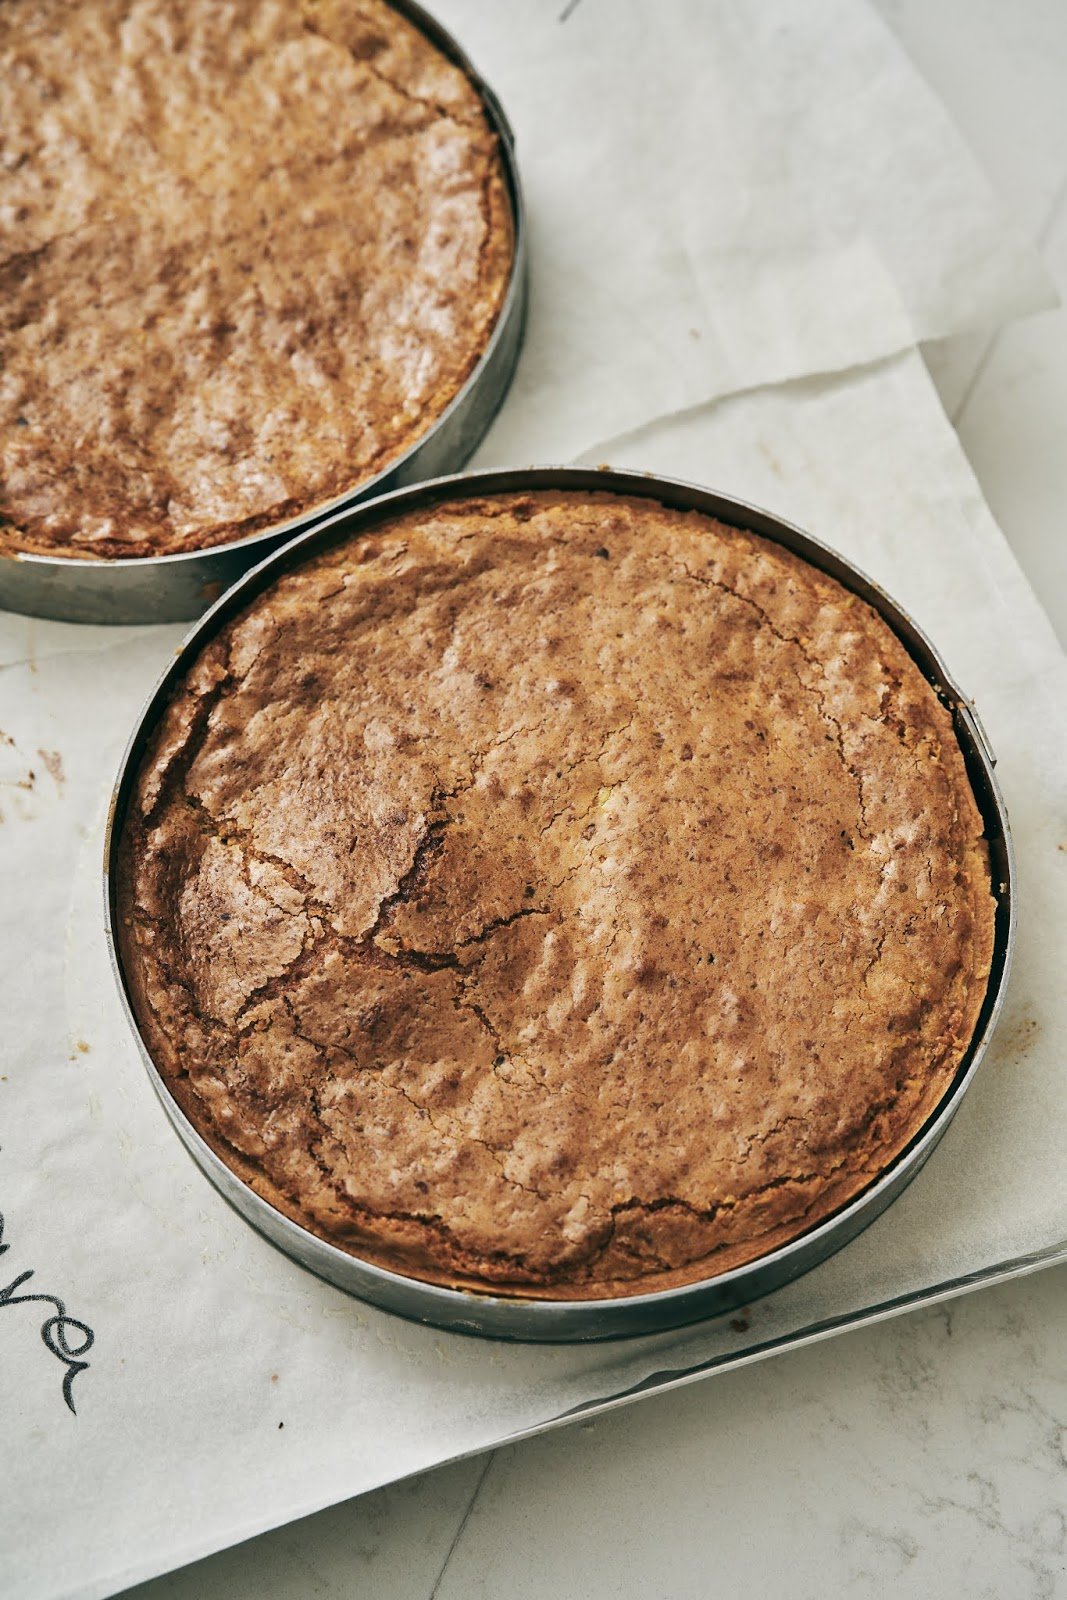
Don’t worry about it too much if your filling is too puffy—we’ll cover the entire thing with whipped cream later. Similarly, the tart shell’s border can come out rough and jagged. You can use a microplane grater to shave down these rough edges and ensure a perfect tart crust.
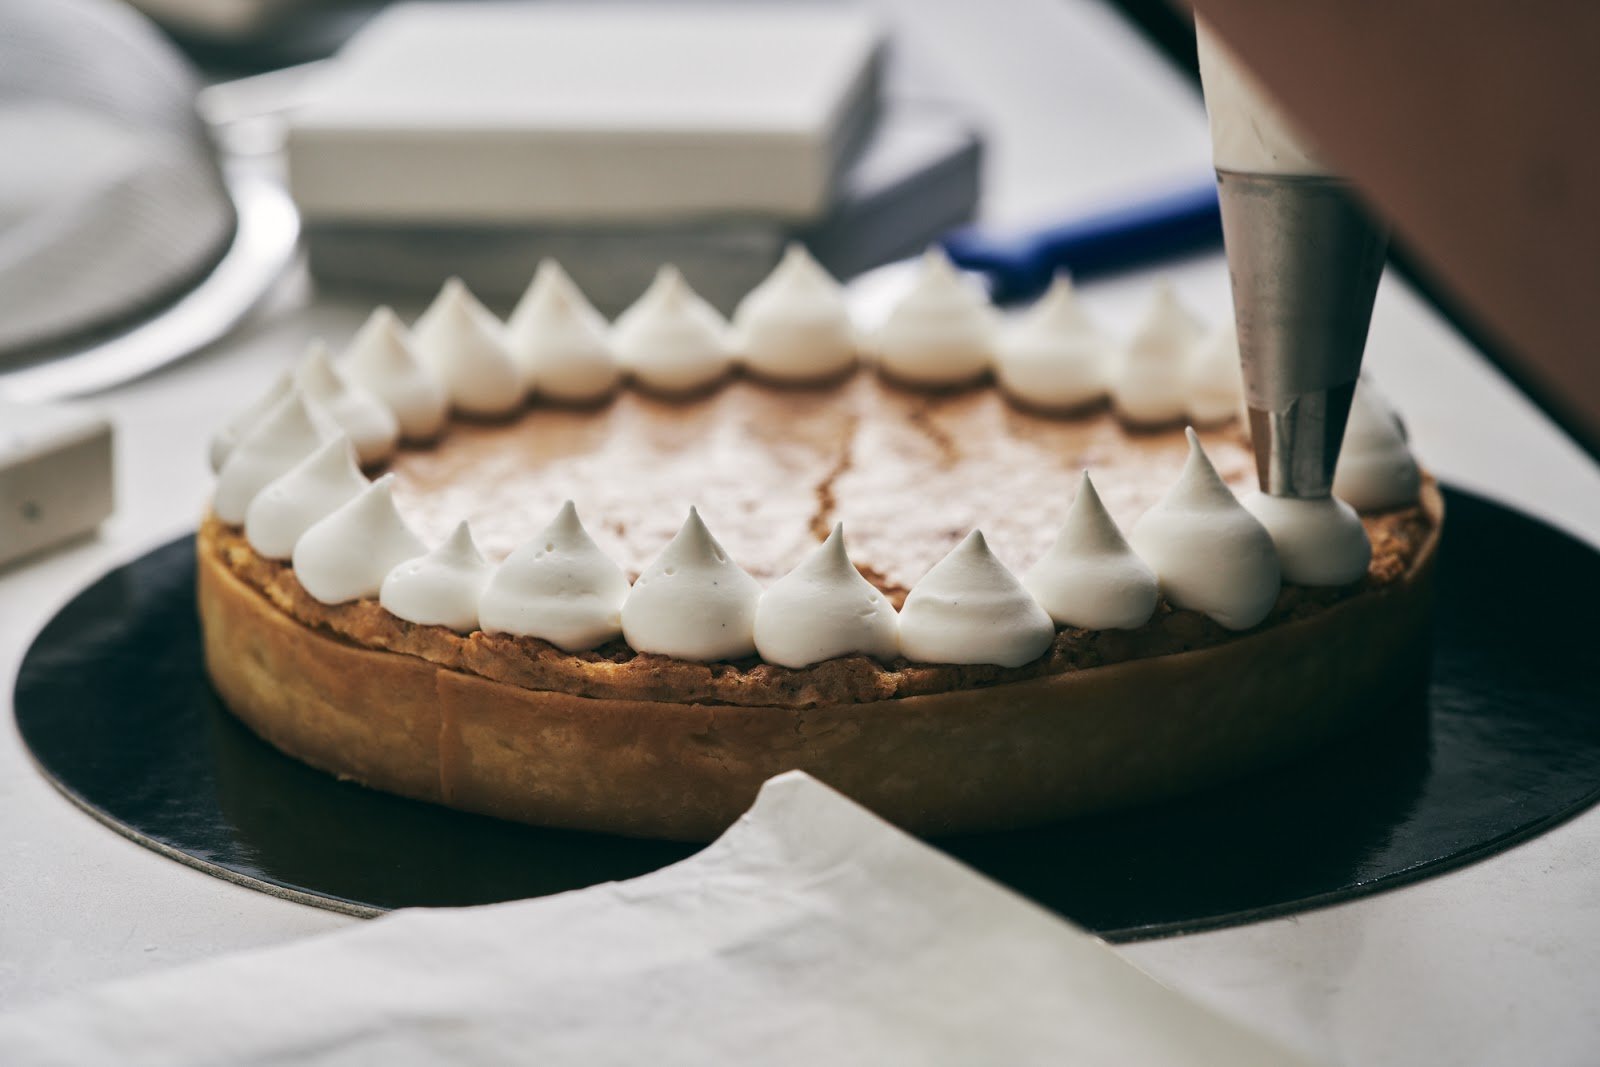

After you’re satisfied with your tart, it’s time to decorate it! We filled piping bags with whipped cream and piped dollops on top of the tart to cover the rustic top. In addition to looking beautiful, the light and airy whipped cream pairs wonderfully with the pistachio frangipane filling. Alon also provided us with dyed chocolate wafers and edible flowers to decorate our tarts with:


Some baker’s notes:
-
- Tart rings are available online at Amazon; although I made my tart with an 8-inch ring (specifically, I used this model), the recipe makes enough dough (see note below) and pistachio cream for a bigger 9-inch or 10-inch version. The choice is yours—you do you. You can also use smaller English muffin rings (I have this set leftover from when I made homemade English muffins) and make several mini pistachio cream tarts. In a pinch, you can also use a more traditional fluted tart pan with a removable bottom. The instructions for rolling it out and molding it to the pan will still work, though it might be a bit more finnicky molding the dough against the fluted sides (see last note).
-
- I actually didn’t use Alon’s tart dough recipe—while his was very tasty, it used half an egg and I worried about what I was going to do with the remainder (Honestly! It seemed a shame to throw it out, but I’m not going to fry up half an egg! Mike from my trip cracked that I should just make two doughs, which honestly is a great idea that I don’t know why I didn’t think of, so lol I’m stupid). So instead, I used the pate sucree recipe from Republique’s new cookbook. Although it comes together really easily and quickly in a stand mixer, it can be a bit fragile when rolled, tearing easily. Chilling the dough overnight will make it easier to work with. In fact, in true weeknight baking fashion, I broke up the recipe into two days: I actually made the dough the night before, then made the filling, baked the tart, and decorated it on the second day.
- And finally, don’t panic if, when molding your rolled out dough into the tart ring, your dough tears. You can fix any tears by pressing extra dough from the overhang and patching it up with your hands.
Get the Recipe: Pistachio Cream Tart
Ingredients
For the Tart Dough
- 2 cups 9 ounces all-purpose flour
- 1/4 cup 1 ounce fine almond meal
- a pinch of kosher salt
- 1/2 cup 4 ounces very cold unsalted butter
- 3/4 cup 3 ounces confectioners’ sugar, sifted if necessary
- 1 large egg
For the Pistachio Cream Filling
- 6 tablespoons 3 ounces unsalted butter, at room temperature
- 3/4 cup 3 ounces confectioners’ sugar, sifted if necessary
- 3/4 cup 3 ounces ground pistachios
- 2 tablespoons cornstarch
- 1 large egg
- 1 teaspoon pure vanilla extract
For the Whipped Cream and Raspberry Topping
- 1 cup 8 ounces heavy cream
- 3 tablespoons confectioners’ sugar
- fresh berries, I used huckleberries, raspberries, and strawberries
- edible flowers
Equipment
- Special Equipment: an 8-inch tart ring (see baker’s notes for substitutions)
- a piping bag fitted with a round tip (I used Ateco 804)
Instructions
For the Tart Dough
- In a medium bowl, whisk together the flour, almond meal, and salt.
- In the bowl of a stand mixer fitted with the paddle attachment, combine the butter and confectioners' sugar and beat on medium until pale, 1 to 2 minutes, using a rubber spatula to scrape down the bottom and sides of the bowl as necessary. Reduce the mixer to low and add the egg, beating until well combined, about 3 minutes, scraping down the bottom and sides of the bowl as necessary. The mixture will still be lumpy, but the butter and egg mixture should look like thick pancake batter.
- Add the dry ingredients all at once and continue to beat on low speed until the dough is just combined and clumps around the paddle and sides of the bowl—do NOT mix the dough longer, or the dough will be brittle and hard to roll and I’ll cry for you.
- Scrape the dough onto a lightly floured counter. Quickly knead it into a rough ball, and flatten to a small disc. Tightly wrap in plastic wrap and refrigerate for at least 1 hour, preferably overnight, before rolling out and shaping to the tart ring. The tart dough will keep in the refrigerator for up to 2 days, and in the freezer for up to 3 months.
For the Pistachio Cream Filling and Assembly
- Center a rack in the oven and preheat the oven to 335 (F). Prepare an 8-inch tart ring by generously buttering the inside of the ring. Set the prepared tart ring on the center of a parchment-lined half sheet pan.
- Roll out, mold, and trim the chilled tart dough to the tart ring with the instructions in the above blog post. Refrigerate the sheet pan with the tart ring while you make the pistachio cream filling.
- Next, make the pistachio cream filling: in the bowl of a stand mixer fitted with the paddle attachment, combine the butter, confectioners' sugar, pistachios, and cornstarch. Beat on low until combined, about 15 seconds, then add the egg and vanilla. Beat on low until just combined, about 1 minute.
- Use a rubber spatula to scrape the pistachio cream into the center of the tart ring, using an offset spatula to spread it out evenly across the inside of the tart ring and ensuring that it does not fill more than two-thirds of the way up the sides of the tart ring. Smooth the top.
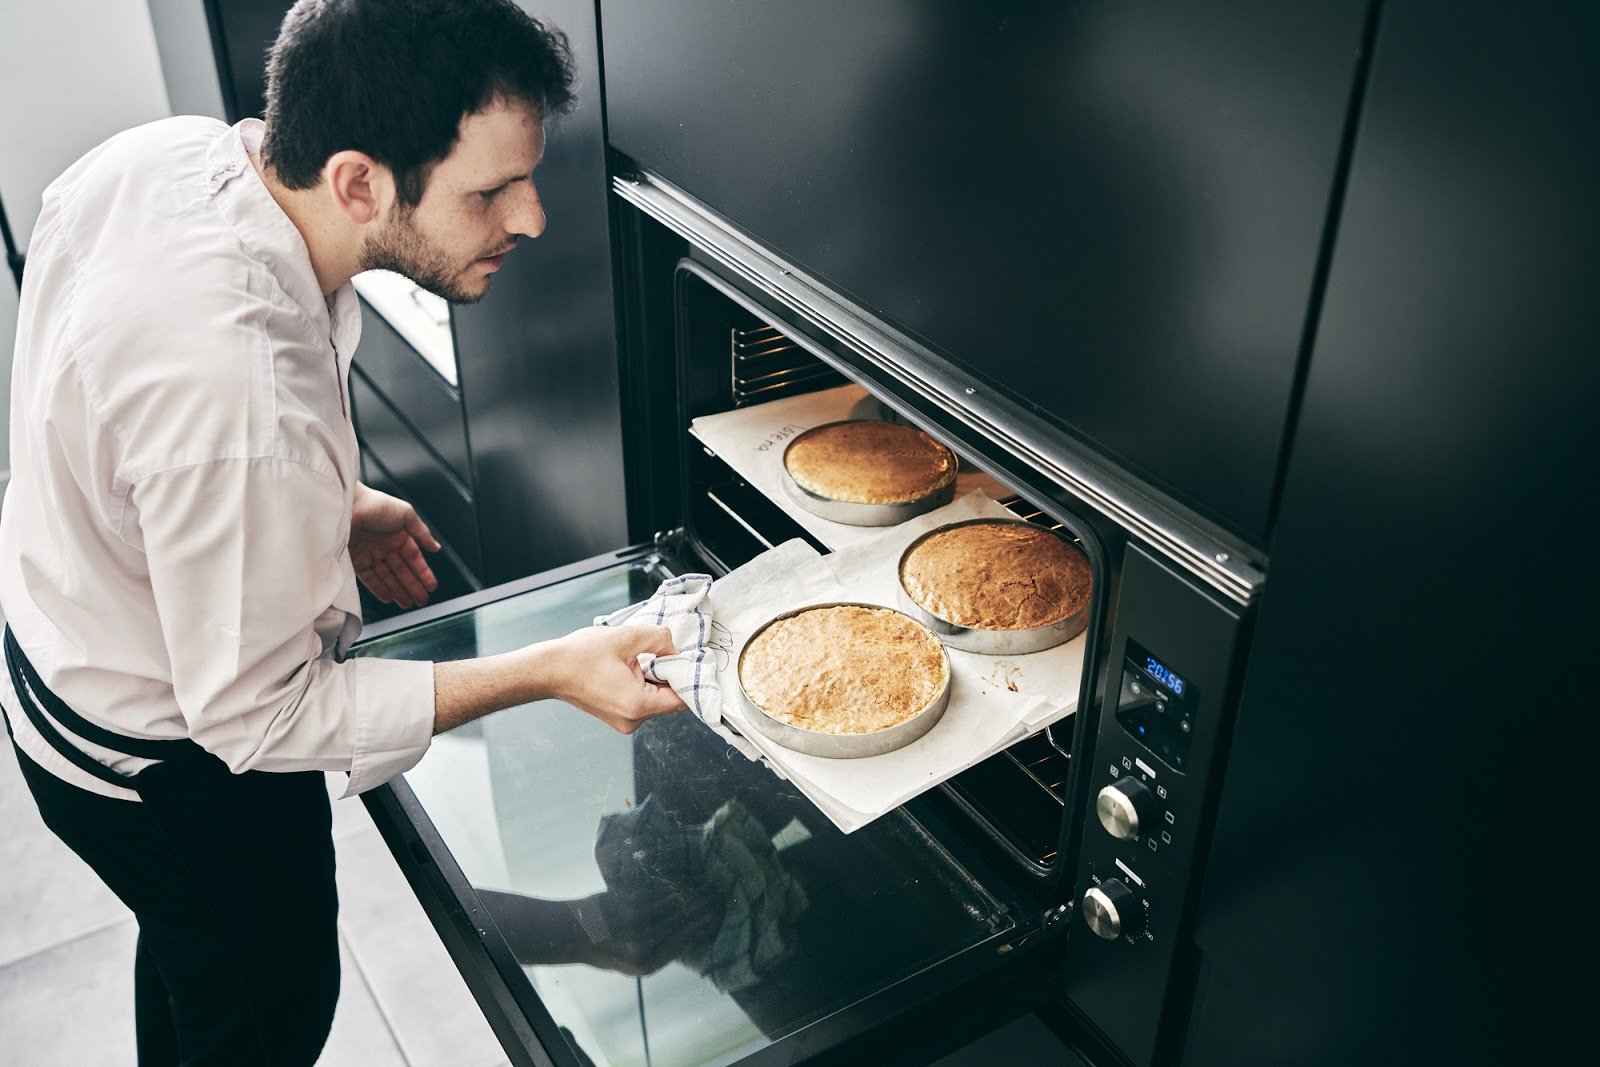
- Bake for 25 to 30 minutes, or until the pistachio cream has puffed up to the entire height of the tart ring and both the tart crust and the filling are browned. Cool completely on a wire rack before decorating with the whipped cream. If the edges of the tart crust are uneven, you can use a Microplane grater to shave down the rough parts so that it is smooth and flush with the rest of the tart. To unmold the tart from the ring, place the tart on top of the center of a wide mug turned upside down and gently pull down on the tart ring.
For the Whipped Cream and Decorating
- In the bowl of a stand mixer fitted with the whisk attachment, combine the cream and confectioners' sugar. Whisk on medium-high speed until firm peaks form, about 4 minutes—but be careful not to over whip or you'll end up with butter!
- Use a rubber spatula to scrape the whipped cream into a piping bag fitted with a round tip. Pipe the whipped cream on top of the tart in the pattern and style you desire. Once done, garnish with fresh berries and edible flowers. The tart is best the day it's made, but will keep refrigerated in an airtight container for up to 3 days.
Hi! This looks beautiful! Could we skip the egg or replace the egg for the pistachio cream filling?
Hmmm replacing the egg would be REALLY hard as you need something to bind all those dry ingredients together. Are you replacing because of an ingredient shortage or an egg allergy? Let me know and I’ll try and make an appropriate substitution, but off the top of my head, it’s tough to replace egg in this particular recipe!