
About This 6 Inch Cheesecake Recipe
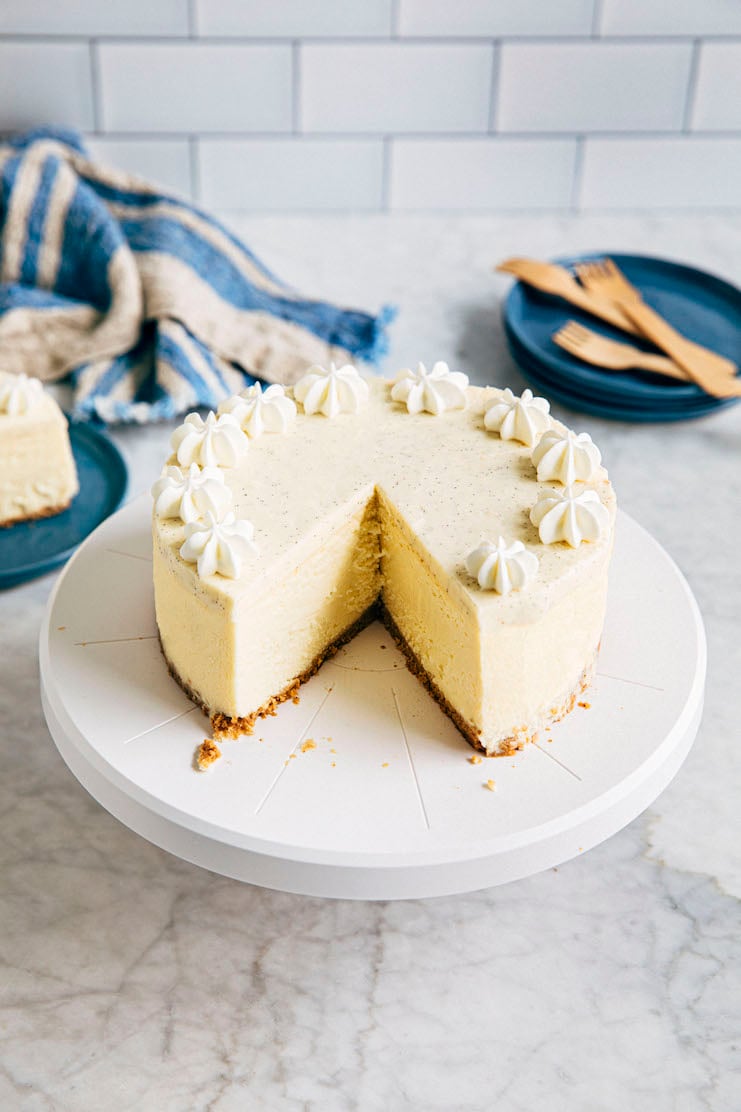
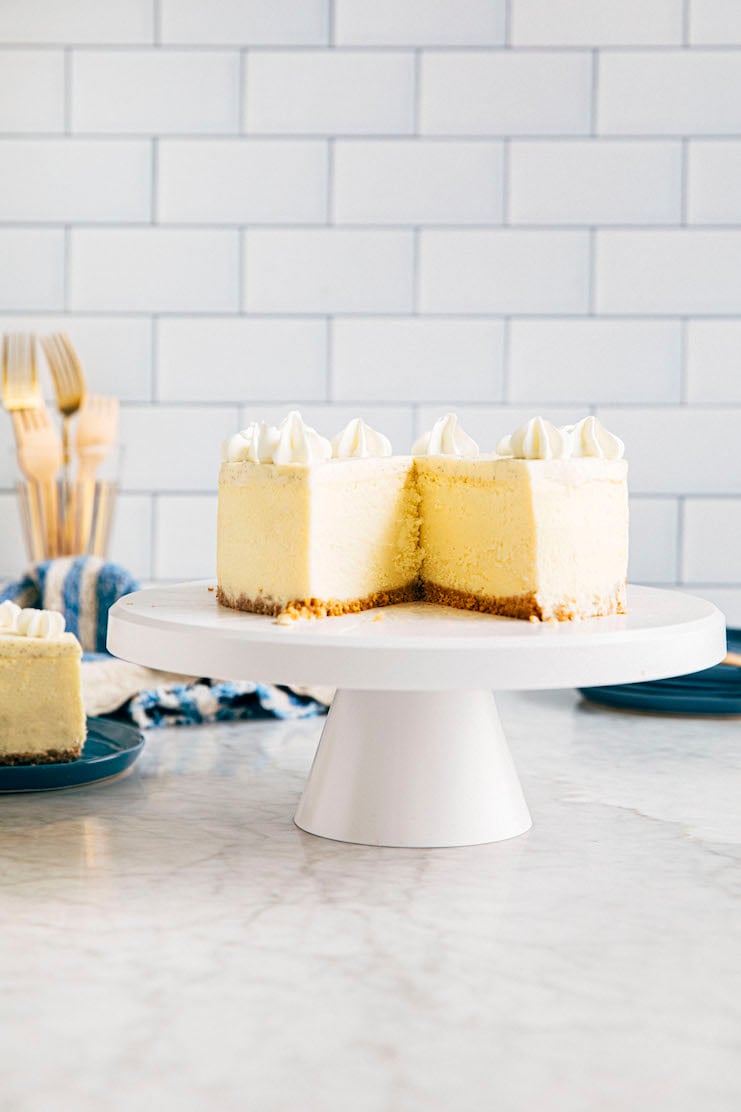
This 6 inch cheesecake recipe makes a mini version of classic, New York style cheesecake! 6 inches is the perfect size for small gatherings and special occasions. Why? 6 inch cheesecake cheesecake only serves 8 to 12 people!
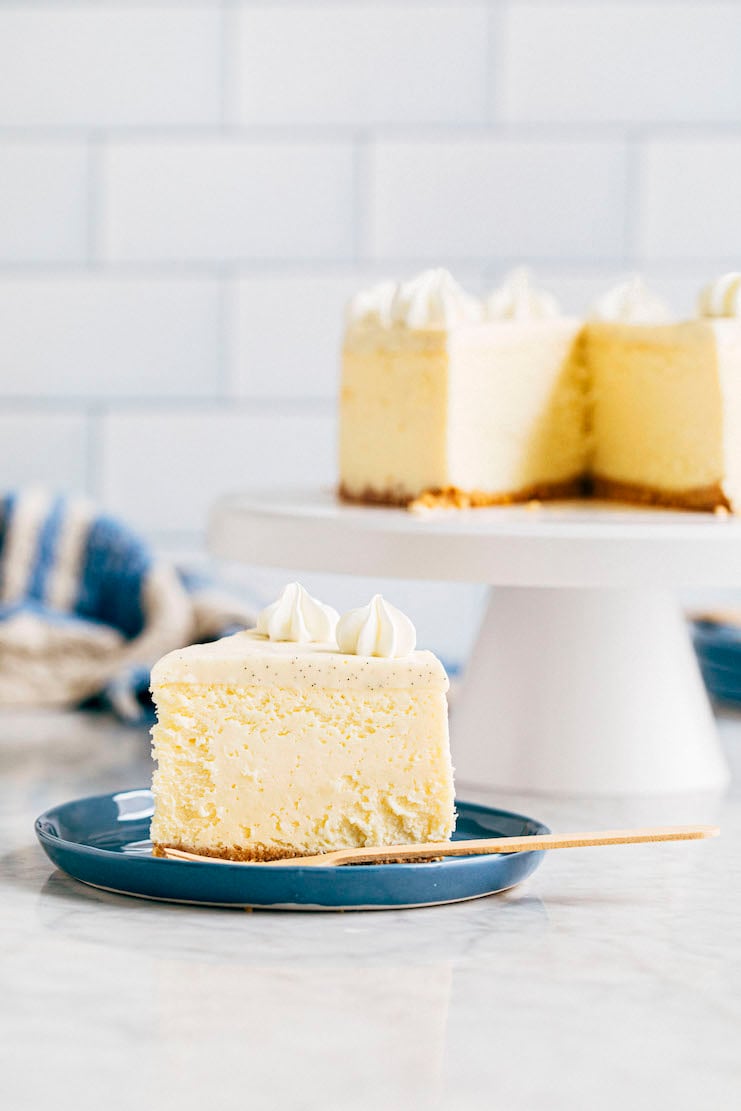
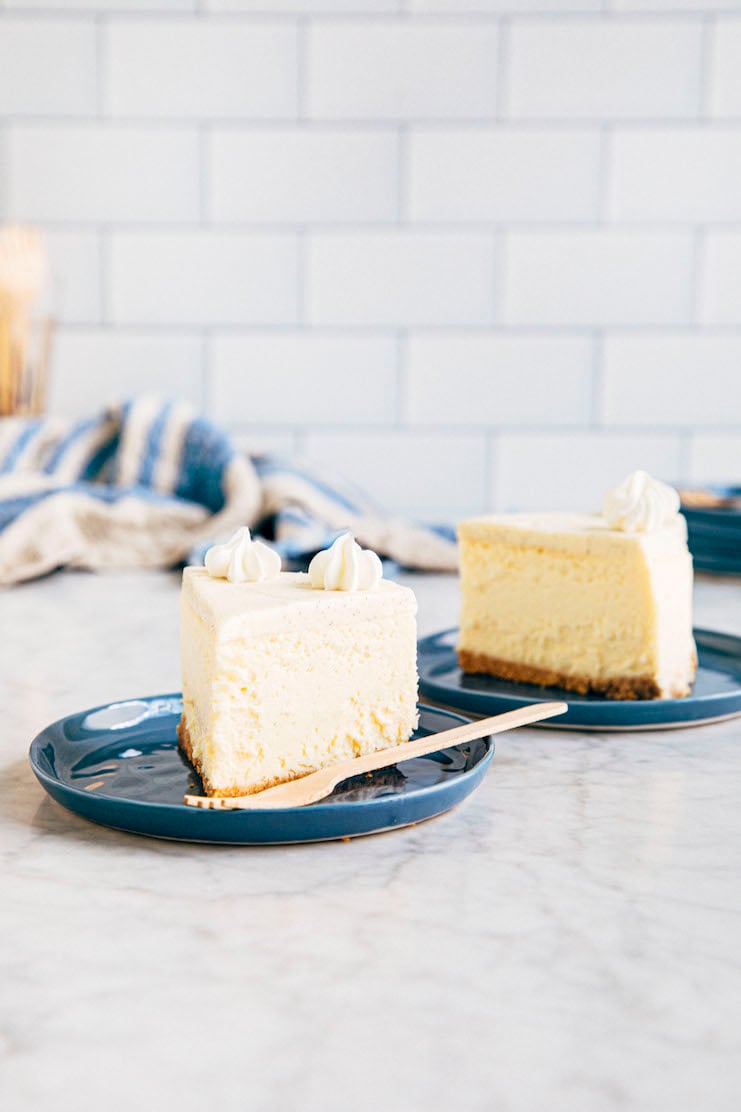
But despite its smaller size, this recipe still makes a classic cheesecake. It has three dekicious layers: buttery graham cracker crust, dense and creamy cream cheese filling, and tart and tangy sour cream topping.
The recipe is adapted from San Francisco’s famed Miette Bakery, which specializes in small batch, 6-inch celebration cakes like this one. The only change? I included all my best cheesecake making techniques! My tips ensure that your 6 inch cheesecake comes out perfectly, with a silky smooth texture and a crack-free top.
Looking for other small batch dessert recipes that feed 4 to 6 people? Check out Hummingbird High‘s small batch baking recipe collection!

Ingredients and Substitutions
Now that I’ve convinced you to make this 6 inch cheesecake, let’s talk about some key ingredients:
Graham Cracker Crumbs
How do I make graham cracker crumbs?
To make graham cracker crumbs, use a digital scale to weigh out as many crackers as needed to match the weight listed in the recipe. Use a food processor to pulse the crackers into fine crumbs.
If you don’t have a food processor, you can place the graham crackers in a zip top bag and crush them manually. Smash them in the bag with a rolling pin or heavy object.
And if all of this sounds like too much work, you can always source pre-ground graham cracker crumbs at the grocery store.
Can I use a gluten free graham cracker instead?
Yes! If you’re using gluten free graham crackers, it makes the ENTIRE cheesecake gluten free. Why? The cheesecake batter and sour cream topping contains no gluten!
Cream Cheese
Can I use low-fat cream cheese instead of regular cream cheese in this 6 inch cheesecake recipe?
Technically yes, but I don’t recommend it. Using low-fat cream cheese leads to a less flavorful cheesecake.
Recipe Troubleshooting and FAQ
Help! My cheesecake cracked. What did I do wrong?
Okay, so you skipped the majority of this blog post and missed out all the info I shared about why your cheesecake cracked. Let me summarize everything below:
Your cheesecake cracked because you didn’t use room temperature ingredients.
Ingredients like cream cheese, eggs, and cream mix together better when they’re at room temperature. This is especially important for cheesecake—you don’t want any lumps of unmixed cream cheese or eggs in the batter. These lumps could potentially cause cracks in the cheesecake. So make sure that all your ingredients are at the temperature listed in the recipe before beginning any of the recipe steps.
Your cheesecake cracked because you overmixed the cheesecake filling.
Incorporating too much air into cheesecake batter also causes cracks in the cheesecake. If using a KitchenAid stand mixer, only mix the cheesecake batter on speed “2” or lower after adding the eggs to the batter. Doing so prevents overbeating and/or overmixing the cheesecake batter.
Your cheesecake cracked because you didn’t bake it in a water bath.
Baking the cheesecake in a water bath ensures that it bakes evenly and gently. Cheesecakes are prone to cracking when parts of the cheesecake bake faster than others. Unless you’re an immediate or advanced baker, find a cheesecake recipe that bakes the cheesecake in a water bath (like this recipe!).
Your cheesecake cracked because you didn’t cool it slowly after baking.
Cheesecakes crack when they are exposed to sudden temperature changes. One of the most common causes of cracking comes from moving the hot cheesecake into a cold room. Don’t skip the recipe’s instructions to cool the cheesecake slowly in the oven.
Can you freeze this 6 inch cheesecake recipe?
Yes! This 6 inch cheesecake recipe freezes really well. After chilling the cheesecake overnight, unlatch the springform pan and lift the sides of the pan away from the bottom of the pan. Place the cheesecake on a plate, uncovered, and freeze until solid, 1 to 2 hours.
Once solid, tightly wrap the cheesecake in two layers of plastic wrap. If storing long term (that is, for longer than 1 month), wrap in a layer of aluminum foil. The aluminum foil helps prevent the cake from absorbing flavors and odors in the freezer. Freeze for up to 6 months.
When ready to serve, transfer the cheesecake to the refrigerator to thaw overnight. Before serving, unwrap the cheesecake and thaw at room temperature for 30 minutes before slicing.
Best Recipe Tips
On Making The Water Bath For The Cheesecake
- This cheesecake recipe instructs you to bake the cheesecake in a homemade water bath. To make the water bath, place the springform pan with the cheesecake in the center of a large baking pan. Fill the baking pan with water until it reaches halfway up the sides of the springform pan. Be sure to use warm, preferably boiling, water. Cold water affects the temperature of the oven, increasing the recipe’s Bake Time. I recommend boiling a large kettle of water before starting any of the recipe’s steps.
For Prepping The Ingredients You Need
- To make graham cracker crumbs, use a digital scale to weigh out as many crackers as needed to match the weight listed in the recipe. Use a food processor to pulse the crackers into fine crumbs.
- For this recipe, it’s INCREDIBLY important that the ingredients are at the temperatures described in the recipe. That means bringing your cream cheese, eggs, and heavy cream to room temperature. Cold ingredients don’t mix as well, resulting in a lumpy cheesecake batter prone to cracking. If you’re wondering how to bring these ingredients to room temperature quickly, I recommend checking out my cookbook. I have a whole section outlining my tricks on how to bring ingredients to room temperature fast!
For Making The Perfect Cheesecake
- Be careful not to overbeat the mixture after adding the eggs—doing so will result in your cheesecake cracking! If you have a KitchenAid mixer, do not increase the mixer speed past speed 2.
- It’s better to pull the cheesecake out of the oven early than to leave it in too long. If you over bake the cheesecake, it will be tough and grainy. Follow the recipe instructions to bake only until the cheesecake sides are set—the center should still wobble and jiggle. Despite the Bake Time of 90 minutes, I recommend checking for doneness at 60 minutes.
- Most recipes neglect to tell you that cooling a cheesecake properly is the secret to preventing your cheesecake from cracking. Why? Cheesecakes are very sensitive to temperature changes. If the cheesecake is cooled too quickly—that is, it goes from a hot oven to a cold room—it cracks.
So how do you prevent this without cranking the heat up the heat in your house? Simple! Turn your oven heat off and leave the cheesecake in the oven. However, we still want the oven to cool faster than it otherwise would. So we encourage it to do so by cracking the oven door ever so slightly. If your oven door insists on snapping shut, hold it open with a heatproof cooking utensil like a wooden spoon.
Finally, How To Slice The Cheesecake So Clean and So Pretty
- To get straight edges and smooth sides when you slice the cheesecake, use a hot serrated knife. Fill a tall, heatproof glass with VERY hot water. Place the blade of the serrated knife in the water for 20 seconds. Use a kitchen towel to dry the knife. Use it to slice the cheesecake, dipping the knife into the water and drying it ever so often, especially if the filling starts sticking to the blade.

Get the Recipe: 6 Inch Cheesecake Recipe
Ingredients
For the 6 inch Cheesecake Crust
- ¾ cup (2.65 ounces or 75 grams) graham cracker crumbs
- 3 Tablespoons (1.5 ounces or 43 grams) unsalted butter, melted
- pinch of kosher salt
For the 6 inch Cheesecake Filling
- 2 (8-ounce) boxes cream cheese (16 ounces or 454 grams), at room temperature
- ½ cup (3.5 ounces or 99 grams) granulated sugar
- ¼ teaspoon kosher salt
- 2 large eggs, at room temperature
- ¼ cup (2 ounces or 57 grams) heavy cream, at room temperature
- ¾ teaspoon vanilla extract
For the Sour Cream Topping
- ½ cup (4 ounces or 113 grams) sour cream
- 1 Tablespoon granulated sugar
Equipment
- a 6-inch round springform pan
- a 9 x 13-inch cake pan OR a roasting pan
Instructions
For the 6 Inch Cheesecake
- Prep the oven. Position a rack in the center of the oven and preheat the oven to 350°F.
- Make the crust. In a medium bowl, combine the graham cracker crumbs, melted butter, and salt. Toss with your fingers until the mixture looks like wet sand. Pour the mixture into the springform pan and use a tart tamper or your hands to press it evenly over the bottom of the pan, all the way to the edges. (You can use the bottom of a coffee mug or heavy glass to pound the crumbs in place—you want to apply some pressure here so that the crust holds its shape.)
- Bake the crust. Bake for 8 minutes. The crust will look underbaked and feel soft to the touch when you remove it from the oven, but will firm up as it cools. Set on a wire rack to cool slightly while you make the filling.
- Make the filling. In the bowl of a stand mixer fitted with the paddle attachment, beat the cream cheese on medium until soft and creamy, about 4 minutes. Add the sugar and salt and beat until light and fluffy, about 1 minute, using a rubber spatula to scrape down the bottom and sides of the bowl as necessary. Reduce the mixer to low and add the eggs one at a time, adding the next egg only after the previous one is fully incorporated, scraping down the bottom and sides of the bowl after each addition. With the mixer on low, add the cream and vanilla all at once and beat until combined, about 1 minute. Scrape down the bottom and sides of the bowl once more, and beat on medium for an additional 30 seconds.
- Assemble for baking. Pour the filling over the crust and use an offset spatula to smooth the top. Tightly wrap the bottom of the springform pan with two layers of aluminum foil. Place in the center of a 9 x 13-inch cake pan or roasting pan. Pour boiling water into the pan until water reaches halfway up the sides of the springform pan.
- Bake the cheesecake. Bake for 90 minutes, or until the edges of the cheesecake are set but the center still wobbles slightly. Check the cheesecake at 60 minutes. The outer edges of the cheesecake should be starting to set. If the edges are completely set, check for doneness again in 5 or 10 minutes. If the top of the cheesecake is starting to brown too much, tent the top of the springform pan with a loose sheet of aluminum foil.
- Cool the cheesecake. Once the cheesecake is done, turn off the oven's heat. Open the oven door just a crack, propping it open with a heatproof cooking utensil like a wooden spoon. Leave the cheesecake in the water bath in the oven for 30 minutes. After 30 minutes, remove the cheesecake from the oven and place on a wire rack. Run a butter knife or offset spatula around the edge of the pan to loosen the cheesecake. Cool the cheesecake completely in the springform pan on the wire rack.
- Make the sour cream topping. Once the cheesecake is completely cool, make the sour cream glaze. In a small bowl, whisk together the sour cream and sugar for the topping.
- Finish assembling the cheesecake. Pour the topping over the cheesecake and use an offset spatula to smooth it across the cheesecake's top.
- Chill the cheesecake. Cover the top of the springform pan loosely with plastic wrap and refrigerate until the cheesecake is firm, at least 4 hours, preferably overnight.
- Serve and store. To serve, unlatch the springform pan and lift the sides of the pan away from the bottom of the pan. Use a hot knife to slice and serve. Serve chilled from the refrigerator. Leftover cheesecake slices can be stored in an airtight container in the refrigerator for up to 5 days.
Notes
get new recipes via email:

buy the book
Weeknight Baking:
Recipes to Fit your Schedule
Over the past several years of running Hummingbird High, I kept a crucial aspect of my life hidden from my readers: I had a full-time, extremely demanding job in the tech world. In my debut cookbook, Weeknight Baking, I finally reveal the secrets to baking delicious desserts on a tight schedule.
Did you make this recipe?
Please leave a comment and rating for the recipe using the form below!
Your ratings make it easier to find the recipe online, and I’m always looking for ways to improve Hummingbird High.
delish!!!
Excellent outcome using the detailed instructions.
I added a little cornstarch to make it more dense and also made this with Lily’s Dark chocolate chips – delicious! Also used Swerve confection sugar as a substitute to make it more keto friendly. I kept the graham cracker crust – it is simply better than one made with almond flour.
Have tried many cheesecake recipes, this is definitely top 2.
Thanks for so many helpful specifics!
Wonderful looking cheesecake (although I would not mind at all a crackled or uneven shape – it is the taste that matters :)) )
This cheesecake looks fantastic! I like that it's a 6-inch cake. And I like the tartness of sour cream glaze. Thanks for some great tips!
What a beautiful cheesecake!
I made this recipe and it was absolutely perfect! I followed the exact steps and it came out wonderful. Noting, this was my first time baking a cheesecake. I highly recommend this recipe to anyone wanting to try.
Thanks for sharing this recipe, your cheesecake does look perfect!
I feel compelled to comment because cheesecake is one of my all time favorites. I've been looking to switch up mine and I feel like heavy cream will be the perfect addition. I'm already prepping to try this tonight along with the honey graham crackers. Also, I assume if I'm making this in an 8" tin it will be a little flatter, right? Thanks anyway! All compliments from tonight's dinner party will be forwarded to you, yes?
Hi there,
I've never made it in an 8-inch baking pan, but yes, I assume it will be flatter. Let me know how this works out for you!
This is adorable and I love Miette! Cheesecake is one of my favorites so I'll have to try this soon. Sidenote: I found this blog through the Saveur Food Blog Finalists so congrats!
Made it yesterday, it turned out so perfect! Thanks a lot for the recipe! The bain-marie really makes the difference.
I have to say this was not my favourite cheesecake. I found it kind of bland and I am not sure if it is just the brand of cream cheese I used (different than normal) or what the problem is. I even added a full tsp vanilla and a tsp of lemon juice. Also not sure if it was slightly overbaked (though it didn’t look it) or because I was just shy on 1/4c cream but it seemed a little drier than I was expecting. Love the size though, was looking for a recipe to use up 2 blocks of cheese!
The former! Bake the crackers into cookies, crush them into crumbs, then measure to 3/4 cup. You can also use store bought graham crackers.
How did you get your crust to hold? In the recipe you stated to press the crumbs and then bake, but no mention of using any kind of a binder like butter or oil. Can you please explain? I’ve never attempted a Graham cracker crust without a binding agent. Thank you.
The recipe for Miette’s homemade graham crackers (linked in the blog post) don’t need a binder because they’re pretty moist and buttery. If using store-bought, mix the crumbs in 1 to 2 Tablespoons of melted butter.
Question: do you have a 6in pumpkin cheesecake recipe or a 6inch base cheesecake recipe with flavor suggestions? I wanted to make a mini pumpkin cheesecake but wasn’t sure how much if any cream cheese or heavy cream to swap with pumpkin puree.
I’m sorry, I don’t!
I would use 1/2 a can of pumpkin and use about a1 tsp of pumpkin spice.
This is my go-to cheesecake recipe. I’ve made it multiple times for birthdays, anniversaries, etc. and its always well loved. It’s light and creamy and not too sweet. I’ve added lemon zest once, and another time some spices, but its great plain as written too. And the smaller 6 inch size is perfect. Thank you!
I made the cheesecake and I wish I could post a completed photo.
I didn’t do the sour cream topping. I did a homemade strawberry preserve on top and homemade whipped cream on the outer top edge using a pastry bag. I also used a biscotti instead of graham crackers. This was the most delicious cheesecake I have ever had. I also used cane sugar instead of white and the sweetness was perfect.
My question is could I take this recipe and make minis in a muffin tin with liners or is this a springform pan only type recipe?
Hm, I haven’t ever tried it in a muffin pan myself. Try it and report back!
First time making cheesecake. Your instructions and notes helped me make a perfect cheesecake. No cracks!
Tried for the first time, following the room temp ingredients, using a timer for mixing the proper amounts of time requested, and was careful to bake with just enough but not too much time. Seemed like a good recipe, per the ingredients, but the texture was not a cheesecake texture. Was really hoping it would come out smooth, creamy, and thick as cheesecake should, but it was more like a light, and sort of a spongey-like consistency. I thought that only happens with over mixing but not since using the timer and times mentioned in the recipe to a T. If anyone has tried a revised version that did turn out like cheesecake please advise what you changed.
Thank you for this recipe. This is basically the same recipe that my late aunt gave me many years ago which in the course of moving etc I lost. She used to make the cheesecake in an antique french pie pan which is about 2 1/2″ tall. (I still have it.)
The technique was the same as using a spring form pan but we served it in the pie pan. She also used the water bath method. It always came out perfect.
What an amazing cheesecake recipe! I’ve made this recipe a few times for the 6-inch cheesecakes and they came out perfectly every time. No shrinkage, no cracks, just smooth and beautiful and so delicious. Today I successfully made this in an 8-inch pan by multiplying the recipe by 1,5. It came out absolutely perfect. Thanks so much for this great recipe. This is my go-to baked cheesecake recipe from now on.
You wrote 3-4 hours worth of bullshit before you even posted the actual recipe. Why do you have this much free time?? Nobody wants to read all of your wordy nonsense filler where you state obvious facts about the recipe. Get out of Starbucks and fill your life with something better. Some of us just want to make a good cheesecake and we don’t want to suffer your internet hubris.
Devin, who hurt you?
I agree, Devin, why so bitter? The blog is delightful and the cheesecake is amazing!
Poor poor Devin… can’t figure out how to use the internet. Michelle can you please give thorough directions on how to use your web page buahahahaha and possibly help Devin? He’s so mad, mad mad Devin poor little guy. On a pleasant note I’m making this recipe today for my son’s gfs b-day, can’t wait to try it, ill leave a review tomorrow, thank you Michelle. Somehow I figured out how to get to the recipe, and quite quickly
Lol. There’s a button at the top that you can click on to jump to the recipe… If you don’t know how blogs work then that’s your own problem – no need to be rude about it. And it’s not “wordy nonsense”, there’s a lot of helpful tips and explanations within the blog post. If you can’t appreciate that then you shouldn’t be reading blogs.
Agree with you…
Haha, you’re being made fun of on reddit.
Don’t be a Devin
Wow! You really must have had a bad day to feel you needed to write such meanness. I feel it was undeserved and shame on you. Take a breath and see the good in the world. I am sorry you live your life so angry.
Thank you Michelle for taking the time to give us this recipe.
I followed the directions but my cheesecake is not tall. I don’t know what I did wrong. It looks like half the height it should be.
Thank you
Hi! Did you use two boxes of cream cheese?
Yes.
I did not bake it for 90 minutes. I checked it at 60 and it was done. A little brown on top not jiggly. Could I have underbaked it?
Yes
This cake is delicious! I made this cake so I could layer it with two red velvet 6” cakes so I cut the recipe in half and didn’t make the crust. I also used sour cream instead of heavy cream along with a small splash of fresh lemon juice. I baked it on a 325 degree oven in a water bath for 39 min. It was delicious.
Fantastic recipe idea!
Made this for good friends. His exact words were, “I think this is the best cheesecake I’ve ever had”!
Cheesecake turned out ok but the flavor was non existent as a previous review stated. I too added more vanilla, I did not add lemon juice.
It makes a big difference to use minimal ingredient cream cheese, as in real, instead of cheap store brands with lots of other additions.
I obsessively read reviews before I make and/or buy anything, but rarely write them (I know…). But I just made this and had to come back. There are some very mixed reviews on this cheesecake, but I do not understand how? I made it exactly as written (I did throw some blueberries in right before going into the oven per husband’s request – I recommend this!), and it was DELICIOUS. The taste, texture, everything was spot on. I’ve made a lot of cheesecakes before and my husband says this may be the best one yet. Saving this recipe forever. Don’t listen to the negative reviews — MAKE THIS!
While this recipe is delicious and is a keeper I really think the baking time is incorrect. The first time I made and baked it for an hour it was way over baked. (I should’ve checked it sooner but was trusting the recipe)
I tried it again for 40 minutes which was perfect. Even at 40 minutes the edges started to brown slightly.
I thought 90 minutes was way to long. I baked at 325 degrees for 40 minutes and then turned the oven off and left the cheesecake in for 20 min and then opeaned the door for 30 min. Turned out perfect. tried to send a pic but couldn’t
I would like to try the recipe. I want to know how much sugar ? I would use for the crust I don’t see it mentioned in the crust recipe.
The crust recipe doesn’t contain any sugar, but if you’d like to add some, I recommend a Tablespoon of granulated sugar!
We were supposed to go to a friend’s house for dinner last week, so I made this tiny cheesecake. It was perfection! The texture/consistency was spot on and I love the portion size. I have another one in the oven baking right now. Thanks for sharing this.
Where do you add the vanilla bean paste/or just vanilla bean. I can tell you have it in the topping by the look but it isn’t anywhere in the directions or your story. Thank you!
Good eye! I omitted it from the recipe because vanilla bean is too expensive for a lot of people and it’s good without it. But I personally added beans from 1 vanilla bean pod to the sour cream topping.
Hi Michelle! Can you tell me what recipe you used to pipe the rosettes on the top of cheesecake?
Everything else turned out beautifully!
Thank you!!
Hi! I just used homemade whipped cream. You can use store bought too!
Love this. So easy!
made this recipe and was very good. making it again can i add fresh blueberries to it
I made this yesterday, it turned out really well. But it is REALLY rich, I felt like the heavy cream coated my tongue and after a few bites I almost couldn’t taste the cream cheese. I’d like to try again and make with sour cream, as a few others have done, and see if that fixes the issue. But overall a great recipe, the texture was divine.
Came out perfect, this is a keeper!
I just made this, however, I added 1/4 cup kuala, 1/2 square semi sweet chocolate, melted, 1/2 tsp instant coffee. I omitted the heavy cream. It is now in the oven. I hope it turns out!
So the taste of the recipe itself was really good although I did not like the fact that the suggested bake time was so long I did follow everything in the recipe with room temp ingredients and mixing etc. if I didn’t check at an hour my cheesecake prob would have been burnt bc it got really brown on top and cracked, I did put it in a water bath. I will try to reduce the bake time next time as someone else suggested. Other than that, I really liked it.
Thank you, Michelle! This is an excellent cheesecake recipe! I’ve had trouble with cheesecakes in the past, but the tips you included in the notes made all the difference. (Boiling water bath, leaving the cake in the oven after completion for 30 mins, checking it at 60 minutes, etc). Mine was done earlier that I would have expected. I am gluten-free, so I made an oat crust, but followed the filling and cream cheese topping instructions exactly as listed. It tasted just like a Costco cheesecake (well, better…but the best one I’ve made by far!)
This is a marvellous recipe and I have made it several times with really good results.
My family think this is the best cheesecake ever. Thank you for taking time to share with everyone.
I’ve made this 6” cheesecake several times. It’s my go-to recipe. It’s simple and always comes out perfect.
I also increased the ingredients by 50% and made an 8” version and it was perfect, too.
My only “adjustment” is I add a touch of freshly grated lemon zest to the batter. And I prefer just plain whipped cream on top.
For my 6” pan it takes 60-70 minutes to bake, no where near the 90 minutes suggested.
Thanks for a great recipe!
There is an error in this recipe that could affect the outcome. In the baking instructions about time, it says “if the edges ARE set” and then proceeds to say to bake longer. Shouldn’t it say “if edges are NOT set”?
no the edges need to set first,
The recipe calls for the cheesecake to be baked at 350-degrees, but I would bake it at 325-degrees (still in a water bath).
I made this cheesecake today for my son in law’s birthday. It was so creamy and delicious! Everyone loved it! I knew it was going to be good because of all the information you included in your recipe. I have made cheesecakes in the past and they were not creamy, almost dry and grainy and now I finally know why. Thank you so much for the help and recipe! I would love to make a big one using this recipe format.
Absolutely wonderful!!! My neighbor requested it for his birthday, better than any cake, and I make wedding cakes. I
So good and so easy!! I did not do the water bath and it came out perfect at 40 mins. 🤗🤗🤗 for the crust I used cinnamon grahams and brown butter w/ brown sugar. So delicious!!
This was the first cheesecake I have ever made from scratch. The directions were easy to follow and made a delicious cheesecake.
This was my first attempt at cheesecake and what a winner. It was better than any others due to the light and fluffiness of it. To me, cheesecake is often dense and heavy. Not the case here. My family absolutely loved it. Now I need to use this recipe as the base for a lemon cheesecake!! Thank you.
I tried making this dish and somehow water got into the pan while baking. I haven’t looked yet but the crust is soggy now. What should I do?
And that is why i never use a water bath
This cheesecake recipe helped me make the best cheesecake my husband and I have tasted — ever. Because we are seniors watching our sugar intake, I used no-sugar-added cherry pie filling (the best I’ve found are at Walmart) to spoon over the sliced cheesecake. It’s creamy and just barely rich. The sour cream-based topping is perfect. When I add the costs for this compared to buying something ready to eat, this recipe for cheesecake is less than half as much to prepare. Thank you for this. It’s amazing. My crabby old fella husband loves this cheesecake. That’s nearly a miracle.
Yes, on 9/21/24…perfect…the first cheesecake that didn’t crack on me! I use your directions to a tee!
I made this and it turned out amazing !!!
This was my first use of the 6” springform pan. I found it baked much faster than expected—it was caramelized and lightly cracking on top after 1 hour, 5 minutes. I used a chocolate cookie crumb crust and incorporated mini Oreos into the batter. The cheesecake was delicious and a pleasantly dense, but not excessively rich, texture. I served it with whipped cream and chocolate curls on top. It’s an excellent base recipe and I’ll be sure to monitor the bake time more closely in the future. Thank you!