Hummingbird High’s Kitchen Remodel, Pt. III: After
This is the final part of my three-part renovation diary for my kitchen remodel that happened last summer. In this post, I give a tour of my kitchen AFTER the remodel. To see the kitchen before the remodel, check out Part I: Before. To hear more about my kitchen design plans, check out Part II: Inspiration. Thanks for following along!

After half a year, I’m finally revealing my kitchen! A big thanks to my incredibly talented photographer friend Celeste for taking these beautiful photos of my kitchen. For the last few months, I’ve been sharing bits and pieces on Instagram. But now it’s finally time for the official tour! Here we gooooo:
BEFORE/AFTER: THE SINK AREA
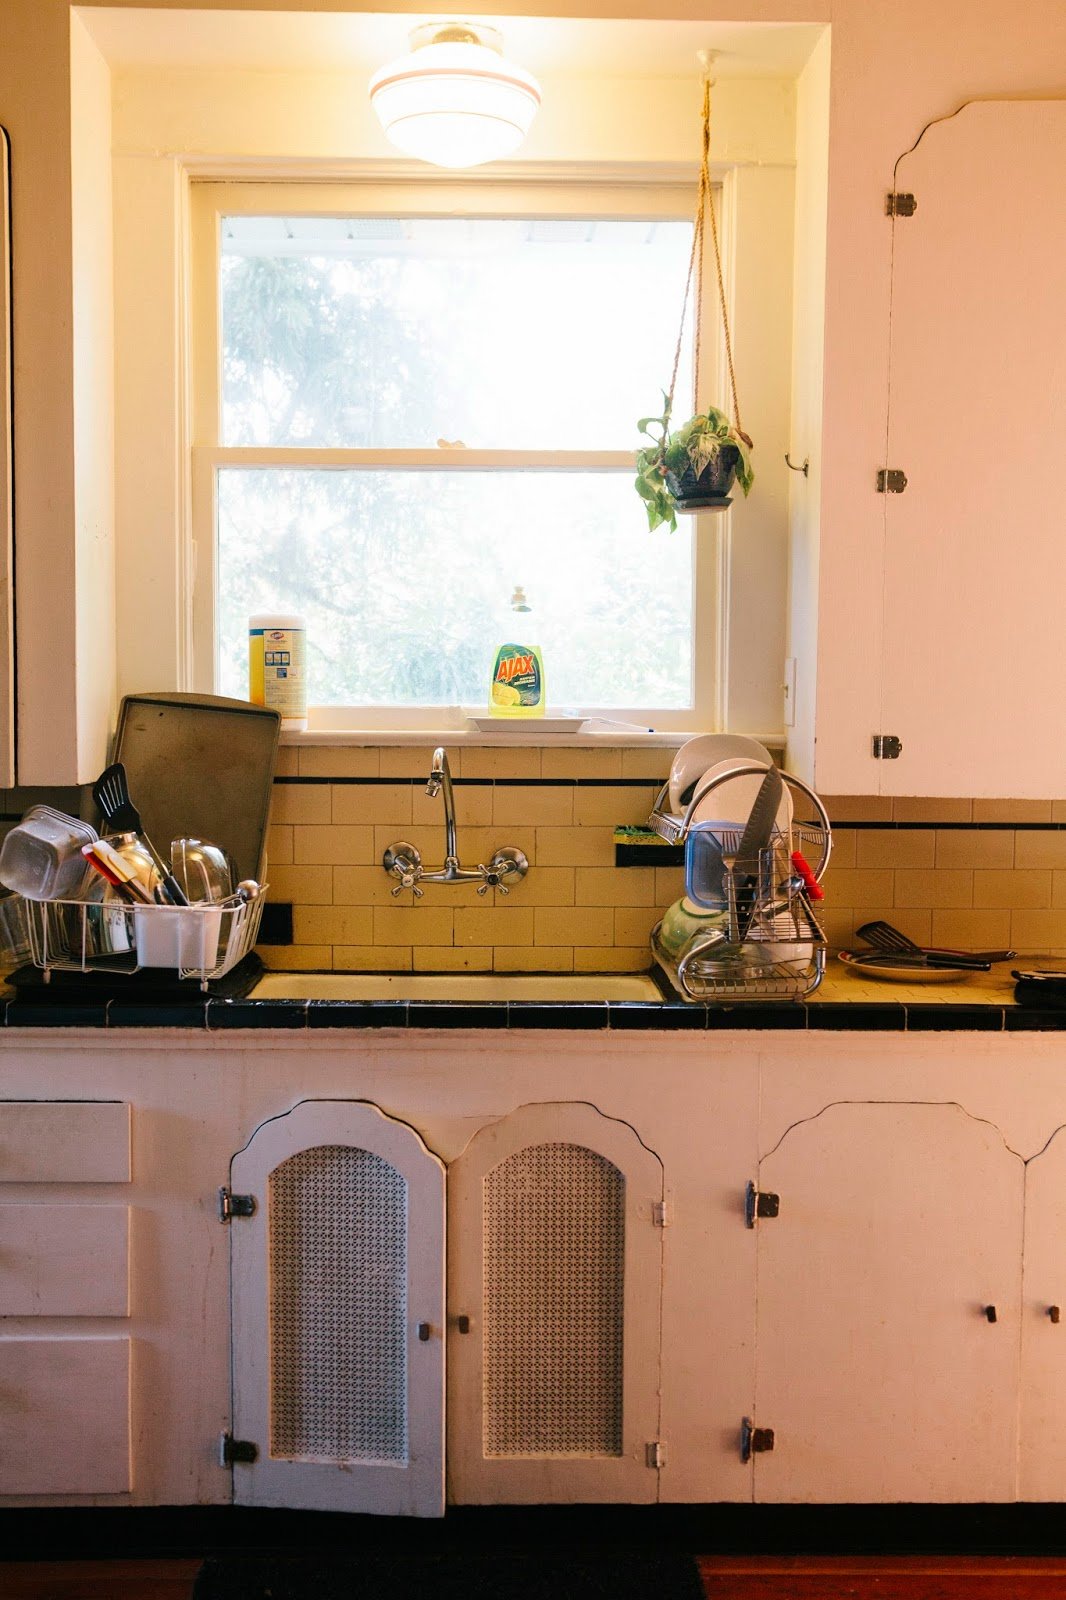
So remember this hot mess? Complete with a sink leaking into the wall of the house, 18-inch depth countertops, a window that I couldn’t open since it was painted shut and no dishwasher resulting in a setup of two space-consuming dish racks perpetually full of drying pots and pans?
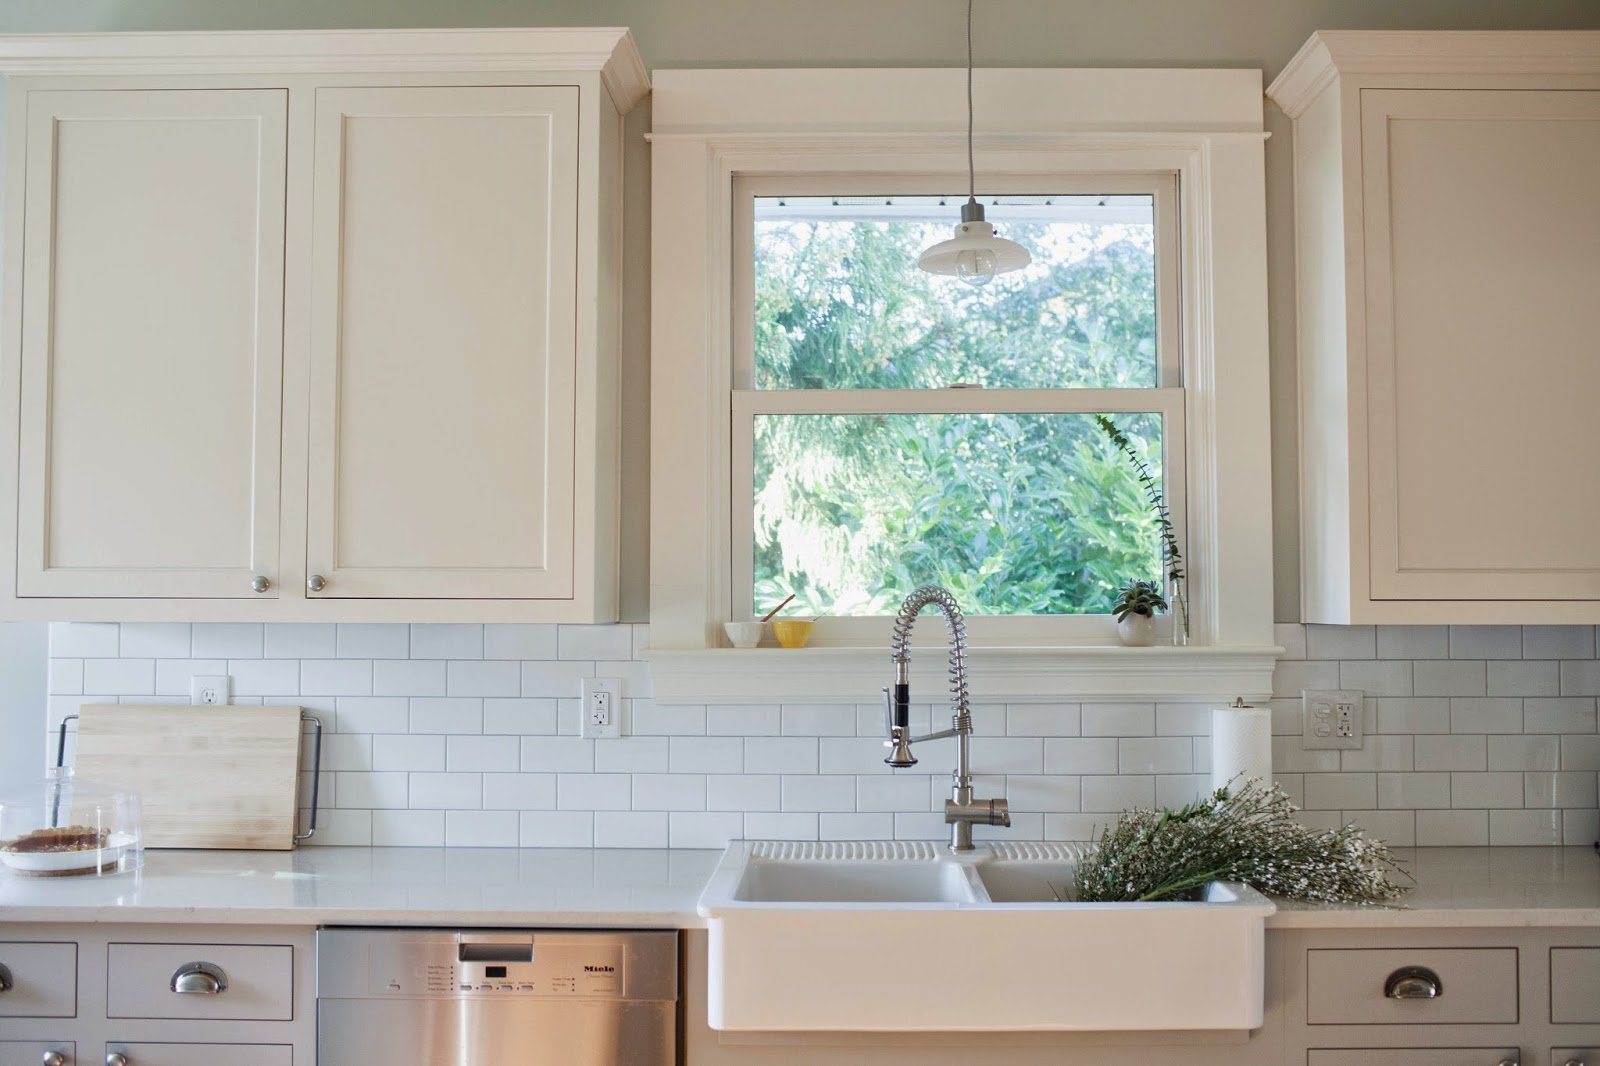
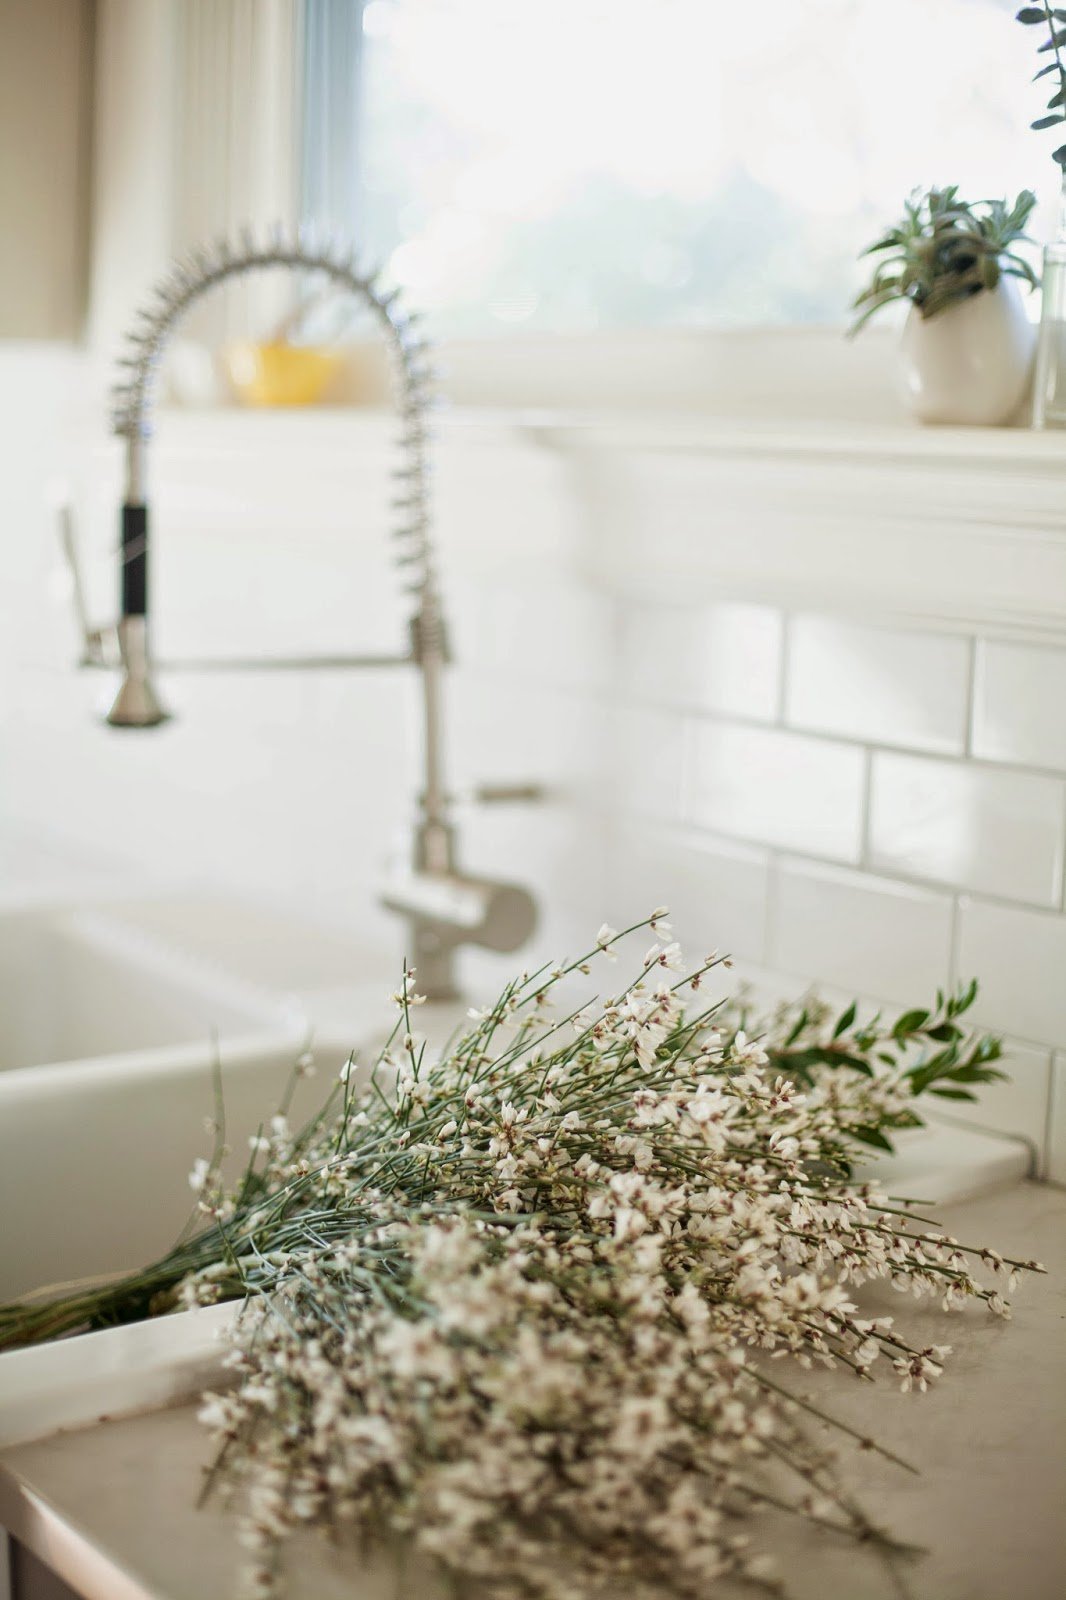
Well, now it’s THIS:
Although I did lose some of the old house charm (in particular, I’m sorry to see the black tile border and the ventilated cabinets under the sink go), the sink area is much more timeless and functional with the white subway tile and neutral rectangular cabinetry.
Can we just take a second to acknowledge the dishwasher next to the sink? Prior to the remodel, I hadn’t had a dishwasher in years. And let me tell you something, guys — Erlend and I get in to so many less fights now that we have a dishwasher. It’s crazy how many of our fights were related to washing and leaving dirty dishes in the sink.
In the end, despite some initial reservations, I went with the double bowl farmer’s sink from Ikea that some of my blogger friends had warned against. It was just too cheap, huge and pretty not to buy. Although I sometimes panic when I wash off things with particularly colorful ingredients like turmeric or beets, staining hasn’t been a problem yet — everything can be cleaned off with citrusy soap, salt and elbow grease. Also that faucet deserves some praise: it reaches all corners of the huge sink, and its spraying capacity is out of this world. Washing sheet pans and giant woks has never been easier.
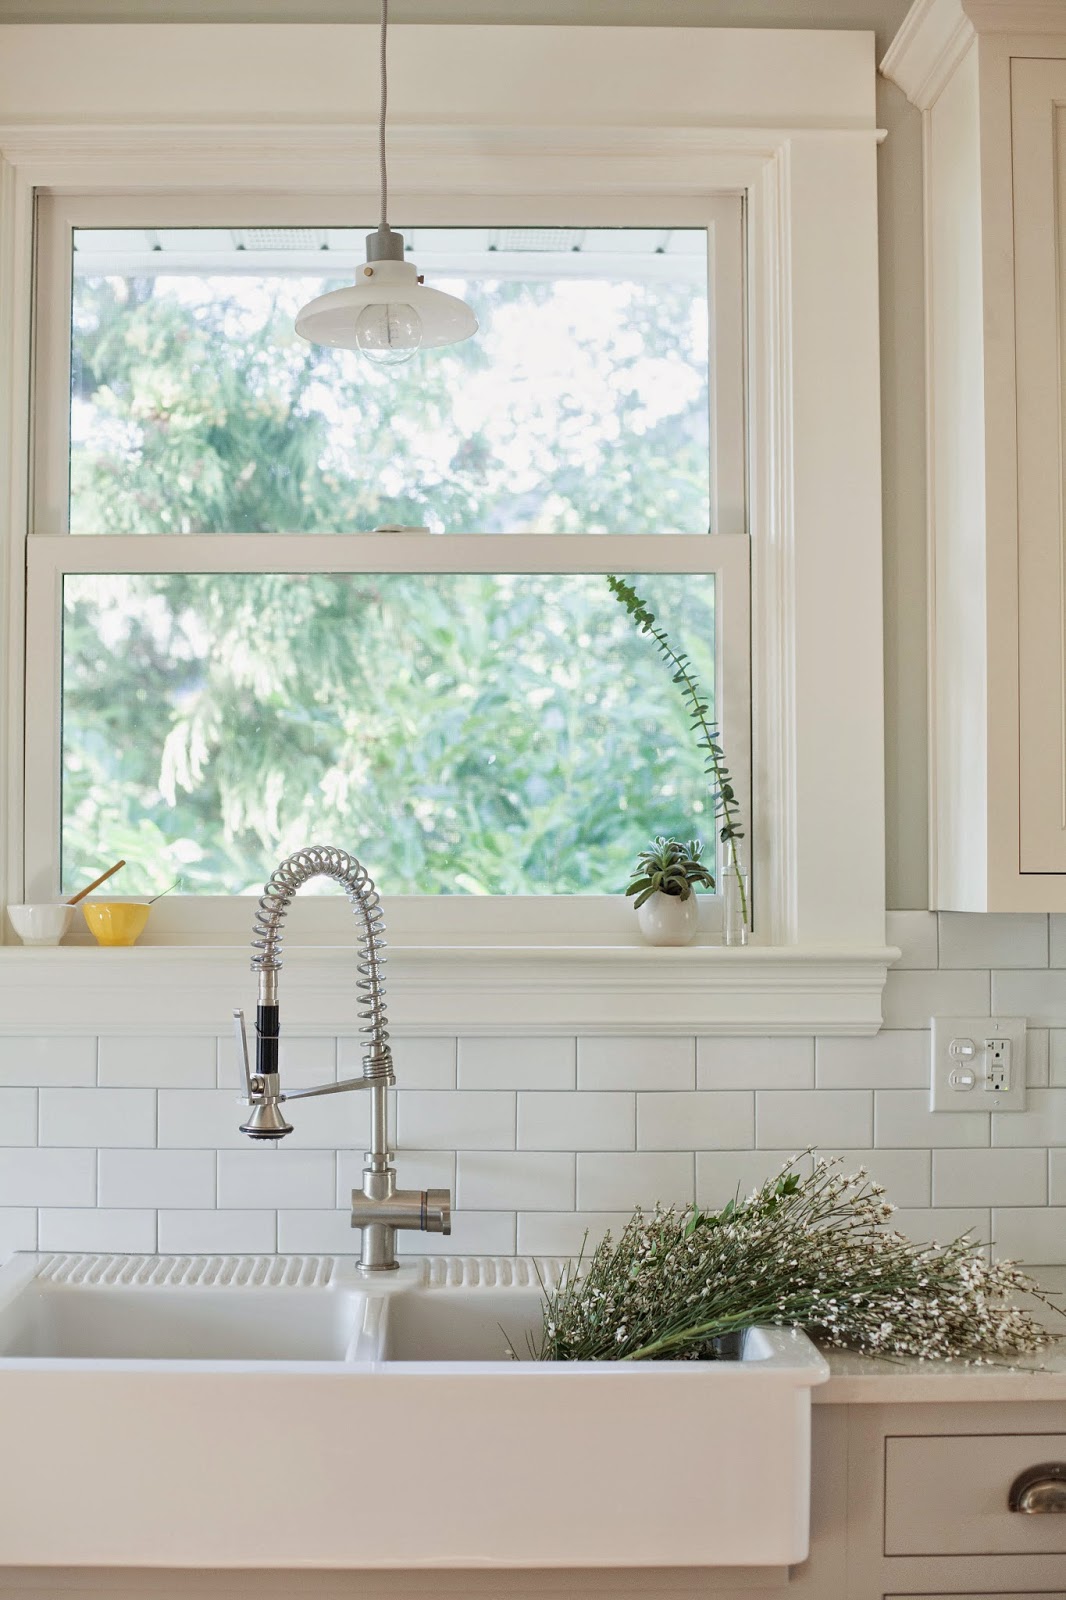
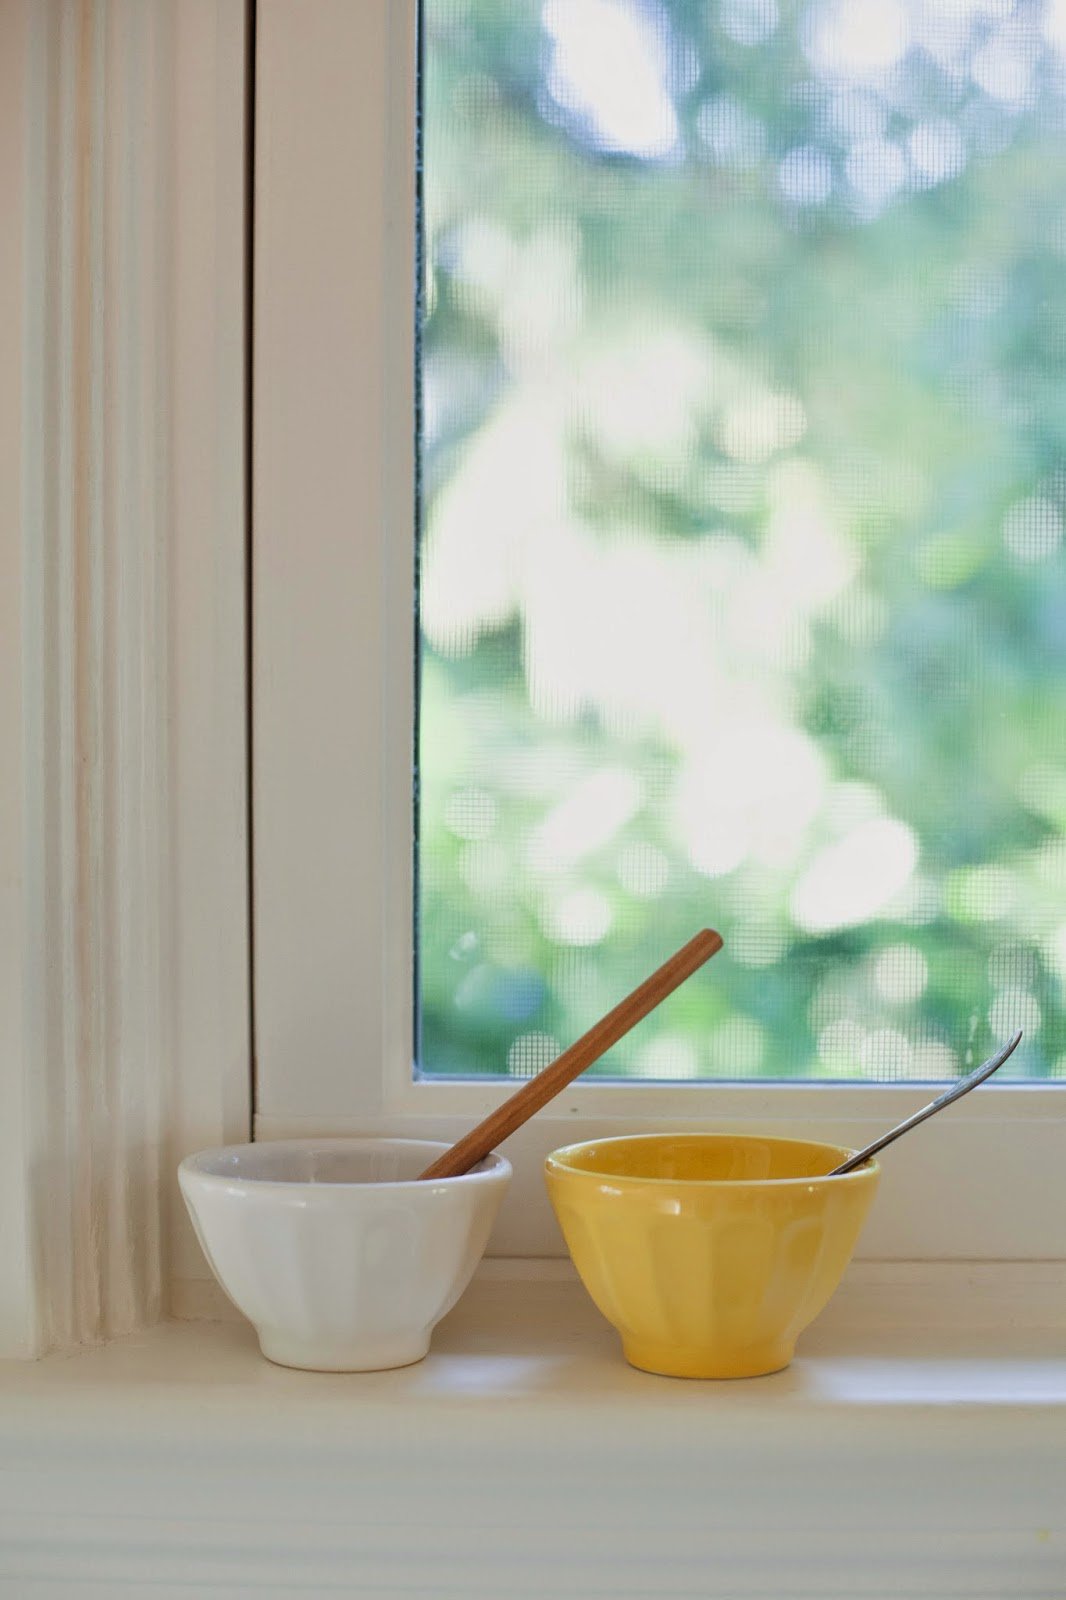

My neighbors used to grow bamboo in their garden, turning their house into some sort of mini bamboo farm in the 70s and 80s. My own house benefits from this funky bit of Southeast Portland history — even though a new set of owners lives there now, they left a lot of the old bamboo farm’s greenery and a huge, verdant, blooming wall made of bamboo and other trees divides my house from my neighbor’s house. This is what the window looks out onto; the view is nothing but green, green and more green. Also since the window faces west, it lets in a lot of great light in the late afternoon. Considering I live in the heart of the city, this is really the best view I could ask for.
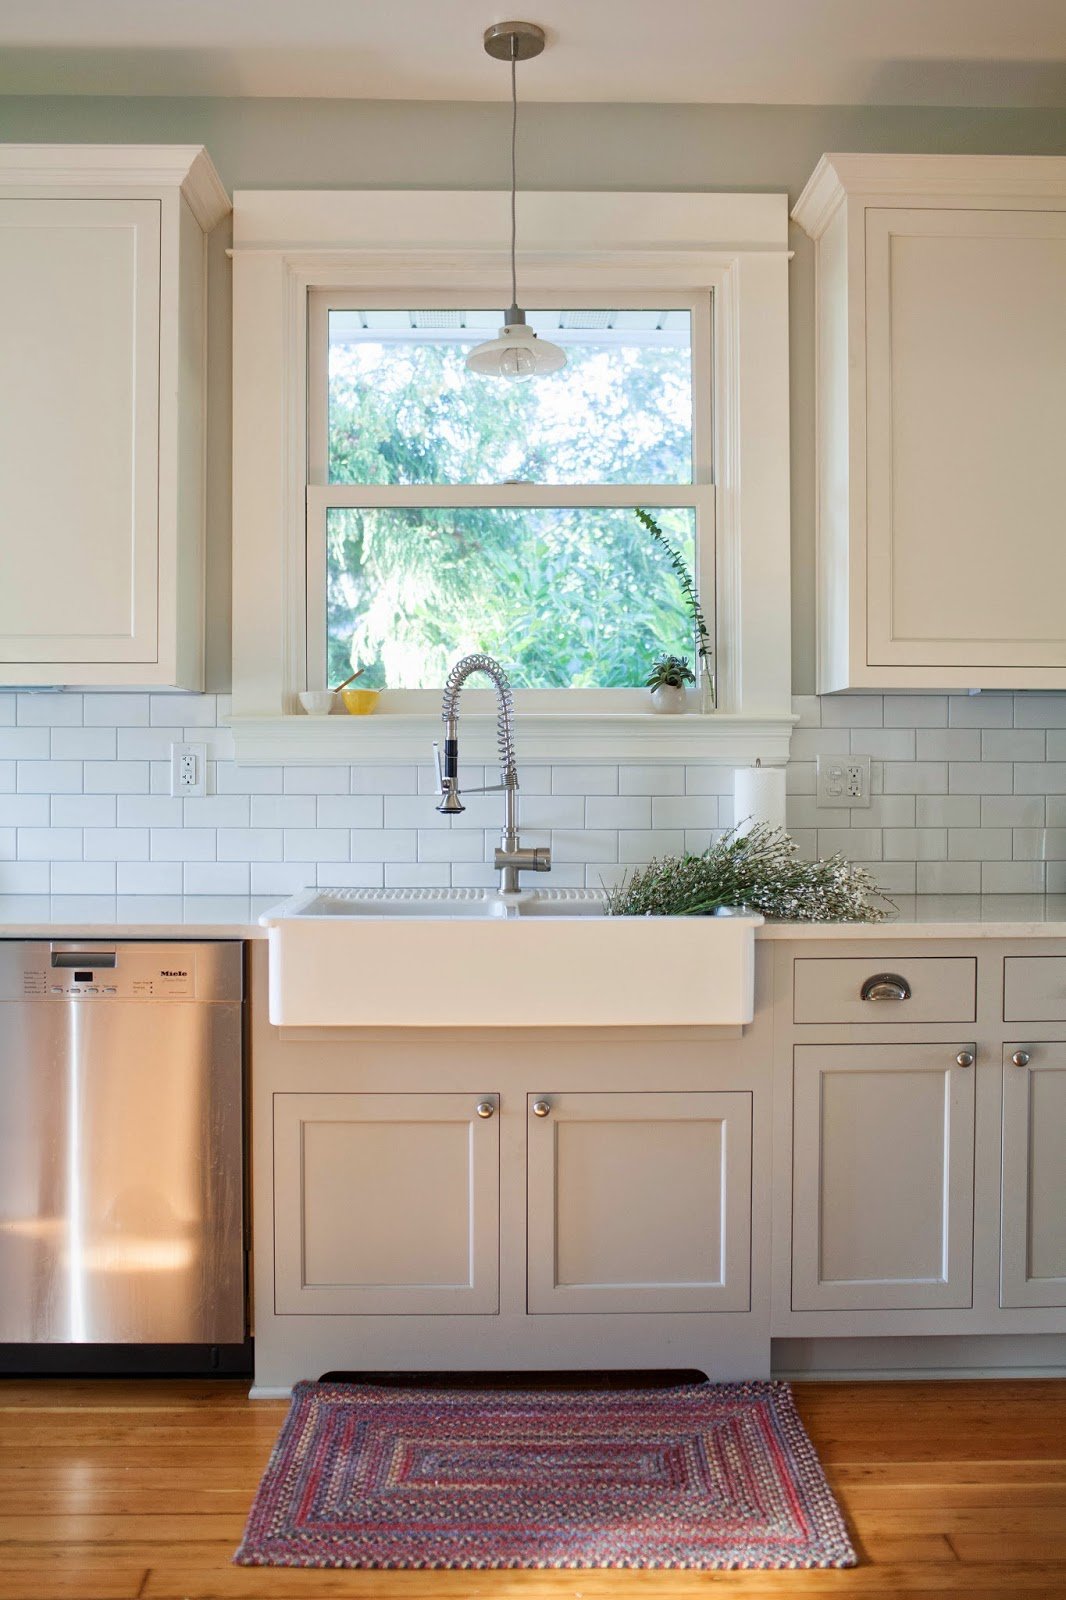
Seen above:
- Dishwasher: Miele Futura Classic 4225 with Cutlery Tray
- Sink Faucet: Ikea HJUVIK
- Sink: Ikea DOMSJÖ Double Bowl
- Rug: World Market Cardinal Concentric Braided Rug (no longer available)
- Pendant Light: West Elm Mini Industrial Glass Pendant + West Elm Spiral Edison Bulb
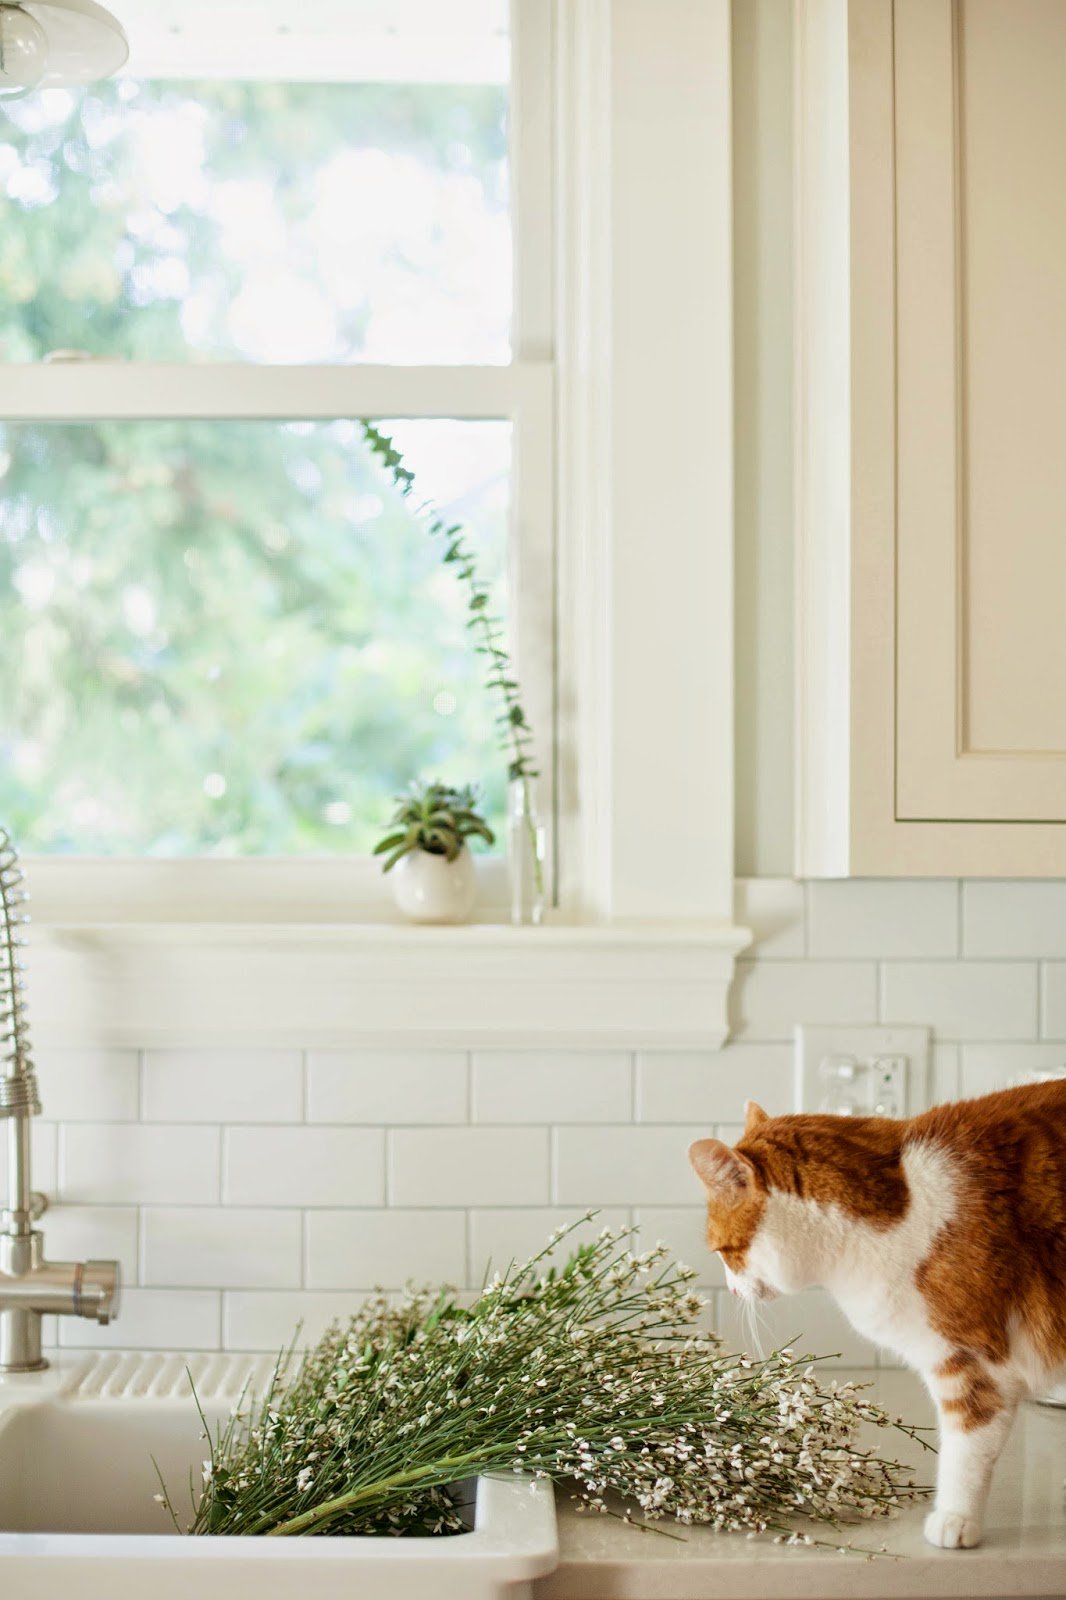
- Plants: Artemisia Portland (succulent) + New Seasons Market (eucalyptus)
- Bowls: Anthropologie Mini Latte Bowls
BEFORE/AFTER: THE RANGE AREA
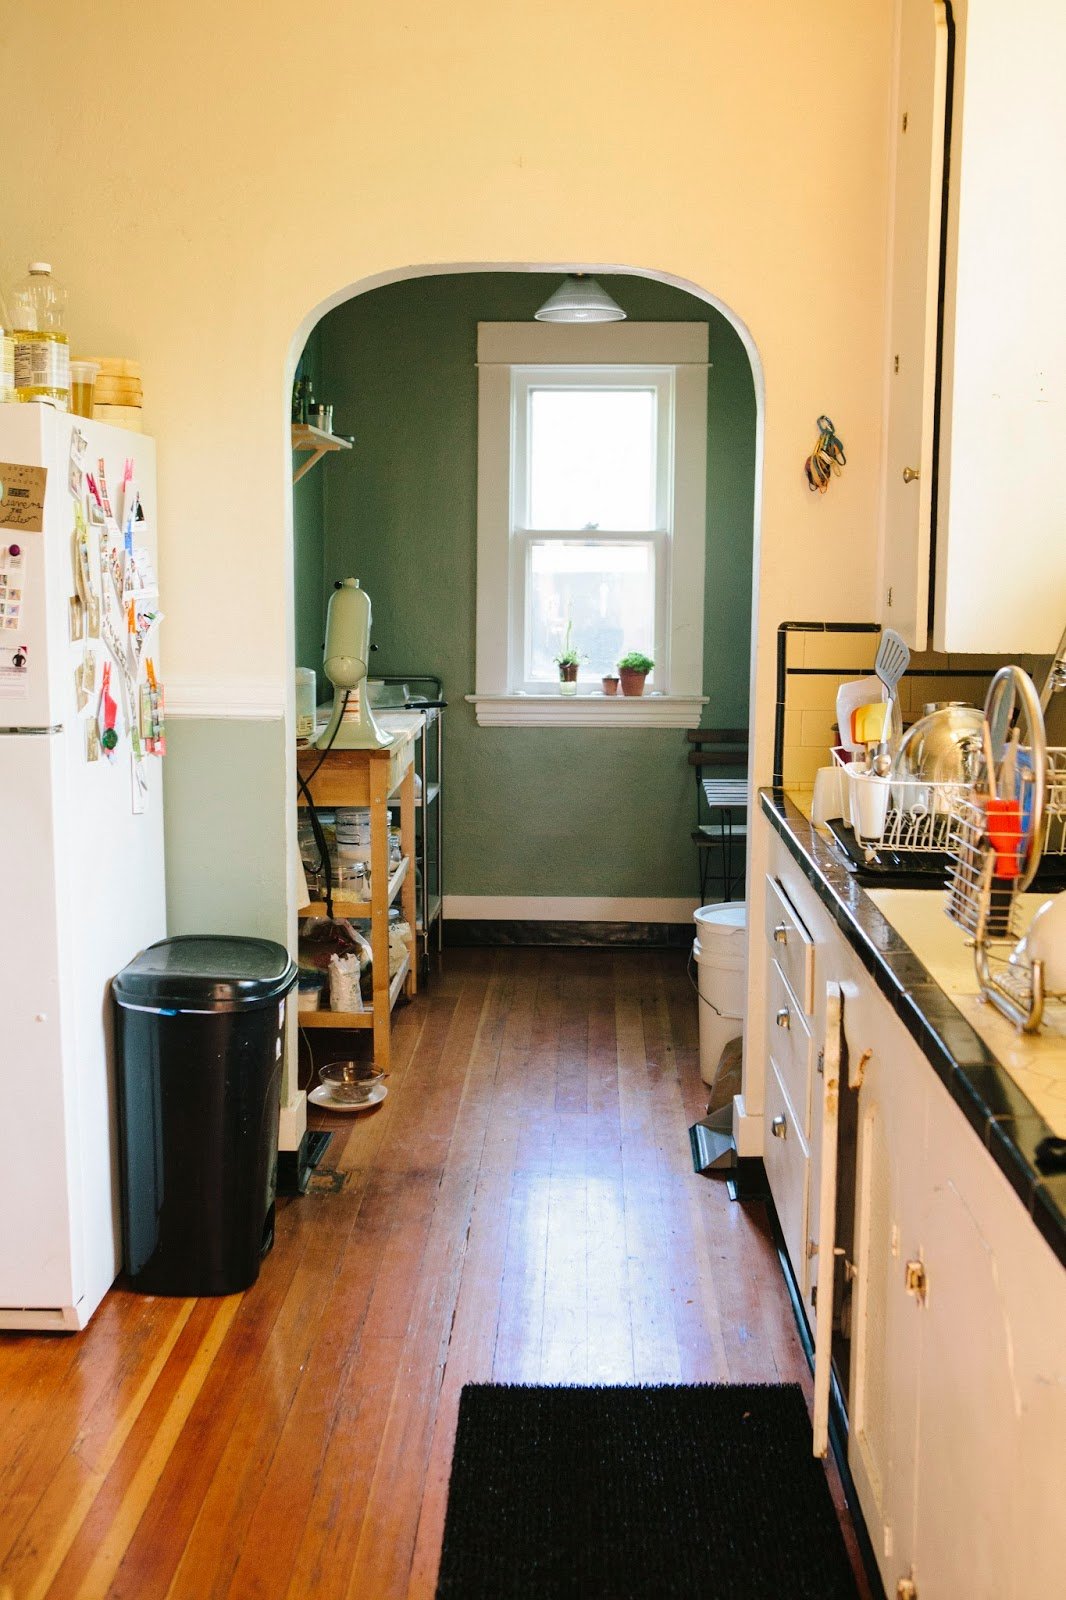
This is where I used to cook. A dimly lit side of the kitchen with no hood, excessive and oddly sized storage that wasn’t actually all that useful leading to tons of clutter:

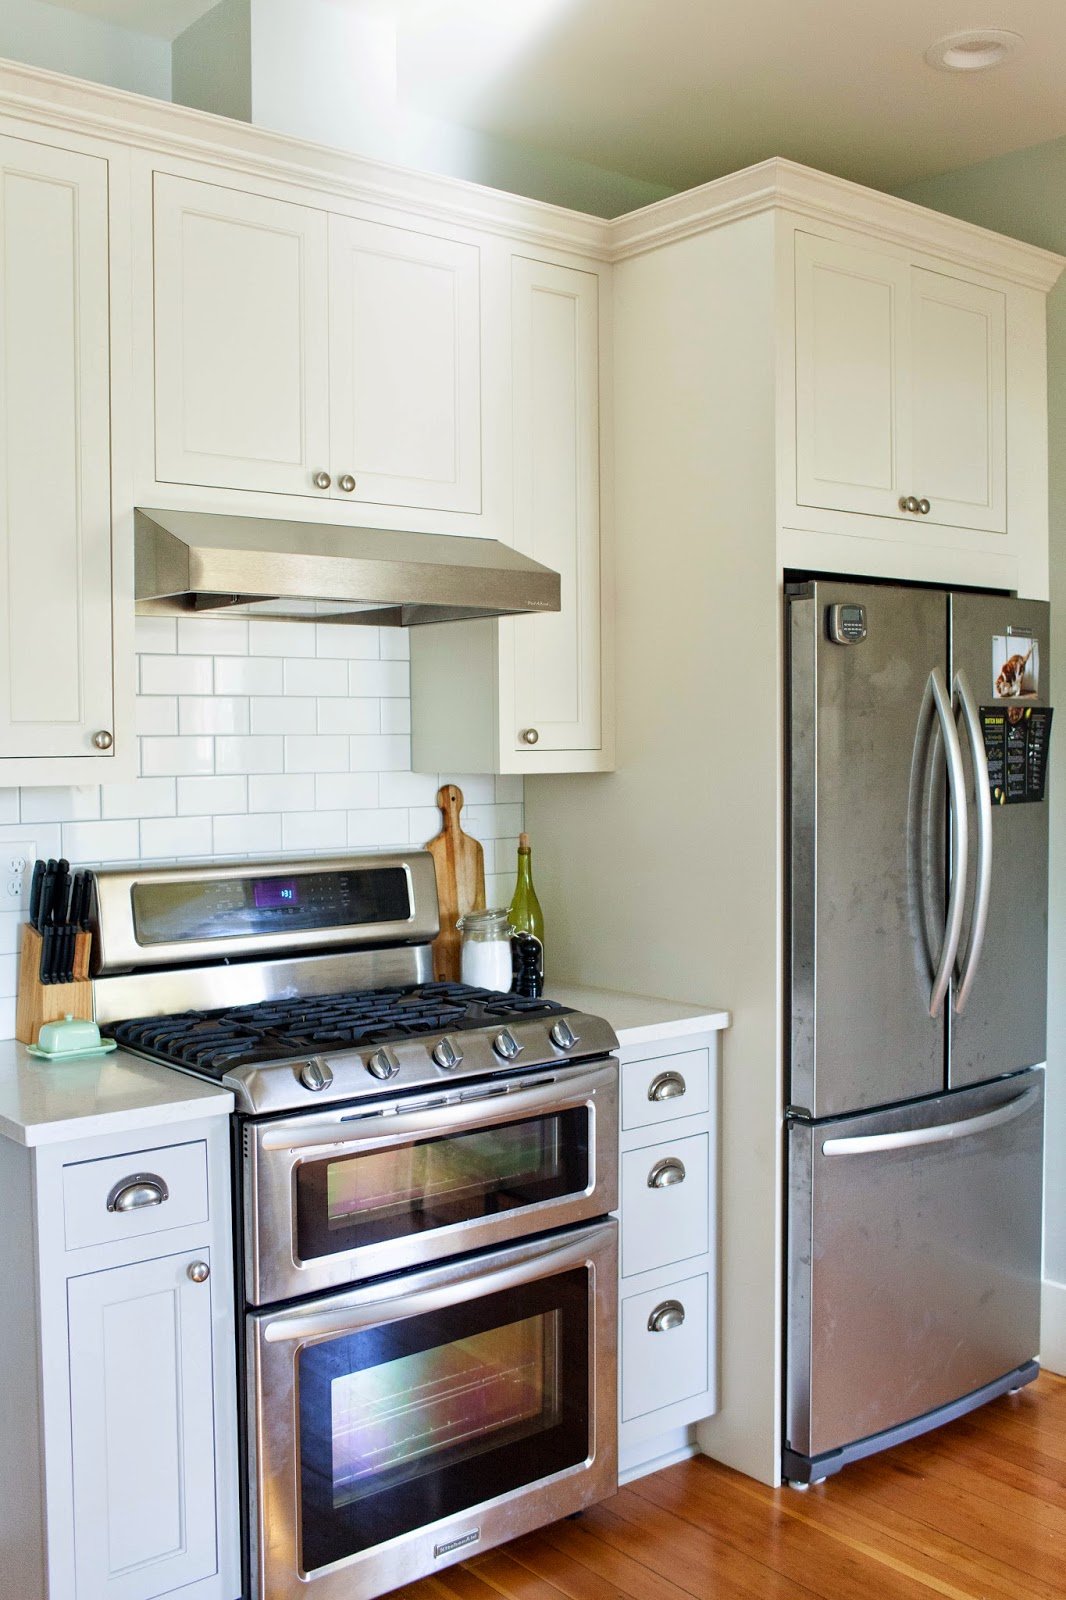
- Hood: Vent-A-Hood K30 Pro Series
- Range: KitchenAid Architect Series II 5-Burner Gas Double Oven Range
- Fridge: KitchenAid Architect Series II French Door Refrigerator
- Cutting Board: Madeira Bread Board
- Salt Jar: Ikea KORKEN
- Butter Dish: Anthropologie (no longer available, but this is similar and very cute)
BEFORE/AFTER: THE “FRIDGE” AREA
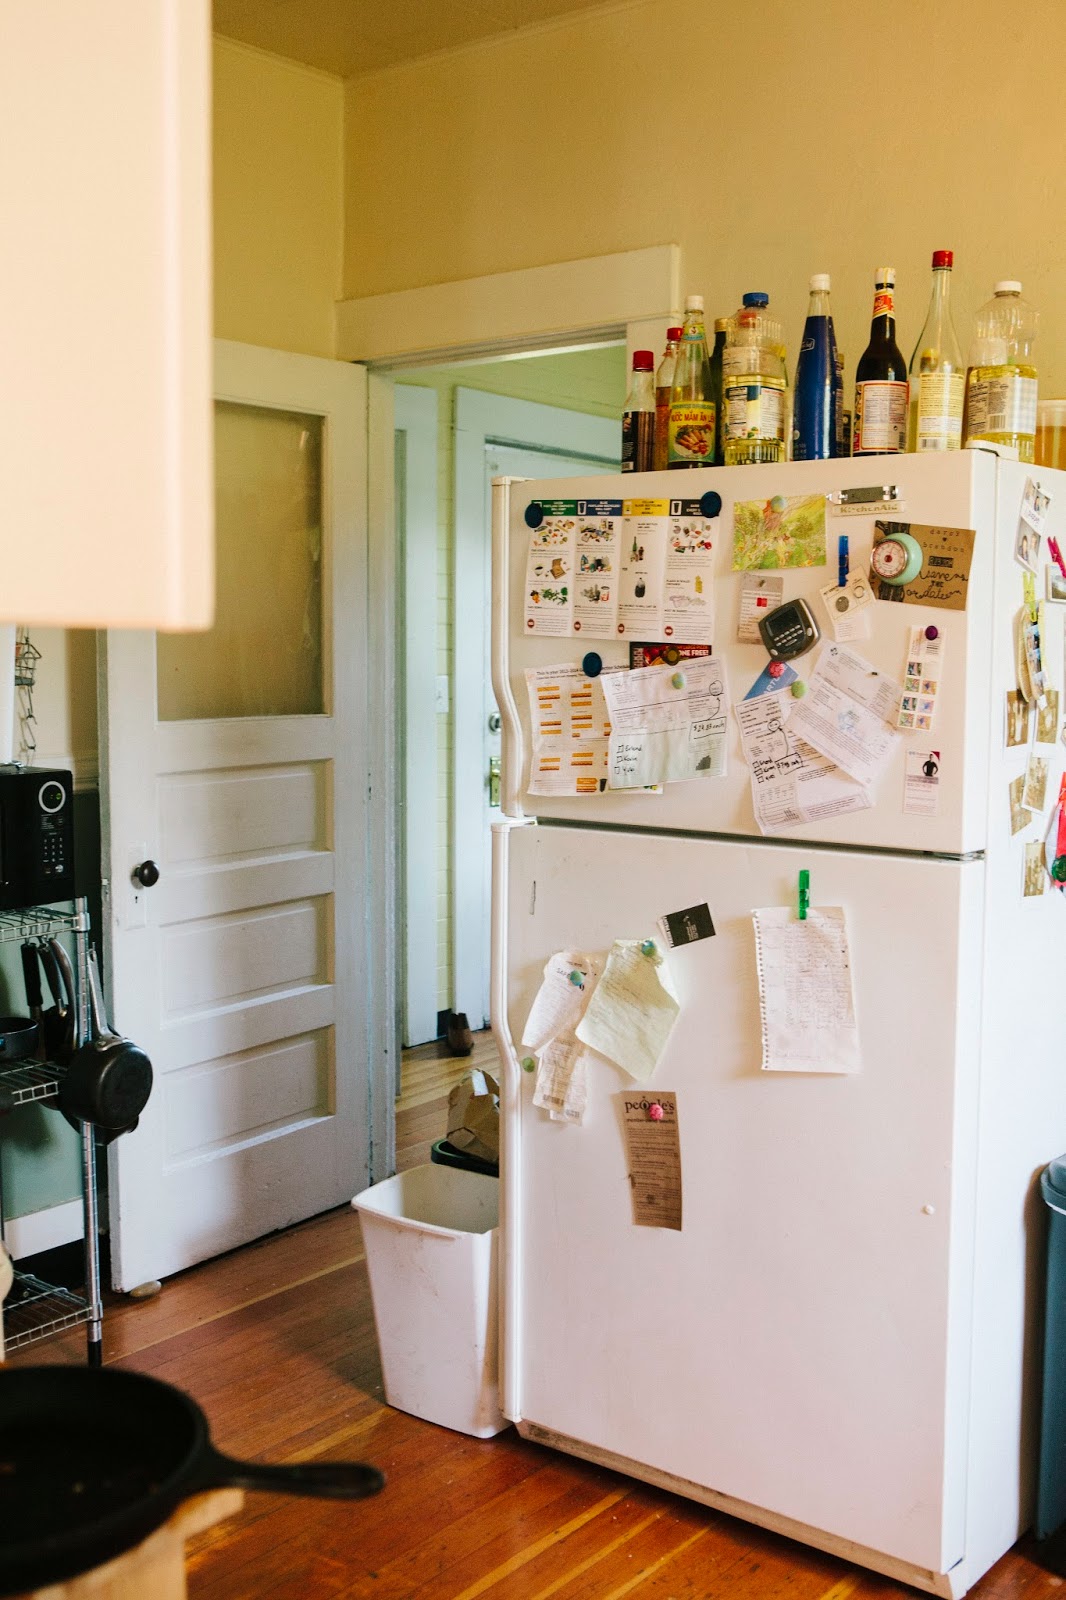
Well, I turned the area into something glorious. Something I hardly believe I have myself. Something that causes me to pinch myself everyday to make sure that it’s real.
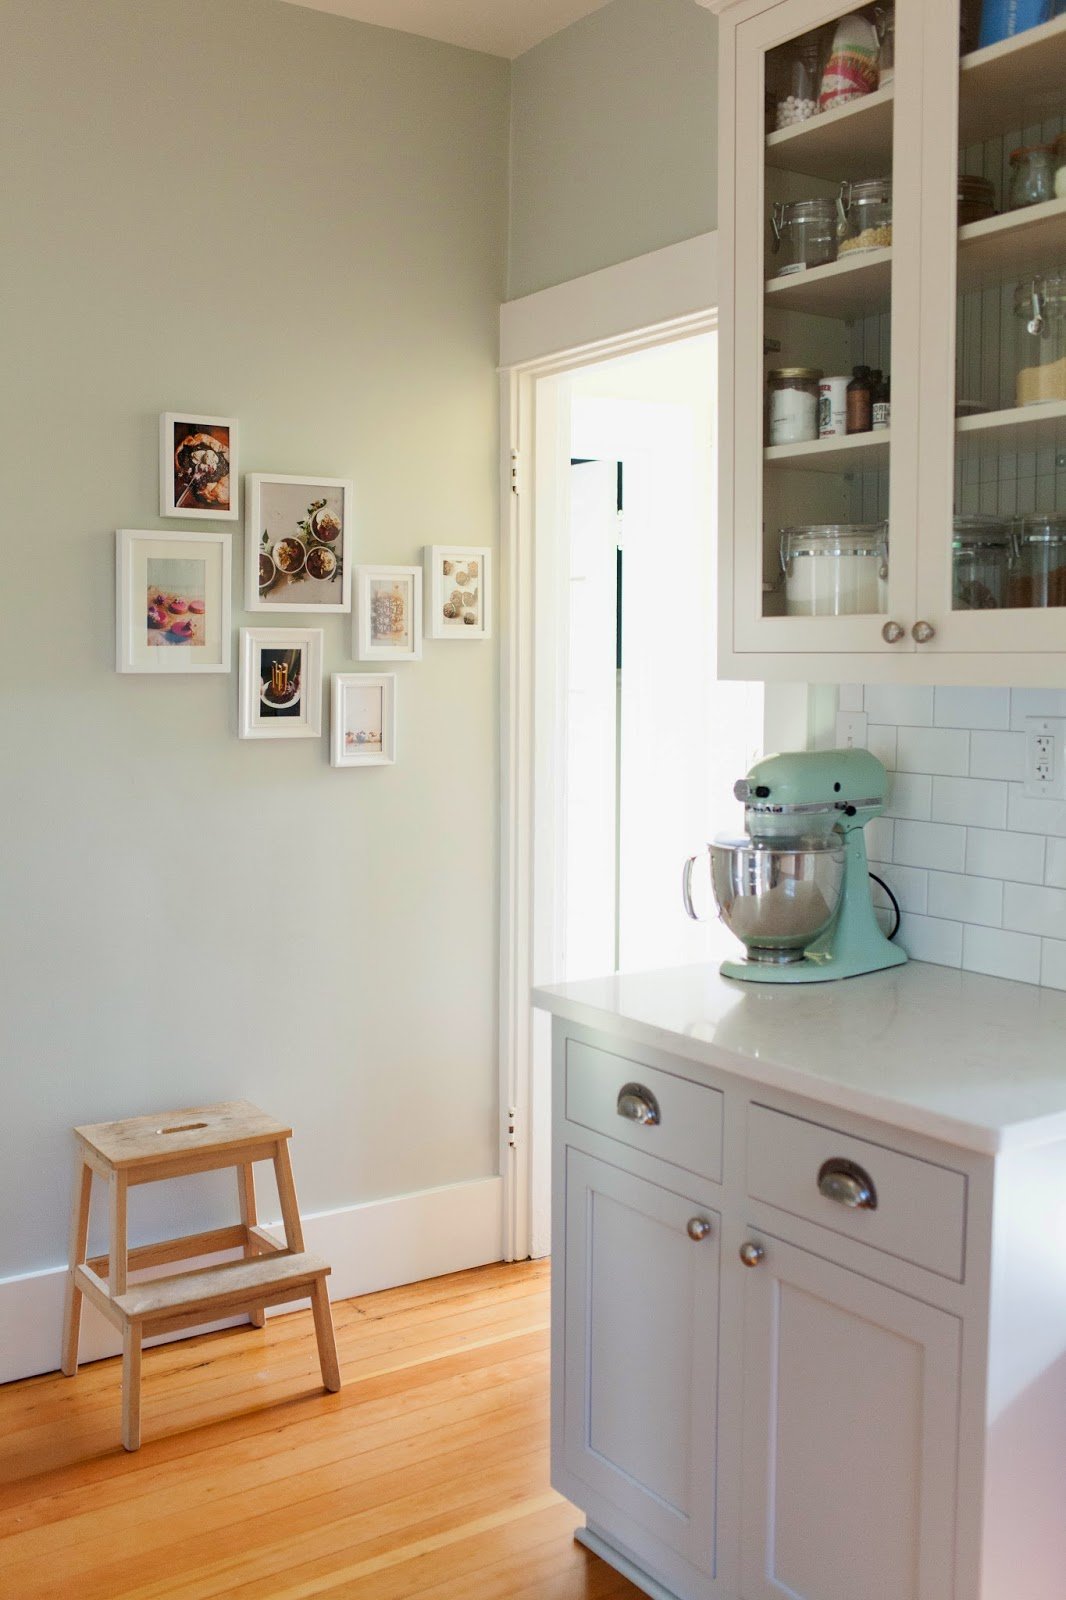
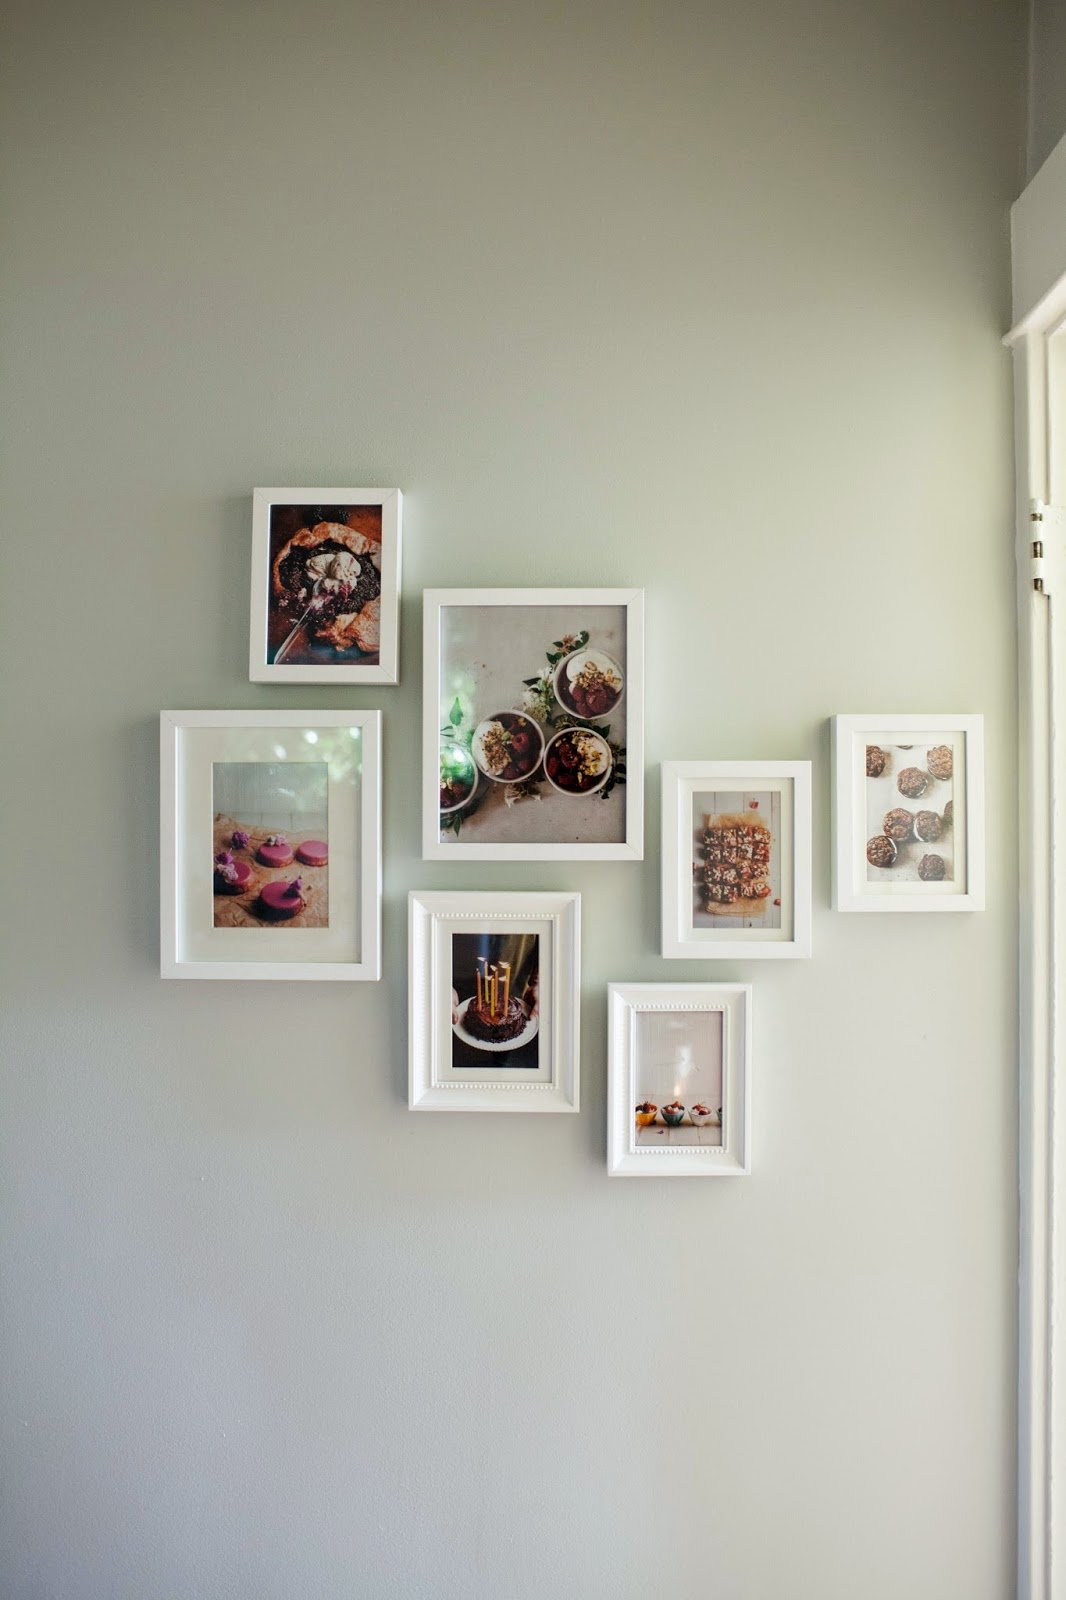
I turned it into a baking station:

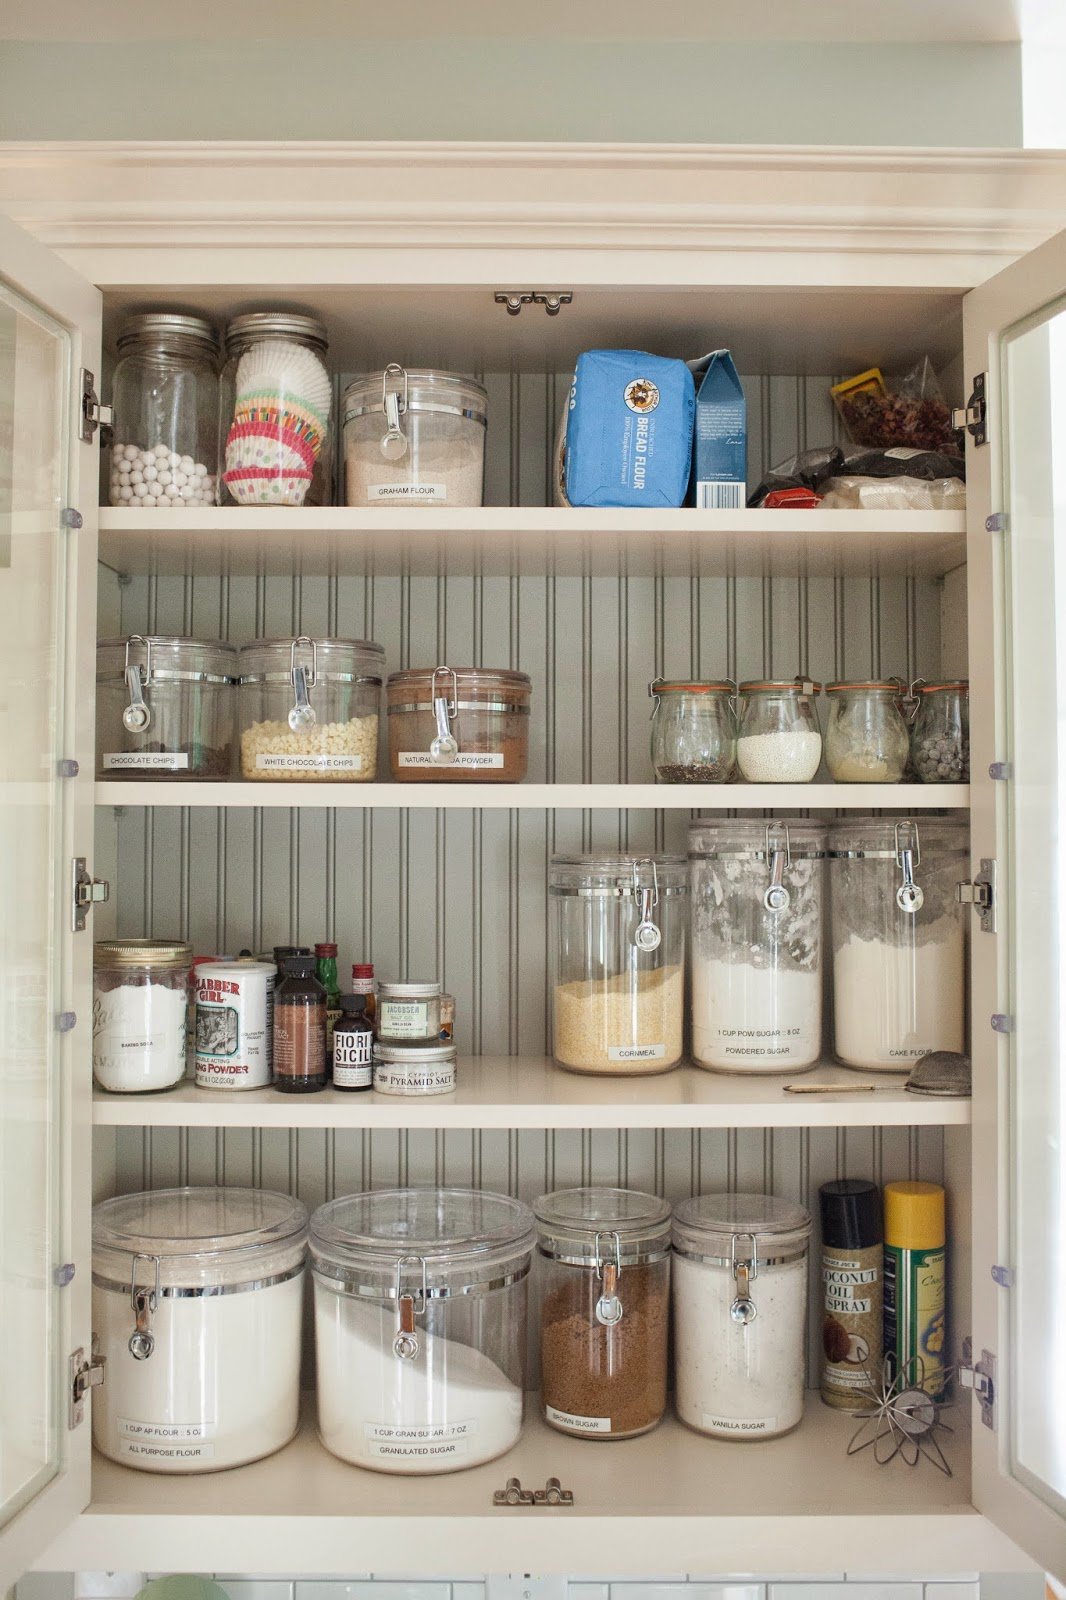
Now if you look closely, you can see how nerdy I really am — not only have I used a freakin’ professional label maker to label all my jars, I’ve also included the weight and volume measurements per ingredient. For instance, my giant jar of flour has two stickers: a label declaring it as all-purpose flour and a sticker reminding me that “1 CUP = 5 OUNCES”.
BAKE NERD 4 LYFE.
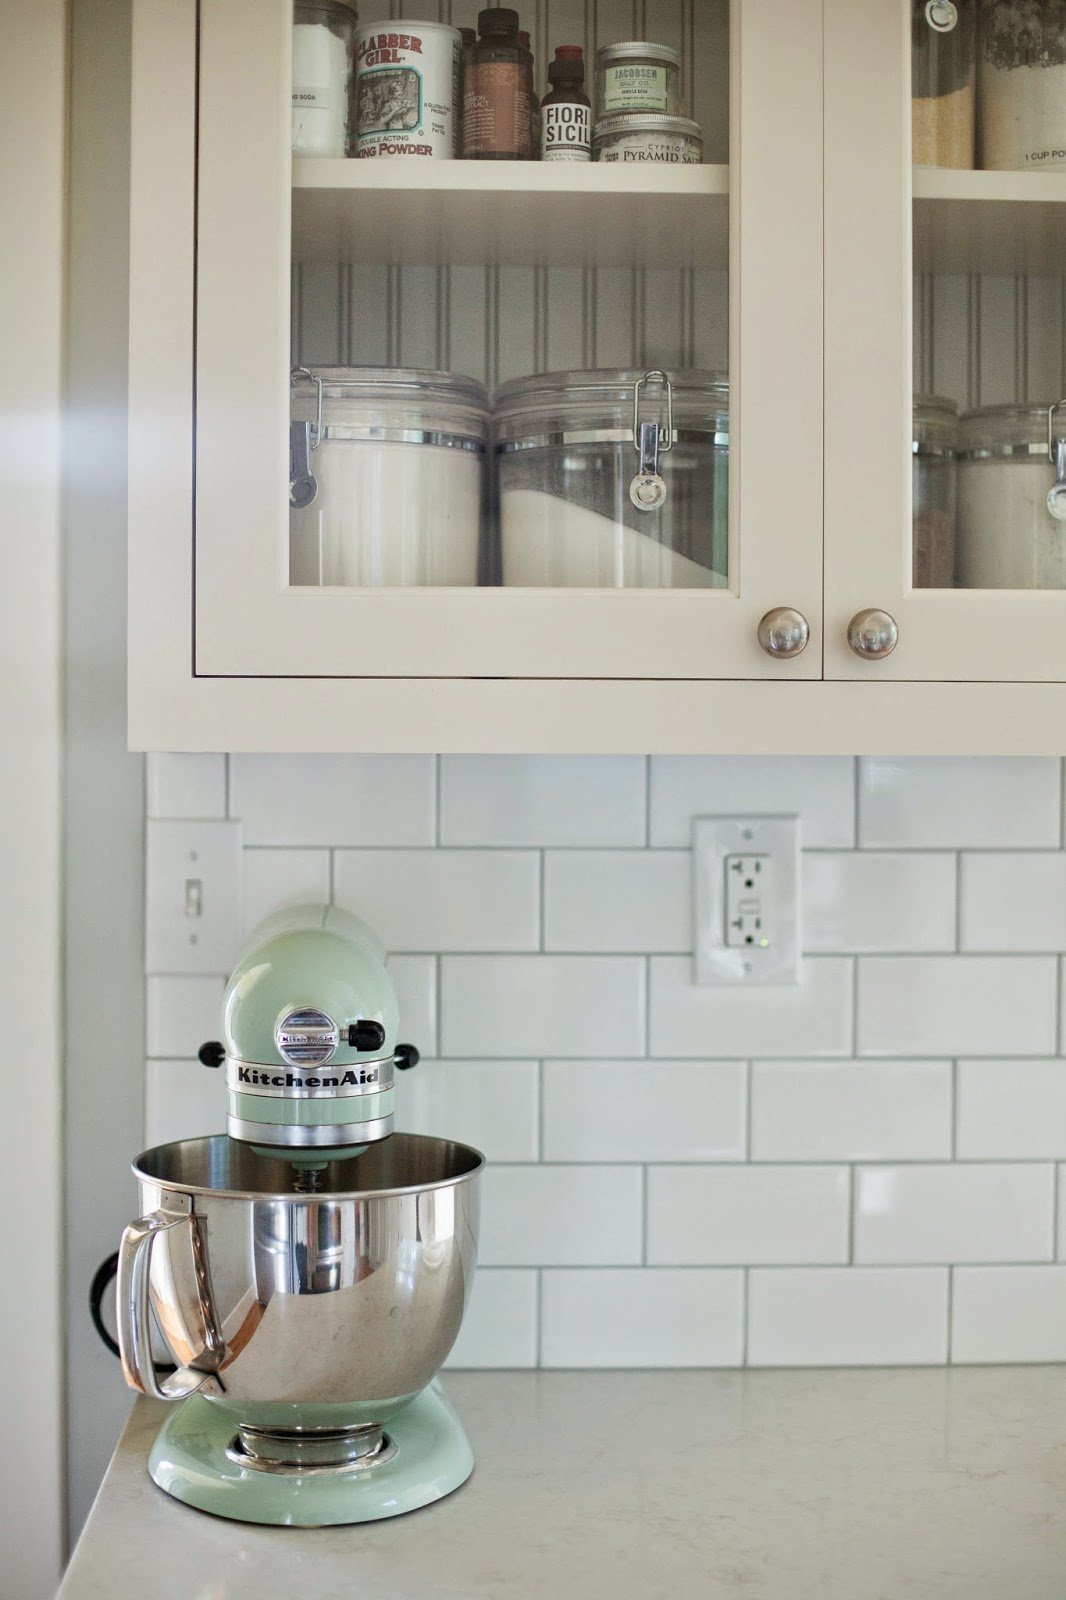
- Mixer: KitchenAid 5-Quart Artisan Stand Mixer in Pistachio
- Jars: Oggi Acrylic Jumbo Canisters, Oggi 5-piece Acrylic Canister Sets, Kerr Wide Mouth 32oz. Mason Jars and Weck 7.4oz Tulip Jars
- Gallery Photo Frames: Ikea RIBBA frames (small and medium) and Ikea VIRSERUM frames (medium and large)
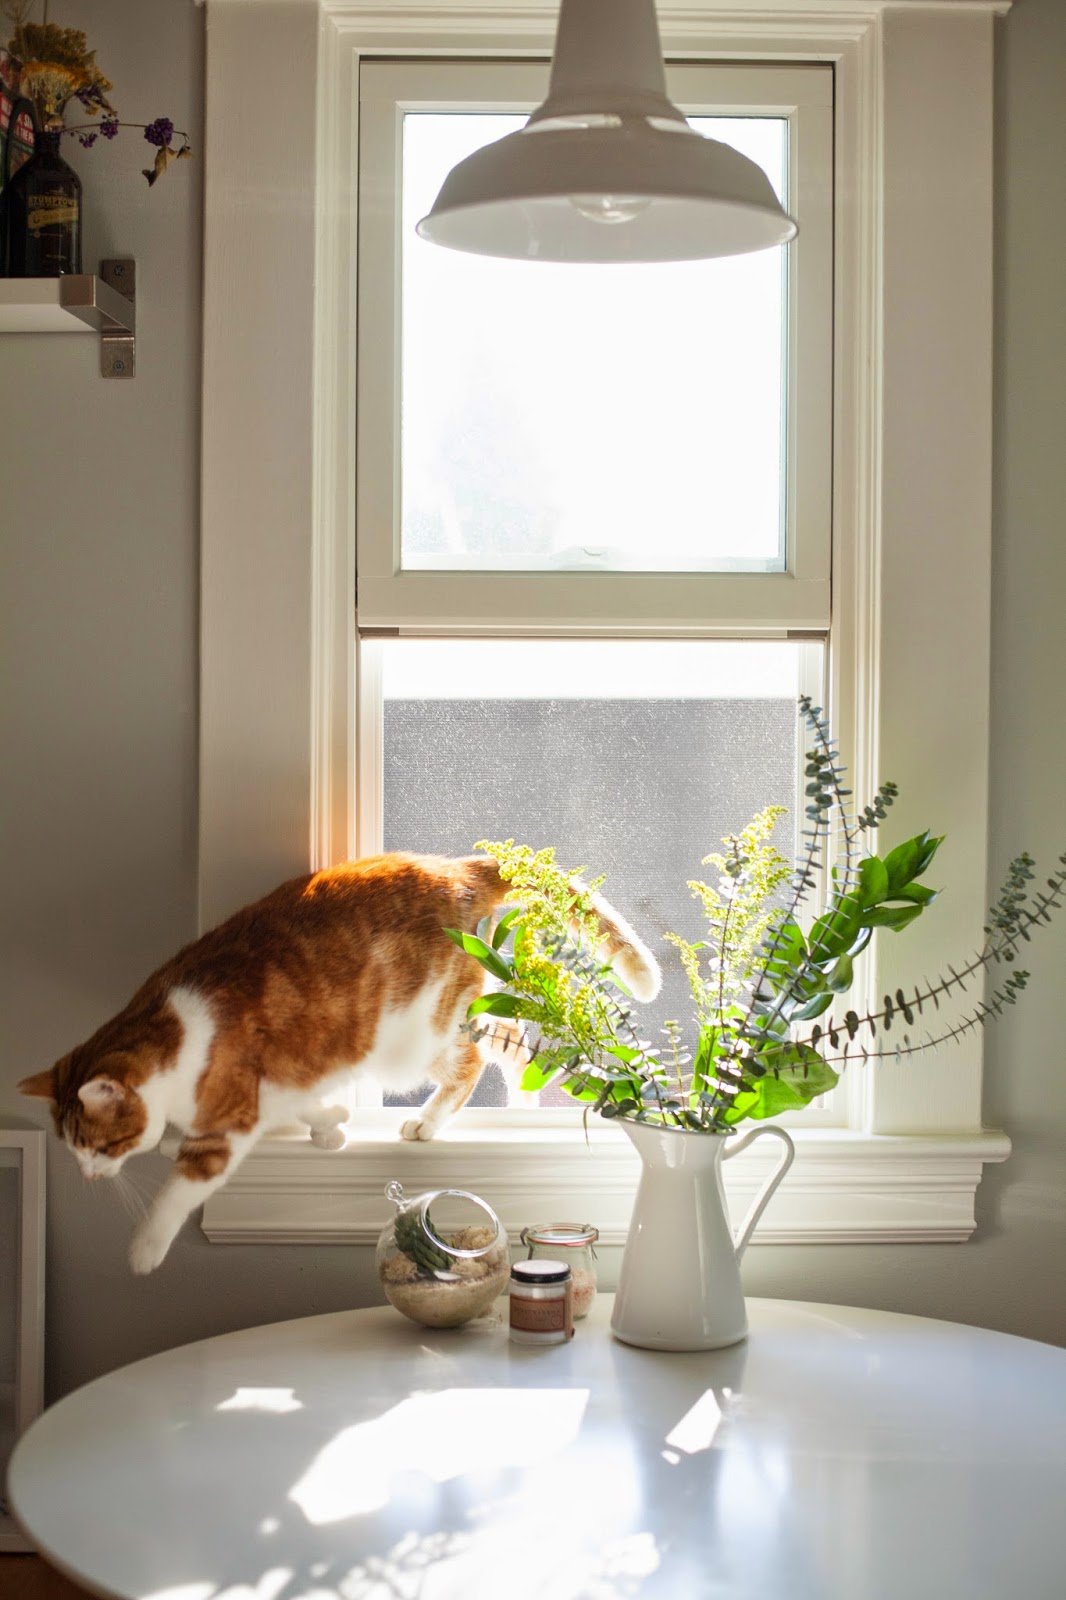
This is the result:

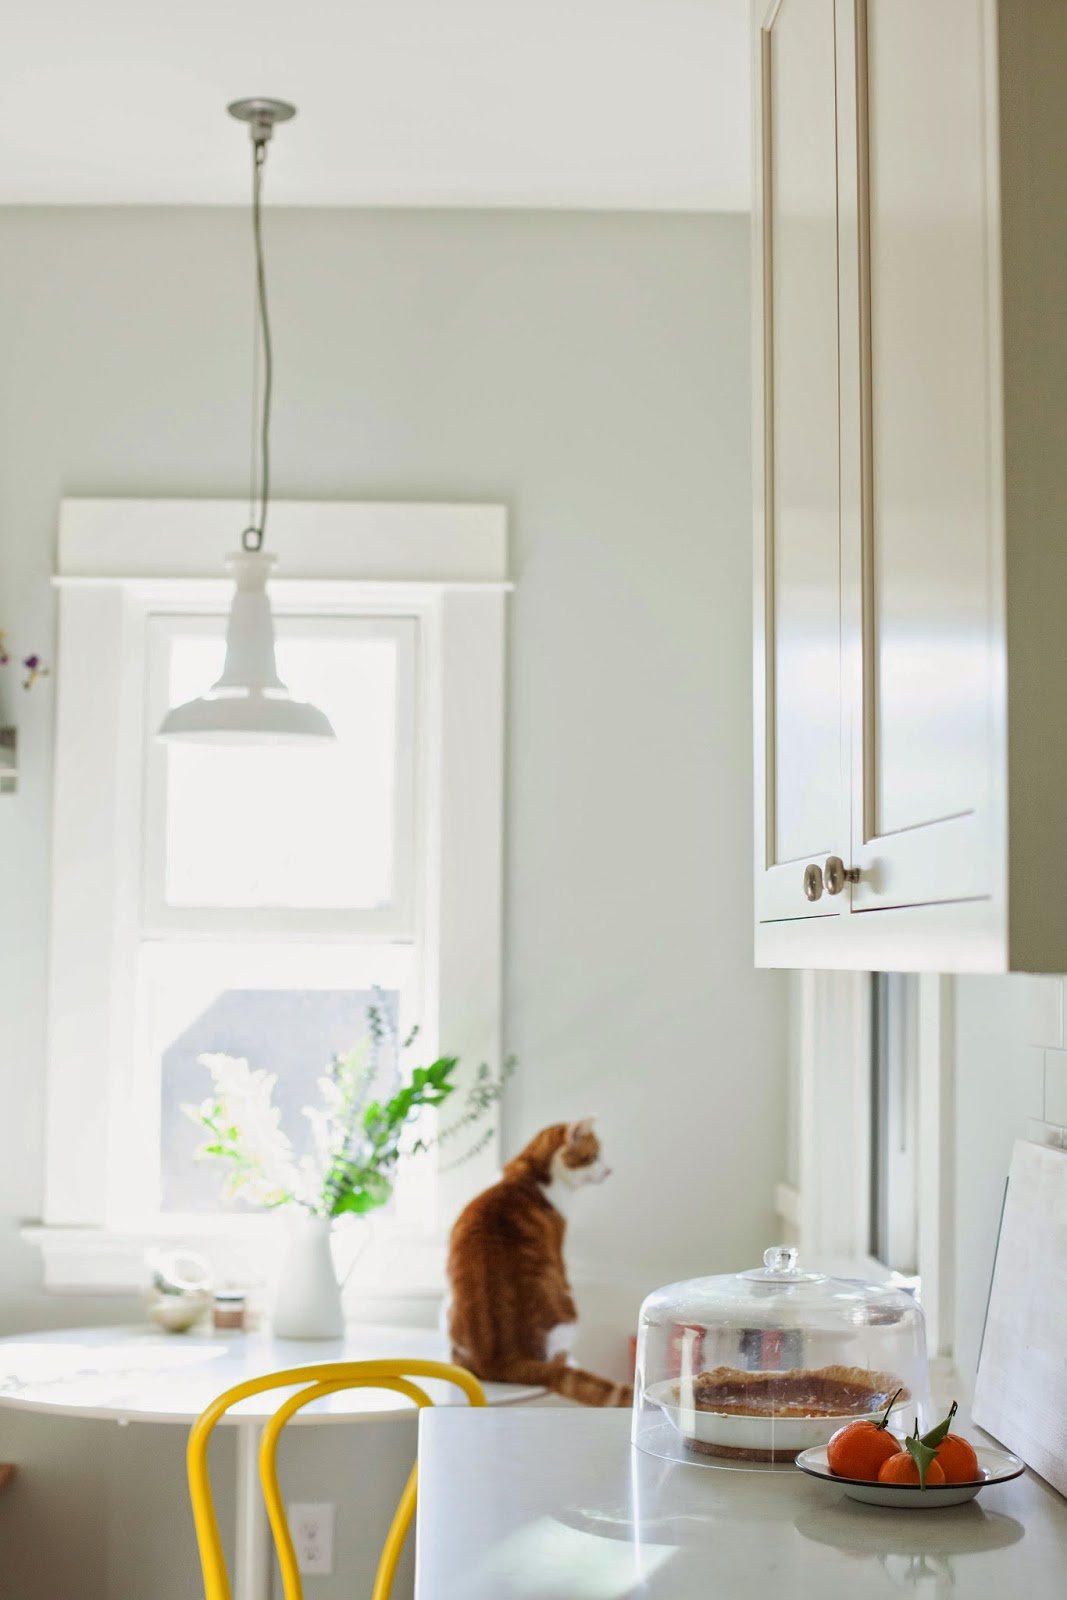
With the arch gone, I was able to expand the counters along the sink, giving me more counter and cabinet space than before. It made a world of a difference, really opening up the kitchen and streaming in more natural light than before.
Remember that a goal I had for my remodel was to be able to turn the kitchen into a place where we would actually enjoy lingering. I think this nook does that — the windows let in lots of lovely light, which makes it the perfect place to enjoy breakfast and lunch. Even at dinnertime, one of us is usually hanging out in the nook while the other person is cooking or cleaning in the kitchen.
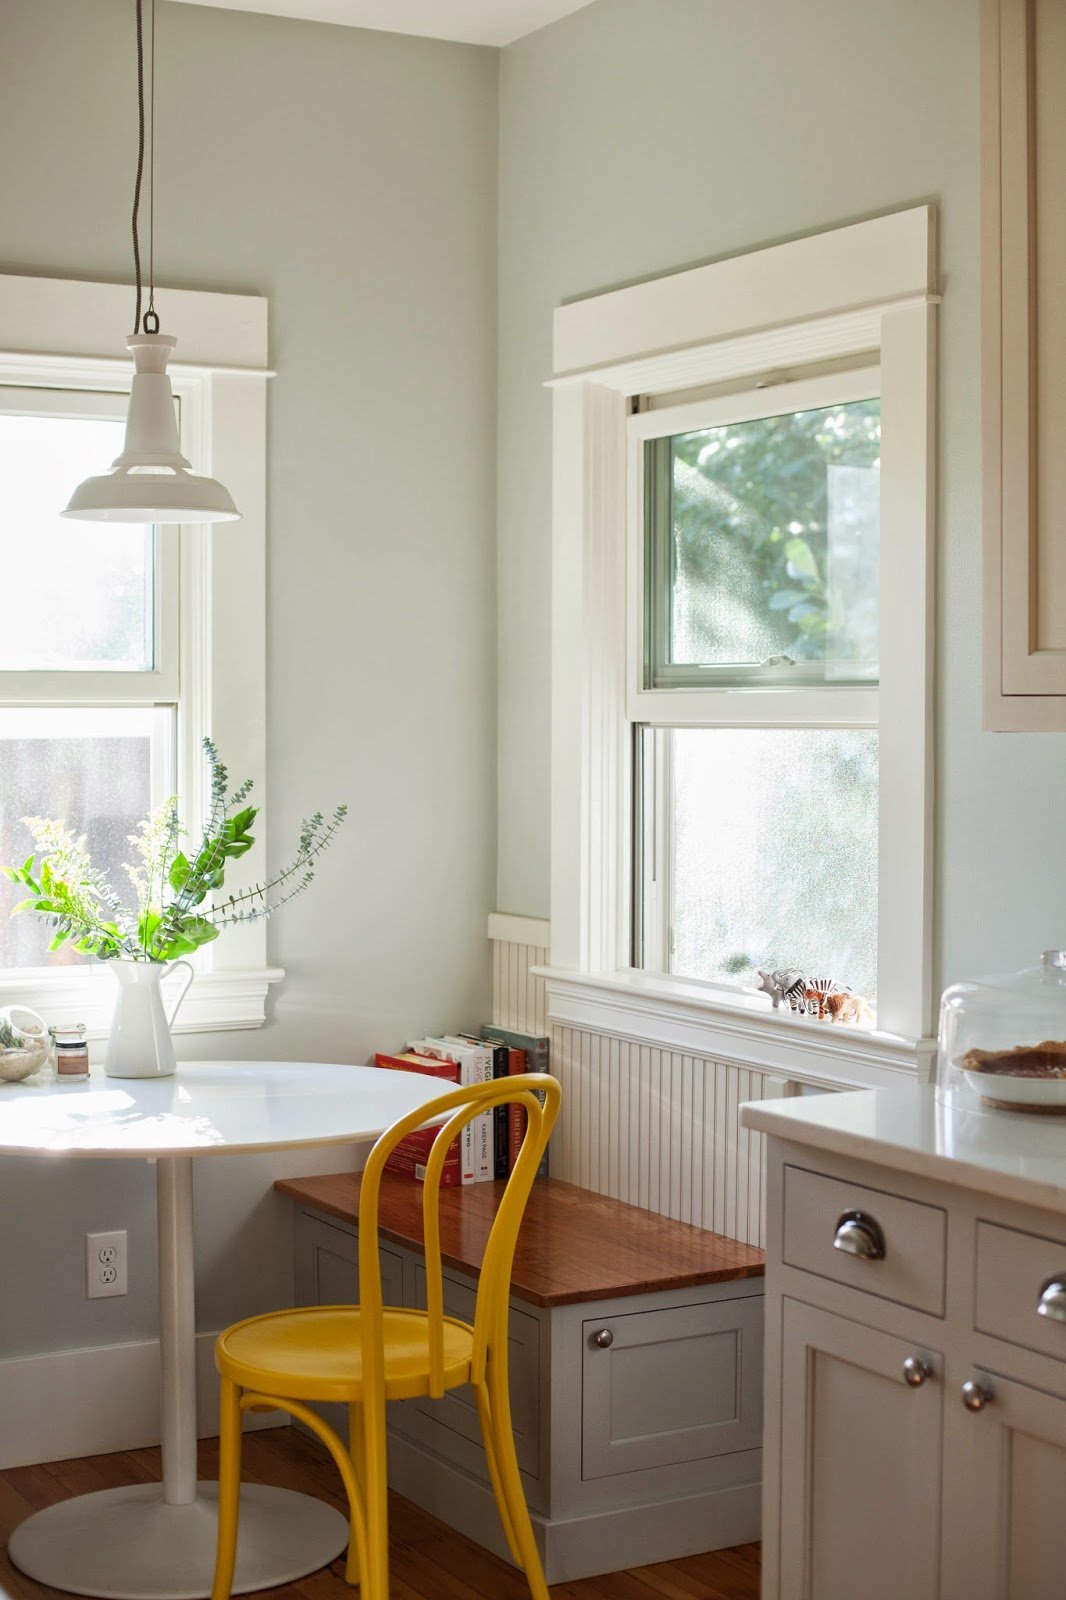
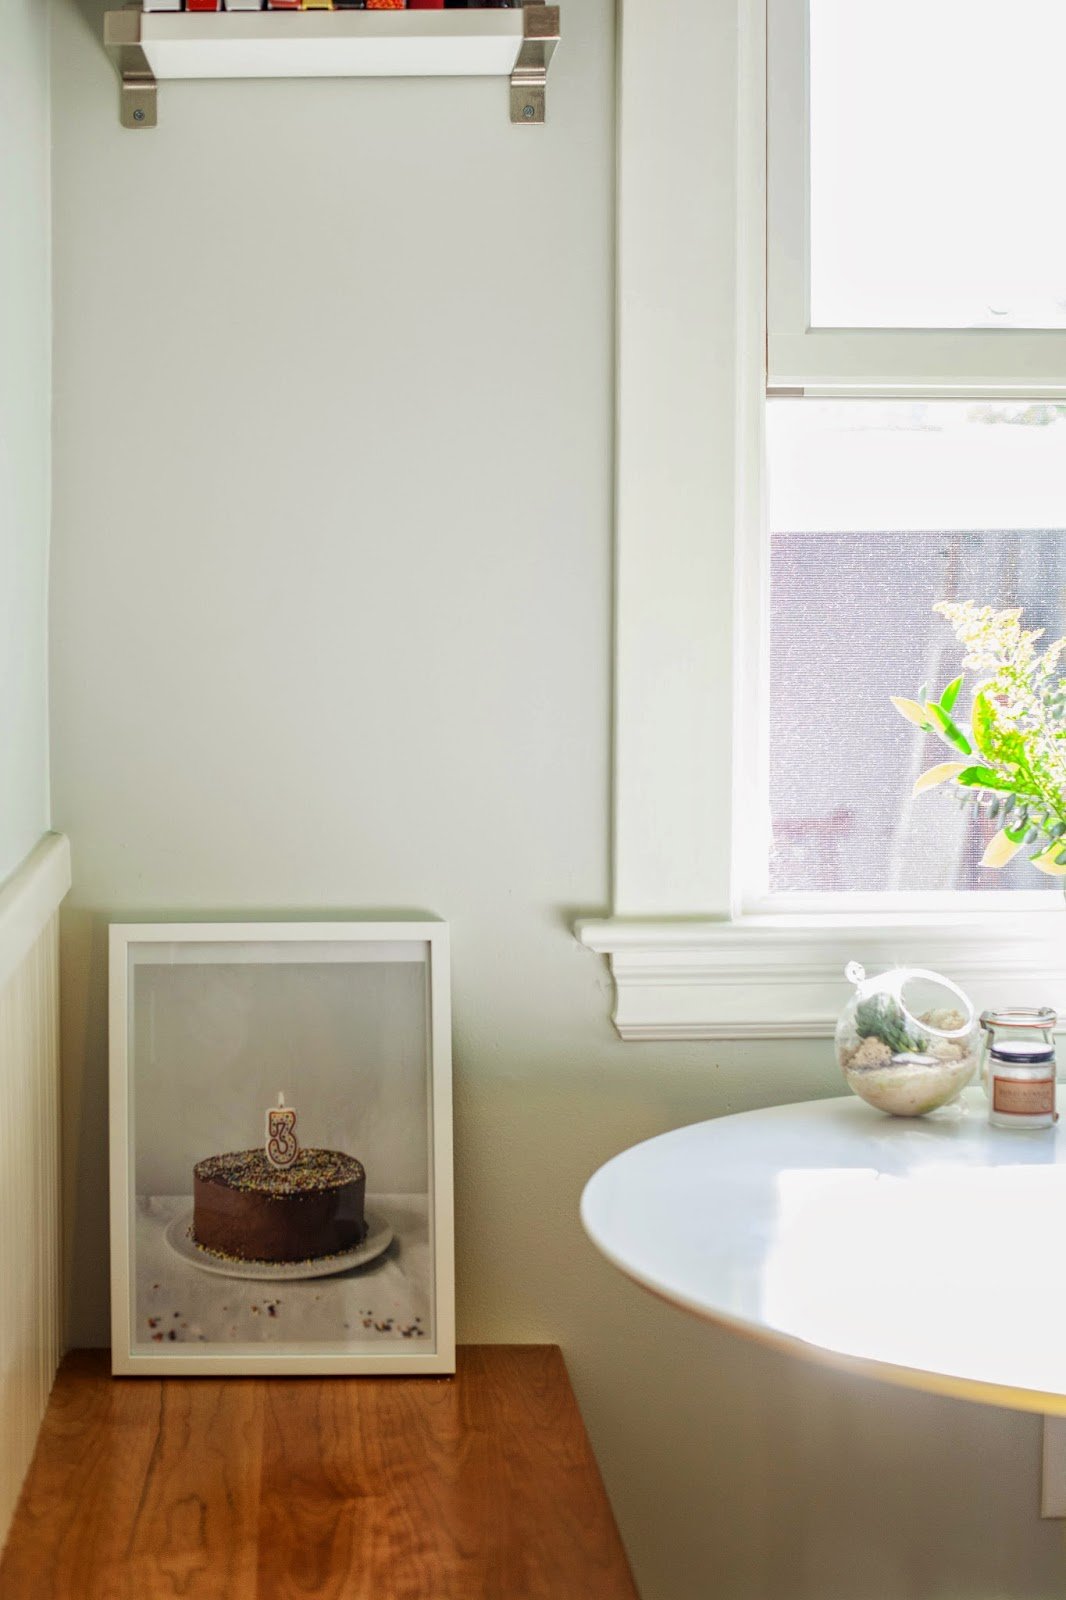
Another favorite detail of mine are the built-in benches. Having built-in benches saved us a ton of space, especially when compared to having a table and four separate chairs. I made sure that the benches had extra storage space underneath — the end of each bench has a cabinet door that opens to reveal storage space the depth of each bench. Pretty nifty, huh?

Seen above:
- Light Fixture: Schoolhouse Electric Factory Light No. 4 Pendant
- Table: CB2 Odyssey White Dining Table
- Chair: Crate & Barrel Vienna Yellow Side Chair
- Shelf: modified Ikea EKBY JÄRPEN / EKBY BJÄRNUM shelf
- Frame: Ikea RIBBA (featuring this funfetti anniversary cake!)
- Vases: Ikea SOCKERÄRT and Stumptown Cold Brew with flowers from New Seasons
- Terrarium: Artemisia
- Chopping Board: Ikea DOMSJÖ
- Animal Figurines: World Market Paper Safari Animal Ornaments (no longer available)
And there you have it!
Before I head out, however, I wanted to take some time to reflect. Back in January, Food52 ran an Instagram contest asking folks to share their tidy kitchens. Mine was one of the kitchens regrammed. While most of the comments were overwhelmingly positive, I noticed a handful on my picture and others regrammed that accused Food52 of only picking high-end kitchens that only rich people could afford. Some Instagrammers even left comments that the kitchens looked unlived in, and that many were purely for form and show.
Here’s the truth: yes, the remodel was crazy expensive — I’m embarrassed to say that it cost more than half of my annual salary, even despite consciously choosing several lower-end options (stock cabinetry and lots of Ikea, for instance). And here’s how I was able to afford it. It’s not sexy, but here’s my formula:
Lots of saving, sacrifice and help.
What does that mean? Saving high-paying bonuses from stressful, soul-sucking jobs that were so awful that I cried of relief and exhaustion every time I left the office. Living with too many immature and careless roommates who I absolutely hated and treated me disrespectfully for way too long. Guiltily borrowing a little bit of cash from my incredibly generous parents. But these are the sort of things that you don’t see on the blog, and it’s far too easy to sit back and judge. And even despite it all, I still know how incredibly lucky and privileged I am in the first place to have had all those opportunities, even the ones that left me feeling miserable and racked with guilt.
As for the claims that my kitchen looked unlived in and unused, I actually laughed out loud. Of course my kitchen doesn’t look like the picture you saw on Instagram!!! Hell, my kitchen doesn’t even really look like the pictures you see above! In reality, there’s a large unphotogenic drying rack by the sink, the double oven range is always splattered with grease and, on the counter, there’s a massive clear jar of fermenting rice that looks remarkably like vomit that Erlend’s studiously trying to coax into wine. There’s almost definitely a stack of dirty dishes in the sink and weird sticky puddles on every surface of the kitchen. But who wants to see that?
People come to Blog Land because we like the glimpses into other people’s lives; it allows us to quit our jobs and vicariously live in beautifully restored barnhouses in provincial France, wear designer clothing that we can’t afford and eat exotic food from far-reaching corners of the world without gaining a single pound. Bloggers are more than happy to provide that escape, but it’s important to remember that these are exaggerated moments and that what you’re seeing is everything at its best/shiniest/happiest/most Pinterest-worthy. It’s a rotten game to start comparing yourself to such unrealistic standards, and it’s one that is ultimately impossible to win. Because outside the frame of every shiny, sparkling picture, all of us have dirty dishes, shabby furniture and ugly rooms too.
Hi, not sure if you answered this question already but, what color paint did you use in your remodel? It's lovely!
What a GORGEOUS kitchen!! It makes me want to cook IN it with you! Love everything about it! The sunlight that comes through in the nook.. simply to die for!
Congrats! I bet you wake up so happy knowing you can step into such beautiful work space 🙂
Hi there,
The walls are painted "Gray Owl" by Benjamin Moore, the trim is "Simply White" by Benjamin Moore. Cabinets are stock colors from Omega cabinetry: dove gray at the bottom, and oyster up top. Hope that helps!
LOVE WHAT YOU DID ……BUT…WHAT COLOR IS THE PAINT..????
THE COLOR ALMOST LOOKS LIGHT GREEN OR GRAY OR ?
Your baking station is great! I don't bake as often as I'd like becuase it's to difficult to sort through my cluttered pantry and cupboards to get everything I need.
I may have to steal your idea… 🙂
I wouldn't mind sleeping in the kitchen if my kitchen is as gorgeous as this. <3
Congratulations – your kitchen looks really fabulous. I also love the baking station. 😉
Wow – just discovered your blog and love your kitchen remodel! The Baking Station is genius! I can imagine it will be hard for you to leave it behind.
Beautiful, what colour did you use on the walls? I love it!
Nice post! When we hire professional for kitchen renovation, all their work is guaranteed. If for any reason something with a remodel goes wrong, the professional will come out and fix it. To get more information regarding professional for kitchen renovation visit IngwallKöket.
Absolutely stunning. Love your hummingbird model. I was thinking to hang hummingbird feeder as well outside of it 🙂 Lol just kidding.
Thanks a lot to you for sharing hummingbird high s kitchen remodel here, these kind of ideas are were much needed. I really appreciate that you have provided the data too, really appreciative and useful blog for us. Looking for more!!
Hello! Incredible work on your remodel. I came across your page looking for photos of double ovens and was wondering if you’d be willing to share the measurements of the cabinets/counters on either side of your range. Our setup is very similar and I’m curious if your layout would work in my small kitchen. Thank you!
Sorry, I no longer live in this house and don’t have measurements.
Great information! This was super helpful!!
Your kitchen remodel post is inspiring! The transformation is stunning, and I love how you incorporated both style and functionality. The attention to detail and thoughtful decisions really shine through. Thanks for sharing this journey!