
Last week, my kitchen contractor set up my shiny new Kitchenaid double-oven range. I had big plans to christen the oven with an epic triple layer red velvet cake made from scratch, but decided to play it safe and stick with a tried-and-true recipe: the Hummingbird Bakery Cookbook’s recipe for vanilla cupcakes with buttercream frosting. A few years ago, at the very beginning of this blog, I’d once spent months baking this recipe over and over for a good two weeks in my attempt to figure out how to bake in high-altitude. It was the kind of recipe I knew like the back of my hand, one I could recite in my sleep.
That Saturday afternoon, as I prepared to bake the cupcakes, there were plenty of things already amiss before I even turned on the oven. It was a hot, hot, hot day — the butter I’d left out only a half hour ago to soften was now only barely solid, slowly melting to create a yellow puddle on my brand new kitchen countertops. I couldn’t find any of my regular mixing bowls, spatulas and measuring spoons as I’d packed them away almost two months ago and promptly forgotten where I’d placed everything. I didn’t have enough powdered sugar, and I had just realized my baking powder had expired three months ago.
But I wasn’t going to let any of these things stop me, nope. I was going to bake these damn cupcakes. It had been way too long until I had baked something in my kitchen, in my oven.
Needless to say, it was a disaster.
With the expired baking powder, the cupcakes didn’t rise and produce their usual beautifully domed tops. It also turns out that the top oven of my brand new range (yep the one with the double oven that I was so, so, so excited about) ran about 25 degrees too cold (if you don’t have an oven thermometer, I highly suggest investing in one — it’s the best way to learn about a new or current oven’s quirks) and created underbaked, overly pale cupcakes that looked like they needed 10 or 15 more minutes in the oven. And with no powdered sugar on hand, I couldn’t even make any frosting to hide the cupcakes’ sad appearance.
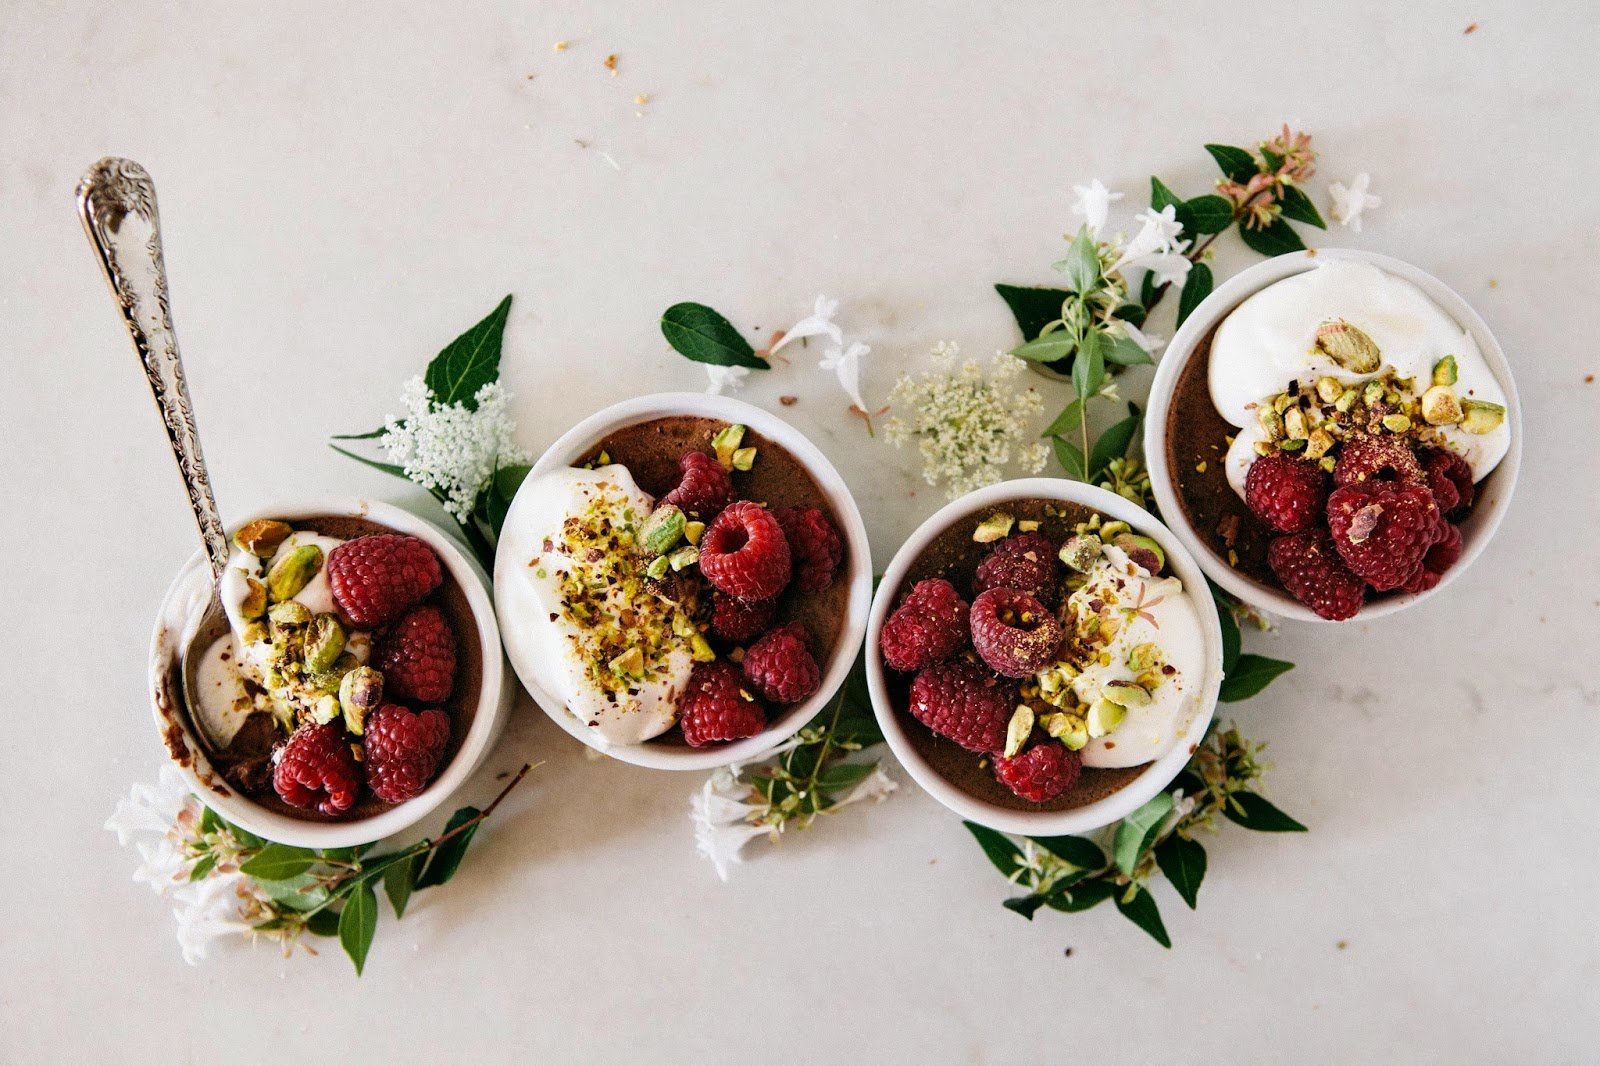
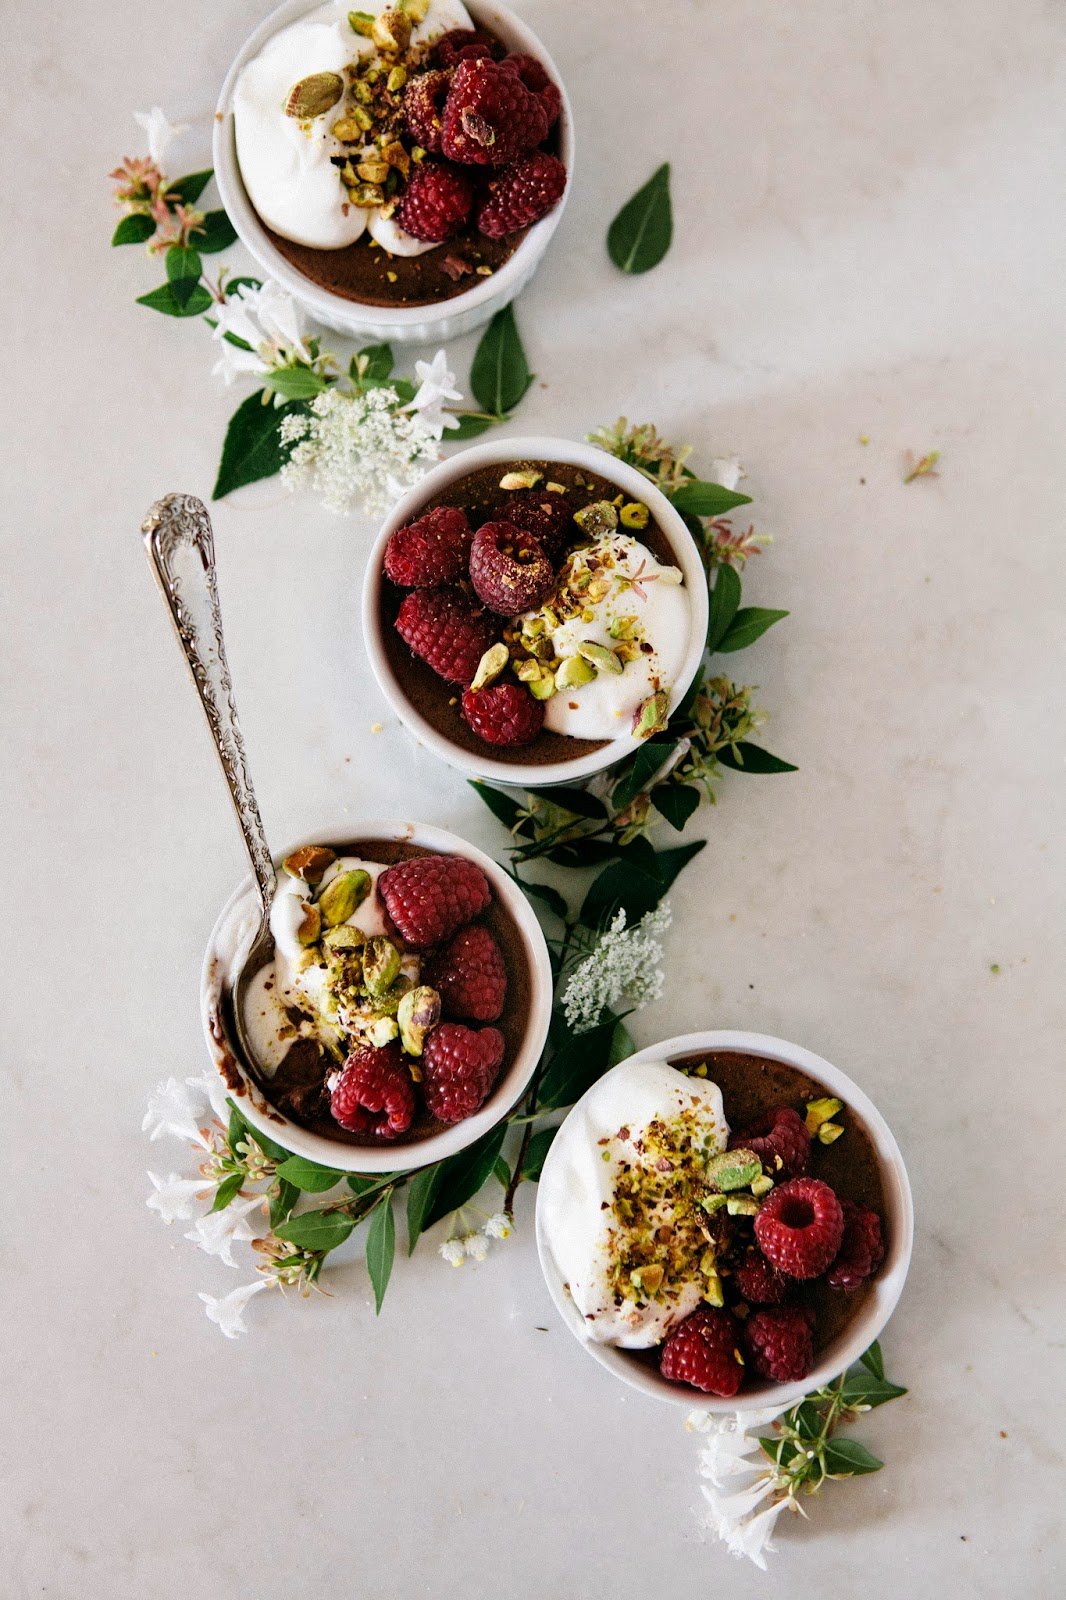
Looking at the failed cupcakes made me upset. I couldn’t let my first day of baking in the new kitchen (the one I’d spent so much time and money on!) with a failure. I began to rip open boxes to see what ingredients I could scrounge. I mean, I guess I’d purchased some fresh raspberries and pistachios earlier that morning to eat as breakfast to eat before my half-marathon training runs, but this was an emergency. And sure enough, combined with the bar of unsweetened chocolate and a half-crystalized jar of blackberry honey that I managed to dig up, I managed to pull together a pretty decent, classic dessert — chocolate pots de crème:

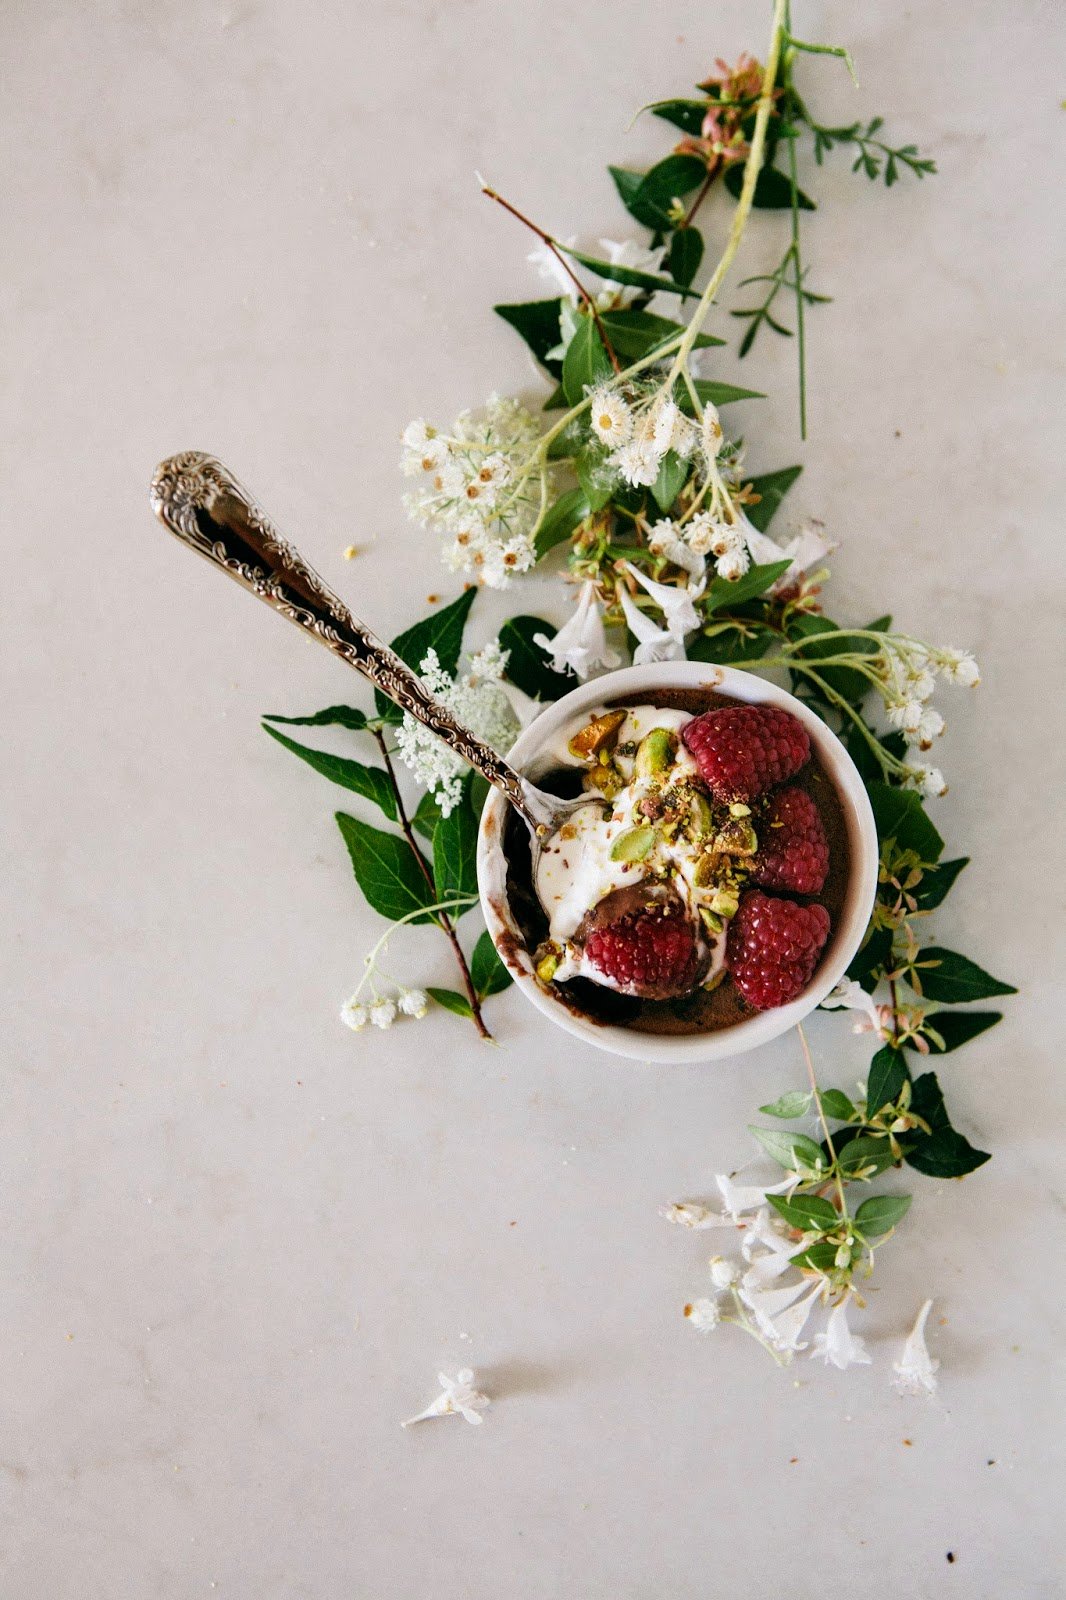
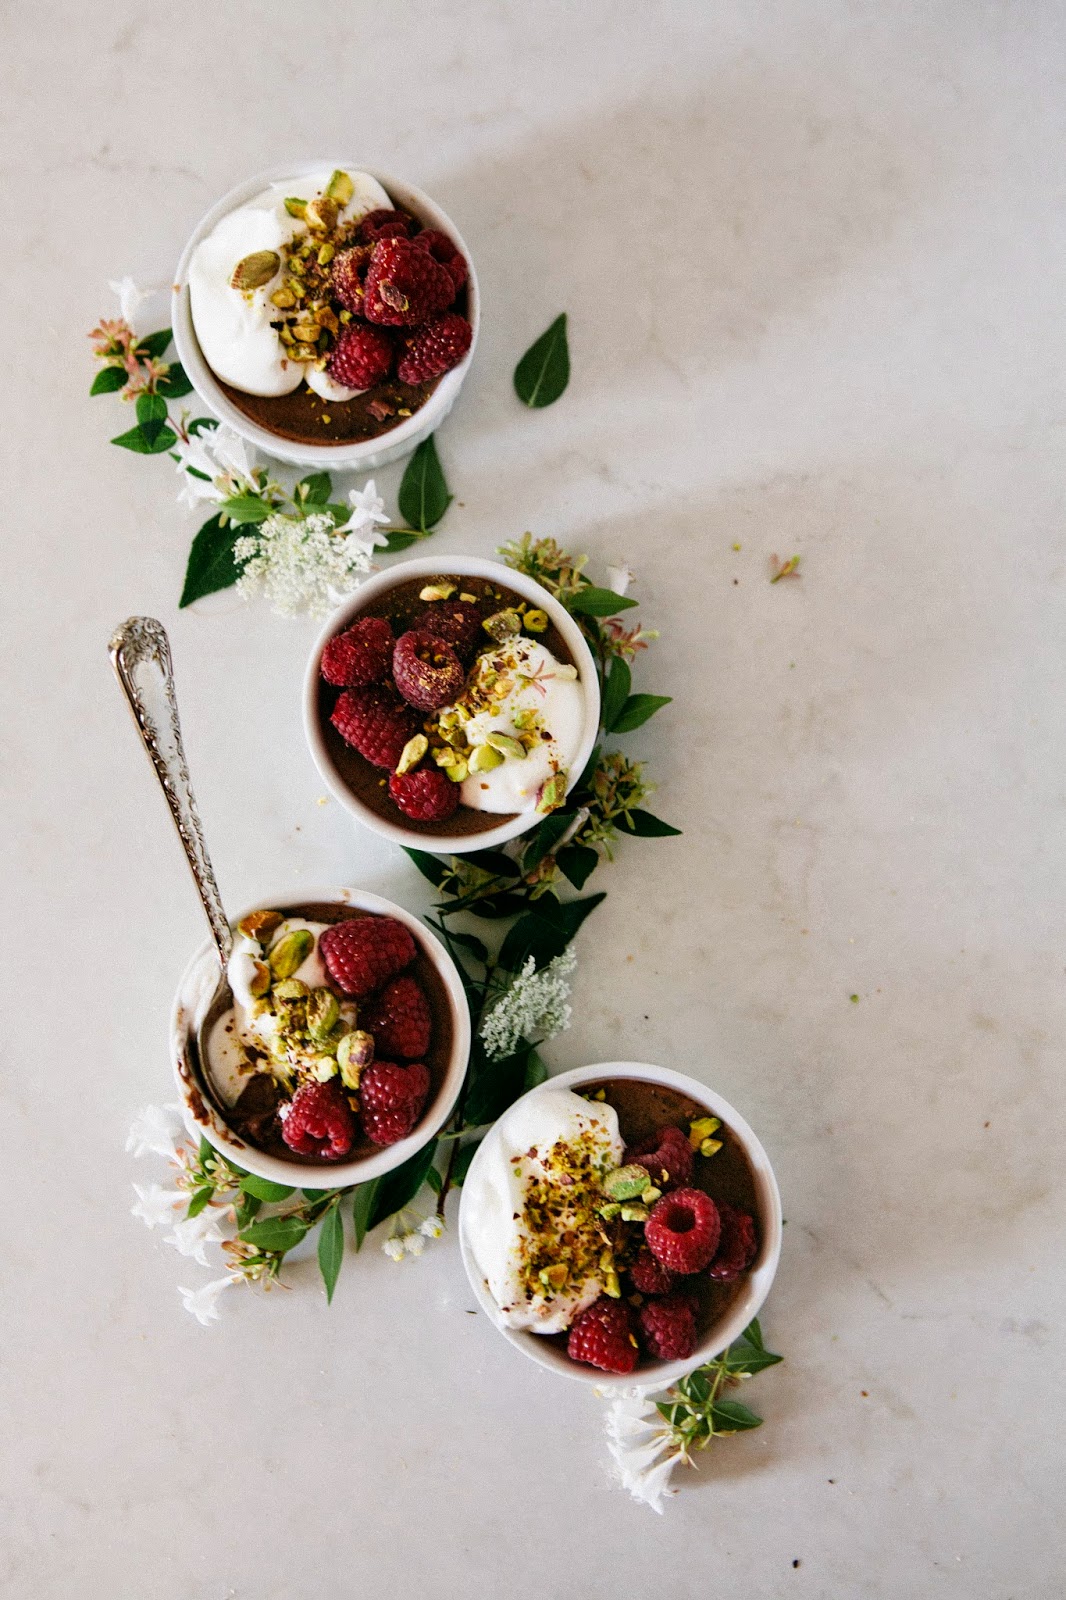
A pot de crème is a French custard dating back to the 17th century. It’s similar to a pudding, but with a smoother, silkier texture since it’s baked in the oven and uses a crap-ton of egg yolks (unlike puddings, which are often cooked on the stovetop and thickened with cornstarch). Combined with fresh, seasonal berries and flowers from the garden, these pots de crème quickly became the appropriate “first-recipe” that my kitchen deserved: beautiful, seasonal and delicious.
Some baker’s notes:
-
- I used 100% cacao chocolate because this is the bar that I had available; feel free to substitute with any other dark chocolate that’s 70% cacao or more. There’s quite a bit of extra sugar and honey from the fruit, nuts and whipped cream, so anything less than 70% cacao might be too sweet.
-
- It’s important that you cook the custard ramekins in the water bath (as instructed in the recipe). This will allow the custards to cook evenly throughout, but please do NOT overcook the custard. Overcooking will result in a weirdly crumbly and grainy custard texture and me crying tears of sadness for you. If you know your oven runs hot, constantly check your ramekins to see how done they are. Custards, unlike cake, are unaffected by the number of times you open your oven door. You can find the perfect custard texture by taking a heatproof utensil and giving each ramekin a gentle tap on its side. If the sides are firm but the center jiggles, you’re good to go. If the center is firm, you’ve overcooked your custard.
- Baked chocolate takes on a weird, almost-powdery and grainy-like appearance when it’s over cooked. If you see this start to happen to the tops of your pots de crème, cover the pan loosely with aluminum foil to prevent the tops from cooking faster than the rest of the custard.


Get the Recipe: Salted Chocolate, Raspberry and Pistachio Pots de Crème with Honey Whipped Cream
Ingredients
For the Salted Chocolate Pots de Crème
- 6.5 ounces 100% cacao unsweetened chocolate
- 1 1/4 cups heavy cream
- 3/4 cup whole milk
- 5 large egg yolks
- 2/3 cup granulated sugar
- 1 1/2 teaspoons vanilla extract
- 1/2 teaspoon kosher salt
For the Raspberry, Pistachio and Honey Whipped Cream Topping
- 1/2 cup heavy cream, cold
- 1/4 cup plus 2 tablespoons honey, divided into 1/4 cup and 2 tablespoon portions
- 3/4 cup fresh raspberries
- 1/4 cup raw pistachios, unshelled and finely chopped
- 1/2 teaspoon kosher salt
Instructions
For the Salted Chocolate Pots de Crème
- Center a rack in the oven and preheat to 325 (F).
- Finely chop 6.5 ounces 100% cacao unsweetened chocolate and transfer to a medium, heatproof bowl. Set aside.
- In a medium, heavy-bottomed sauce pan, combine 1 1/4 cups heavy cream and 3/4 cup whole milk. Cook over medium heat until the mixture is just about to boil, and immediately pour over the finely chopped chocolate. Let sit for a minute or so to allow the chocolate to melt, then whisk together until smooth.
- In a small bowl, whisk together 5 large egg yolks, 2/3 cup granulated sugar, 1 1/2 teaspoons vanilla extract and 1/2 teaspoon kosher salt. Slowly stream this egg mixture into the chocolate mixture, whisking the chocolate mixture constantly to prevent the eggs from cooking and curdling.
- Divide the mixture evenly between six 4-ounce ramekins. Arrange the ramekins in a baking dish and carefully add enough boiling water to come about two-thirds of the way up the sides of the ramekins. Transfer the baking dish to the preheated oven and bake for 30 minutes.
- After 30 minutes, remove the baking dish from the oven and transfer to a wire cooling rack. Allow the pots de crème to sit in the hot water for 5 minutes. Use a knife to gently tap each ramekin — if they still appear very jiggly in the middle, let them sit for another 5 minutes in the water. The goal here is to have a custard that is set around the edges, but still slightly jiggly in the center. See baker's notes for more tips and tricks.
- After your the custards have passed the jiggle test to your liking, remove each ramekin from the water and transfer to a wire rack to allow to cool completely to room temperature. Once the ramekins have cooled, cover each with plastic wrap and transfer to the refrigerator to chill for 3 to 4 hours, preferably overnight.
For the Raspberry, Pistachio and Honey Whipped Cream Topping
- Once the pots de crème are chilled and ready to serve, make the raspberry, pistachio and honey whipped cream topping. In the bowl of a freestanding electric mixer fitted with a whisk attachment (or, use a handheld electric whisk), whip 1/2 cup heavy cream until soft peaks form. Use a rubber spatula to fold in 2 tablespoons honey.
- In a separate medium bowl, combine 3/4 cup fresh raspberries, 1/4 cup raw pistachios, 1/2 teaspoon kosher salt. Drizzle 1/4 cup honey over the mixture and toss with a rubber spatula until the fruit and nuts are covered.
- Divide the whipped cream, fruit and nuts evenly between the ramekins and serve immediately.
Wow…what an epic story! But you now, this dessert might be even more suitable to tell about your new kitchen (my congratulations!), this pots de creme are so good looking!!
I hope you will get used to your new oven very soon and we'll see the perfect vanilla cupcakes)
These are sooo gorgeous! Wow.
Thank you for sharing it looks delicious.
I love these photos. (I think I post that every time)
I love these pots de crème to the moon and back. Sometimes amazing things flourish out of frustration.
Pots de crème are the bestest, and in my book, better than cupcakes. I love the chocolate and raspberry combo – so awesome. And your photographs are GORGEOUS!
These look so delicious! Your photos are beautiful! I want to go home right now and make these. Yum!
Looking at these pretty, pretty pots de crème, I´m almost happy that your planned oven christening didn´t work out – otherwise, you would´t have posted these amazing little fruit´n´chocolate gems! A fest for the eye, and , I bet, for the palate also…
So beautiful! I love the combination of creamy chocolate with rich pistachio and tangy raspberry. 🙂
I would say that about 75% of all my kitchen disasters in the past have been cupcake related. What is it about cupcakes, man? Troublemakers. But these pots de creme kick the crud out of cupcakes any day, so I think you won that round.
How super gorgeous are these? Such an impressive dessert.
so gorgeous michelle!
ugh, i know how you feel…you really really want the first thing ever to be fantastic and then it's…not. but, you can look at it this way, you know everything's going up from there. and if these pots de creme are any indication, everything coming out of your new kitchen is going to be WOW!
Thank you for the awesome tips, I love how you share them! And I have a feeling I'm waaayyyy overdue for trying out an oven thermometer. Also, this is so beautiful it makes me all giddy inside. Keep up the awesome work, Michelle.
As ever, your photography and creativity totally blow me away. These are the prettiest little desserts I've seen in a long time and I'm pretty sure they're the first of many such gorgeous treats that will be coming out of your new kitchen.
Hi Michelle,
thanks for sharing these stunning pictures. They are, as everyone has already said, utterly beautiful. But I particularly love the way you wrote this post. It's so honest and real.
Thanks again for sharing and good luck with your half-marathon training.
Kimberly
Ughhhh. That is so frustrating, but you always have to learn those annoying little things with new (or new-to-you) ovens. It will get better! And I'm sure your kitchen is looking gorgeous! Can't wait to see what it looks like all finished!
In a word? Stunning!
I think this is what heaven might look like…
Those are so beautiful. I really need to create a dairy free version! The raspberries and pistachios make it look so elegant.
So pretty! I love your photos. This looks really delicious. 🙂
wow wow wow. looking forward to creating and consuming these!
Beautiful, just beautiful.
For a throw together dessert, they are absolutely beautiful.
Laura @ http://www.myfriendsbakery.ca
Michelle! I've been meaning to come back to these ever since I realized I missed them a few weeks back — these pots de creme are SO. so unbelievably gorgeous! A major, major UGH to your cupcake troubles … I know the feeling and it's the worst :(:( but I have to second everybody else that I'm so glad that these gorgeous creations came out of it! They're so fairy-tale ethereal, I can't get over how beautiful they are. This is some kickass lemonade out of your lemons, for sure. (Also, a double-oven range is kind of blowing my mind right now.) Congrats on the new kitchen, friend!!!