
About This White Chocolate Pistachio Babka Recipe
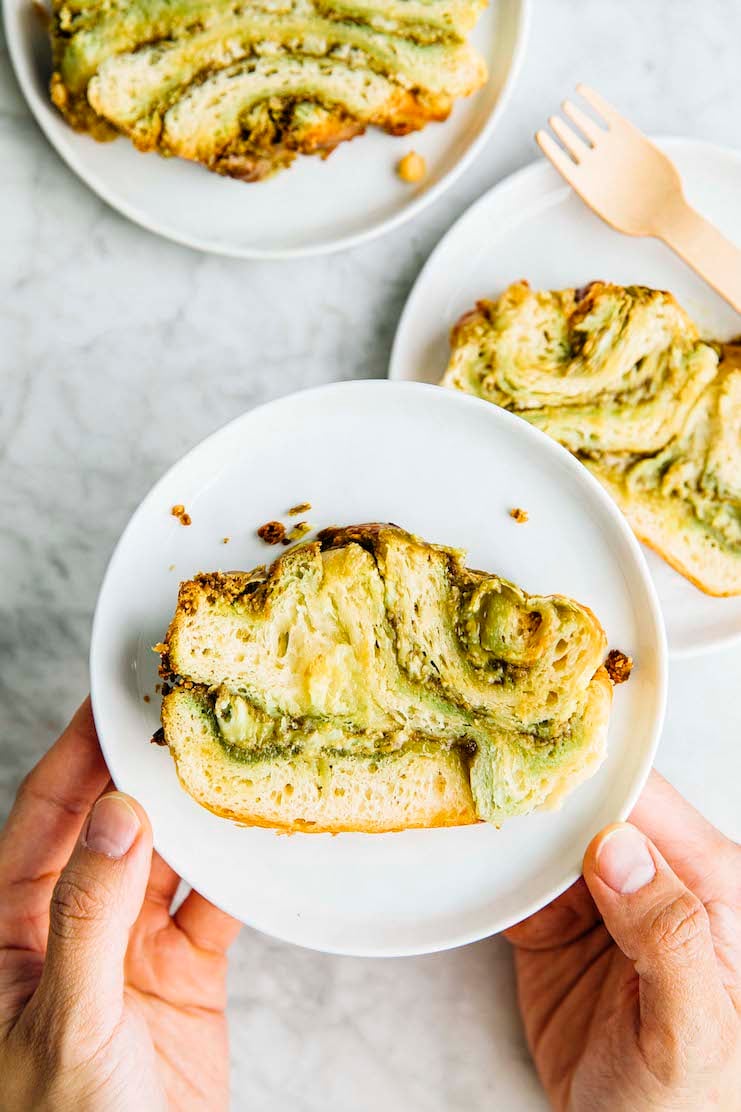
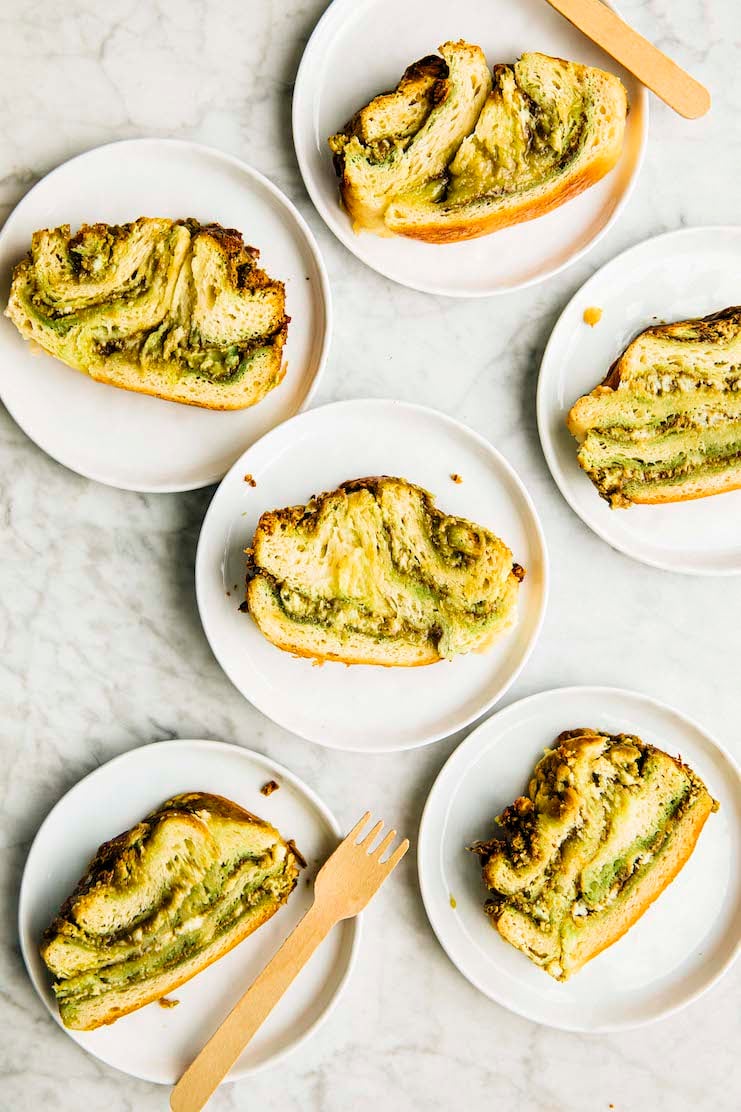
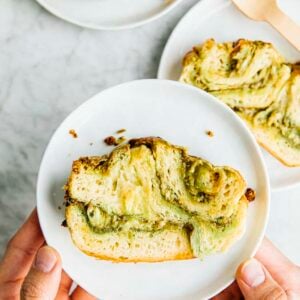
This white chocolate pistachio babka recipe makes two delicious 9-inch babka loaves, both swirled with white chocolate chips and pistachio cream (a Nutella-like sweet nut spread, but made with pistachios instead of hazelnuts!). The dough is proofed overnight to ensure that you won’t spend all day in the kitchen waiting for the babkas to rise. I’ve also included tons of helpful tips, tricks, and step-by-step videos showing you how to braid the babkas!
@hummingbirdhigh found this amazing gem at @Costco!!! #baking #costcofinds #costcobuys #cooking #bakingrecipe ♬ Love You So – The King Khan & BBQ Show
For more unique and delicious enriched bread recipes, check out Hummingbird High‘s Bread Recipes collection! Popular recipes include this Monkey Bread Recipe In A Loaf Pan and Small Batch Cinnamon Rolls.
All About Pistachio Cream
Now that I’ve convinced you to make white chocolate pistachio babka, let’s talk about some key ingredients:
What is pistachio cream?
Pistachio cream is similar to Nutella, but without the chocolate and made with pistachios instead of hazelnuts! However, don’t confuse it with nut butter. While nut butter tends to be made exclusively from nuts, pistachio cream contains other ingredients like sugar, milk powder, and olive oil to give it an extra smooth and velvety texture.
Seriously—it’s so good, I can eat the stuff by the spoonful!
Where can you buy pistachio cream?
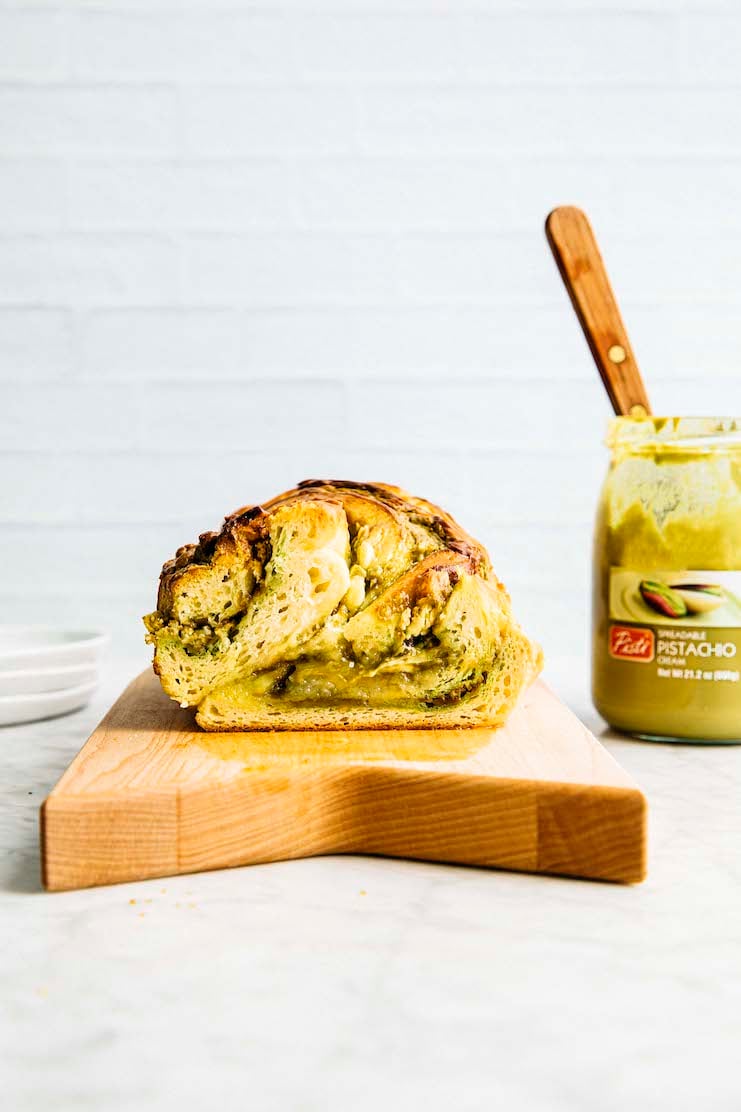
I found a huge jar of Pisti Pistachio Cream at my local Costco—it’s what inspired this recipe! But you can also find smaller (but more expensive, ugh) jars online on Amazon.
From their selection, I can recommend the following brands: Il Colle Del Gusto Pistacchiosa, Pisti Cream of Pistachio (it’s what I used!), and Vincente Sicilian Cream of Pistachio Nut Spread.
I don’t want to buy pistachio cream. Can I make my own pistachio butter instead?
Technically yes, but I’m not sure I recommend it. I mentioned before that pistachio cream is different from pistachio nut butter. Pistachio cream contains other ingredients like milk powder, sugar, and oil to give it its extra creamy, sweet, and luscious texture.
Pistachio butter, especially the homemade kind, will be a lot more chunky and have the texture of a natural chunky peanut butter. It also won’t be as sweet. While you can still make this white chocolate pistachio babka recipe with it, your babka will probably be less sweet than mine. It will also be harder to put together since the chunky nut butter will probably tear the delicate babka dough.
The Perfect Make Ahead Schedule For Babka
Below are the basic steps to make white chocolate pistachio babka from scratch. When making enriched doughs with butter, eggs, and milk, I like to proof the dough overnight. Why? Multiple reasons.
First, the longer rise overnight leads to a better flavored bread. Second, the butter, eggs, and milk can make the dough sticky and hard to work with at room temperature. Chilling the dough overnight ensures that it’s a dream to work with. Learn more below!
Day 1: Make the Babka Dough
- Prep the ingredients for the babka dough. (Prep Time: 10 minutes)
When working with doughs leavened with yeast, it’s especially important to pay attention to the ingredients. Specifically, make sure the ingredients are listed at the temperature specified by the recipe! Yeast can be a finnicky thing. If the ingredients it’s mixed with are too hot, it could kill the yeast. If the ingredients are too cold, it might not activate the yeast. So take the extra few minutes to ensure that everything is at the right temperature! - Make the babka dough. (Work Time: 15 minutes)
Once you’ve prepped the ingredients, it’s time to make the babka dough. Luckily, it comes together fairly quickly. Simply mix the dry ingredients like flour, sugar, yeast, and salt, then add the wet ones like milk, eggs, melted butter, and vanilla. Knead on medium-low for 10 minutes. That’s it! - Proof the dough. (Rise Time: 1 hour at room temperature, then overnight)
I mentioned this earlier, but I like proofing enriched doughs with milk, eggs, and butter overnight in the fridge. Doing so gives the dough a better flavor and makes it easier to work with the next day!
Day 2: Assemble and Bake The Babkas
First, prep the dough, baking pans, and ingredients for the filling.
- Prep the dough and pans. (Prep Time: 5 minutes)
Once you’re ready to assemble and bake the babkas, remove the bowl of dough from the fridge. Set it on the counter to warm it to room temperature for a few minutes while you prep the loaf pans for the babka. Doing so will make the dough easier to work with! - Prep the ingredients for the white chocolate pistachio filling. (Prep Time: 5 minutes)
Luckily, prep for the white chocolate pistachio filling is a breeze. Simply measure out the amount of pistachio cream and white chocolate chips needed for the recipe. That’s it!
Next, assemble the babkas.
- Roll out the babka dough. (Work Time: 10 to 15 minutes)
Once you’ve got your pans and ingredients for the filling organized, it’s time to assemble the babkas. Roll out the dough into a large rectangle about 10 inches wide and 24 inches long. The resulting slab will be around ¼-inch thick.
I’m not going to lie—rolling out the doigh is probably the most time-consuming part of the recipe. The dough will initially be stiff and hard to work with from being chilled. Don’t be afraid to give it a few whacks with your rolling pin to soften it up! It will become easier to roll out the more you work with it. - Fill and roll the babka dough. (Work Time: 5 minutes)
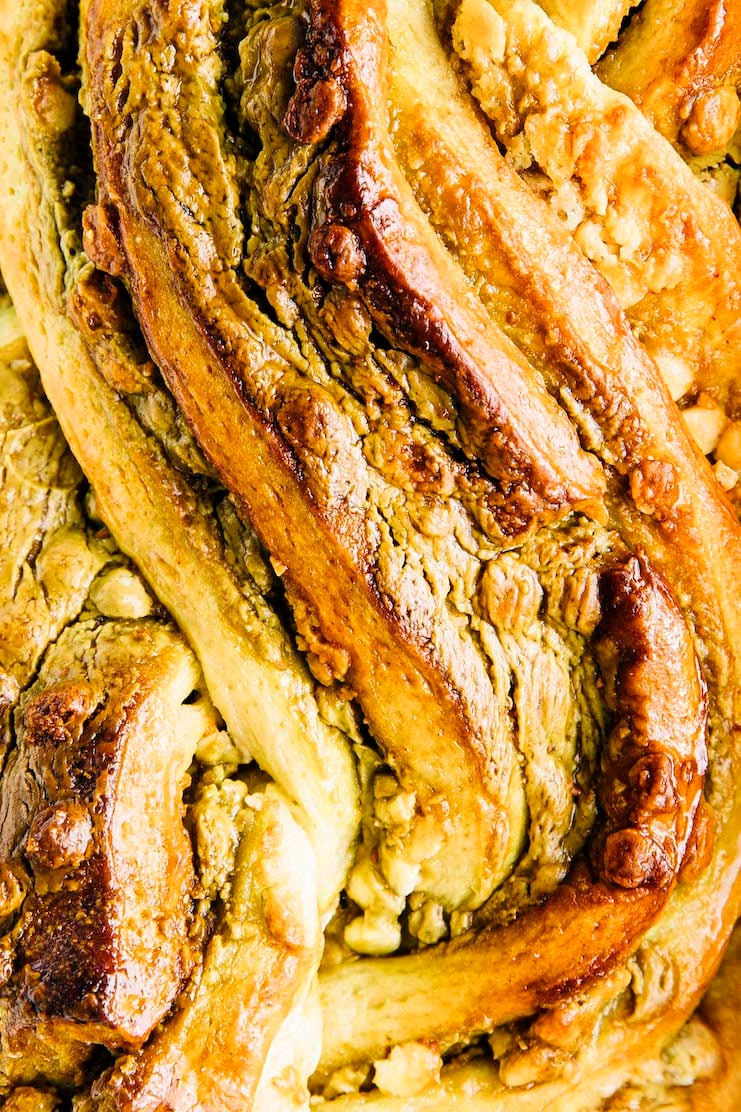
Once you’ve got your slab of dough, use an offset spatula to spread pistachio cream all over the dough (like you would butter on toast). Make sure to go all the way up to the edges of the dough for best results. Then, sprinkle the pistachio cream with the white chocolate chips.
After you’ve used up all your pistachio cream and white chocolate chips, it’s time to roll it back up! Starting from one of the long ends, roll the dough into an even log, like you would a burrito or when making cinnamon rolls. - Slice the babka dough. (Work Time: <5 minutes)
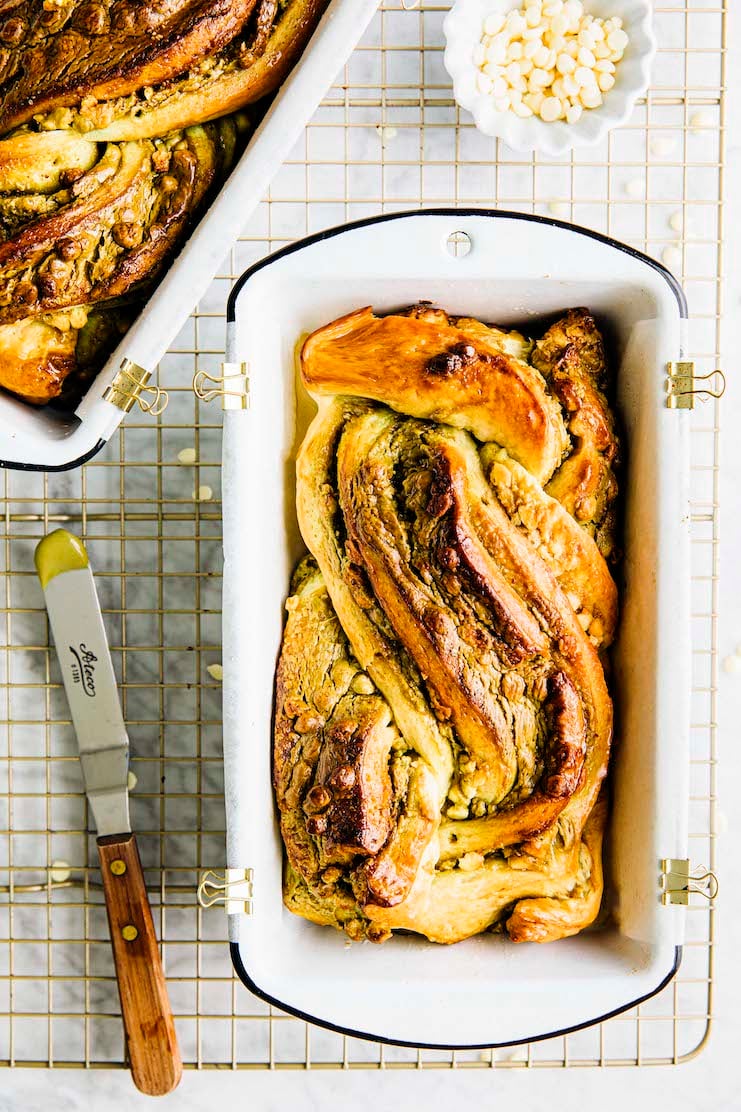
At this point, you should have what looks like an extra long burrito made out of dough and stuffed with pistachio cream and white chocolate. Now, this is where it gets wild: Use a serrated knife to cut the log in half lengthwise. Doing so will result in two strands of dough with the filling exposed.
Next, slice these 2 strands in half crosswise so that you have 4 shorter pieces of dough with the filling exposed. If you need a quick refresher on what it means to slice things crosswise versus lengthwise, I highly recommend this Buzzfeed article. And definitely check out the video tutorial below where I show you how to slice and braid the babka! - Braid the babka dough. (Work Time: <5 minutes)
Now, take the 2 of the 4 pieces and twist them together to form a simple braid. If you’re confused on how to do this, keep scrolling for the video tutorial. Repeat with the remaining 2 pieces. Congratulations! You just assembled your babkas.
Then, proof and bake the babkas.
- Proof the babkas. (Rise Time: 2 to 3 hours)
After you’ve assembled the babkas, transfer them to the prepared loaf pans. Tightly cover with plastic wrap and proof until very soft and jiggly to the touch, another 2 to 3 hours. If that sounds like a long time, check out the Baker’s Tips below on how to speed up this process! - Bake the babkas. (Bake Time: 40 to 45 minutes)
The babkas need 40 to 45 minutes in the oven. It can be a little hard to tell if they’re done; their tops tend to brown quickly and get more toasted than their gooey centers. I recommend using an instant read thermometer if you have one. The center of each loaf should read 190°F.
Finally, make the babka syrup and soak the babkas.
- Make the syrup. (Work Time: 5 minutes)
You need some time management skills for this recipe. About 10 minutes before the babkas are done baking, make the simple syrup. Combine the sugar and water for the syrup in a small sauce pan and bring to a boil, whisking to dissolve the sugar. Set the syrup on a wire rack to cool slightly as the babkas finish baking. - Soak the babkas. (Work Time: 10 minutes)
Once the babkas are out of the oven, immediately start soaking them with the syrup. Why? They tend to absorb more liquid while they’re still fresh and warm. For best results, don’t pour the syrup over the babkas—it will be too much all at once for the babkas to absorb. Instead, brush the syrup over the babkas with a pastry brush. At first, it will seem like there’s too much syrup—be patient! Allow the syrup to soak into the babkas a little before brushing more on.
Recipe Troubleshooting and FAQ
Why does this babka recipe make two babkas? Actually, why do most babka recipes make two babkas?
Oh boy, do I have thoughts on this! Because I literally spent the last week trying to develop a single loaf babka recipe. Every trial was pretty much a disaster.
Why? You don’t need a ton of dough to make babka. That makes kneading it in a regular-sized mixer difficult (unless you happen to have a mini KitchenAid mixer). Because the mixer is unable to knead the dough properly, you end up with a dense and squat babka.
But a recipe for two babkas does away with these negatives completely. If you don’t love the idea of having two babkas, don’t worry! Assembled babkas freeze beautifully. Scroll down below for my instructions on how to freeze babka for serving later.
Can I halve the recipe to make just one babka?
Technically yes, but I don’t recommend it. Halving the recipe makes a small amount of dough that’s hard to knead in a mixer (unless you happen to have a mini KitchenAid mixer). If you insist on going this route, I recommend kneading the dough by hand.
That being said, halving the recipe also doesn’t make enough dough to get a good twist on your babka. You have to roll out the dough so thin—thinner than the ¼-inch thickness that I already call for—that it quickly becomes overworked and hard to work with.
I don’t want to wait overnight for my white chocolate pistachio babka. Can I make this recipe all in one day instead?
Yes! You can make this babka recipe all in one day.
To do so, follow the instructions to make the dough. However, instead of proofing it overnight in the refrigerator, proof it for 1 to 2 hours in a warm, draft-free spot.
Then, follow the instructions to fill and assemble the babkas. However, instead of proofing them for 2 to 3 hours, proof them for 1 to 2 hours instead.
I have the opposite problem. I can make the dough right away, but want to make the babkas a few days later. How long can I leave the dough in the fridge for?
After making the dough, you can keep it covered in the refrigerator for up to 3 days before filling, assembling, and baking the babkas.
Help! My babkas tasted delicious, but don’t look as twisted and swirled as yours. What did I do wrong?
In the babka recipe below, I instruct you to roll out the dough into a fairly large rectangle that measures 10 inches wide and 24 inches long. If you slacked on rolling out your dough and rolled a smaller square than what I instructed, your babka won’t look as twisted and swirled as mine!
The most important thing is to roll it long as opposed to wide. The longer the dough, the more twists and swirls you end up with!
Help! My babkas tasted delicious, but came out short and squat. I was expecting them to have the height of a sandwich bread loaf. What did I do wrong?
First things first—babkas tend to be shorter and squatter than other breads like cinnamon raisin bread. They’re just built differently!
But if it seems unusually short and squat, it could be that its filling is uneven. If you didn’t spread it out evenly, the parts with more filling won’t rise as much as the parts with less filling.
And finally, if you want taller babkas in the future, I recommend baking the recipe in smaller 8 x 4-inch loaf pans. The smaller pan size will encourage the babkas to bake upwards as opposed to outwards!
My Best Recipe Tips For Making Babka
Ingredient Tips
- Just another friendly reminder to make sure to pay attention to the ingredients and the temperatures they’re listed at in the recipe. Yeast is a living thing and you can easily kill it by mixing it in water that’s too hot. You want the temperature to be similar to that of a warm bath and no more.
- Also, make sure to use eggs that are at room temperature rather than straight from the fridge. Eggs straight from the fridge will be too cold and lower the temperature of the overall mixture, risking dropping it to a point where the yeast won’t activate properly.
- The dough recipe also instructs you to use butter that’s melted and cooled slightly. What does that mean? Similar to the water for the recipe, its temperature should feel like a warm bath. When I’m prepping ingredients for this recipe (and others that uses melted and slighted cooled butter), I like to melt the butter first (either over a gentle heat on the stovetop, or short bursts in the microwave to ensure it doesn’t get too hot). Once it’s melted, I prep the rest of the ingredients. That gives it enough time to cool slightly—by the time I’m done prepping the ingredients and ready to start the recipe, it should be at the right temperature!
Proofing Tip
- Dough rises fastest and best on warm, humid days. Although you can get the same effect on cold, dry days, it can take two to three times as long to proof dough. This is why professional bakeries have dedicated drawers to proof dough. The proofing drawer mimics the environmental conditions of a warm, humid day. And guess what? You can do that at home too, with the oven you already have.
First, if your oven has a pilot light, turn it on—doing so increases tehe temperature inside the oven by about five degrees. Next, bring 2 to 4 cups of water to a boil and pour it into a heatproof glass or ceramic bowl. Place the bowl of water in the oven, then place the dough you’re trying to proof next to it. The warmth from the light and moisture from the steaming, hot water will create a warm, humid environment in the oven to proof the dough faster.
Baking Tips
- Check the babkas 25 minutes into their Bake Time. If they’re browning too quickly, loosely cover each babka with a tent of aluminum foil.
- It can be hard to tell when the babkas are done baking. The skewer test isn’t as reliable since you might accidentally hit a patch of molten white chocolate chips. So if you have one, I suggest using an instant read thermometer to check for doneness! The center of each babka should read 190°F.
Video Tutorial Showing How To Assemble Babka
Use the video player below to watch my Instagram Story tutorial on how to assemble and braid this babka recipe! Clicking the right side of the frame allow you to skip forward through the different recipe steps. Conversely, clicking the left side of the frame allows you tos rewind.
Get the Recipe: White Chocolate Pistachio Babka Recipe
Ingredients
For the Babka Dough
- 2 cups (9 ounces or 255 grams) all-purpose flour
- 2 cups plus 2 Tablespoons (8.5 ounces or 241 grams) cake flour
- ⅓ cup (2.35 ounces or 67 grams) granulated sugar
- 2 ¼ teaspoons instant yeast
- ½ teaspoon kosher salt
- ½ cup (4 ounces or 113 grams) whole milk, warmed to between 120°F to 130°F
- 2 large eggs, at room temperature
- ½ cup (1 stick or 4 ounces or 113 grams) unsalted butter, melted and cooled slightly
- ½ teaspoon pure vanilla extract
For the White Chocolate and Pistachio Filling
- 1 cup (9.5 ounces or 269 grams) pistachio cream
- 1 cup (6 ounces or 170 grams) mini white chocolate chips
For the Syrup
- ¾ cup (5.25 ounces or 149 grams) granulated sugar
- ½ cup (4 ounces or 113 grams) water
Instructions
Day 1: Make the Dough
- Mix the dry ingredients. In the bowl of a stand mixer fitted with the dough hook, combine the flours, sugar, yeast, and salt. Knead on low to combine, about 30 seconds. Press a tall glass into the center of the dry ingredients to make a well.
- Add the wet ingredients. Pour the milk, eggs, butter, and vanilla into the dry ingredients and mix with a rubber spatula until a rough, shaggy dough forms.
- Knead the dough. Use the mixer to knead on medium-low for 10 minutes, or until smooth and elastic, using a rubber spatula to scrape down the bottom and sides of the bowl as necessary.
- Proof the dough. Tip the dough out onto a lightly floured counter. Dust your hands with flour and knead the dough once or twice into a rough ball. Scrape down the bottom and sides of the bowl to remove any excess dough.Spray the bowl with cooking spray and place the dough back in the bowl. Cover with plastic wrap and let rise for 1 hour at room temprature before refrigerating overnight.
Day 2: Assemble And Bake The Babka
- Prep the dough and pans. Uncover the dough and discard the plastic wrap. Tip it onto a lightly floured counter. Spray two 9 x 5-inch loaf pans with cooking spray and line with parchment paper, leaving a 2-inch overhang on the long sides. Spray the parchment, too.
- Roll out the dough. Use a rolling pin to roll the dough into a large rectangle about 10 inches wide and 24 inches long. Press a bench scraper against the sides of the dough to create straight edges.
- Fill and roll the dough. Use an offset spatula to spread the pistachio cream evenly across the dough. Sprinkle the white chocolate chips evenly on top.Starting from one of the long ends, roll the dough into an even log, like you would a burrito or when making cinnamon rolls.
- Slice the dough. Use a serrated knife to cut the log lengthwise into 2 strands, each about 12 inches long.Use the knife to slice the 2 strands in half crosswise so that you have 4 pieces with the filling exposed.
- Braid the babkas. Position the 4 pieces so that the exposed layers are facing upwards and are parallel next to each other. Take 2 of the pieces and gently press together the end of each half. Then, lift the right half over the left half. Repeat this process, but this time, lift the left half over the right to create a simple, two-pronged plait. Repeat this process until there is no longer any dough left to braid — I think I was only able to cross the dough around 3 times or so. Squeeze together the ends. Congratulations! You just braided one of the babkas.Repeat with the remaining 2 pieces to create the second babka.
- Proof the babkas. Place the braids in the prepared pans and cover the top of the pans with plastic wrap. Set the loaf pans aside in a warm, draft-free spot until the dough is very soft and jiggly to the touch, 2 to 3 hours.
- Prep the oven. About 30 minutes before baking, position a rack in the center of the oven and preheat to 350°F.
- Bake the babkas. Bake the buns for 40 to 45 minutes, or until the edges are golden brown and an instant read thermometer inserted into the center of a babka reads 190°F.
- While the babkas bake, make the simple syrup. Combine the sugar and water for the simple syrup in a small saucepan. Bring to a boil over high-heat, whisking to dissolve the sugar. Set the syrup on a wire rack to cool slightly as the babkas finish baking.
- Soak the babkas. Once the babkas are done, place on a wire rack. Immediately use a pastry brush to brush the top of the babkas with the syrup, waiting until the babka(s) absorb the syrup before using more syrup—it will seem like there's too much syrup, but it will work out, I promise!
- Serve and store. Cool the soaked babkas in their pans on the wire rack for 1 hour. Serve warm, or at room temperature. The babkas will keep at room temperature, covered loosely in plastic wrap, for up to 3 days.
Notes
- Freeze the assembled, unbaked babkas before baking.
To freeze the shaped dough, tightly wrap it in two layers of plastic wrap, then a layer of aluminum foil. Freeze for up to 3 months. To bake these babkas, unwrap them and let sit out at room temperature. Place them in parchment-lined and greased loaf pans and proof until the babkas have doubled in size. It will take several hours to do so since the babkas need to defrost, then rise—expect a Rise Time of about 5 to 6 hours, or maybe even overnight. Once the babkas have risen accordingly, follow the recipe instructions to bake and soak the babkas in simple syrup. - Freeze the baked babkas for serving later.
If freezing the extra loaf of babka, cool completely to room temperature after soaking with simple syrup. Then, remove the babka from its loaf pan. Tightly wrap it in two layers of plastic wrap, then a layer of aluminum foil. Freeze for up to 3 months. To serve, transfer the babka to thaw in the refrigerator overnight. Remove the plastic wrap and rewrap in the aluminum foil. Bake at 325°F for 8 to 10 minutes, or until warm. Then, unwrap the babka and bake uncovered for another 5 minutes. Serve immediately.
Did you make this recipe?
Please leave a comment and rating for the recipe using the form below!
Your ratings make it easier to find the recipe online, and I’m always looking for ways to improve Hummingbird High.
get new recipes via email:

buy the book
Weeknight Baking:
Recipes to Fit your Schedule
Over the past several years of running Hummingbird High, I kept a crucial aspect of my life hidden from my readers: I had a full-time, extremely demanding job in the tech world. In my debut cookbook, Weeknight Baking, I finally reveal the secrets to baking delicious desserts on a tight schedule.
So good!! Very decadent- but so worth it.