Vanilla Mille Crepe Cake
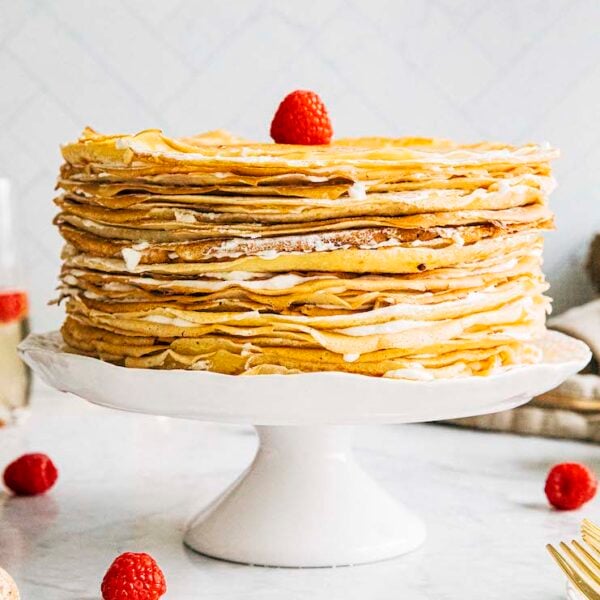
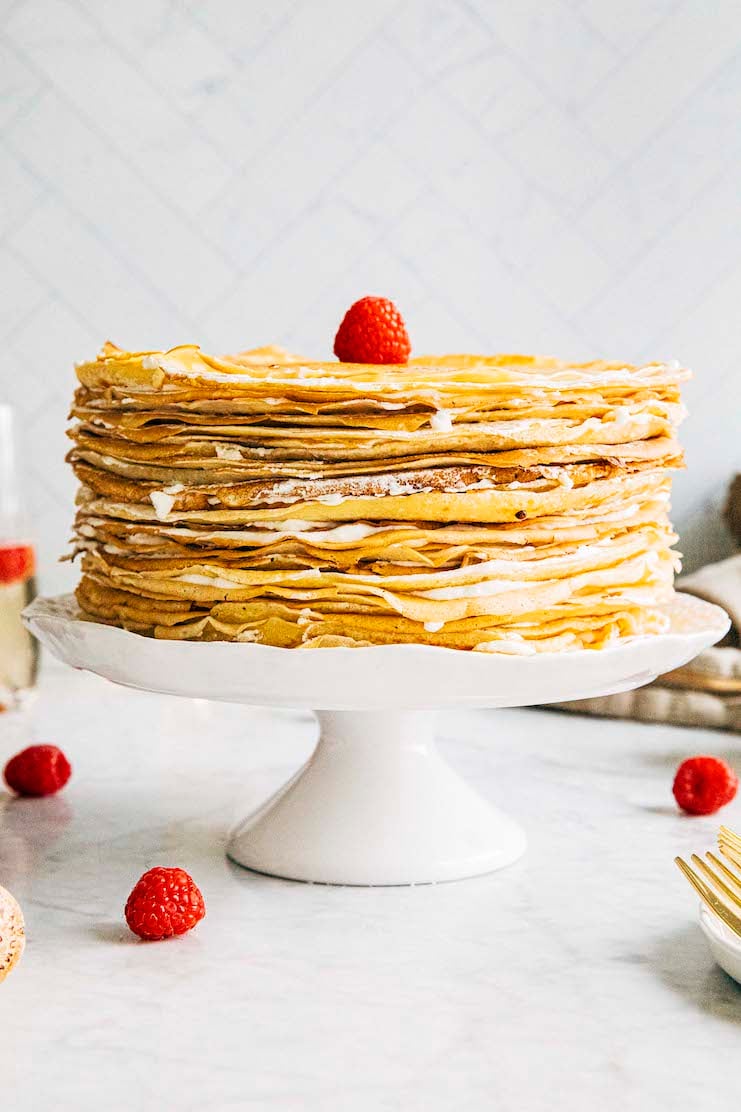
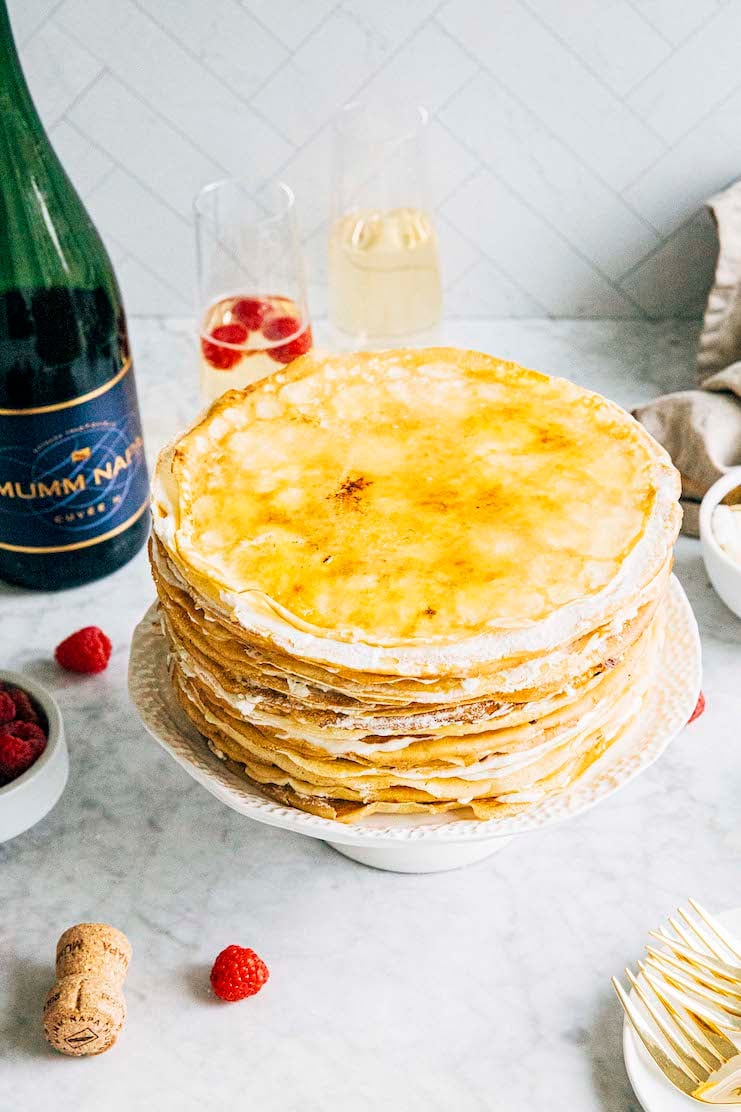
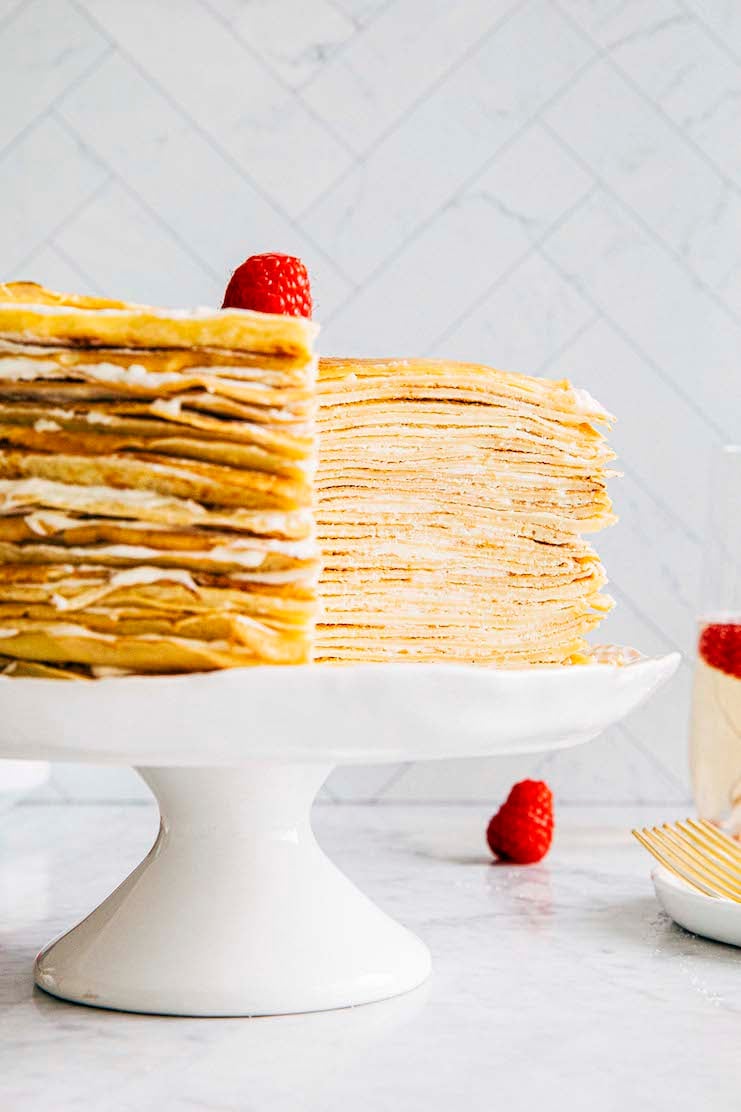
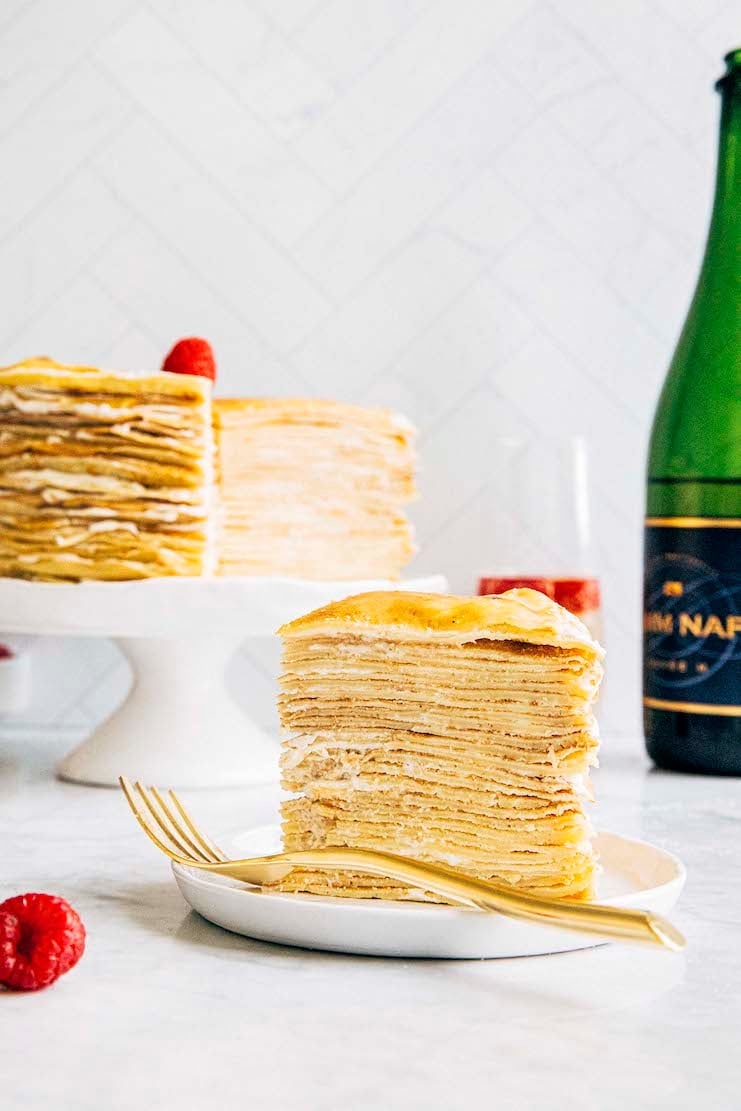
This vanilla mille crepe cake is made with a whopping 75 layers of crepes, whipped cream, and sugar! The recipe instructs you to layer 25 crepes with equal layers of vanilla whipped cream and granulated sugar. The layered crepes make a soft and tender cake that is light and creamy from the whipped cream, with some crunch and bite from the granulated sugar and bruleed top. It’s the perfect holiday dessert, especially when paired with a sparkling champagne like Mumm Napa Cuvée M.
A big thank you to Mumm Napa for sponsoring this vanilla mille crepe cake. As always, all thoughts and opinions are my own. Thank you for supporting the sponsors that keep Hummingbird High up and running!
For more unique layer cake recipes on Hummingbird High, check out my Layer Cake Recipe collection! Popular recipes include My Best Chocolate Birthday Cake and this Vietnamese Iced Coffee Cake.
Why You Should Make Vanilla Mille Crepe Cake
This cake is a showstopper at any holiday party.
And let’s talk about Mumm Napa for a second. Mumm Napa is a sparkling wine brand established in California in the late 1970s. However, their roots can be traced back to G.H. Mumm, France’s leading champagne house. They follow traditional French heritage winemaking techniques to create their sparkling wine.
As a result, their sparkling wine is delicious. The wine has delicate white and yellow stone fruit aromas, with subtle notes of wild strawberry, vanilla, and honey. It pairs perfectly with many desserts, especially ones with strong vanilla flavors (like this vanilla mille crepe cake). Be sure to grab a bottle for your next holiday soiree over on MummNapa.com!
Ingredients and Substitutions
Now that I’ve convinced you to make this vanilla mille crepe cake recipe, let’s talk about some key ingredients:
- Kosher Salt. In my cookbook, I argue that kosher salt is the best salt for baking recipes! Learn more in this blog post.
- Whole Milk. While developing this recipe, I found that you can use other plant-based milks to make the crepes too. But whole milk makes the most flavorful cake!
- Unsalted Butter. I also found that you can use salted butter instead of unsalted butter. No need to adjust the salt recipes in the level either!
- Heavy or Whipping Cream. Some folks have asked me if they can use store-bought canned whipped cream in this recipe. No, please don’t! Canned whipped cream tends to deflate quickly once you’ve squirted it from the can. If you use it in this recipe, it will quickly turn into liquid between the layers, leaving you with a soggy, slippery crepe cake!
Recipe Troubleshooting and FAQ
Let’s Talk About The Best Frying Pan To Make Crepes
Although you can get specialty crepe machines and crepe pans, I personally find that the best frying pan is probably already one you have at home. Just use your favorite nonstick, large (at least 9 or 10 inches) frying pan.The most important factor is this: the pan needs to be NONSTICK. I love my cast iron skillet, but it is not the tool for this particular job.
Why do I need to rest the crepe batter?
Great question! During this resting period, the starch molecules in the flour absorb the milk, eggs, and butter in the batter. Doing so causes the molecules to swell, giving the batter a thicker and more viscous consistency that’s easier to cook when making crepes.
Additionally, the gluten formed during the whisking process relaxes. Any air bubbles in the mixture also slowly work themselves out of the batter. Both processes make the crepes extra tender and delicate.
Best Recipe Tips
Ingredient Tips
- The ingredient quantities for the batter will seem like they will make TOO much batter for this cake, but trust the recipe! The quantities should make around 25 crepes, with just a little extra to make around 5 or so crepes for “practice” (see more below) and “baker’s rewards.”
- You may have some extra whipped cream leftover after assembling the cake. Don’t throw it out! Save it as a garnish to serve on top of or as a side with the cake.
Technique Tips
- Similar to making pancakes, your first crepe is probably going to be bad. That’s totally okay! You can discard this “practice” crepe, or eat it as some kind of “baker’s reward”.
And if any other crepes come out imperfect, don’t throw them away! This cake is pretty forgiving. You can still use crepes with small tears around the edges in the cake. Just use them in the middle of the layer cake—I promise nobody will notice! - In the recipe below, I instruct you to make a crepe by swirling the batter in a frying pan. When you swirl the batter, don’t coat the sides of the pan—just the bottom! This is the trick to getting perfectly round crepes that are all roughly the same size.
- The recipe instructs you to whip the cream to a specific texture: “soft peaks.” The best way to determine the cream’s texture is to do a test with a whisk. Dip the tip of a whisk (or the whisk attachment) into the whipped cream, remove it, and quickly turn it upside down. If the cream is too soft, it will slide off the whisk. You’ll need to keep whisking. Once the cream has a cloudlike structure, with peaks that lose their shape but hold on to the whisk, you’re at the “soft peaks” stage!
- Spread cream all the way to edges of crepe to prevent the sides from wrinkling up.
Styling Tip
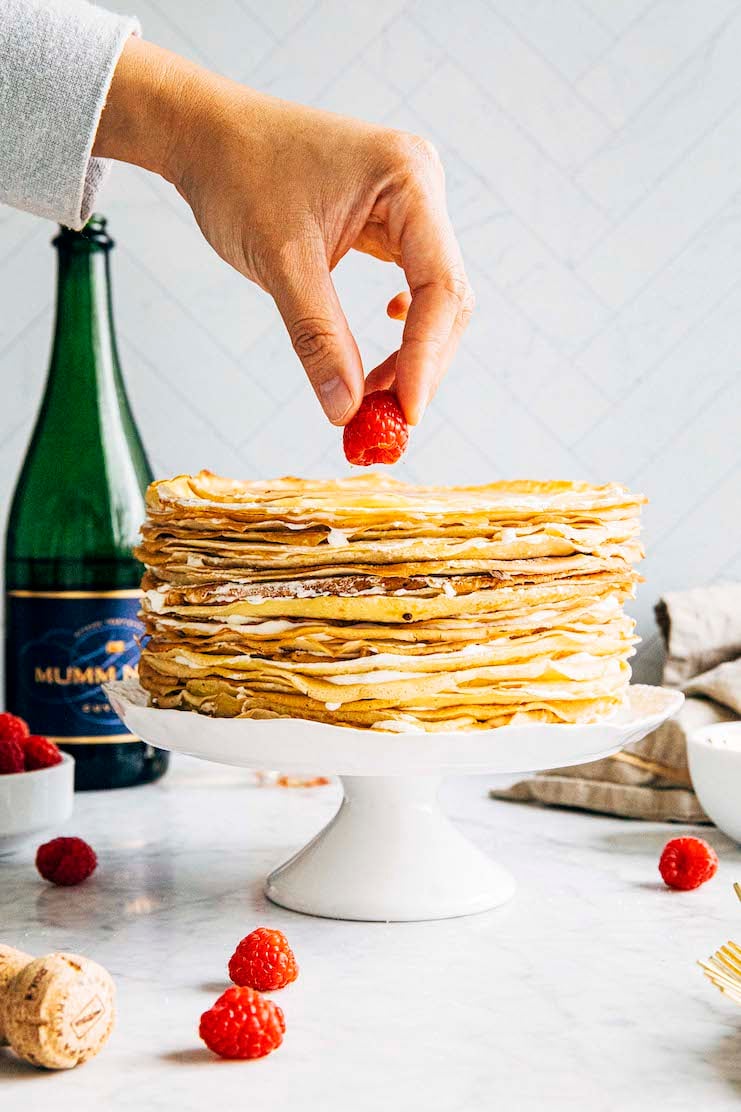
- Save your prettiest crepe for the top and final crepe layer. That’s the one everybody will see!

Get the Recipe: Vanilla Mille Crepe Cake Recipe
Ingredients
For the Crepes
- 8 large eggs
- ½ teaspoon kosher salt
- 4 cups (18 ounces or 510 grams) all-purpose flour
- 4 ½ cups (36 ounces or 1021 grams) whole milk
- ½ cup (1 stick or 4 ounces or 113 grams) unsalted butter, melted and cooled slightly
For the Whipped Cream
- 1 ½ cups (12 ounces or 340 grams) cold heavy cream
- 1 Tablespoon pure vanilla extract
- pinch of kosher salt
Assembly
- 6 Tablespoons (2.65 ounces or 75 grams) granulated sugar
For the Brulee (Optional)
- 1 Tablespoon granulated sugar
Equipment
- a chef's torch (optional)
Instructions
For the Vanilla Mille Crepe Cake
- Make the crepe batter. In a large bowl, whisk together the eggs and salt. Gradually whisk in a quarter of the flour, followed by a quarter of the milk. The mixture will be a little lumpy, but that's okay, I promise! Continue whisking in a small amount of the flour, followed by a small amount of the milk until both ingredients are incorporated. Add the butter and whisk until just combined.
- Chill the crepe batter. Cover the bowl with plastic wrap and refrigerate for at least 1 hour, but preferably overnight.
- Make the crepes. Heat a large nonstick frying pan over medium heat. Whisk batter to reincorporate and ladle ¼ cup of batter into the pan.Working quickly, swirl the pan or use a crepe batter spreader to spread the batter until it forms a rough 9-inch circle. Cook, until bubbles form on surface and the edges are set, about 1 minute. Slide a spatula underneath the crepe to loosen and carefully flip. Cook for 15 to 30 seconds, or until light brown spots appear on the bottom surface of the crepe. Transfer to a flat plate.Repeat with remaining batter, stacking the crepes on the plate as you go. You should have around 25 crepes. Cool the crepes completely before assembling the crepe cake.
- When ready to assemble the crepe cake, make the whipped cream. In the bowl of a stand mixer fitted with the whisk attachment, combine the cream, vanilla, and salt for the whipped cream. Whisk on medium-high until soft peaks form, about 3 minutes.
- Assemble the crepe cake. Place one crepe in the center of a flat plate or cake platter. Sprinkle ¼ teaspoon granulated sugar over the surface of the crepe. Use a rubber spatula or cookie dough scoop to drop 2 Tablespoons of whipped cream in the middle of the crepe. Use an offset spatula to spread it evenly all over the crepe, just like you would spread butter on toast. Place another crepe on top of the cream, and repeat the process of sprinkling sugar, spreading whipped cream, and stacking with another crepe until only one crepe remains.Place the remaining crepe on top, then loosely cover the crepe cake with plastic wrap. Refrigerate for at least 1 hour.
- Serve and store. Serve chilled straight from the fridge. If bruleeing the top, sprinkle 1 Tablespoon of granulated sugar on top of the crepe cake. Use a chef's torch to brulee the sugar until melted and golden brown. Serve immediately.The crepe cake will keep in the refrigerator, loosely covered with plastic wrap, for up to 2 days.
Notes
Can you freeze vanilla mille crepe cake?
Sort of. I don’t recommend freezing the entire assembled crepe cake. Whipped cream doesn’t hold up well after being frozen—it tends to get weepy and liquidy! You’ll likely end up with a soggy crepe cake after defrosting. However, you can freeze the individual crepes without any toppings or fillings after you cook them. To do so, stack the crepes with a layer of wax paper in between each one. Wrap the entire stack in two layers of plastic wrap and freeze for up to 3 months. To use in this recipe, thaw in the refrigerator overnight. Assemble the crepes with whipped cream and granulated sugar as instructed in the recipe.Did you make this recipe?
Please leave a comment and rating for the recipe using the form below!
Your ratings make it easier to find the recipe online, and I’m always looking for ways to improve Hummingbird High.
get new recipes via email:

buy the book
Weeknight Baking:
Recipes to Fit your Schedule
Over the past several years of running Hummingbird High, I kept a crucial aspect of my life hidden from my readers: I had a full-time, extremely demanding job in the tech world. In my debut cookbook, Weeknight Baking, I finally reveal the secrets to baking delicious desserts on a tight schedule.
When I make the 25 crepes, is it ok to set them on a surface on top of each other or do I need to prep parchment/wax paper to layer in between each? Will they stick to each other? Crepe novice here!
Great question! It’s okay to stack them on top of each other; just be extra careful when peeling them apart!
Is it ok that the crepes have no sugar?
Yes, a traditional crepe is not very sweet and sometimes even savory on its own. The fillings and toppings are what make it sweet.