
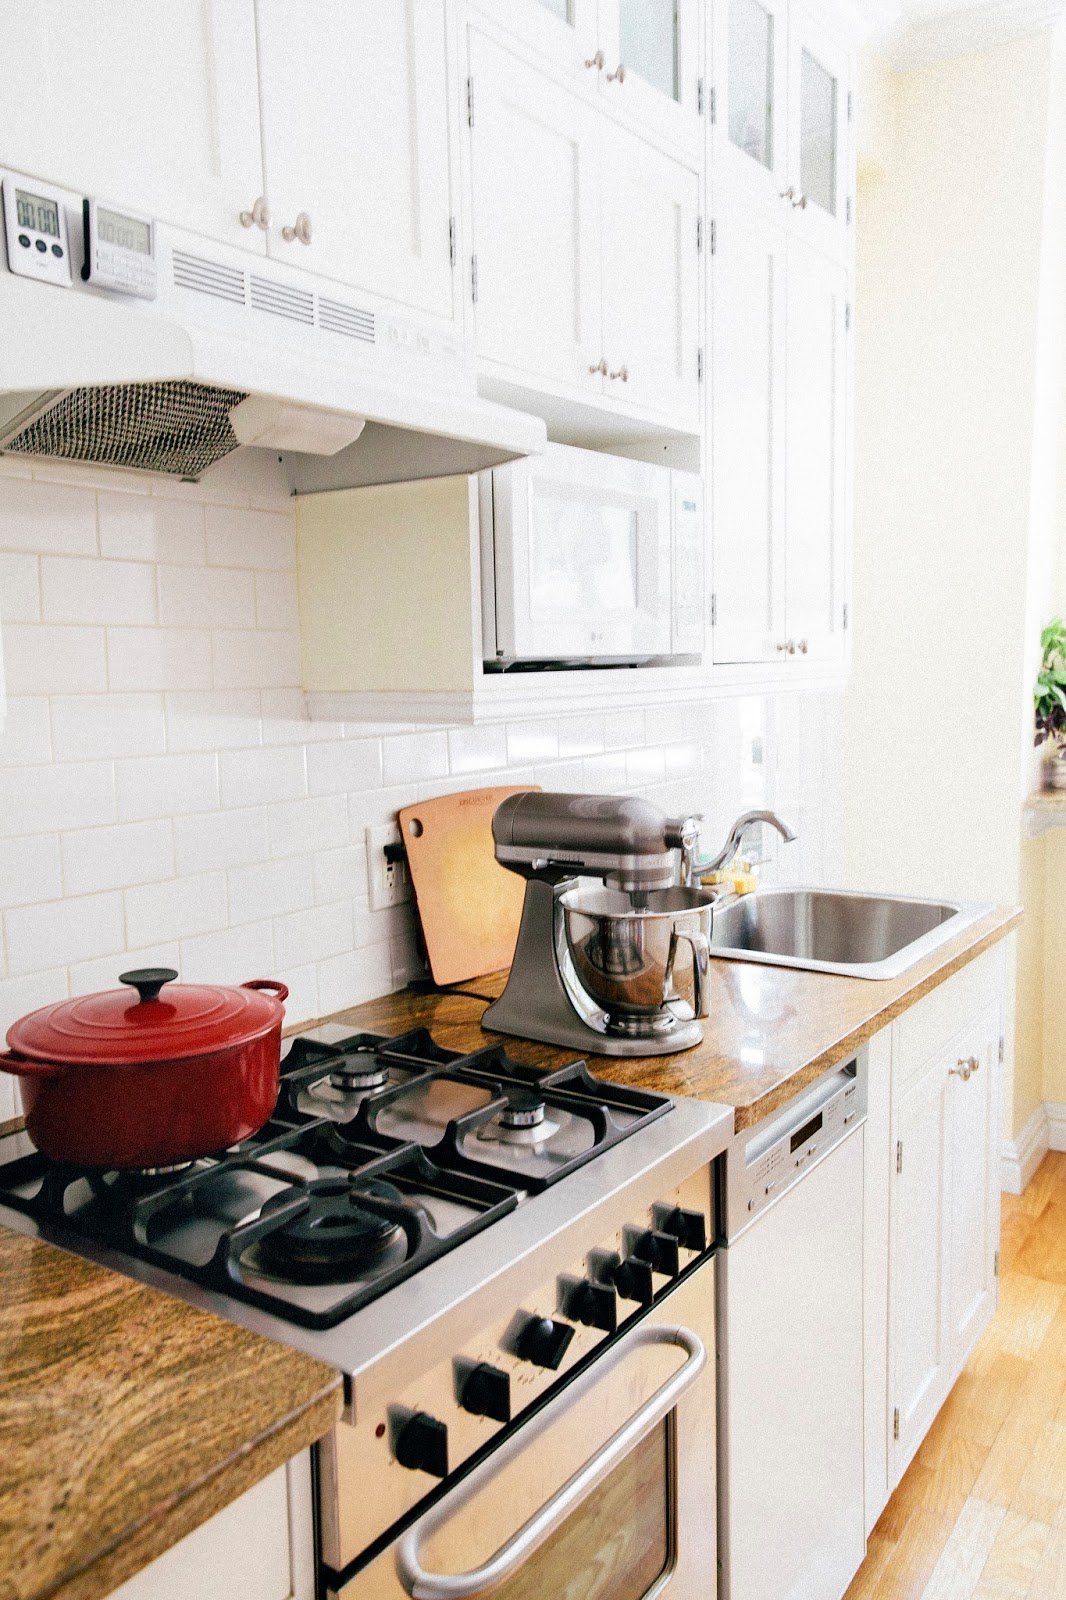
For me, one of the most stressful things about moving is getting to know my new kitchen. We’re staying in Erlend’s parents’ apartment for now, and while their kitchen is well-stocked and spacious for New York, it’s still a little smaller and narrower than what I’m used to. If you saw the tour of their kitchen on my Snapchat, you probably noticed that everything on the counter was miniature: mini toaster oven, mini drying rack, complete with an even smaller-than-standard fridge and oven to boot. For a hot second, I briefly unpacked my KitchenAid mixer, and was equally amused/ashamed by the amount of space it took up on the counter. It didn’t last very long out there — while chopping up vegetables, Erlend accidentally slammed his elbow into the mixer and nearly sliced his thumb open.
Ah, New York City kitchens.

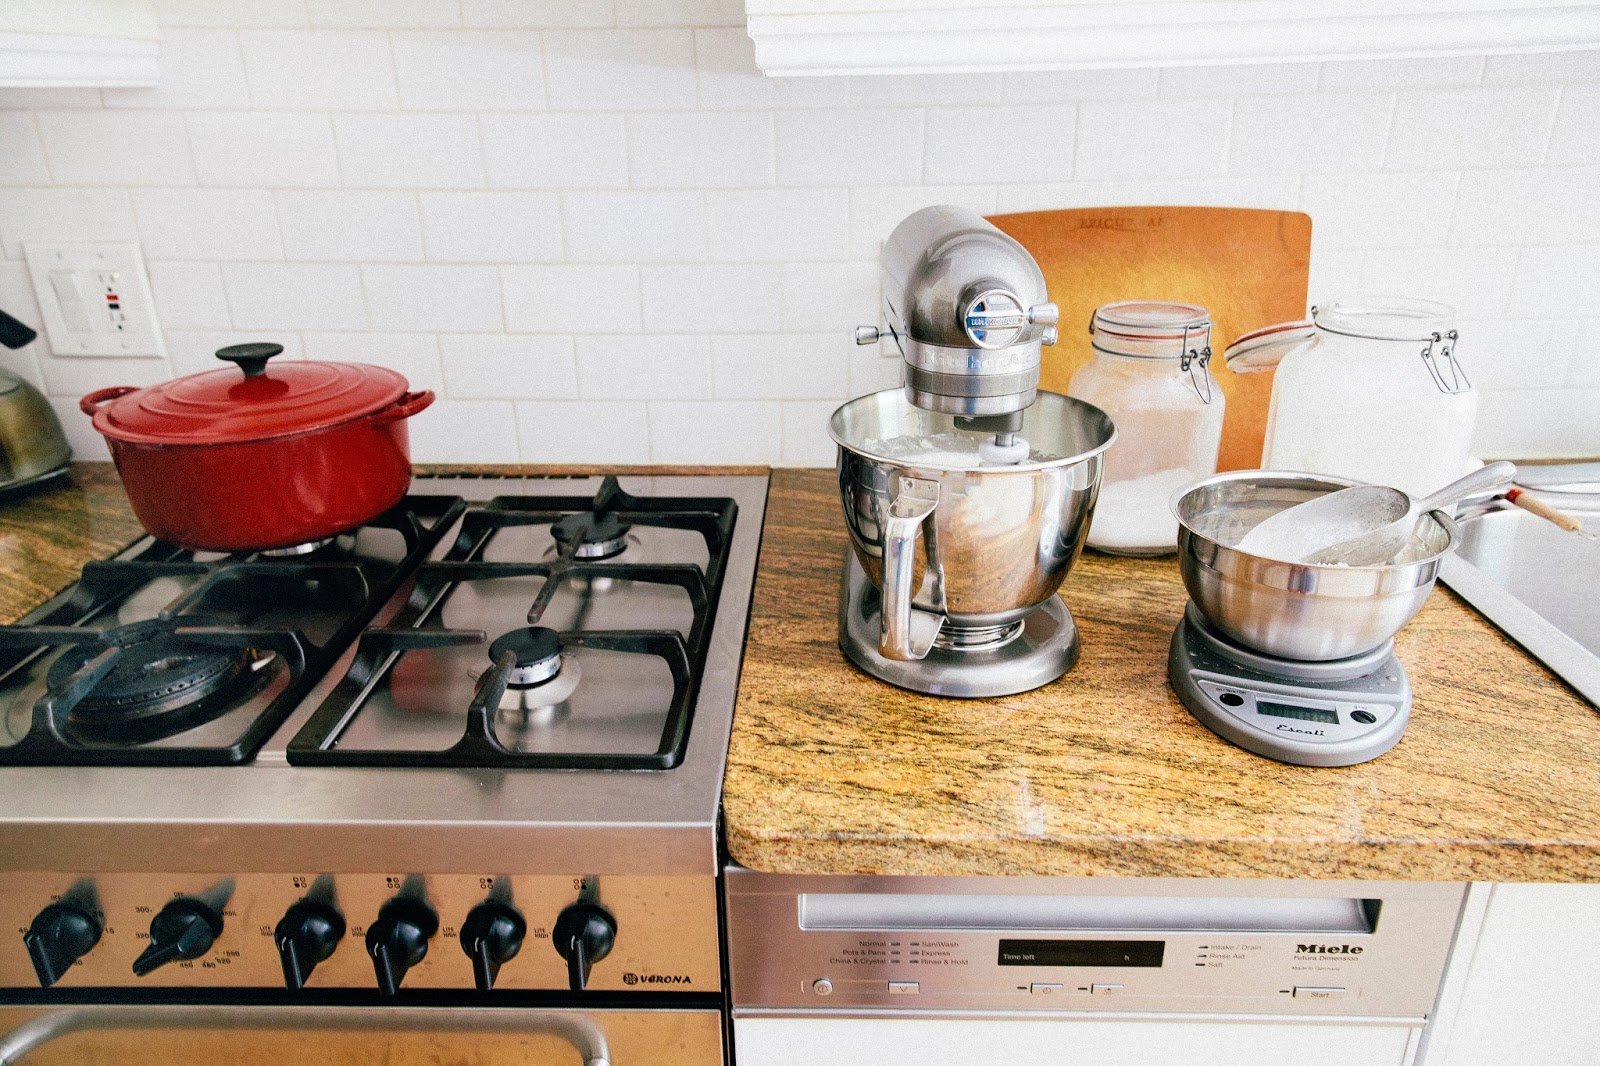
But did you guys know that KitchenAid mixers come in a mini size too? It’s a relatively new size, and, according to the press materials I got with the package (Williams-Sonoma had found out about my move and generously sent one over as a housewarming present), is 20% smaller and 25% lighter than the standard size. TBH, as I was unwrapping the mixer, I was a little skeptical. Because sure, it looked great in the pint-size NYC kitchen; but would it actually be able to handle the batter required for three-layer cakes and other baked goods? I had visions of turning on the mini mixer, seeing the cake batter ooze and splatter across the walls of Erlend’s parents’ clean kitchen, followed by us arguing about me being a mess and my stuff taking up too much space. Great.
So initially, I was going to play it safe and test out the mixer with a small-batch recipe for vanilla cupcakes that only made 10 cupcakes. But Alana and Ashlae convinced me otherwise: Alana had received a mini mixer a few weeks beforehand and assured me that the paranoia was in my head, telling me that the mixer was more than capable of handling typical cake batter quantities, while Ashlae was in the midst of remodeling her kitchen and was trying to figure out if the mini mixer was the way to go. Thus, in the name of science and blog friendships (thankkkkssss Alana for putting up with my frantic texting!), I decided to put the mini mixer to the test with a bundt cake recipe.
Why a bundt? A typical bundt cake recipe has around 10 to 12 cups of batter, which is slightly more than that of an three layer 8-inch cake or a two layer 9-inch cake (both of which average around 9 cups of batter). I figured if the mini could handle a bundt cake recipe without overflowing, then it could handle the cake and cupcake batters I usually make.
And you know what? Alana was right. There wasn’t a problem at all: no overflowing, no spillage, no splashing, no drama, nothing. In fact, the mini might have even performed better than my standard size mixer — the mini mixer has the exact same motor as the standard, and the smaller bowl size meant that more of the batter was being mixed and incorporated as opposed to going up the sides of the bowl and needing to be scraped down. Pretty boss.
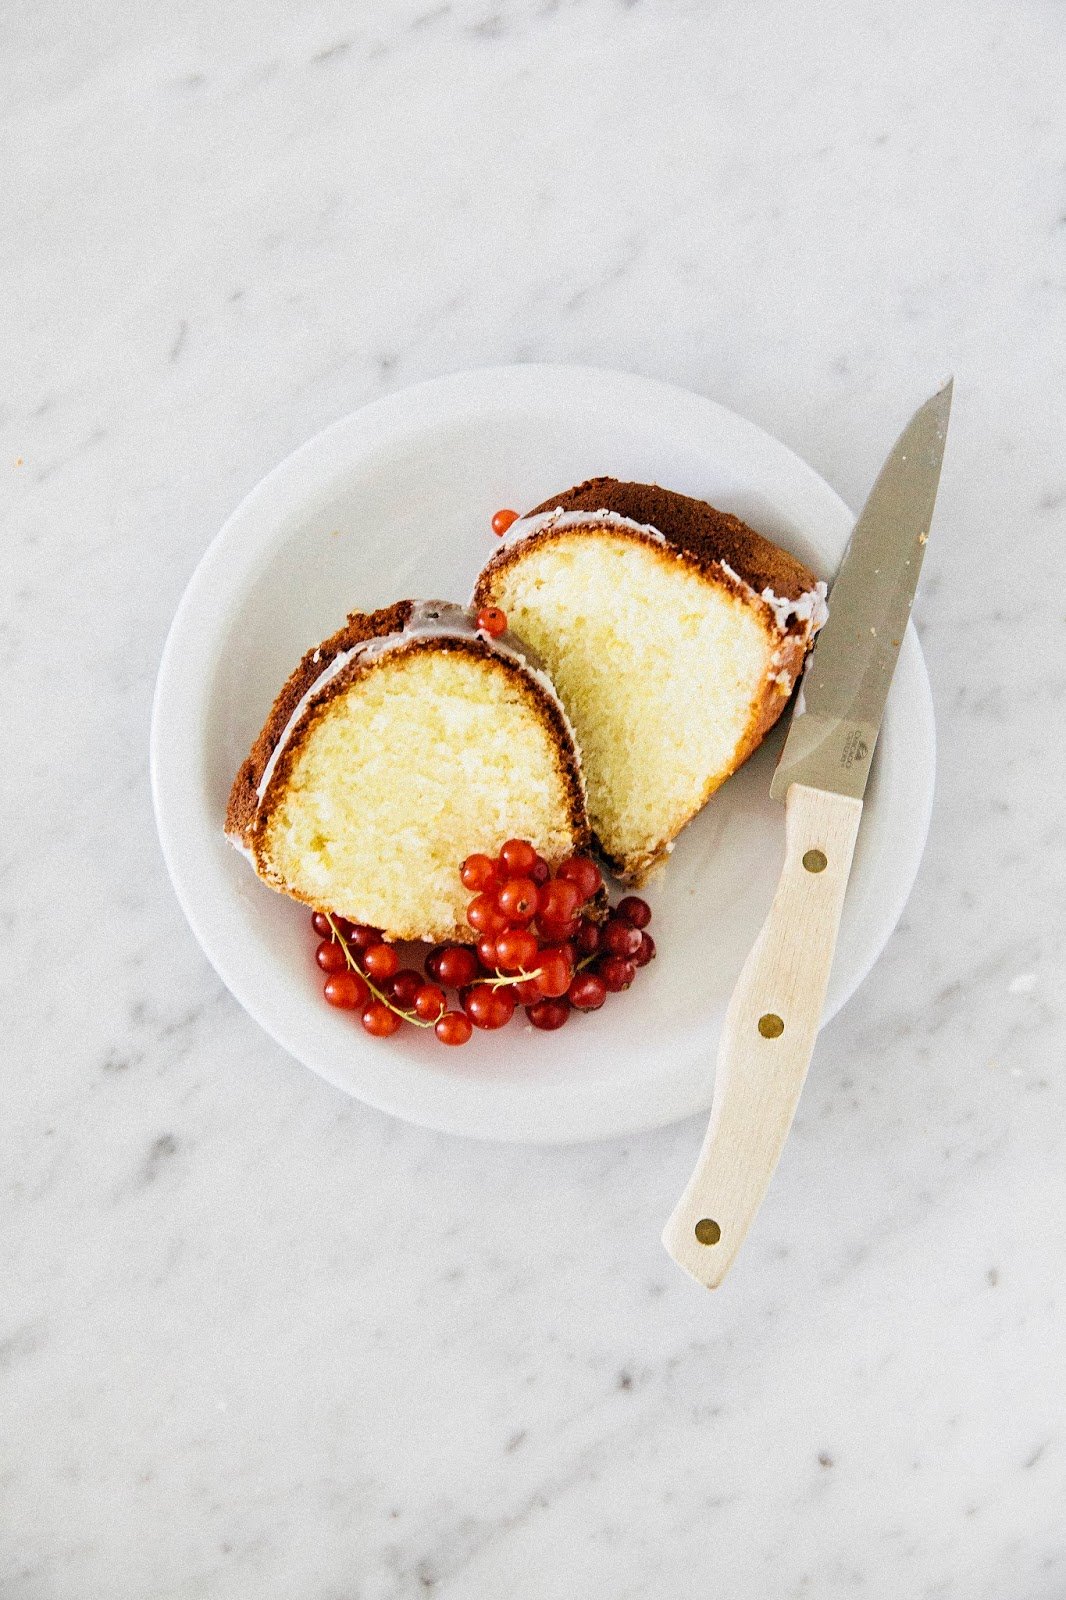
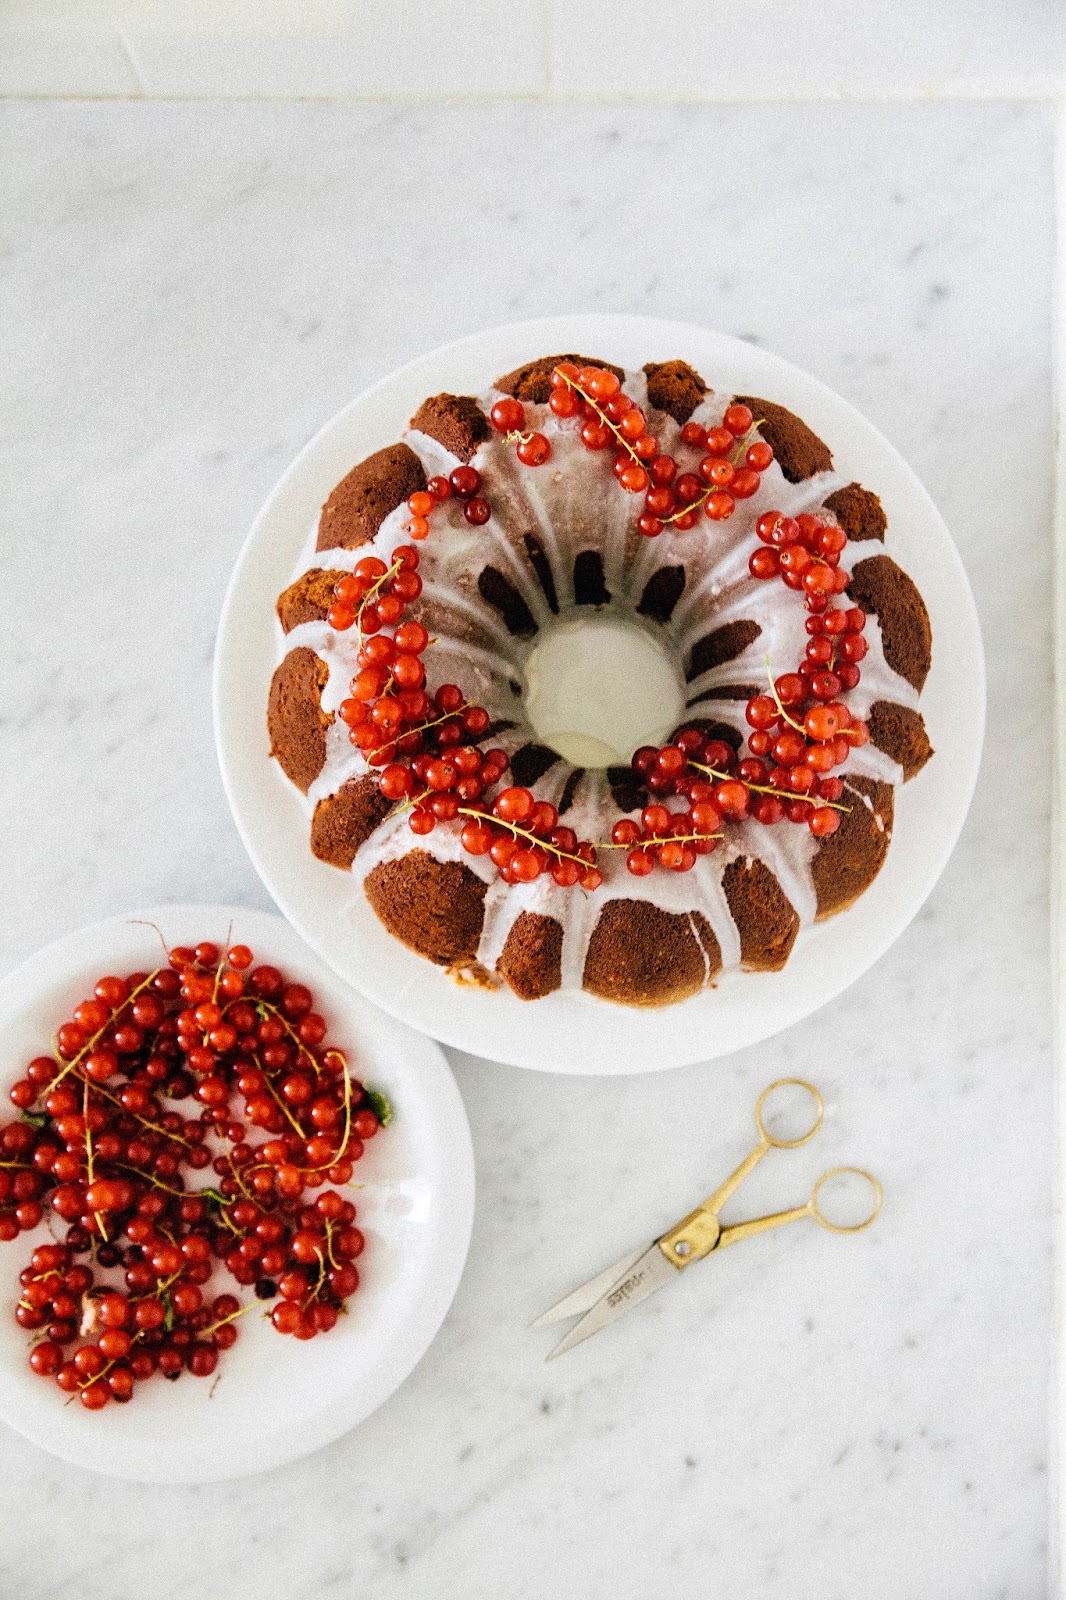
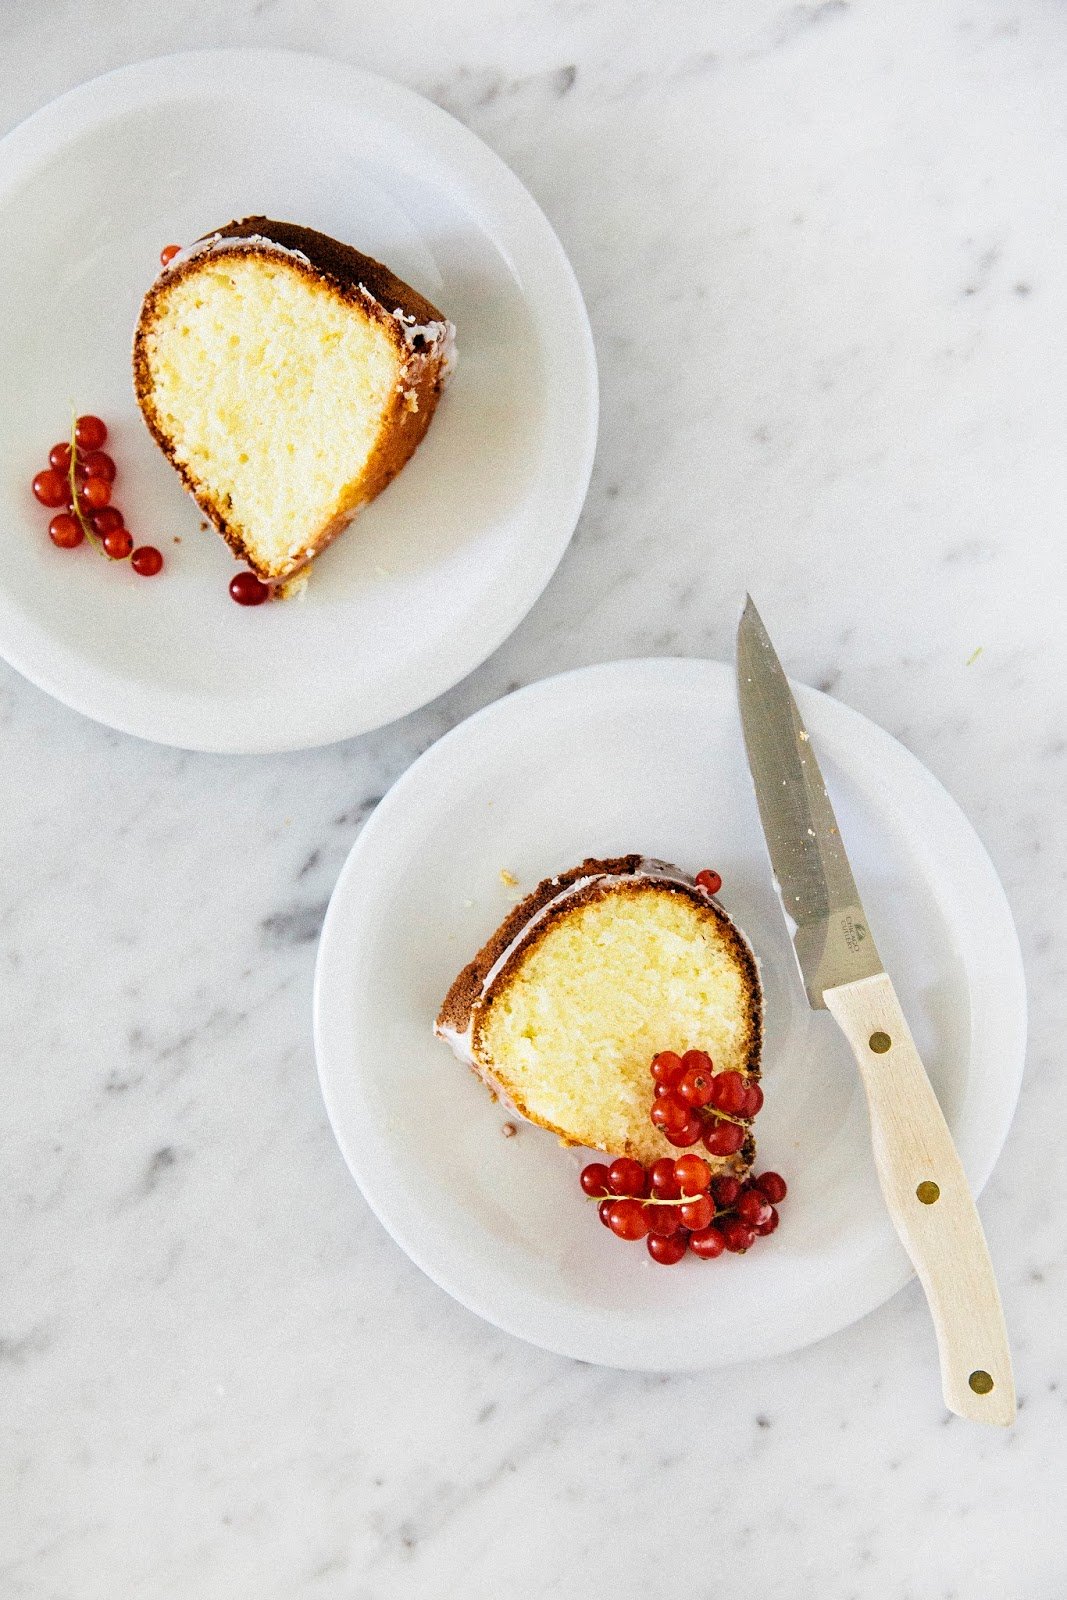
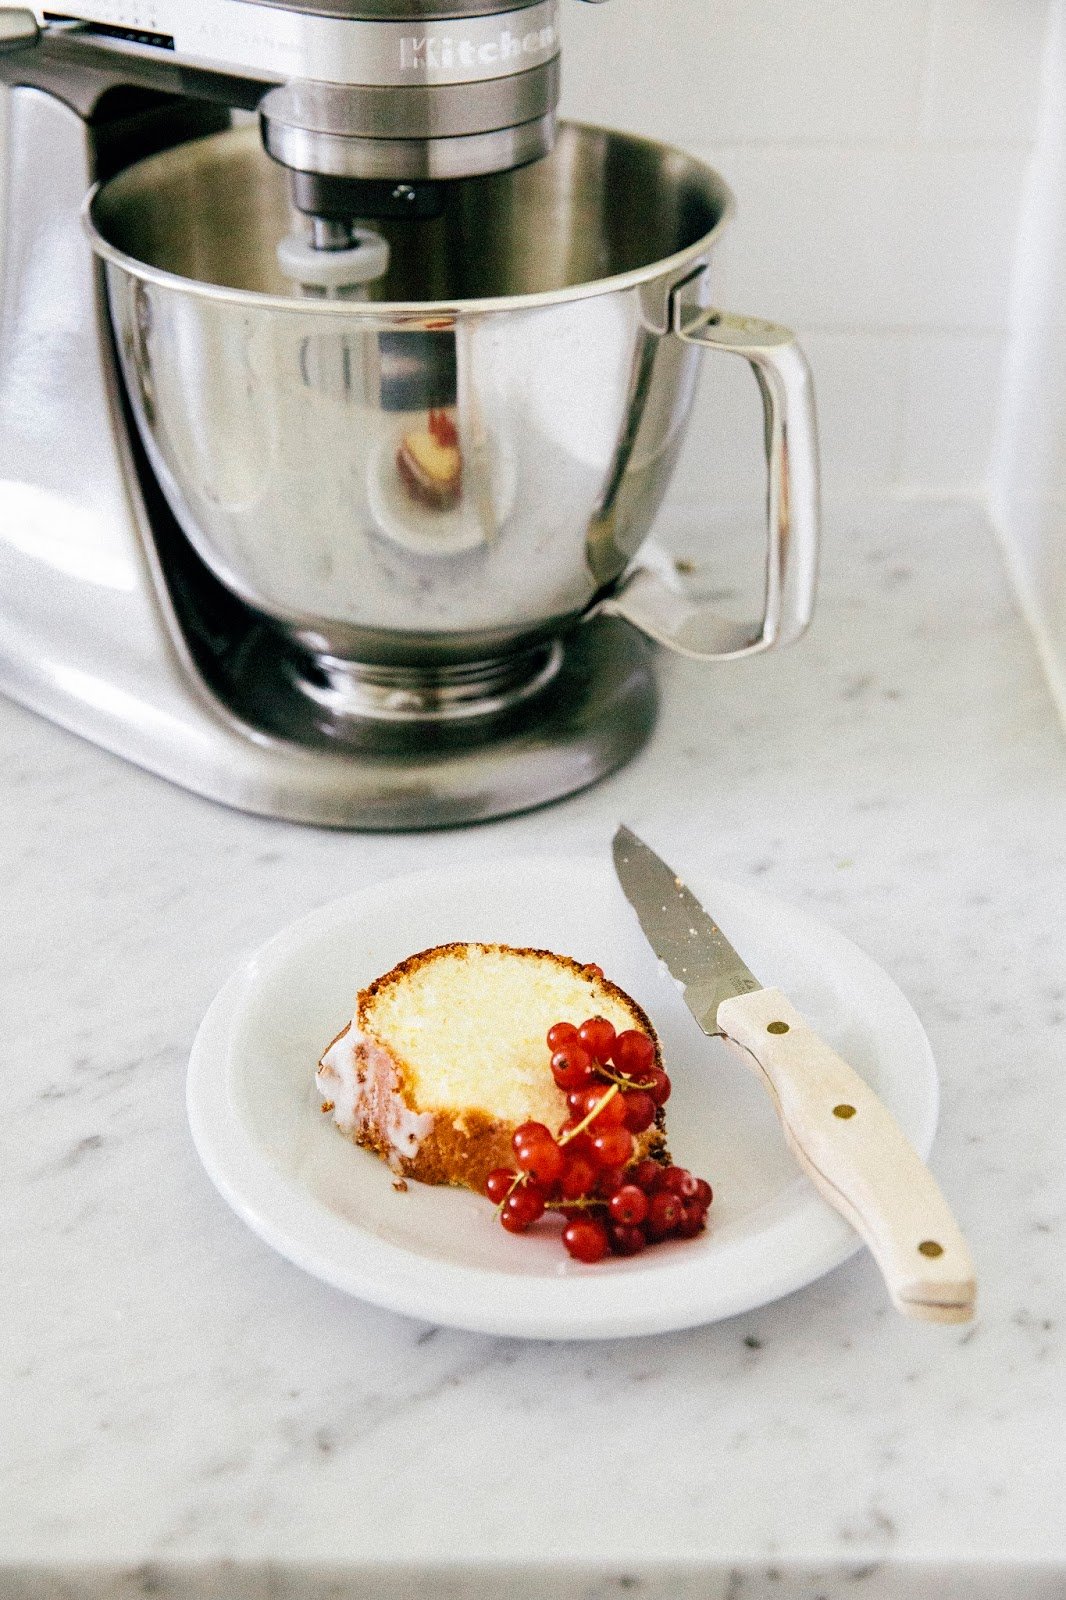
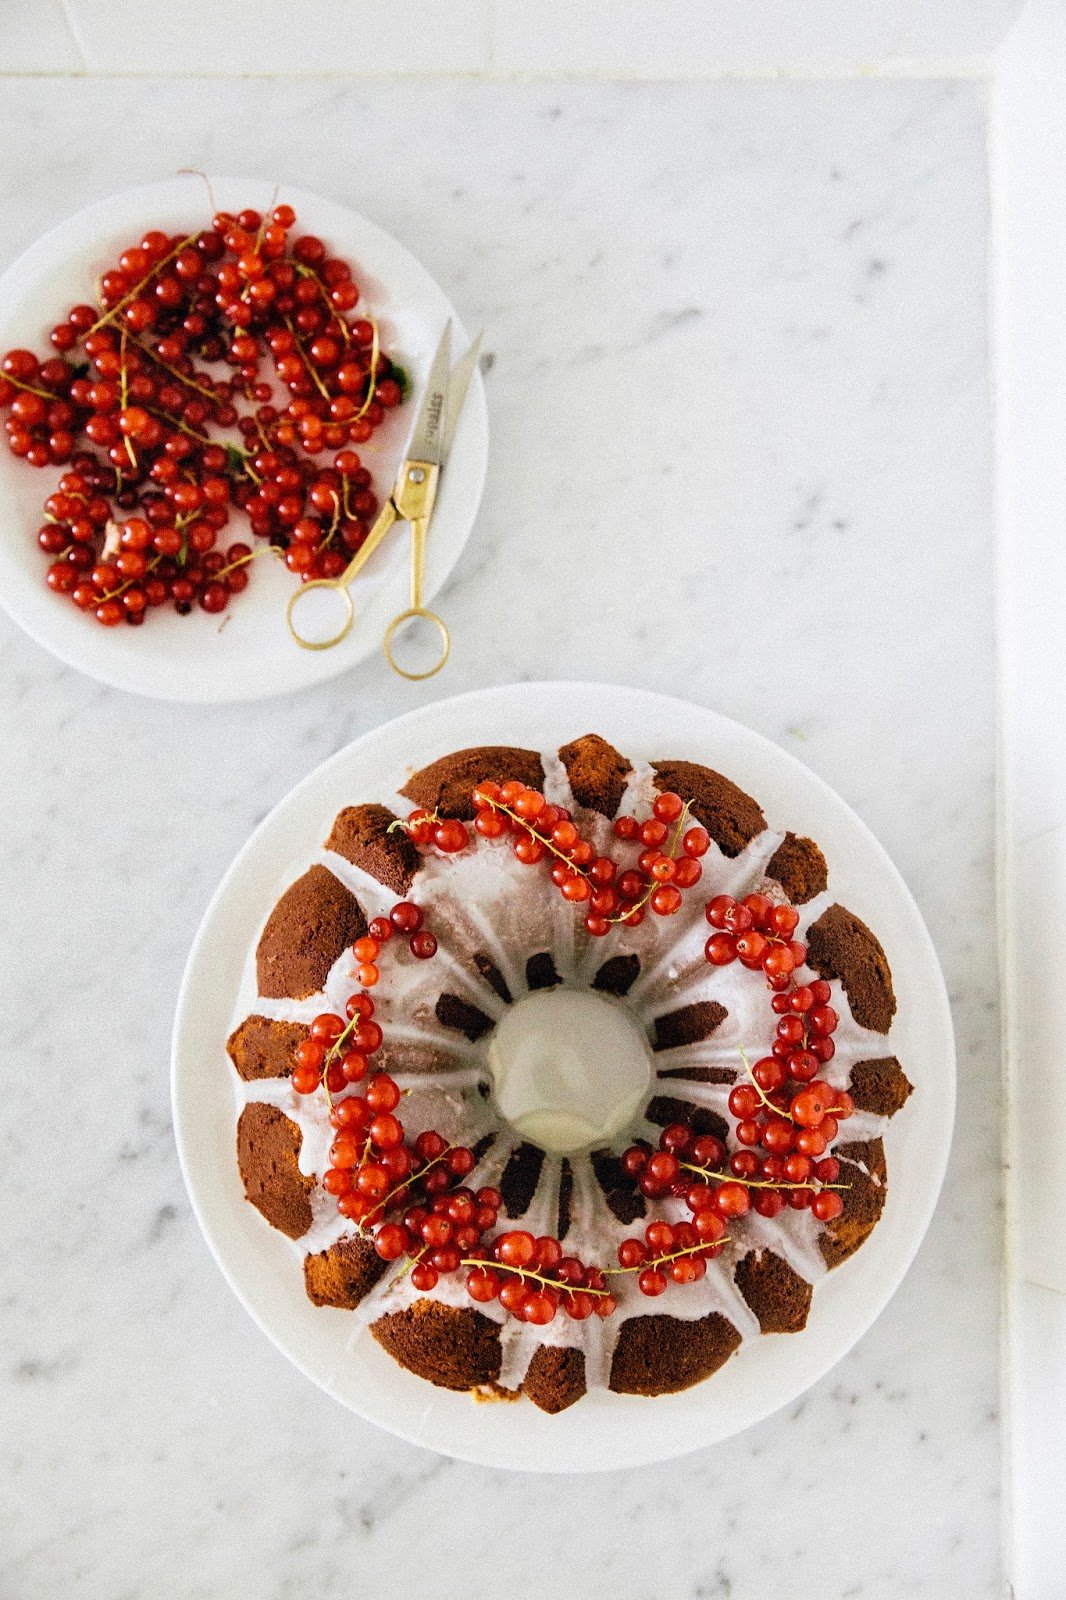
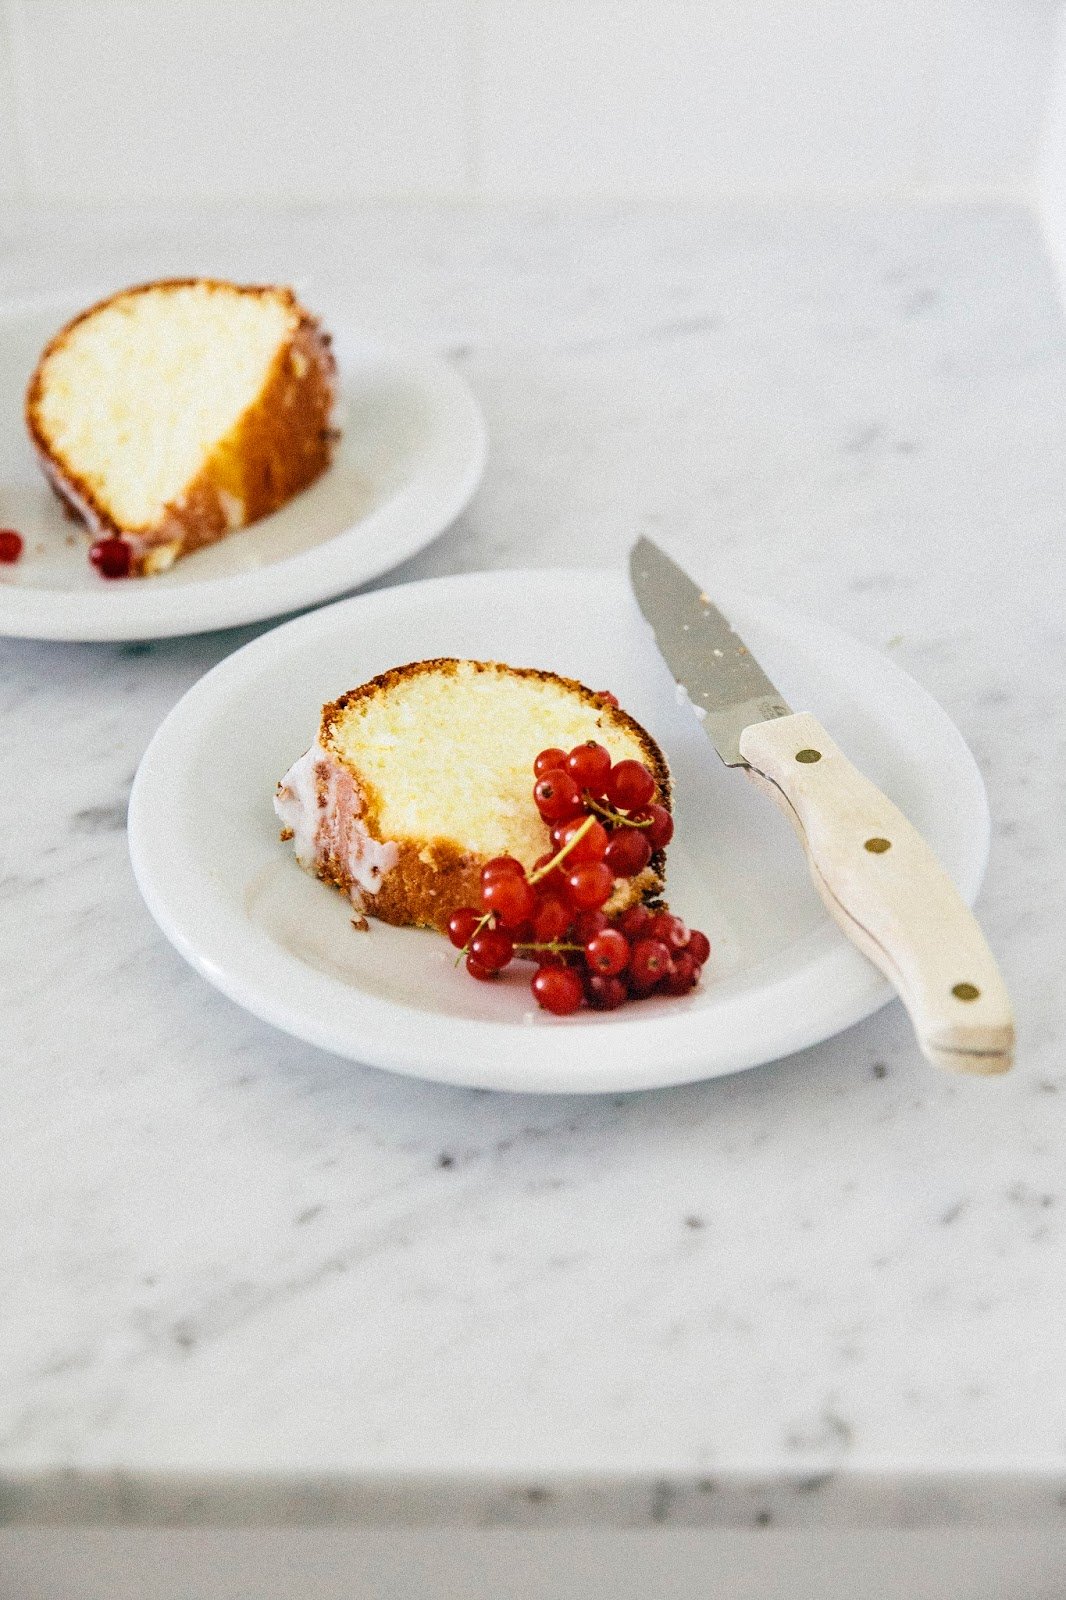
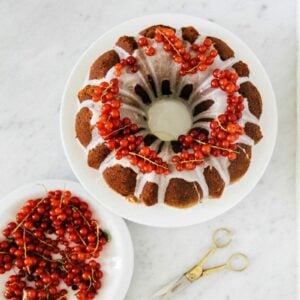
So without futher ado, here is the pretty standard classic that came out of the mini mixer: a lemon bundt cake, soaked with lemon simple syrup for moisture and flavor, and topped with a milk glaze and red currants. Drama and mess free.
I dig it.
This post was sponsored by Williams-Sonoma, who graciously provided me the mini KitchenAid mixer discussed in this post. All thoughts and opinions are my own, and I’m genuinely impressed by the mini KitchenAid mixer and am planning on making sweet potato curly fries next week using the mixer with a KitchenAid’s spiralizer attachment (oh yeah — all regular attachments work with the mini too!). Thank you for supporting Hummingbird High and all my sponsors!
- I’ve been wanting to bake a lemon drizzle cake ever since the last season of The Great British Bakeoff (SPOILERS AHEAD since the US is a season behind so skip the next bit if you’re still watching through PBS) and the winner successfully used one as a base for her big fat British wedding cake. Nobody seems to know the exact origin of a lemon drizzle cake, but it’s big in Britain and most people seem to think that it’s derived from classic pound cake (or madeira cake, if we’re being super British). It’s differentiated from regular lemon cake as it has an additional step in the recipe, which instructs you to drench the cake in a simple lemon syrup for extra flavor and moisture. I guess that’s where the “drizzle” comes from.
Get the Recipe: Lemon Drizzle Bundt Cake
Ingredients
For the Lemon Simple Syrup
- 1 cup (7 ounces) granulated sugar
- fresh zest from 1 medium lemon
- 1/2 cup (4 fluid ounces) freshly squeezed and strained lemon juice
- 1/2 cup (4 fluid ounces) water
For the Lemon Bundt Cake
- 3 cups (15 ounces) all-purpose flour
- 1 teaspoon baking powder
- 1 teaspoon kosher salt
- 2 1/2 cups (21 ounces) granulated sugar
- fresh zest from 3 medium-large lemons
- 1 cup (8 ounces // 2 sticks) unsalted butter,, at room temperature
- 4 large eggs, at room temperature
- 1/2 teaspoon lemon oil or extract
- 1 cup (8 fluid ounces) sour cream
For the Lemon Glaze
- 1 cup (4 ounces) confectioner’s sugar,, sifted
- 1 1/2 teaspoons whole milk
- 1 1/2 teaspoons freshly squeezed and strained lemon juice
Equipment
- a 10-inch bundt pan
Instructions
For the Lemon Simple Syrup
- In a medium, heavy bottomed sauce pot, combine 1 cup granulated sugar and the zest from 1 medium lemon. Use your fingers to rub the zest into the sugar until the zest is fully incorporated throughout and the sugar smells fragrant — this helps the sugar absorb some of the oils and flavor from the zest. Set aside for 5 to 10 minutes.
- Add 1/2 cup lemon juice and 1/2 cup water, whisking until the sugar has dissolved. Bring the mixture to a boil over medium heat and allow to boil for 1 minute, before pouring into a glass jar and allowing to cool completely on a wire rack. The syrup can be stored in the fridge with an airtight lid for up to 2 weeks.
For the Lemon Bundt Cake
- Center a rack in the oven and preheat to 350 (F).
- In a medium bowl, combine 3 cups all-purpose flour, 1 teaspoon baking powder, and 1 teaspoon kosher salt. Set aside.
- In the bowl of a freestanding electric mixer fitted with a paddle attachment, combine 2 1/2 cups granulated sugar and the zest from 3 medium-large lemons. Use your fingers to rub the zest into the sugar until the zest is fully incorporated throughout and the sugar smells fragrant. Add 1 cup unsalted butter, and beat on medium-high for at least 5 minutes, until the mixture is light, fluffy, and has doubled in volume.
- Once the batter is light and fluffy, reduce the mixer speed to its slowest setting. Add 4 large eggs, one at a time, only adding the next egg when the one before it has fully incorporated into the batter. Add 1/2 teaspoon lemon oil or extract.
- Once all the eggs and the extract are added, keep the mixer on its slowest setting. Add the dry ingredients (from the 2nd step) in three parts, alternating with 1 cup sour cream in two parts, beginning and ending with the dry ingredients. Continue mixing just until the dry ingredients have incorporated into the batter — BE CAREFUL NOT TO OVERMIX, or your cake will be dry and dense and I will cry for you.
- Spray a 10-inch bundt pan generously—and I mean, GENEROUSLY—with cooking spray. Make sure you spray entirely up the sides and the weird circle thing in the middle so you don’t have a hard time unmolding the cake! Immediately transfer the batter into the bundt pan, using an offset spatula to spread the batter evenly throughout the pan and smoothen out the top.
- Bake in the preheated oven for 55 to 60 minutes, or until a skewer inserted into the center of the cake comes out clean and the cake bounces back when gently poked. Transfer to a wire rack, and use a wooden skewer to poke several deep holes across the bottom of the cake. Use a pastry brush to brush 3/4 cup of the lemon simple syrup across the bottom of the cake and into the holes, pausing every so often to allow the syrup to seep into the holes.
- Allow the cake to cool in the pan on a wire rack for 30 minutes, before inverting it out onto a cake plate so that the glazed portion is the bottom of the cake. Brush the top of the cake with the remaining lemon syrup and allow to cool completely to room temperature before glazing.
For the Lemon Glaze
- In a small bowl, combine 1 cup confectioner’s sugar, 1 1/2 teaspoons whole milk, and 1 1/2 teaspoons lemon juice and whisk together immediately until it turns into a thick, syrupy glaze. You might need to add a little bit more milk, depending on how dry your confectioner’s sugar is. Use immediately.