
I’ve never had much of a green thumb. I’ve been a successful plant parent a grand total of two times in my life: the first was when I was 24 and kept a random bamboo plant in the corner of my kitchen far away from natural light, occasionally watering the poor thing when I remembered to (so, maybe like, once a month?). For some reason, it thrived — I gave it to my friend when I moved away to Denver, where she promptly killed it by overwatering it. C’est la vie.
The second time was three years ago, also the second time I lived in San Francisco. Erlend’s mom gifted me a potted orchid right before I left for Europe for two weeks. It promptly shed its flowers, but I kept watering its dead-looking bulb under Erlend’s long-distance guidance. Nothing happened for a full freaking year; despite my constant watering, it looked as dead as it ever was… right until the week I moved to New York, of course. Literally days before my big move, the moldy looking bulb burst into life, sprouting thirty or so beautiful orchids all at once. I gave it to that same friend I gave my bamboo plant to; she promptly killed it. Again.

These days, my plant parenting duties are limited. After years of struggling to take care of and killing the trendy plant du jour (let’s see… my plant casualties include a window garden box full of herbs, many small succulents, a fiddle leaf fig, an airplant or two, a potted string of pearls, cacti of different varieties, and probably more I’m forgetting), I’ve given up officially. My interaction with plants is now limited to the following: occasionally stopping on my bike rides across town to take photos of pretty flowering trees; purchasing overpriced blooms at New Seasons and the Portland Farmers Market for use on cakes; and using cookie cutters to recreate my favorite flowers and leaves on pies.
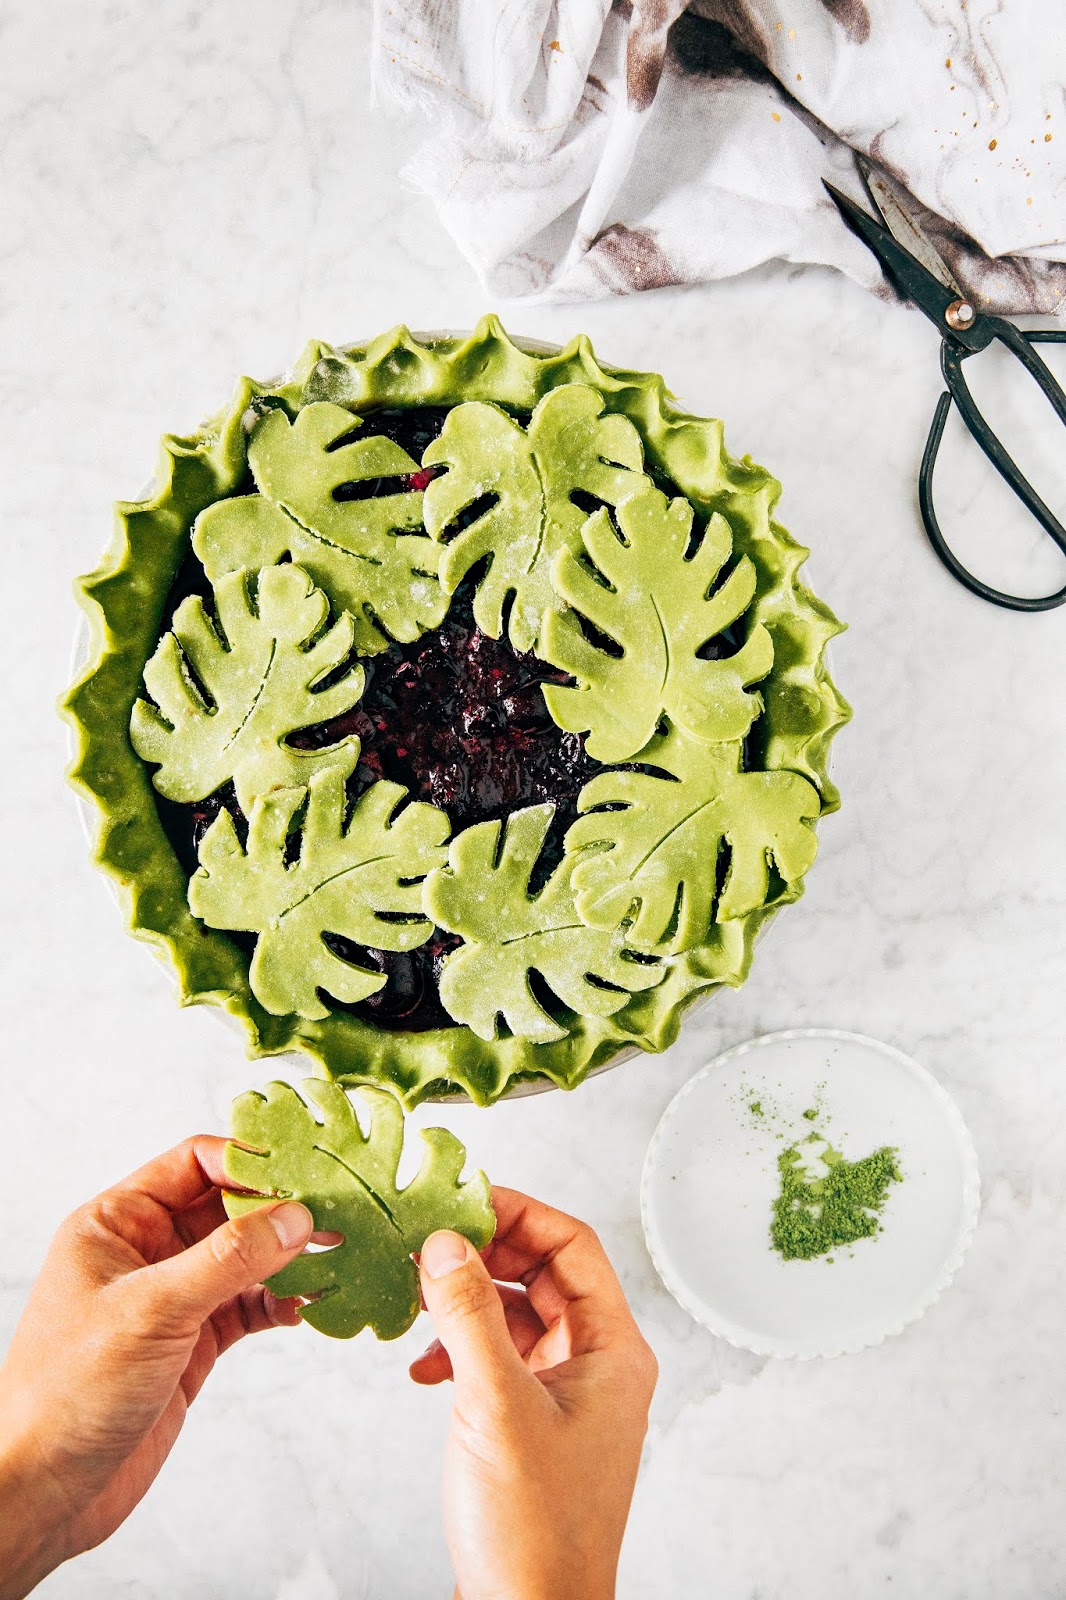
Monstera leaves are the hip plant du jour and I see them everywhere in trendy hotel lobbies, restaurants, and of course, Instagram. So when I saw these monstera cookie cutters on Amazon, I knew I had to have them. I initially thought about making a matcha sugar cookie situation with the cutters, but being summer and all, thought that pie was probably more relevant and seasonal.
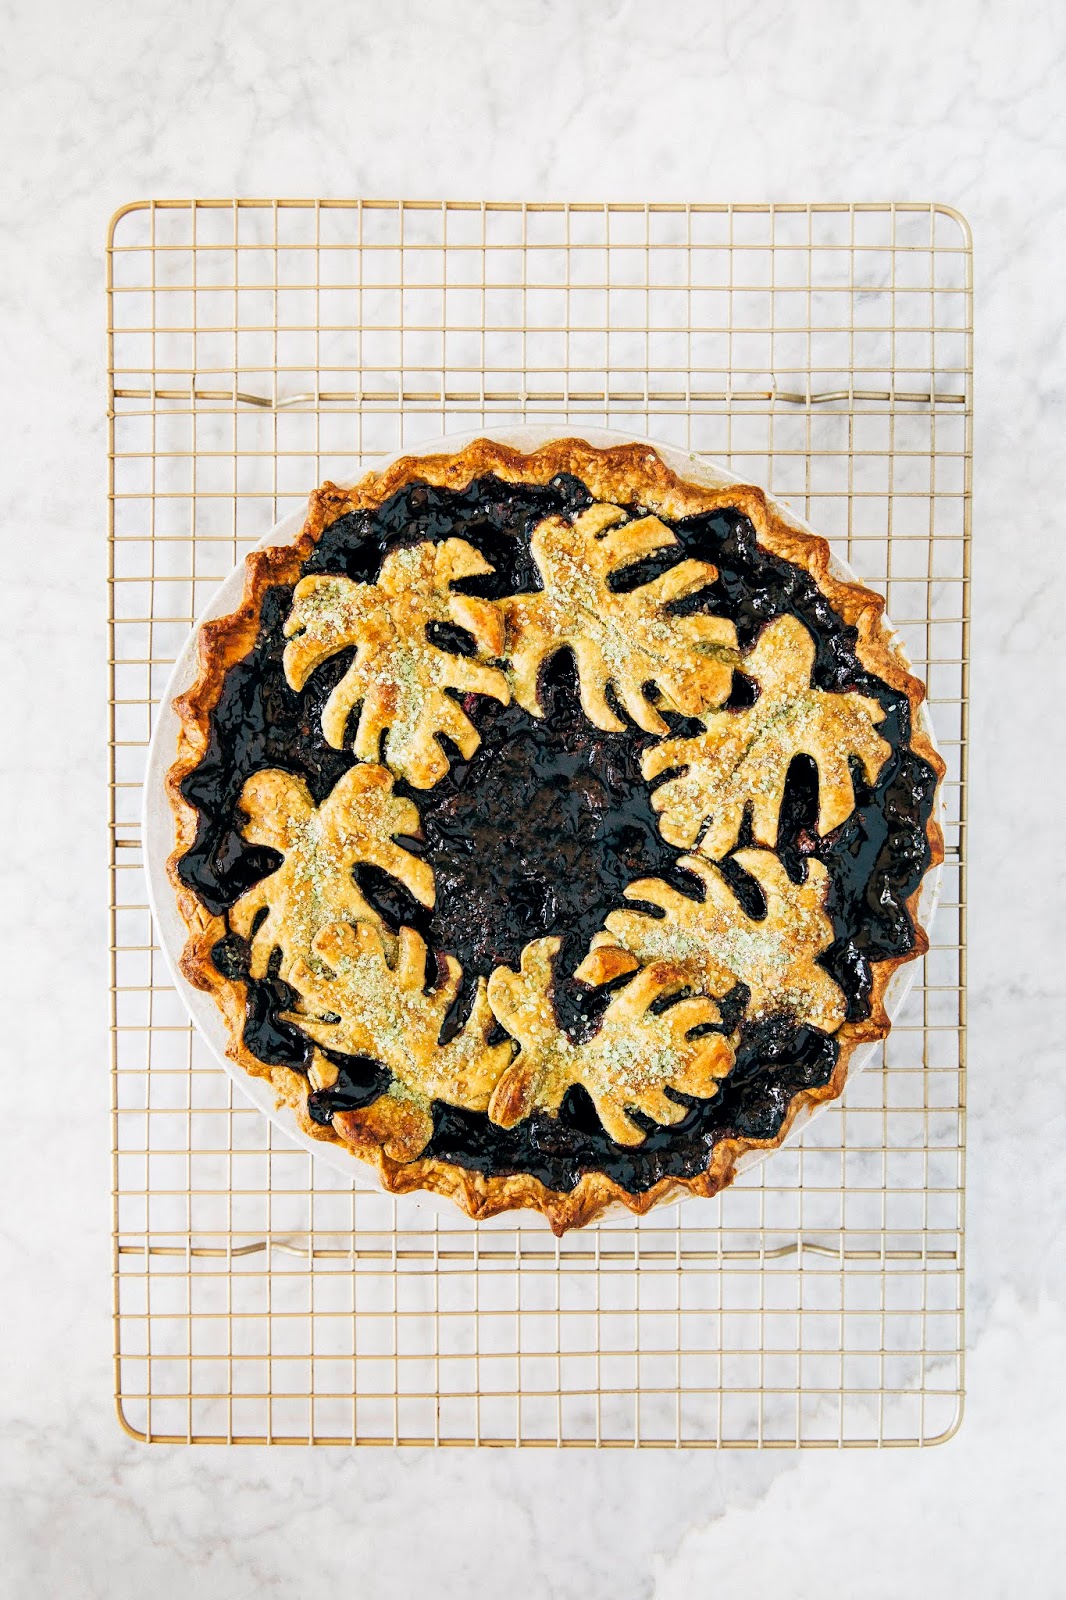
The problem with making dyed pie dough (either with a vibrant green powder like matcha, or with other vegetables like beets or freeze-dried fruit with blueberries) is that once cooked, the color tends to get usurped by the Maillard reaction and any coloring fades away to the generic golden yellow of pies. I tried to combat this in many ways (by sprinkling the top of the pie with matcha and/or dyed green sugar and finding that the matcha burned to an unattractive brown and that the sugar wasn’t strong enough to fight the pie’s golden color), none of which worked. I also thought that cooking the pie filling before baking would reduce the pie’s overall bake time, allowing me to pull the pie out earlier when it was still green (yeah, no, all that ended up resulting in was a pie with an undercooked bottom crust and middle). And after everybody’s enthusiasm for this pie’s vibrant green color on Instagram, I was actually ashamed to post the final product, a generic golden pie, on this blog and considered scrapping it completely.
But then I took a bite.
The pie crust, despite its golden color, was perfect. Crispy, flaky layers, with just the slightest hint of matcha to compliment a deep, cherry vanilla flavor. The best part is that cooking the filling beforehand yielded the perfect pie consistency, the kind that didn’t run or turn the pie crust soggy after slicing.
So maybe the baked pie doesn’t stay as attractive and appealing as it is raw. But it sure as heck is tasty, and maybe that matters more? You tell me.
-
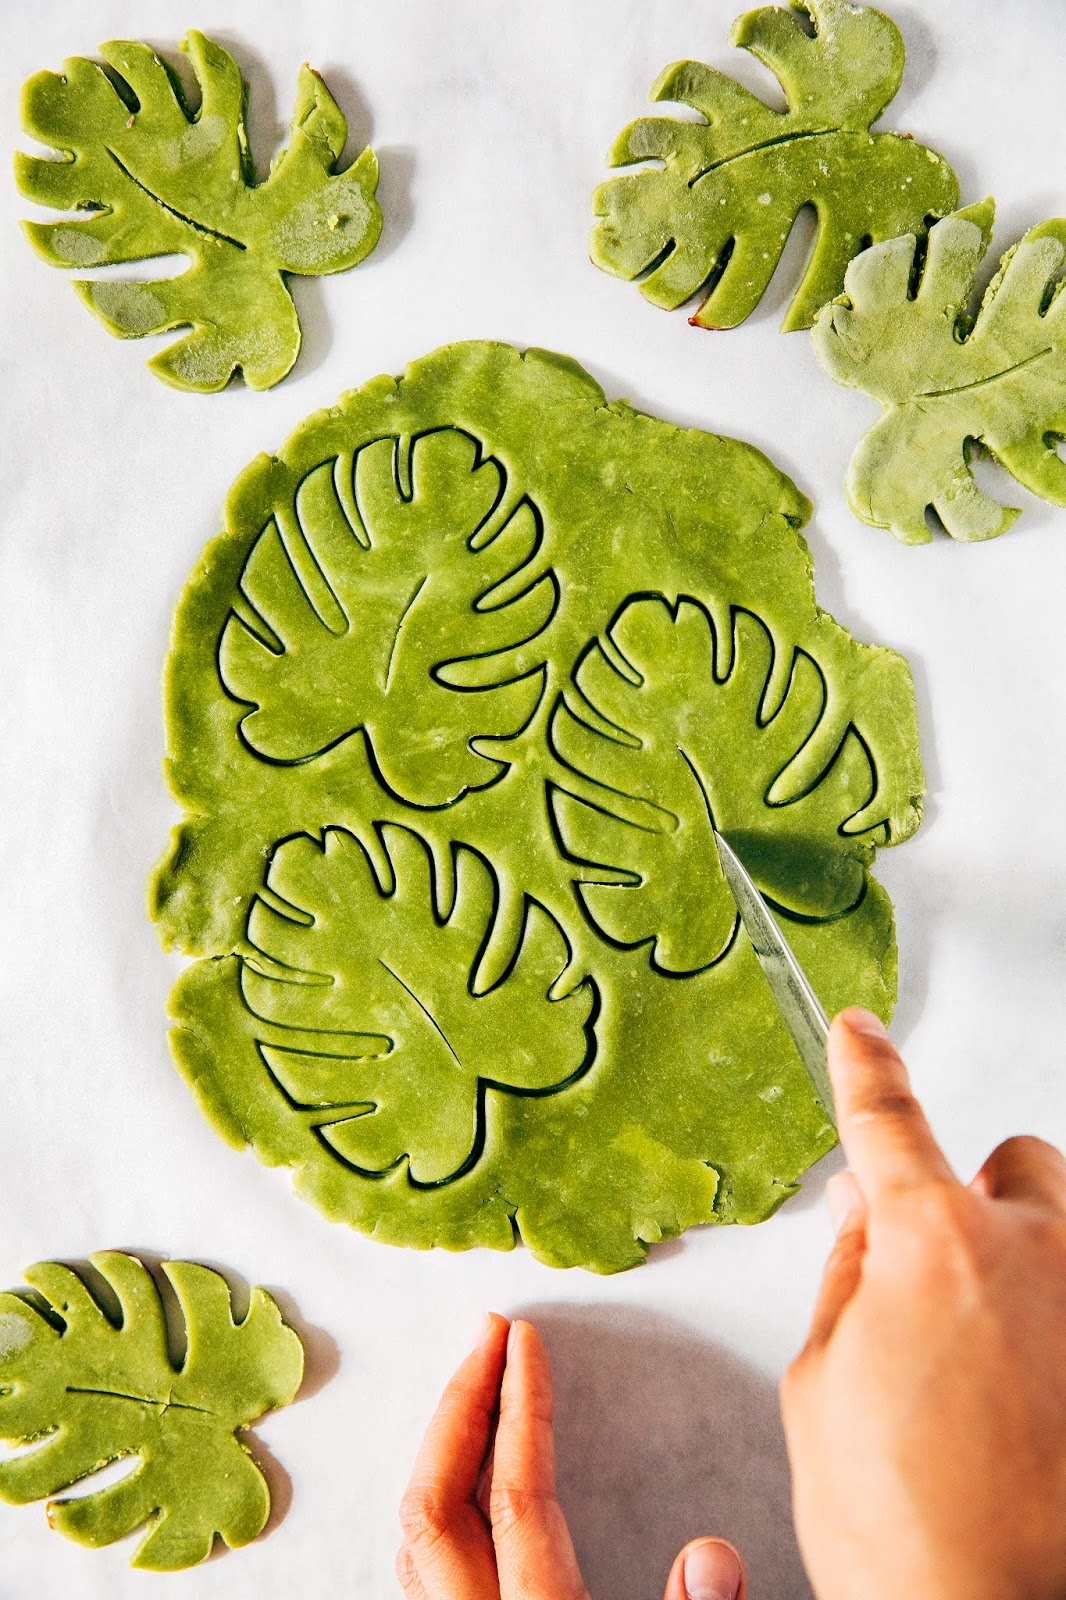
- For the pie leaves, I used this monstera cookie cutter, which is a touch on the expensive side but worked perfectly. You can get different sizes too! In a pinch, if you don’t want to pay $10 for the cookie cutter, you can print out a monstera leaf stencil and use a sharp paring knife to trace around the dough.
- When I first wrote about matcha in 2012, I felt like I needed to explain what it was to my readers — these days, matcha is pretty ubiquitous and needs no introduction. Just remember that matcha is available in different grades; when baking, it’s always best to opt for the culinary variety, which is cheaper and more strongly flavored than the ceremonial grade. I used the culinary matcha from Tea Bar, a local tea chain in town that also packages some of their most popular tea products for shipping around the country.


Get the Recipe: Matcha Monstera Cherry Pie
Ingredients
For the Matcha Pie Crust
- 6 tablespoons (3 ounces) very cold water
- 2 teaspoons apple cider vinegar
- 1/2 cup ice
- 1 cup (8 ounces) very cold unsalted butter
- 2 1/2 cups (11.25 ounces) all-purpose flour
- 1 tablespoon culinary matcha
- 1 tablespoon granulated sugar
- 1 teaspoon kosher salt
For the Cherry Filling
- 3 1/2 cups (32 ounces) Bing or dark red cherries, stemmed and pitted
- 1/4 cup (1.85 ounces) tightly packed dark brown sugar,
- 1/2 cup (3.5 ounces) granulated sugar
- 1/4 cup (1 ounce) cornstarch
- 2 teaspoons pure vanilla extract
Equipment
- Special Equipment: a monstera cookie cutter
Instructions
For the Matcha Pie Crust
- In a large liquid measuring cup, combine 6 tablespoons water and 2 teaspoons apple cider vinegar and whisk to combine. Add 1/2 cup ice and whisk once more before transferring to the refrigerator to chill as you work with the rest of the ingredients. Slice 1 cup butter into 1-inch cubes and transfer to the freezer while you prep the rest of the ingredients.
- Combine 2 1/2 cups flour, 1 tablespoon matcha, 1 tablespoon granulated sugar, and 1 teaspoon kosher salt in the bowl of a food processor. Pulse for a few seconds until the ingredients are well combined. Remove the butter from the freezer and transfer to the food processor bowl and pulse the ingredients until the mixture looks like cornmeal, with no butter pieces bigger than your thumbnail. Remove the ice mixture from the refrigerator and drizzle 5 tablespoons of the mixture over the dry ingredients; pulse for a few more seconds until the dough begins to form a ball around the food processor blade.
- Use a rubber spatula to tip the dough out onto a counter. Use your hands to quickly knead the clumps together into a rough ball. Use a bench scraper to divide the dough into two even halves. Shape each half into a rough ball and cover in plastic wrap; punch down to flatten to a small disk. Transfer to the refrigerator to rest and chill for at least 1 hour, preferably overnight.
For the Cherry Filling
- Combine half the prepared cherries (16 ounces, or around 1 1/4 cups) and 1/4 cup dark brown sugar in a medium saucepan over medium-high heat. Cook, stirring frequently to prevent the fruit from scorching, for 15 minutes or until the cherries have released their juices and darkened in color. Remove from heat and stir in the remaining cherries, 1/2 cup granulated sugar, 1/4 cup cornstarch, and 2 teaspoons pure vanilla extract until well combined. Let cool to room temperature before filling the pie; the filling can be stored in an airtight refrigerator for up to 3 days.
Assembly
- Liberally dust a work surface with flour and transfer one pie dough disc to the surface while keeping the second one in the refrigerator. Sprinkle the top of the pie dough with flour. If the dough feels solid in your hands, place it on the counter and use a rolling pin to give it a few solid whacks, rotating every so often to flatten it out. This will help soften the dough before rolling it out. Use the rolling pin to roll the dough into a rough circle around 10-inches wide, rotating the disc about 90-degrees to ensure that you're rolling the dough out into an even circle.
- Transfer the dough to a 9-inch pie plate and trim any excess dough beyond a 1-inch overhang. Tuck the overhang so that it’s rolling back underneath itself and sitting like a tube on the border of your pie plate. Squeeze the tube together so it creates a firm edge. Dip your fingertips in some four and use your thumb and index finger on the opposite hand to pinch around your thumb to crimp the pie tube. Repeat around the tube, flouring your fingers as necessary to prevent the dough from sticking to your fingers.
- Once the pie is crimped, pour the cherry filling into the center of the pie, using a rubber spatula to spread it evenly across the bottom of the crust. Transfer to the refrigerator to chill while you work with the second dough disc. Follow the instructions on Step 1 to roll out the pie dough to a rough circular slab around 1/4-inch thick. Use a monstera leaf cookie cutter to stamp out several shapes. Remove the pie crust base from the refrigerator and arrange the monstera leaf cutouts on top of the cherry filling. Loosely cover with plastic wrap and transfer to the freezer to chill for at least 1 hour, preferably overnight.
Bake
- Once the pie has frozen, it’s time to bake the pie! Position a rack in the lower third of the oven and preheat to 350 (F). Line a sheet pan with parchment paper and set aside.
- Once the oven is preheated, transfer the frozen pie to the center of the prepared sheet pan and transfer to the lower third rack of the oven. Bake for 60 minutes; transfer to a wire rack to cool completely before slicing.