The following guest post is by my roommate, Kevin.
As we all know, I’m a terrible bread maker. Well, not terrible exactly, but it’s definitely not my forte — whereas I can churn out beautiful cakes just like that, my bread often looks flat and misshapen while tasting dense and doughy. I’ve always made it a resolution to get better (Anybody remember Bread Month on this blog? Nope? Me either. What about the three times I declared that I would get better at baking bread?), but life always keeps getting in the way.
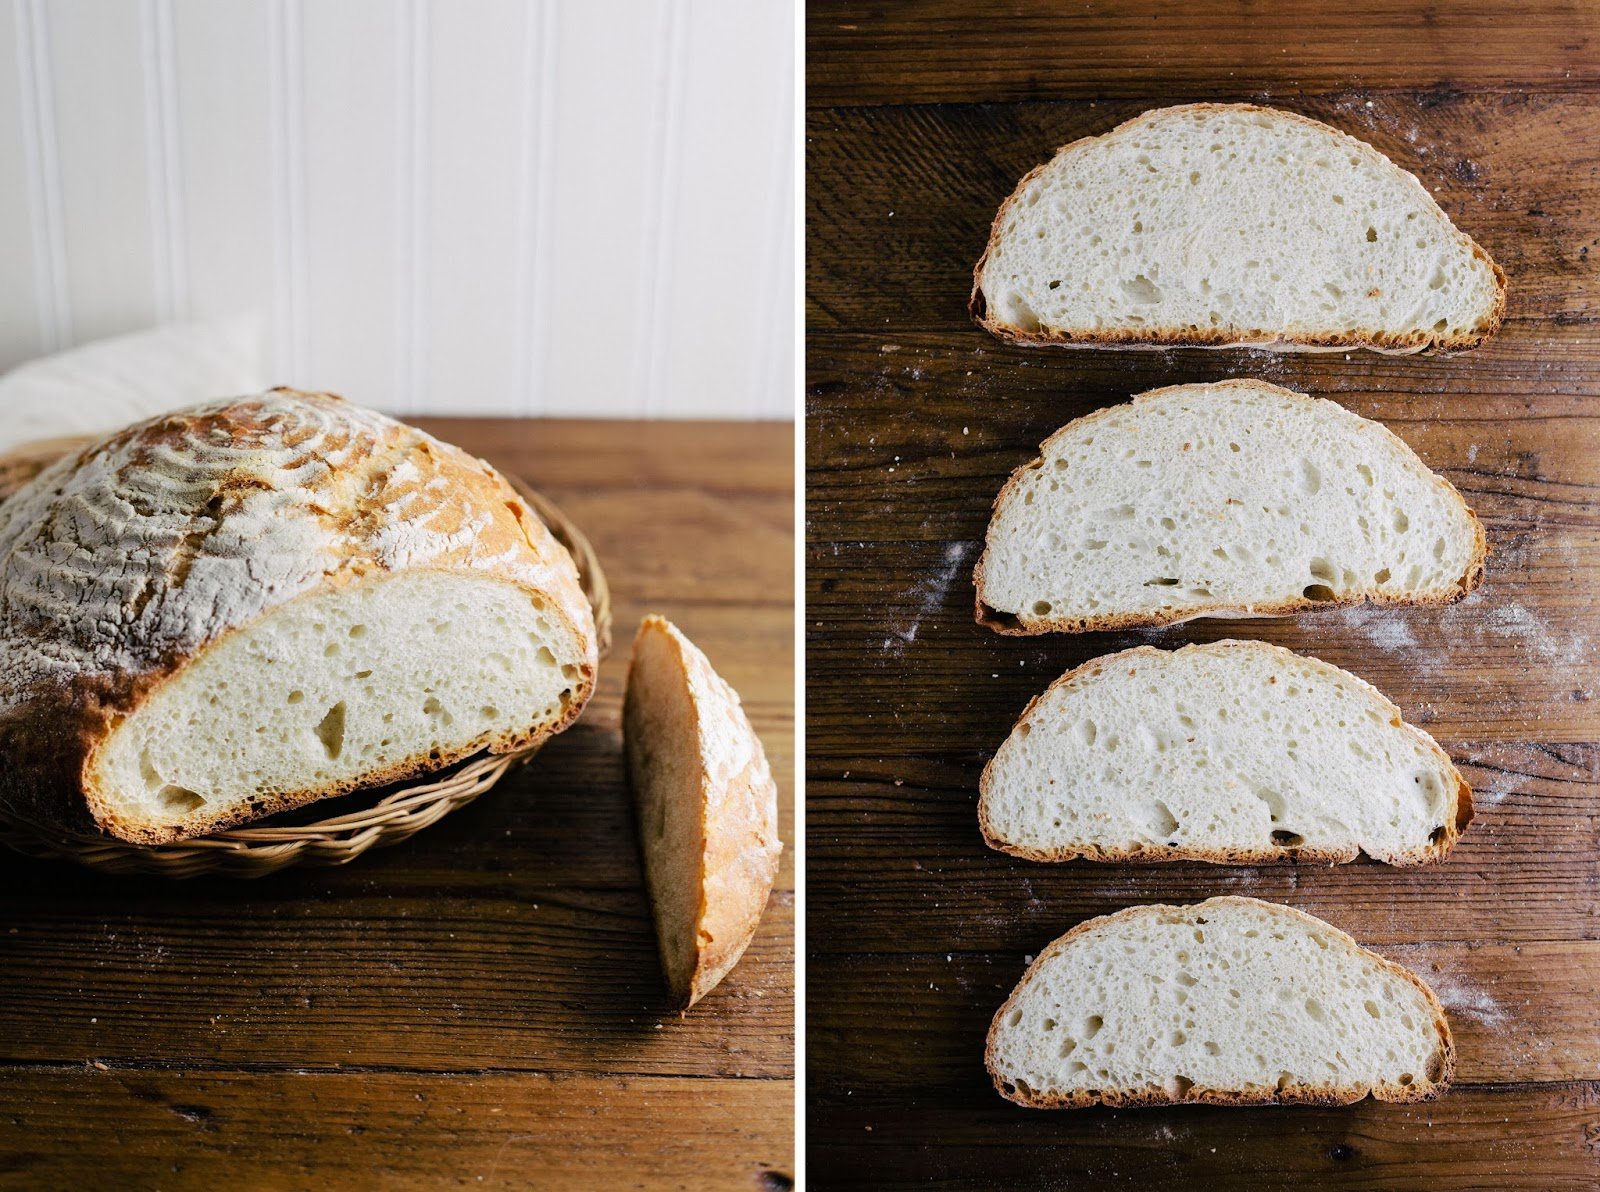
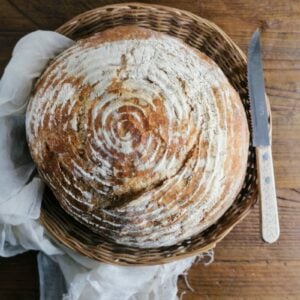
Kevin, on the other hand, knows and understands things about dough that I don’t. He effortlessly churns out beautiful, well risen breads with golden crusts on a weekly basis. Almost every loaf he makes has a perfect open crumb, with a gorgeous crackly crust. His bread is absolutely delicious, especially when fresh from the oven and served with some butter and salt.
A few weeks ago, I asked him if he could teach me and my readers the way of bread. And here are his secrets:
Making bread is pretty easy. Of course, there’s always more to work on, but the basics are remarkably accessible and the product looks good and tastes better even from the beginning. Honestly, I still feel a little guilty when somebody compliments a loaf that I baked. I don’t wake up at four in the morning or knead the dough until my wrists get sore. I don’t have a sourdough start in the back of the fridge that I regularly feed or hum little songs to. I just put four ingredients in a big tupperware, mix it all around a bit with a wooden spoon, wait, shape it, bake it and eat it. It took me a long time to realize that these first steps of the long climb to bread mastery are a totally guilt-free, acceptable, and (mostly) non-sacrilegious way to make a good bread that’s better than what you’ll find at the supermarket.
Unfortunately, the simplicity of this foundation can be hard to spot under the shadow of the edifice it supports. Cracking open a book of bread recipes, it’s easy for the uninitiated to get overwhelmed by the vocabulary: proofing, hydration ratios, barms, bigas, sponges, and starts. Sure, there are plenty of great resources to read about these things. In fact, you’d probably never run out of them — and that’s the problem: rather than just diving in and baking, it’s easy to get the feeling that you’ve got a lot of homework to do.
But if you’re like me, you can just skip all that, start in the middle with some sort of multi-grain pâte fermentée, and fail. And not fail spectacularly so much as… well, just imagine the sound of a spoiled sourdough start flopping into the compost bin and you’ll have a pretty good onomatopoeia for the feeling of bread-making gone wrong! And to think that I’d been feeding the damn thing for a week and a half.
It’s not easy for a beginning baker tackling a complex recipe to find the cause of a problem, so start simple. Once you have a working baseline, it’s a lot easier to tinker with things. If you’re making adjustments to a recipe that you know already works, it will be a lot easier to diagnose any issues you have with the final product. To do this, you’ll need a baseline recipe. The first recipe that I found that worked for me was the adaptation of Jim Lahey’s no-knead bread recipe featured in the Dining and Wine section of the New York Times (side note from Michelle — I tried this recipe too, but my bead was never as good as Kevin’s!). As far as the home-baker is concerned, this recipe has two big advantages going for it. First, rather than requiring kneading the to accelerate the development of gluten in the dough, Lahey’s recipe simply includes a longer resting period — allowing the gluten to develop at its own rate. This is a bit of a trade-off: a longer overall bake time, but a much shorter hands-on time. Second, rather than requiring a bread-machine or a professional high-temperature oven, this recipe suggests using a heavy covered pot to get a similar effect at a much lower temperature. The pot traps steam, so you don’t have to worry about the steam dish suggested by some recipes. Additionally, if you use a heavy Dutch oven or clay pot, it will act like a breadstone and contribute thermal mass, giving you a crispier crust.
However, if you work all day, scheduling the long rise can be a bit of a hassle. This recipe from The New Artisan Bread in 5 Minutes A Day is another great one that I’ve found, and I highly recommend it. I’ve kept a couple things I like about Lahey’s recipe — mostly using a Dutch oven — but worked in a lot of the time-saving techniques from Jeff Hertzberg and Zoë François’ book. It turns out that you can cut down the suggested 12-18 hour rise time significantly and get a similar effect. Furthermore, by making a high-hydration dough in a resealable container, you can save your dough away in the refrigerator for surprisingly long periods of time (as long as two weeks!) and still get good results.
And before I get to the recipe, a warning: the most grievous error a beginner can make is to mistake aspirations for imperfections. There’s nothing wrong with chasing the dome-topped loaf with a custard crumb and crispy crust, but if yours turns out a little flat or the crumb isn’t as open as you hoped, you’d be wrong to think that you failed. Archaeologists think people have been making breads from natural grains since well before the agricultural revolution of the Neolithic — something like 30,000 years. And you just made yours! It’s fun to set goals for yourself, but the idea that there could be a right and wrong way to bake bread is absurd. So here’s the real test: cut off a slice. Slather it with butter or jam, if you like, and take a bite. Is it good? Then you’ve got nothing to worry about. Bake on!
Get the Recipe: A Simple Boule
Ingredients
- 3 cups (680 grams) lukewarm water (ideally around 100℉ — it should feel warm to the touch, but not hot)
- 1 Tablespoon (10 grams) active dry yeast
- 1 heaping Tablespoon (20 grams) kosher salt
- 6 ½ cups (910 grams) all-purpose flour
- a handful of cornmeal for the bottom of the Dutch oven or baking surface of your choice
Equipment
- a large tupperware or mixing bowl
- a cast iron Dutch oven (or a baking stone, or even a baking sheet with parchment paper or a silicone mat)
- a kitchen scale
- parchment paper (optional — you can use this as a work surface for easier cleanup)
Instructions
- Combine the water, salt, and yeast in a mixing bowl or large tupperware. I like to put my container on top of a kitchen scale and tare it so I can easily add up the weights as I go.
- Add in the flour, and mix with a wooden spoon until the ingredients are evenly combined.
- If you’re using a tupperware, set the lid on top, but don’t seal it — you don’t want the cover to be airtight. If you’re using a bowl, loosely cover the top with plastic wrap.
- Let the dough sit for a minimum of two hours. Leaving it longer — even overnight — should be fine. At this point, you can either continue on to the next step, or refrigerate the dough and use it in the next two weeks. If you do refrigerate it, leave the top loose for a couple days before sealing it.
- When you're ready to bake, take out a piece of dough about the size of a grapefruit. You'll want to use some flour on your hands and the surface of the dough to keep it from sticking too much, but try to avoid incorporating the added flour into the dough. At this point, you want to keep as much gas in the bread as possible, so don't punch it down or knead it. Instead you want to form what Hertzberg and François call a 'gluten cloak.' Holding the dough in both hands, you want to stretch out the top of the ball and pull the bottom together. The top and sides should be smooth and cohesive. The bottom will seem a little messy — that’s okay. It will flatten out and come together as the dough rests and bakes. If you're using a cast-iron Dutch oven, any lightly floured surface will do. If you're using a baking sheet, put the bread on it to rest — this way you can just move the whole tray to the oven when you're ready to bake. And if you're using a baking stone and have a pizza peel, make good use of it!
- Let the dough rest for about 40 minutes. About half-way through the rest, put the Dutch oven (or baking stone) in the oven and preheat to 450 (F). If you set the lid of the Dutch oven to the side or on the bottom rack you can allow it to preheat without having the extra step of to take it off before you can put in your dough. This might sound nitpicky, but the cast iron will be quite hot and heavy, so minimizing the number of steps is as much a matter of safety as convenience. Note that if you’re using a baking tray, the thermal mass is negligible, so you won’t gain anything by pre-heating with it in the oven.
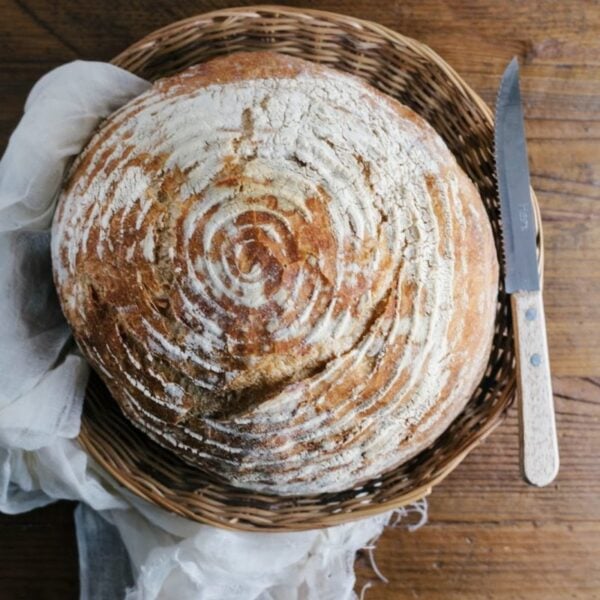
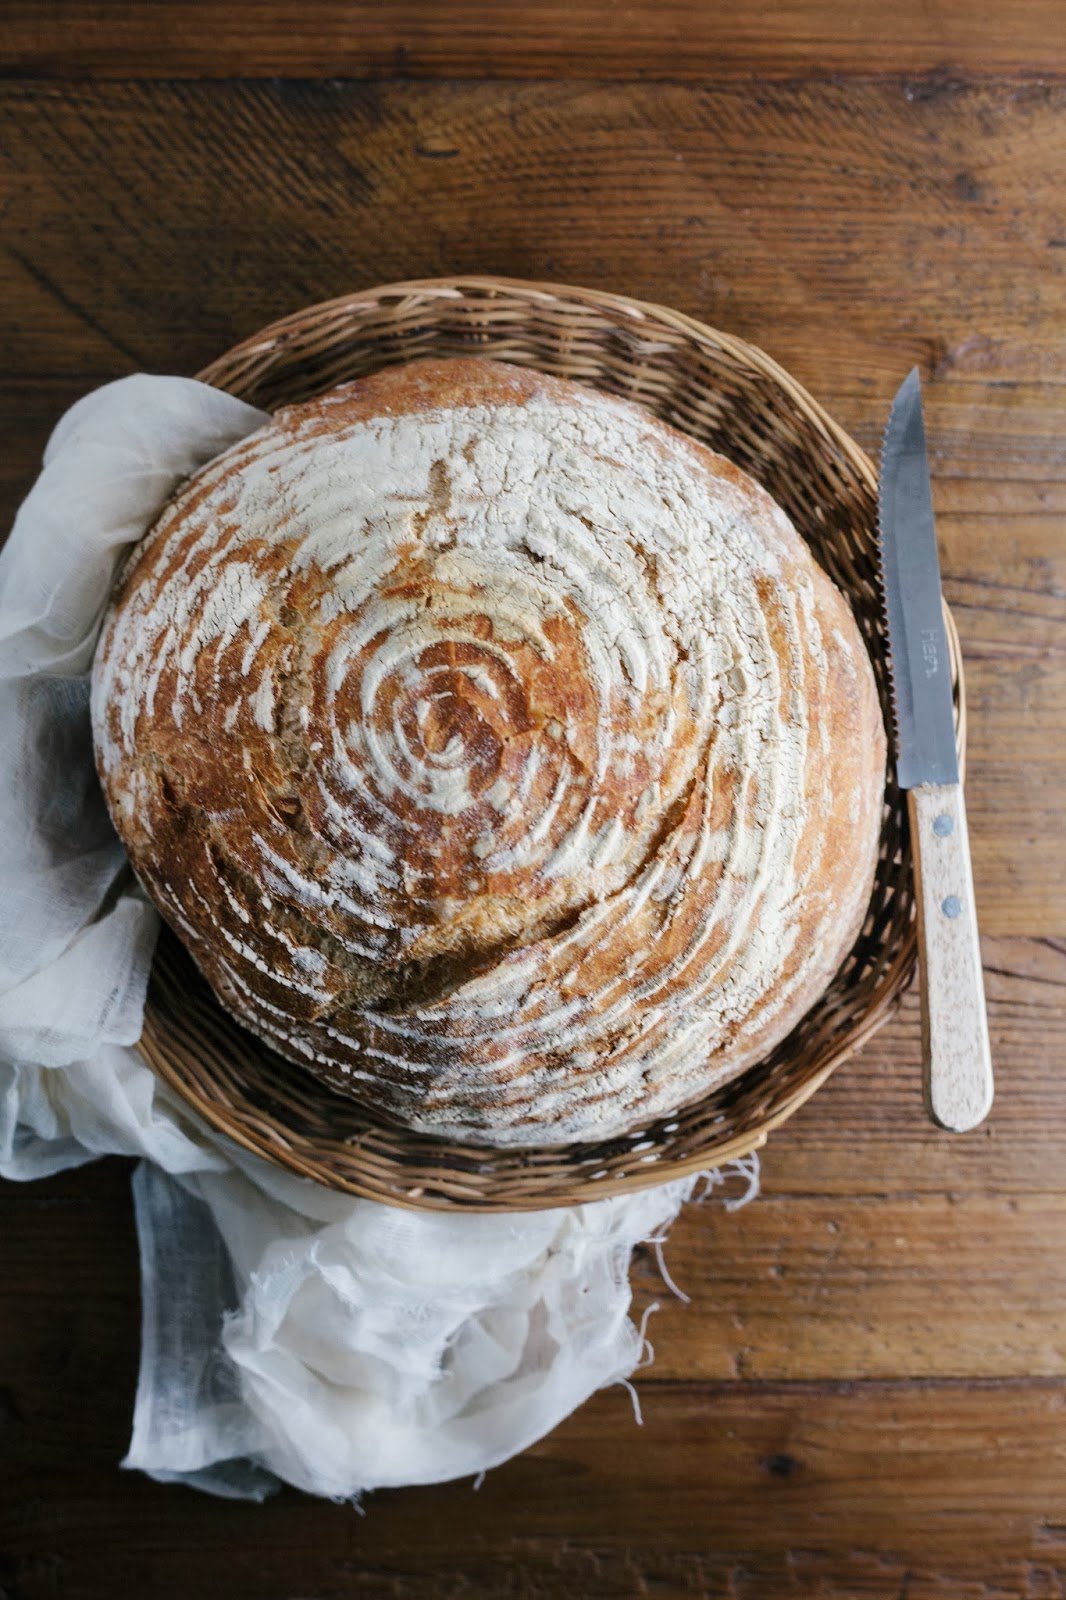
- Just before you put the dough in the oven, dust the surface of the bread with flour. Using a bread-knife, make slashes about a half-inch into the top of the dough. Three parallel cuts will give a classic look, but you can experiment with other patterns. There might be some important technical reason for doing this, but as far as I’m concerned, its main purpose is to make your loaves look sexy. (Confession: I was really excited to play with my new proofing baskets, so the bread I used to illustrate this post look a little different than yours will.)
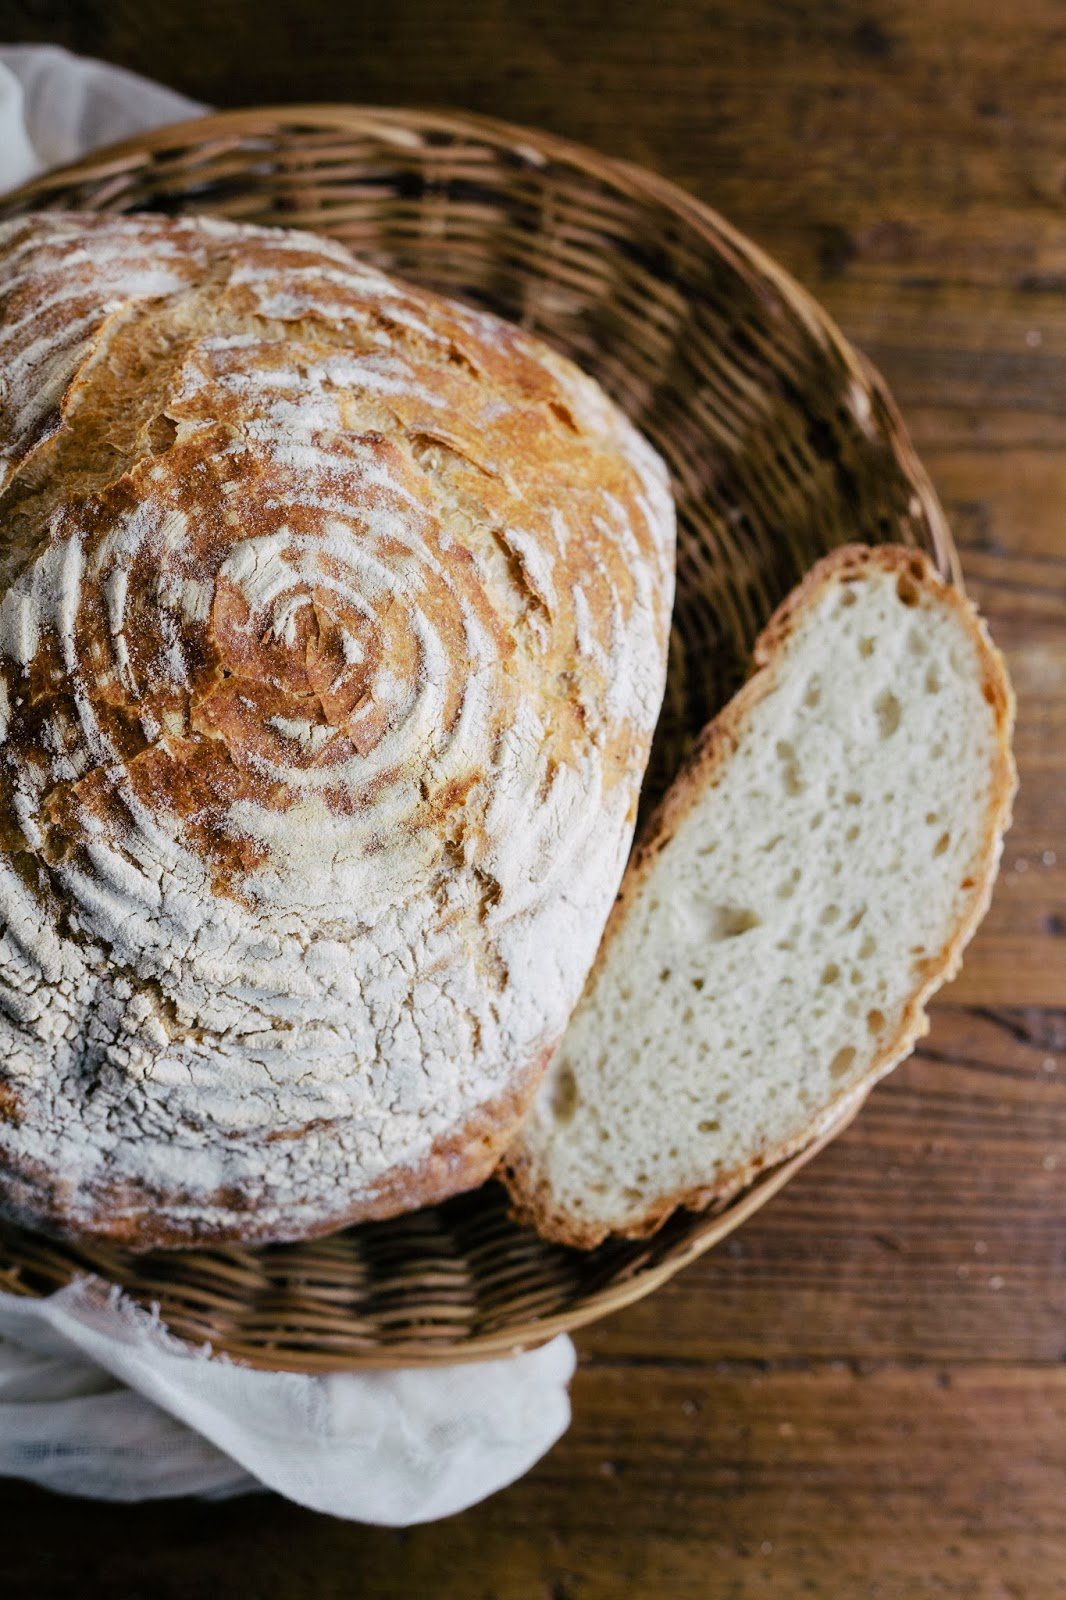
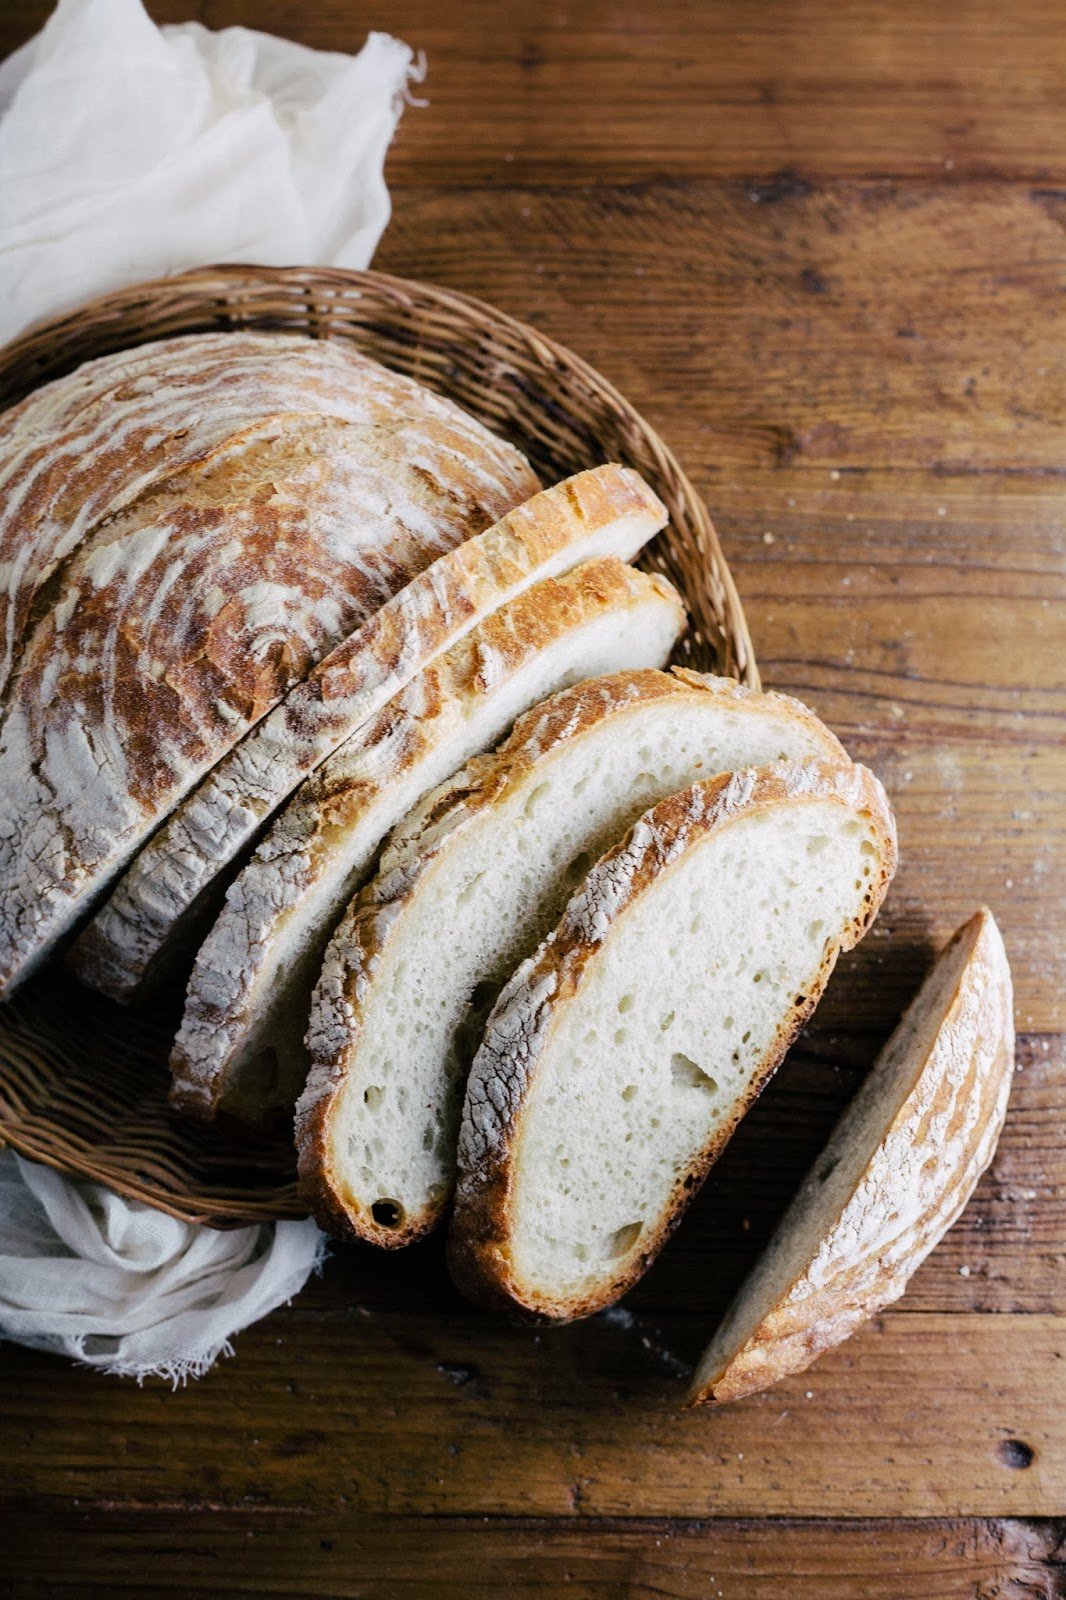
- Bake for 30 to 35 minutes, or until the crust is a rich brown. If you’re using a Dutch oven, take the top off about 20 minutes in. This lets moisture escape so that the crust can crisp.
- See how long you can let the bread cool before trying a slice. The bread continues to cook after you take it out of the oven, so cutting into it can harm the texture. In the book, Hertzberg and François suggest that letting it cool for about two hours is ideal.
I try to make bread from scratch once a summer when I have the time off from being a teacher… maybe this summer it will be my goal to do it 4 times to perfect it…. These tips will be helpful!
HELLO GORGEOUS.
Absolutely lovely boule! Bread-making is such an amazing science and art. I highly recommend Peter Reinhart if you're think of delving deeper 🙂
This might sound really stupid, but are you supposed to knead this? I can't find anywhere that it says to knead…
Hi Hanna. Not a stupid question, but yes, you read right: no kneading necessary. Gluten generally does a good job of developing without much stimulation, it just takes a while. Letting bread rest for longer also allows the flavor to develop, so going the no-knead route is win-win as far as I'm concerned.
I just made your recipe and it is wonderful! As someone just beginning her bread baking adventures, this was a great place to start!
Do I need to grease or flour the dutch oven?
Place a square of parchment paper in the Dutch oven under the dough. They sell it in perfectly sized squares now.
No, you do not need to put anything in the dutch oven before dropping in the dough.
What feeds the yeast?
Hi there,
Although many bread recipes instruct you to use yeast to help start/feed the yeast, yeast doesn’t actually need sugar to grow. Yeast readily makes its own food supply by transforming flour’s starch into sugar.
Ok, I might be too anxious, but should I worry about deflating the loaf while putting it into the Dutch oven? What technique do you suggest to do this?
Also, any need for a pan of water when using a stone or sheet pan?
The loaf is in the oven and looks wonderful.
Thank you!
This recipe is awesome! It is simple, and the bread comes out chewy and delicious! I tried it as written the first time. This time, right now, I am using one cup of bran, 2 cups of whole wheat flour, and 3 1/2 cups of white flour for the gluten. I will keep you posted.
Here is what I did: I used 2 cups of whole wheat flour, 1 cup of bran, and 3 1/2 cups of white flour. I did the recipe as usual other than that. It came out wonderful! Now I am going to experiment and add nuts, Sunflower seeds, and dried fruit to see if it will make a great Christmas present.
I used to buy an olive boule but sadly have moved away from the bakery I got it from. Is it possible to add olives to this recipe if so is how do you do it without the olives dropping to the bottom?
Fantastic recipe. I love the process of making bread. Kneading the dough is relaxing, and I love the smell of the warm yeast. This recipe, however, is perfect when I just don’t have the time. My bread came out perfect the first time, and the flavor is excellent. I usually find bread recipes to have too little salt for my taste, but this one has just the right amount. Great sandwich bread! Thanks for a lovely, easy recipe.
I LOVE this recipe allowing me to bake bread in one day! It is beautiful when scored and turned out so much better than my longer proofing recipes. I am baking 2 loaves today and one is in a heavy stainless pot with a lid which appears to be coming out nicely although the dutch oven boule is browning a bit more quickly.
Are you taking the lids off to see their progress? That’s a no-no.
I feel like this dough recipe is too much for the average baker. There’s a lot of dough for a simple kitchenaid. Can you please give some more instruction on how to handle a super sticky dough?
Otherwise smells great.
It comes together just fine with a wooden spoon, as instructed. You don’t want to overmix it anyway.
Why is the bread so dense?
You might not have proofed it long enough! Dense bread is often either 1) underproofed bread (which can happen if it’s too cold) or 2) overkneading (but this is hard to do).
you said in the instructions to take out a chunk the size of a grapefruit but it’s never stated explicitly what you do with the rest. can it be saved to bake at a later time/eg do you stagger the baking and if so how many loaves will this recipe end up making?
Very poor bread. Ratios might be wrong? Very sticky dough, doesn’t come together properly, barely rose, came out dense… and also needs much longer cooking time
I agree with Daria: what do you do with the rest of the dough if you only use a grapefruit sized piece for one loaf?
Will give this boule a go tomorrow as I like the ingredient portions and also want something simple, time to make not being a constraint. In the past once I’ve found a particular bread recipe that works well the first time, reproducing those results using the same measurements can end up with a different result. I’ve just come to the conclusion that each loaf will be different/unique in some way. If the same recipe produced the same results every time, I’d open a bakery. Whatever happens tomorrow, it will be bread, I will have made it, and it will be good.
5 Stars for great ingredient ratios. The end result will be how well I follow your instructions. The dough will know!
Incredibly easy and simple recipe. Have used the tip to refrigerate and cook over the span of 10 days and it’s going well.
Just finished baking then eating and it’s delicious! I have lots of dough left in fridge for baking in the next few days.
Can you bake the whole recipe bread at once (make a big boule) in a big dutch oven
? Thank you
I did this and the loaf was gigantic, but no regrets!
Just adjust baking times a little bit longer and keep an eye on it.
It’s so funny how every baker definitely has their niche. I can bake pretty decent cakes and cupcakes, am a pretty good pastry artist but it’s not always my favorite thing to do and I’m not gonna claim I’m anywhere near as good as other people lol. Bread on the other hand I absolutely love making and swear it comes SO naturally to me, especially sourdough. I was given an 150 year old starter from an elderly family member and have been obsessed and turning out beautiful loaves ever since. Ice cream is another area I excel at. I think that’s really cool you wanna learn how to bake bread and even if you aren’t great at it now, everyone has to start somewhere. I agree it can be overwhelming at first but once you get it, it’s so rewarding. Best of luck!
I am 100% happy with this recipe! I translated it from white flour to whole wheat by subtracting 20% by weight. (If 100gm white flour, I used 80 gm whole wheat) and for each cup of whole wheat flour, I subtracted 1 Tablespoon flour and added 1 Tablespoon vital wheat gluten for elasticity. Now it’s fresh bread every day!
The dough came out crazy sticky and i had to add quite a bit of flour to the kitchen side just to be able to work with it. Bread turned out fantastic though.
Easy to follow recipe and it made an amazing loaf!
Great recipe overall, it turned out exactly as expected and was extremely simple.
For others’ info, half of this recipe was slightly too large for my 8C dutch oven. I’ll be making this recipe again, maybe 1/3 next time.
I am confused by the step saying to take a grapefruit sized ball of dough out. What is this?
The entire recipe makes 4 loaves, this step is taking part of the dough to form 1 boule. The rest can be put in the fridge for later, or baked.
I commented above that I also baked the whole dough at once; it turned out huge, but good and I just baked for longer.
I’m pretty new to the bread game. I’ve done well in the last few months with a couple of simple bread recipes.
I’m adding this recipe to my repertoire because it is delicious! Thank you:)
I appreciate the weight of the ingredients in grams. I wonder if you have the weight of “size of a grapefruit?”
Little effort and turns out great
Great recipe, the hardest thing for me was the wait.
Can you please suggest what size Dutch oven? I have a cast iron one and a stainless steel one. The cast iron is much smaller. And would you suggest only cast iron? I cannot wait to try this. Thank you for your time!
What’s the diameter and height of each one?
Most places say don’t add the salt and yeast at the same time but I did what the receipt said now it won’t rise! Any thoughts?