
Remember the last love/hate relationship you were involved in. Maybe it was an unrequited love — a flaky boy who played games with your heart and wouldn’t commit. Or maybe it was even a platonic frenemy, the kind of friend who comforts you as you cry on her shoulder, only to have her tell everybody about how pathetic you were as you lost your shit. A relationship that was a roller coaster ride full of high-highs and verrryyy low-lows.
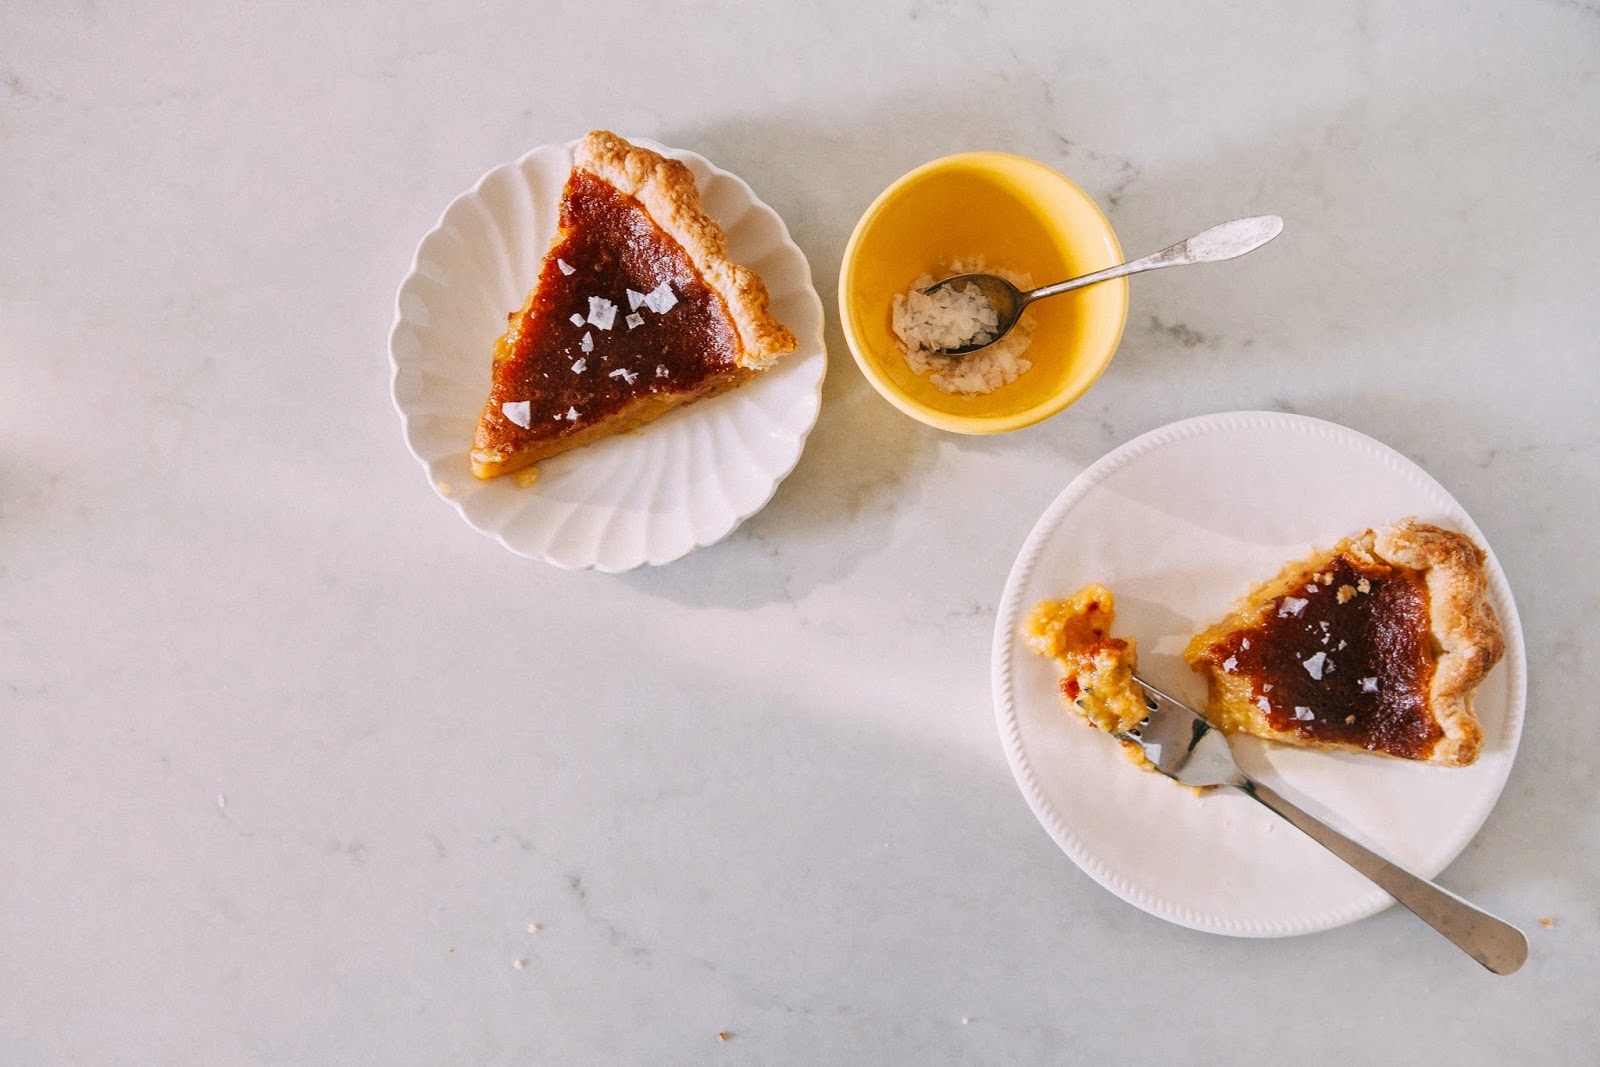
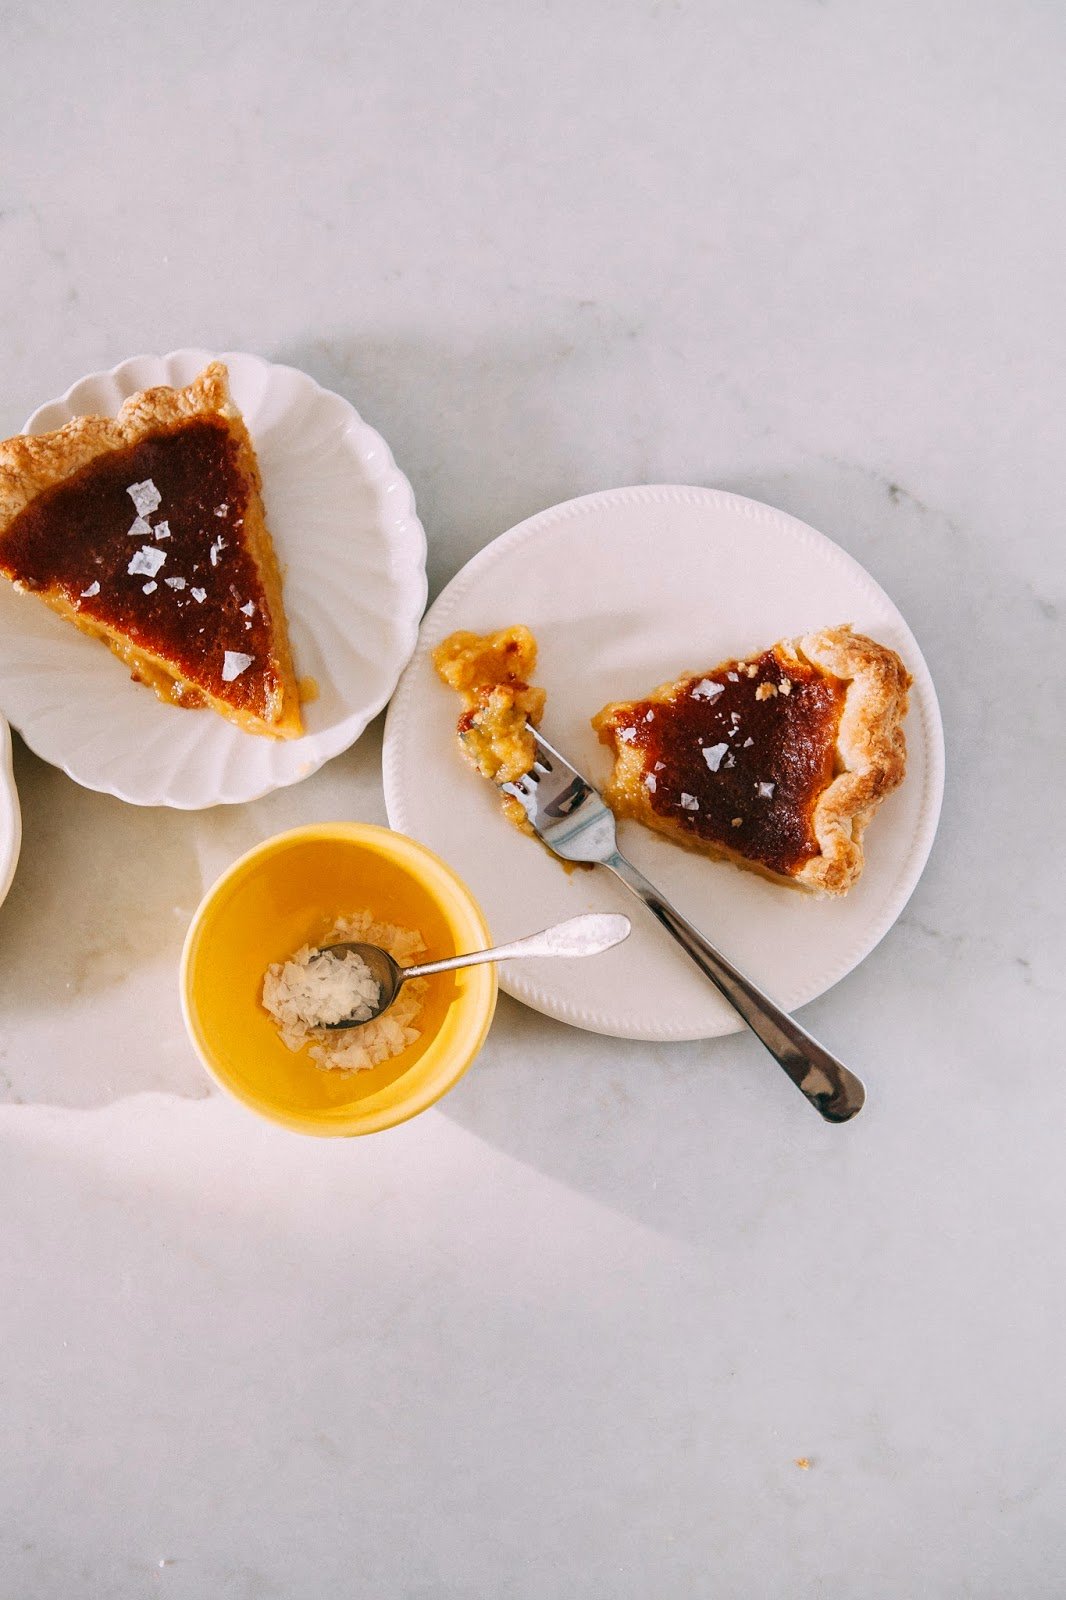
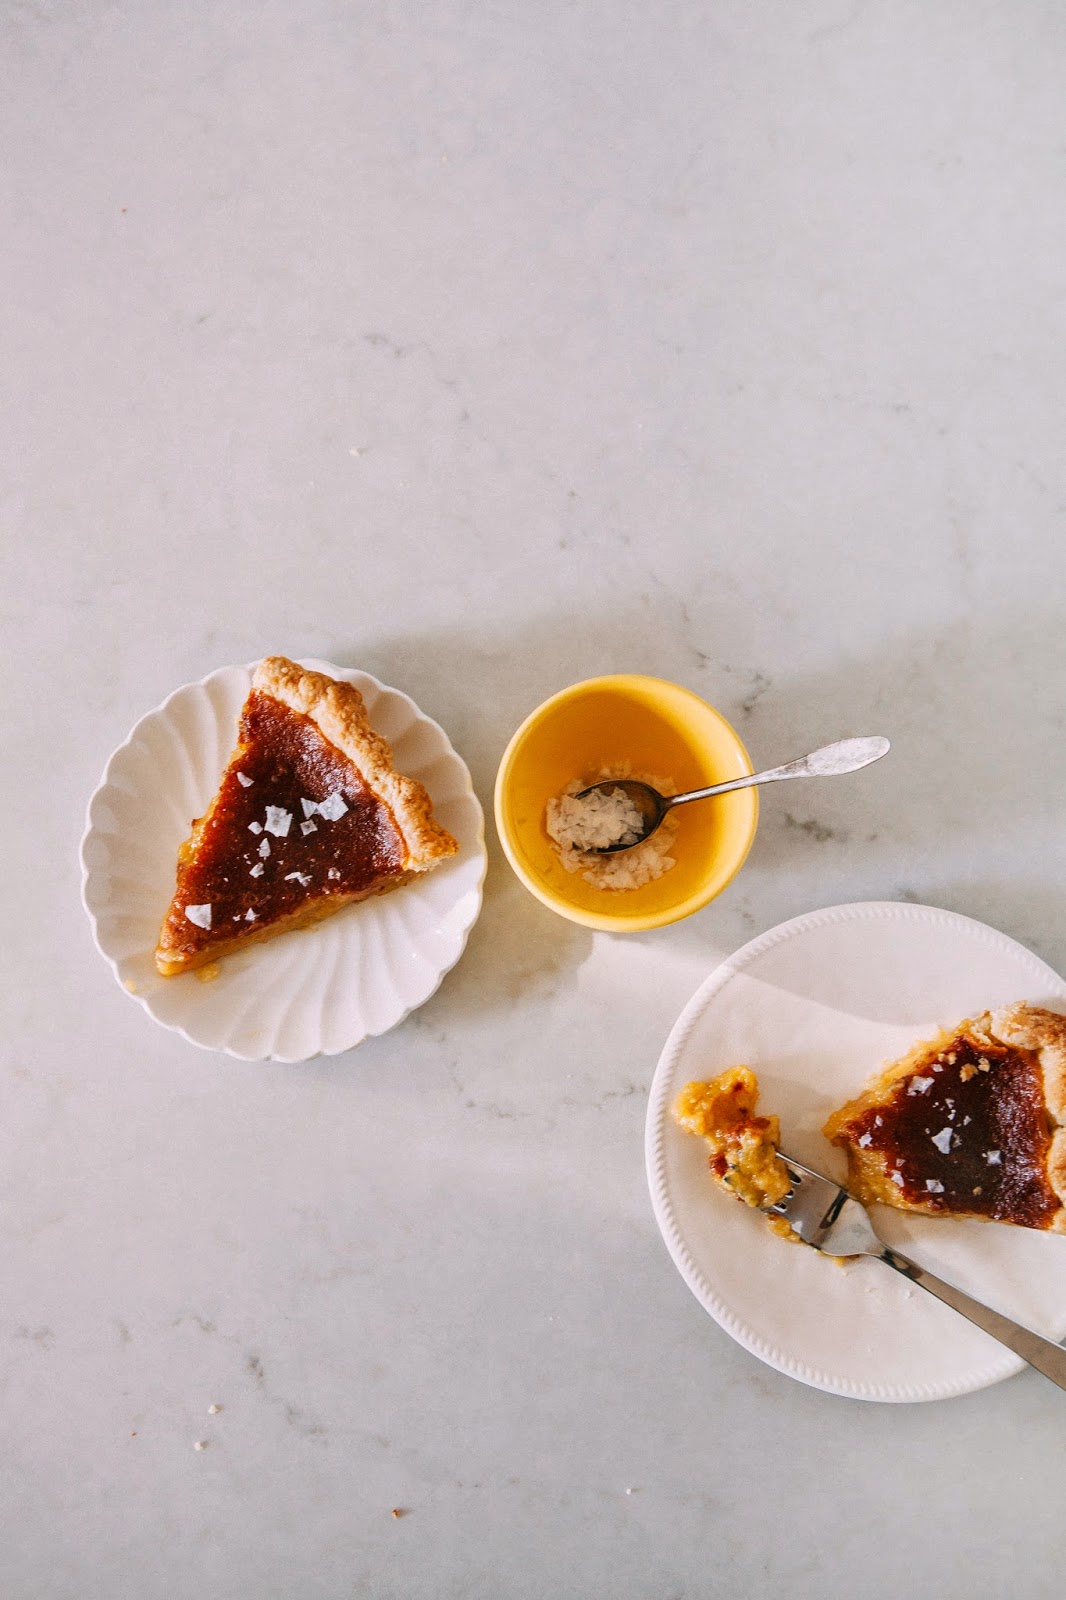
That’s my relationship with this salty honey pie, right here.
Let’s rewind, back to the beginning. For starters, I’ve never been the world’s best pie baker. Most of my crusts and bases turn out soggy, uneven and shrunken. The few that don’t — usually the ones aided by both vodka in the crust and the maker (ehem, me) — are not exactly a sight to behold. Lumpy and uneven, you won’t see my pies on Pinterest any time soon.
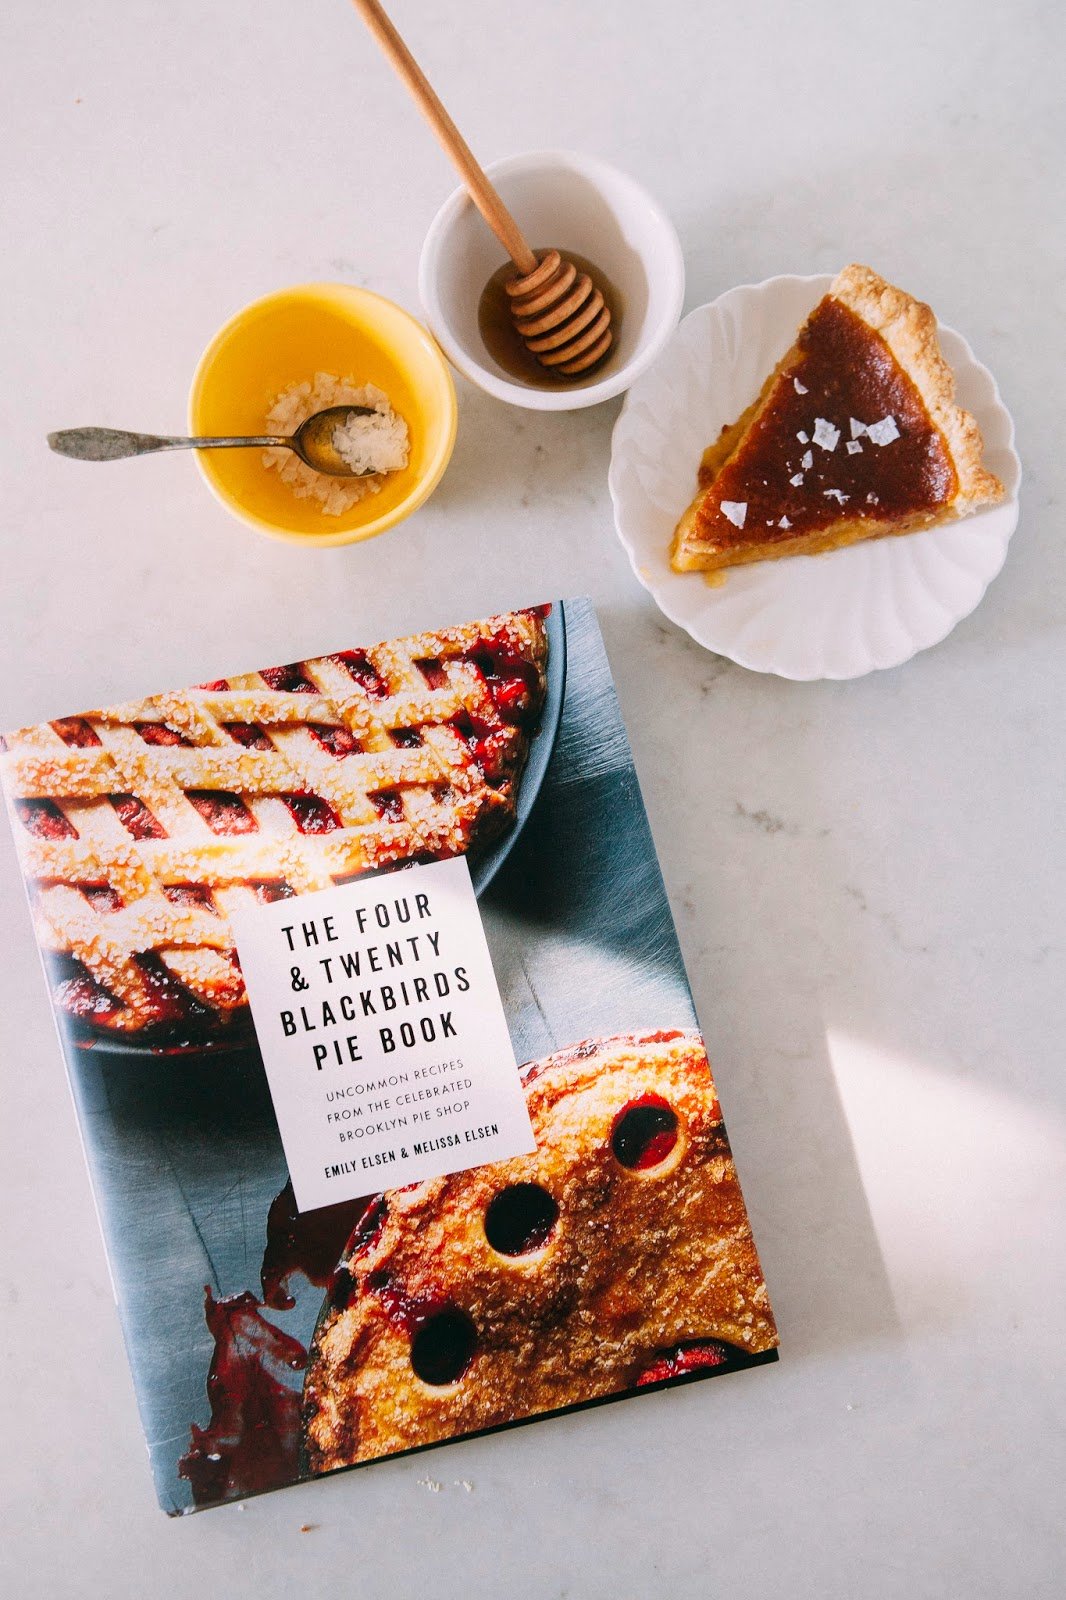
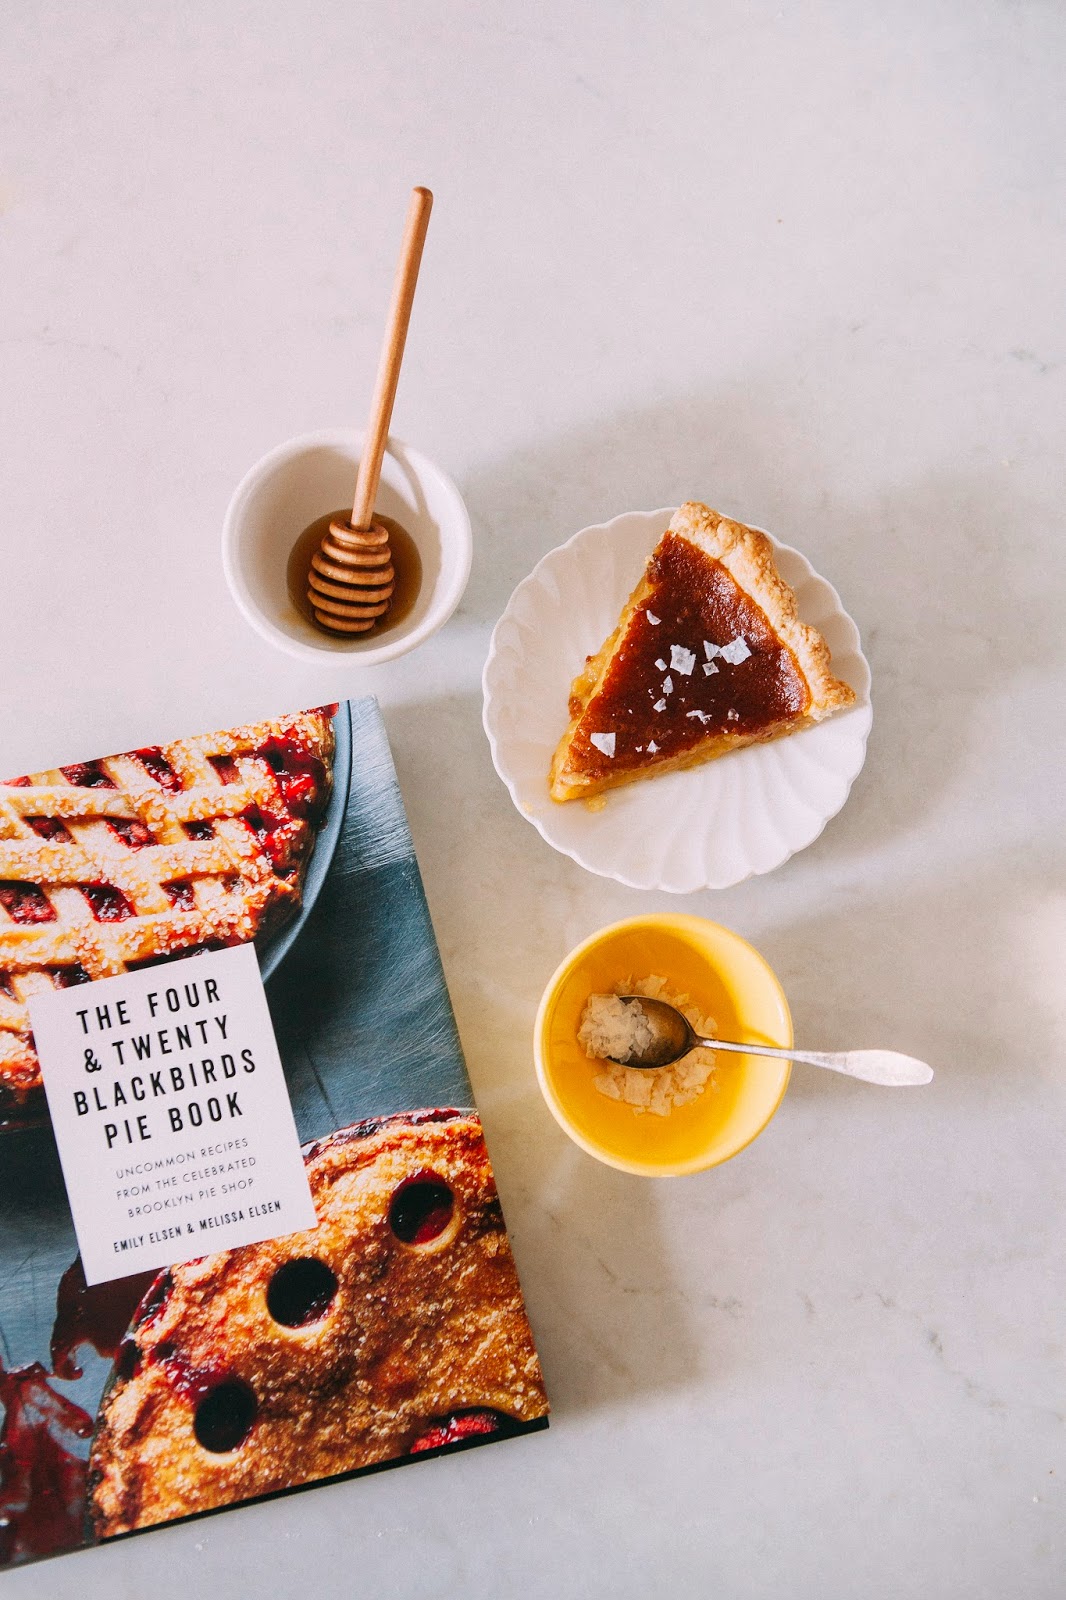
As for this pie, the recipe comes from famed Brooklyn pie shop, Four & Twenty Blackbirds. Four & Twenty Blackbirds broke my heart during my visit to New York last winter when, after a long and arduous trek from the Upper West Side to Gowanus, we arrived at the bakery to find it closed. I recreated the Meyer lemon chess pie that I’d been coveting, but the damage was done. I haven’t forgiven the bakery’s betrayal since.
Fast forward to now. A year later, I’d finally forgiven Four & Twenty Blackbirds to reopen their beautiful cookbook and peek through their recipes. My friend Julie, generally a hater of most pies, was singing high praise for their salty honey pie recipe, while my other friend Meredith had been begging me to bake her a salty honey pie for months now. Pressure was on.
So of course, the first cut of the pie was a complete and utter disaster. My beautifully crimped crust shrank dramatically in the oven, resulting in an ugly and uneven edge. I’d misread the instructions and had baked the pie for twice as long as I needed to, resulting in a burned, ugly, blackened top. A forkful of the pie (once the burned bits had been scraped off) revealed a filling that was too sickeningly sweet — even with a sweet tooth as big as mine, I could only handle a few bites.
After some frantic Googling, I was able to figure out where I’d gone wrong. Three tries later, I finally came up with a pie that I was happy with. A flaky, crunchy and buttery crust that holds its own against an incredibly rich and decadent filling. I’m sharing my tips below — for both general pie making, and this pie recipe in particular — in the hopes that novice pie makers will have better guidance than I did. Good luck and god speed!
Tips for Pie Ingredients:
-
- You want your ingredients as cold as possible. Most pie crusts are only made with four ingredients: flour, butter (or any kind of fat, really — but I’m a purist who only uses butter in her pie crusts, so we’ll stick with that), some kind of liquid and some kind of flavor granules (usually salt and sugar). Most recipes follow the same formula: mix all the dry ingredients, and use a pastry cutter to cut in the butter/fat into the dry ingredients. The colder the ingredients are when they go into the oven, the prettier your pie will be — the cooler temperature of the ingredients keeps your pie crust’s shape. This will also mean that you will need to rest your dough after rolling it out, but we’ll get to that later. For now, prep your ingredients by mixing all the dry ingredients together in a medium bowl, covering the surface with plastic wrap and refrigerating overnight. Prep your butter by cutting it into 1-inch cubes, transferring to a small tupperware and FREEZING overnight. You have to plan ahead for pretty, all-butter pies.
- Use ingredients that prevent gluten development. In the past, a common problem I’ve had is soggy pie crust. There is honestly nothing worse in the dessert world than homemade, soggy pie crust. All that work for NOTHING. When you get soggy pie crusts, it’s usually because the dough has too much moisture (but we’ll get to that later) or has been overworked and overkneaded. This tip solves the latter problem. Last year, my friend Noah let me on a neat trick — vodka doesn’t bind as well with flour’s molecules and evaporates during the baking process, so the vodka helps the crust stay much flakier and more tender. Similarly, the internet tells me that vinegar prevents the formation of gluten by preventing gluten strands from becoming too long. You’ll notice that Four & Twenty Blackbirds uses apple cider vinegar in their pie dough recipe, which, in addition to helping prevent soggy crusts, gives the crust a nice, tangy flavor.
Tips for Pie Making Equipment:
-
- For the prettiest pies, use a METAL pan. Apparently it’s a known fact that glass pans tend to be more slippery than metal pans — meaning that if you use a glass pan, it’s likely that the beautiful crust you worked so hard to crimp will be unrecognizable by the time it finishes baking. This was one of the most common problems I had with my crusts — the moment I switched from a ceramic pie plate to a metal one, my crimps kept their shape. Another advantage is that metal pie pans can withstand a dramatic temperature change, going from the freezer and into the oven without the risk of breaking or exploding.
- Kitchen shears are a pie maker’s best friend. I’m lousy at rolling out perfect circles of dough. With pie crusts, time is your enemy — the longer it takes you to roll out the pie, the warmer the ingredients will get, and the more difficult it will be to work with the pie crust. Roll the pie out into a rough circle (or heck, even a rounded square) and use your kitchen shears to cut it into the appropriate shape and size. You want the dough to be at least 2.5 inches bigger than the pie pan (more on that later) with smooth edges for easy crimping, shaping and general pretty results.
-
- Flour your work surface liberally and move the pie dough around as you roll it. So many sources tell you not to overdo the flouring since too much flour makes a tough crust — but I’m here to tell you otherwise. In the past, I’ve been burned by sticky dough; there’s nothing worse than rolling out a perfect circle and then tearing it as you try and transfer it to the pie plate. Use as much flour as you need to so that the dough doesn’t stick at ALL, and don’t even worry about it. However, once the dough has been rolled out into the appropriate diameter, use a pastry brush to dust off any excess flour. Repeat once you’ve transferred the dough onto the pie plate.
-
- When crimping your pie, go big or go home. Most recipes instruct you to roll out the pie to a diameter that is an inch larger than your pie plate, but I’m telling you to roll it out to 2 to 3 inches larger than your pie plate. Those dramatic crusts that you often see on Pinterest do not come from delicate little shapes — the bigger your crimps, the more beautiful your crust will be. Bear in mind that the crust will also shrink a little bit (even with a metal pan) in the oven, so go big or go home. Don’t be afraid to roll the overhang onto a generous log that sits on the edge of the pie plate — that’s what will give you the big, bold crust you deserve. Worst case scenario, if you have too much overhang, you can always use your kitchen shears to chop it off.
- Rest, rest, rest. Pie dough needs two distinct resting periods — the first resting period comes after the ingredients have just been mixed together, and the second after you’ve rolled it out and shaped it onto the pie plate. Both times, it’s best to let the dough rest in the freezer for at least 2 hours, preferably overnight, each time. I’ve mentioned this earlier — the colder your pie dough is when it hits the oven, the more likely it will hold its shape. But resting the dough for an extended amount of time also allows the gluten strands to relax, resulting in a tender, flakier pie.
-
- Don’t overdo the liquid. Four & Twenty Blackbirds’ all-butter pie crust recipe is unusual in that it features an almost 1:1:1 ratio of dry ingredients to butter to liquid. However, this does not mean you have to use all of the liquid provided. The first time I made this pie crust, I did exactly that, and the crust was sticky, soggy, gooey and gross. Use your judgement and add the liquid provided a tablespoon at a time, just until the dough starts to come together. Add only as much as that, and no more — you want to get to the point where it’s still a little bit dry and you’re having a little bit of difficulty keeping the dough together; it’s okay to have a few pea-sized bits of dough fall off here and there as you’re patting it together. Less liquid means a flakier, crispier and ultimately more tender crust.
- It’s supposed to be that friggin’ sweet. The pie filling is basically honey turned into a custard, and not much else. It’s sweeter than even Momofuku Milk Bar’s infamous crack pie!!! So… unpopular opinion, but here’s the truth: when I first had a bite of this pie — even the remade, perfect one — I took one bite, went “Ew, too sweet!” and pushed it away. I wasn’t even going to post it up on the blog — that’s how much I didn’t like it. But later, I found myself taking forkfuls, sneaking bites here and there… and suddenly, out of nowhere, half the pie was gone in a day. When it was gone, I found myself daydreaming about it and working in tweaks and changes for the next time. In the end, I’m a fan… but only in small quantities and with generous amounts of salt. And, counterintuitively, it tastes better when it’s cold (it’s much too intense when fresh from the oven).
- New York Times Cooking’s How To Make a Pie Crust
- Martha Stewart’s Dish Debate: Choosing The Right Pie Plate
- The New York Times’ Pie Debates: The Experts Weigh In


Get the Recipe: Salty Honey Pie with An All-Butter Pie Crust
Ingredients
For the All-Butter Pie Crust
- 1 1/4 cups all-purpose flour
- 1 1/2 teaspoons granulated sugar
- 1/2 teaspoon kosher salt
- 1/2 cup (1 stick) frozen unsalted butter, cut into 1-inch cubes
- 1/2 cup cold water
- 2 tablespoons apple cider vinegar
- 1/2 cup ice
For Salty Honey Filling
- 1/2 cup (1 stick) unsalted butter, melted
- 3/4 cup granulated sugar
- 1 tablespoon fine-ground cornmeal
- 1 teaspoon pure vanilla extract
- 1/2 teaspoon kosher salt
- 3/4 cup honey
- 3 large eggs
- 1/2 cup heavy cream
- 2 teaspoons white vinegar
- 1 tablespoon flaky sea salt, for finishing
Instructions
For the All-Butter Pie Crust
- In a medium bowl, whisk together 1 1/4 cups all-purpose flour, 1 1/2 teaspoons granulated sugar and 1/2 teaspoon kosher salt. Add 1/2 cup cubed frozen unsalted butter and coat with the flour mixture using a pastry blender. Continue using the pastry blender to cut the butter into the flour mixture, working quickly until mostly pea-sized pieces of butter remain (but a few larger pieces are okay — be careful not to overblend!).
- In a liquid measuring bowl, whisk together 1/2 cup cold water, 2 tablespoons apple cider vinegar and 1/2 cup ice. Sprinkle 2 tablespoons if the ice water mixture over the flour mixture (from the first step), continuing to use the pastry blender to cut the water into the mixture until it is fully incorporated. Add more of the ice water mixture, 1 tablespoon at a time, using your hans to mix until the dough comes together in a ball with some dry bits remaining. Squeeze and pinch with your fingertips to bring all the dough together, and, if necessary, sprinkle any dry bits with small drops of ice water to combine. Shape the dough into a flat disc, wrap in plastic, and refrigerate for at least 1 hour, preferably overnight (see baker's notes), to give the crust time to mellow. Wrapped tightly, the dough can be refrigerated for 3 days or frozen for 1 month.
- Once the dough has chilled overnight and has the texture and consistency of saltwater taffy, it’s ready to be rolled. Liberally sprinkle a work surface with flour (see baker’s notes). Unwrap the dough and place it on the work surface, sprinkling its top with flour. If the dough is hard, let it rest for a few minutes. If the dough seems too sticky at first, add flour liberally. Use a rolling pin to roll with light pressure, from the center out, moving the pie dough around every quarter to roll it evenly. Roll the the dough to about 12 to 13 inches in diameter and about 1/4 inch thick (place your pie plate upside down over it to check its size).
- Move the dough into the pie plate by folding it into quarters, then moving it into the plate and unfolding it. When the dough is in the plate, press it firmly into the bottom and sides of the plate. Roll the excessive pie dough overhang so that it sits like a tube on the pie plate rim. At this point, you can either crimp the tube with a fork or use your fingers to create a crimping pattern (The New York Times has a great how-to video demonstrating a relatively easy crimping technique). Once you've styled the crust, cover loosely with plastic wrap and freeze for at least 3 hours, preferably overnight.
For the Salty Honey Filling
- Once your pie crust has been crimped and frozen overnight, make the filling. Position a rack in the center of the oven and preheat to 375 (F).
- In a medium bowl, whisk together 1/2 cup melted unsalted butter, 3/4 cup granulated sugar, 1 tablespoon fine-ground cornmeal, 1 teaspoon pure vanilla extract and 1/2 teaspoon kosher salt. Whisk in 3/4 cup honey, before whisking in 3 large eggs one at a time, only adding the next egg when the previous one has been fully incorporated. Once all the eggs have been added, whisk in 1/2 cup heavy cream and 2 teaspoons white vinegar until fully incorporated and the mixture has lightened.
- Place the frozen pie shell on a rimmed baking sheet and strain the filling (from the 2nd step) through a fine-mesh sieve directly into the pie shell. Transfer the baking sheet containing the pie to the middle rack of the oven, and bake for 30 minutes. After 30 minutes, rotate the baking sheet by 180 degrees and continue baking for an additional 15 to 20 minutes. The pie is finished when the edges are set and puffed up high; the center should no longer look liquid, but instead is set like gelatin and is golden brown on top. Allow to cool completely to room temperature on a wire rack, about 3 to 4 hours. Sprinkle with 1 tablespoon flaky sea salt immediately before serving. The pie will keep refrigerated for 4 days or at room temperature for 2 days.
I seriously can't wait to try this out. Thanks so much for the crust tips!! This sounds delicious!
Ah Michelle I LOVE this!! I've had that book since it came out, and I fell in love with pie because of it! There are so many options, by season, in that cookbook, and honestly, trying recipe after recipe from that book made me finally understand pie crust. Your advice about not using all the liquid? Golden. I wish I knew that before my many trials of pie crust last year :). Beautiful post!
I just love this post, Michelle! I've struggled with pie baking A LOT in the past, but maybe (just maybe…) I'll be successful with this one.
Love your writing and photos, as always! 🙂
Such a beautifully written post!!! I agree that it is a super sweet pie. Unsweetened whipped cream helps cut that.
Thanks Betty! I'm still working on having my pie crusts look as beautiful as yours — I was poking around your blog the other day, and your rose apple wreath pie is all the <3 <3 <3
Yay! I hope you do! Let me know how my tips work out for you!
Ugh, me too! Pie is one of my least favorite things to make. I still feel like I'm learning something new every time I try a new pie recipe. Hopefully some of my tips will help you out, and thanks for stopping by!
Unsweetened whipped cream?! That sounds like a great pairing, will definitely try that the next time I make this pie!
Love love love all these pie tips! I need to plan ahead more and freeze that crimped pie crust! Your salty honey pie rendition is gorgeous.
What an amazing post, Michelle! I'll definitely come back to this one because pie is fun and a mystery all at the same time for me…I'm so happy that some of my "theories and speculations" were right! Like metal and glass producing different results.
This looks great Michelle and I adore your tips – will keep them bookmarked!
This pie is so good! I made it for Thanksgiving this year, my FIRST time making a pie from scratch by myself, and thankfully it all went very well. But I had seen Joy the Baker make the pumpkin pie from her new book in person shortly before doing it, so I felt pretty confident about what I was doing. You definitely have to plan ahead, though, and make sure your stuff is cold, etc. I'm glad you were able to work your way around this recipe! It's a real winner.
PIE TIPS! Just what I need. I'm notoriously lame at pie crusts, although I'm quite good at fillings. All of these tips apply to gluten free baking too — except the whole tempering the gluten thing. Other than that, the chilling/freezing/ample crustage et al are all super helpful to me. Now I can get to practicing so I'm prepared for berry season! Gonna make a million pies.
Ha! I have the same relationship towards pies…well, pie crusts to be exact. I like to use Crisco as I find it's a little easier to work with, but butter gets a flavour to die for. I love the look of this honey pie!
This looks incredible! Thanks for all the tips…I've been known to destroy a pie or two. 🙂
Thanks Ileana! Freezing is such a pain (it really does require so much more planning, which I am really terrible and bad at), but you ultimately end up with a prettier pie that way.
Yay! That's so exciting that you got to see Joy demo one of her baked goods; that must've been bomb!
YES. The best part about berry season = berry pies, let's be honest here. And I was thinking about playing around with a gluten-free coconut oil pie crust pretty soon, so I'll share any tips I have (though similar to gluten-full pie, it'll probably take me months to master, sigh).
Hahah, I like that: "pie is fun and a mystery all at the same time". Truth, for real.
OKAY, I thought it was just ME who was terrible at rolling out pie dough. So glad to know that you agree with me! And I'll have to try the paste trick you shared, I've never heard it before but it sounds promising!
Crisco and shortening in general usually leads to prettier crusts. I'm just such a sucker for all-butter pie crusts though — there's something so romantic about the idea. But ugh, my life would be so much easier if I just let that go and use Crisco.
Thanks Millie! I hope you get a chance to try them — let me know what you think!
Haha, no problem! I hope you get a chance to try them. Let me know what you think when you do!
My grandmother is an incredible baker, and even after forty + years of making pies, she is still working on her pastry recipe! This looks like an absolutely delicious pie.
Those are some pretty amazing tips you've shared on pies! Ever since I learned about vodka on ATC, I've been a huge fan of the technique. Also, honey and salt sounds rather comforting especially in pie!!!
wowww… i really love to bake pie some other time.. Thanks for this recipe anyways 🙂 You must try to visit this also warwick associates scam
I need this book in my life! This pie looks and sounds so incredibly delicious and love the top pie baking tips!
I always sub in some coconut oil for the butter, and using unrefined gives you that lovely coconut aroma :)))))
& dear god I do not envy either of you in gluten free pie baking O_O
Oh wow this is such a great post!! I am basically scribbling notes frantically right now…can't wait to try some of them out! Oh and the pie, looks delicious 🙂
When I was in New York in the fall, I planned one Saturday around getting to their shop to try a slice of this pie for myself and then the dang subway system foiled my attempts. Now, armed with your ever-helpful tips, I feel confident enough to maybe tackle this pie myself. Or to try and convince you to mail one to me 😉
Kathryn, if I move to NY I will personally make sure you end up with a pie from Four & Twenty Blackbirds. You can hold me to that 🙂
I saw a a photo from this post on pinterest before I'd even seen it in my feedly and I remember thinking 'damn I wish I could bake pies that looked as pretty as that! PIE GOALS' hahah. I've mainly had problems with the crust shrinking but now I've read all your mastermind tips so I can attempt to bake pinterest-worthy pies too! 🙂
Stunning pictures and I love all the tips 🙂
Um, I love lumpy and un-even pies, and just lumpy and un-even desserts in general. Character! This pie is gorgeous though–loving all those subtle beams of light in the photos. The thoroughness of your hot tips section is quite inspiring too–and your suggestion of getting a bit boozed pre-pie making 😉
Salted Honey Pie?! That combo sounds ridiculously perfect. And I'm so glad you're sharing your pie tips and tricks. I just made a pie this week (a savory one) and was frantically adapting the recipe as I went because I just couldn't get it to do what it was supposed to. Damn pies. I'm sure all of your legwork will benefit my cooking too, so thanks for sharing!
Izy, you're crazy! From what I've seen, your pies are BEAUTIFUL. I even linked to your bumpy cherry and almond pie as an example of a big, bold, dramatic crust!!! I've been thinking of that pie ever since you posted it, just in awe of your skills!
beautiful! I've always had problems with pie too, but I'm going to give it another shot with your tips 🙂
do you think cutting the sugar in half would affect how the filling sets?
I went to Four and Twenty Blackbirds for a friend's birthday for the first time last week…but unfortunately wasn't able to partake in pie. It was torture! I'm planning on going there for my own birthday in a few months and call it even.
Thanks for all the tips- I'm *the worst* at pie making- hopefully these will help!
Hi Michelle. This recipe sounds amazing. Don't hate me for asking this, but… could the filling be made and baked in ramekins instead of baking it in a crust like a traditional pie? Has anyone tried it?
Thank you for being so honest about baking pies. It is such a hard and time-consuming process, and non-pie bakers don't understand what really goes into it! I still have not mastered the perfect double crust, for I never am able to divide it correctly and roll it out to the size I need!!
MMM, So I used my foolproof pie crust, halved the filling and added a bunch of pecans! It’s so good. Def adding a layer of chocolate next time and a lightly sweetened whipped cream!
I’ve made this recipe twice, and both times the filling (prior to baking) looks curdled. Is this normal, or am I doing something wrong?
Oh no, sorry to hear that! Did it bake okay?