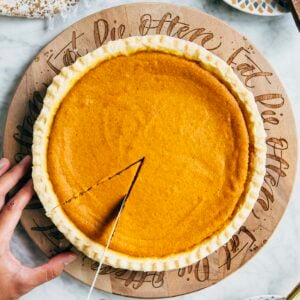
Get the Recipe: Perfectly Smooth and Tangy Cream Cheese Pumpkin Pie
The cream cheese in this cream cheese pumpkin pie recipe makes the filling extra smooth and tangy, just like New York cheesecake! Grab the recipe in the post, along with tips, tricks, and process photos on how to make it.
Ingredients
For The Pie Crusts
- 2 (9-inch) store-bought frozen pie crust OR 1 store-bought or homemade pie crust for a deep-dish pan
- 1 large egg white
- 1 teaspoon water
For The Cream Cheese Pumpkin Pie Filling
- 1 (15-ounce) can pumpkin puree
- 1 (8-ounce) box cream cheese, at room temperature
- ½ cup (1 stick or 4 ounces or 113 grams) unsalted butter, melted and cooled slightly
- 1 ¾ cup (12.25 ounces or 347 grams) granulated sugar
- 1 teaspoon ground cinnamon
- 1 teaspoon pumpkin pie spice
- ½ teaspoon kosher salt
- 3 large eggs, at room temperature
Equipment
- aluminum foil
- pie weights
Instructions
- First, prebake the pie crust. Position a rack in the center of the oven and preheat the oven to 350°F. If baking two crusts, line two half sheet pan with parchment paper. If baking one crust, line one half sheet pan with parchment paper.
- Prep the pie crusts. Place a frozen crust, still in its plate, in the center of one of the pans. Cover the crust with foil, making sure the crimped edges are completely covered and that there are no gaps between the foil and the crust. Fill with pie weights and spread them out so they are more concentrated around the edges of the crust.If baking two crusts, repeat with the second crust.
- Prebake the crusts. Bake for 30 minutes. While the crust is in the oven, make the egg wash: In a small bowl, whisk together the egg white and water.Remove the sheet pan from the oven, keeping the oven on. Carefully lift out the pie weights and foil. Use a pastry brush to coat the bottom and sides of the pie crust (but not the crimped border) with a thin layer of egg wash. If baking two crusts, repeat with the second crust.Bake the crusts, uncovered, for an additional 5 to 8 minutes (bake for longer if you want a crispier, darker crust). Set aside on a wire rack to cool slightly on their pans while you make the cream cheese pumpkin pie filling.
- Make the cream cheese pumpkin pie filling. Reduce the oven to 325°F. In the bowl of a stand mixer fitted with the whisk attachment, combine the pumpkin and cream cheese. Whisk on medium-high speed for 5 minutes, or until completely smooth and doubled in volume.With the mixer on low, gradually add the butter, sugar, and spices, until just combined. Whisk in the eggs, one at a time, only adding the next egg when the previous one is just incorporated. Whisk until just combined.
- Assemble the pies. Divide the batter evenly between the crusts; if using a digital scale to measure out the pie, note that this recipe makes around 42 ounces (1191 grams) of pumpkin pie filling—pour 21 ounces (595 grams) of batter into each crust.Use an offset spatula to spread the pie filling evenly in each pie crust and smooth their tops.
- Bake the pies. Bake for 40 minutes, or until the edges of the filling are set but the center still wobbles slightly. Cool on a wire rack. Serve warm or at room temperature.The pie can be stored at room temperature, under a cake dome or a large bowl turned upside down, for up to 1 day. After that, cover loosely with plastic wrap and refrigerate for up to 2 days.
Notes
- No pie weights? No problem! You can use other pantry items like beans, rice, and even granulated sugar in their place. And if you don’t want to waste food, you can also use household items like coins from your loose change jar! I promise the coins won’t melt in the oven—it takes a LOT of heat to melt metal.
- For the best pie crust, only brush the bottom and sides of the pie crust with egg wash. Avoid brushing the pie crust crimp. Doing so will cause it to overly brown and burn before the filling is done cooking! So don’t worry if you have leftover egg wash—this is normal.
Did you make this recipe?Please leave a star rating and review in the form below. I appreciate your feedback, and it helps others, too!