About These Small Batch Triple Cookie Brownies For A Loaf Pan
These small batch brownies are a small batch version of the internet-famous recipe (named “slutty brownies”, but that name makes me cringe so hard so I changed it):
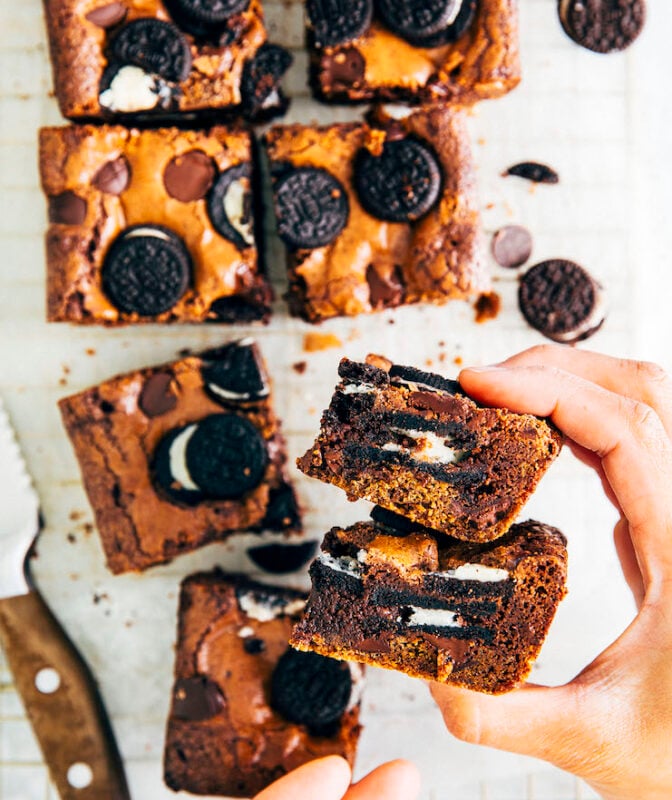
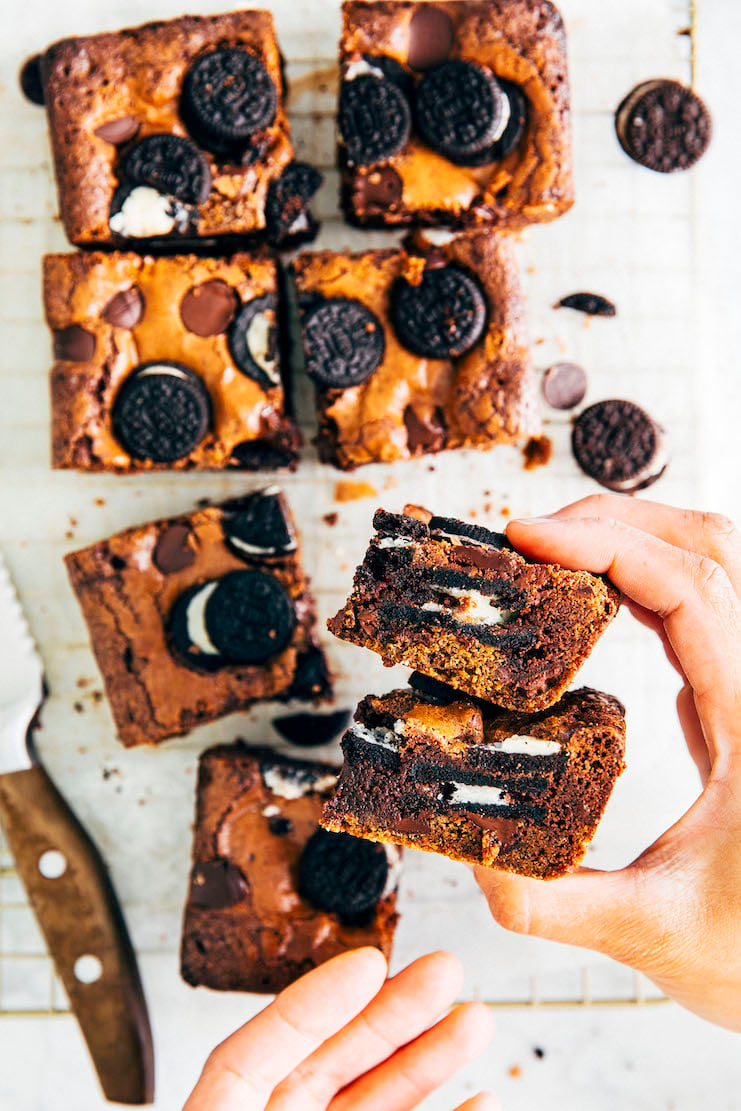
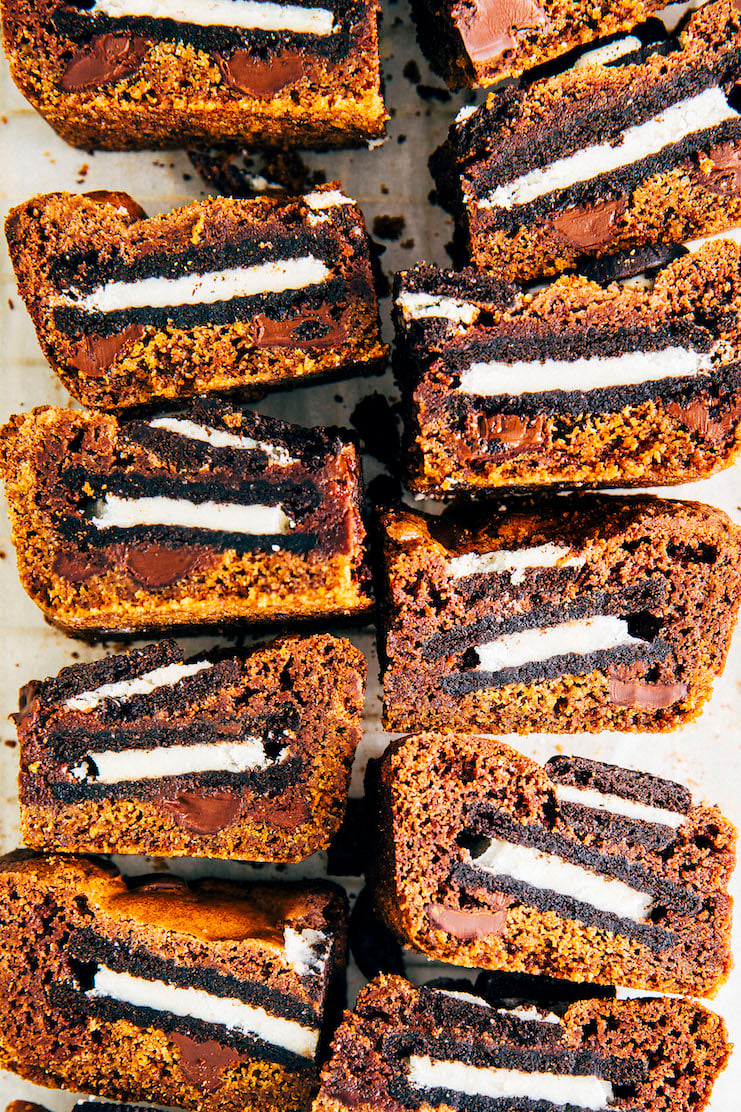
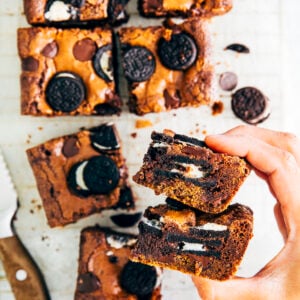
These loaf pan brownies are made with three different types of cookies: a layers of chocolate chip cookie dough and chocolaty brownies, stuffed with Oreo cookies in its center. Think of it as a cross between your favorite chocolate chip cookie and cocoa brownie, but with a layer of Oreos, too.
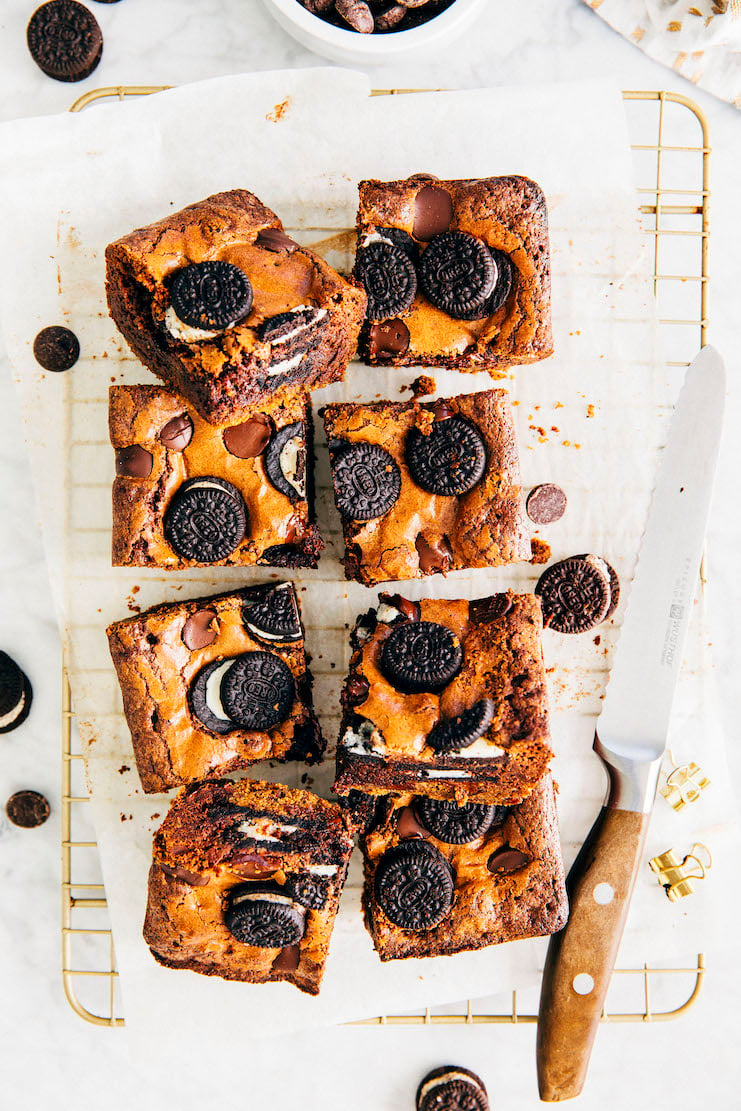
It’s a LOT, I know—but that’s why the recipe is small batch! The recipe instructs you to bake the brownie batter in a loaf pan. Doing so results in only 8 brownies, enough for a small household of 2 to 4 people.
For even more fun brownie recipes, check out Hummingbird High‘s Brownies, Blondies, and Bars recipe collection!
Why You Should Make The Recipe
Here are all the reasons to make these brownies:
The brownie recipe is small batch and makes only enough for a small household of 2 to 4 people!
Most brownie recipes instruct you to bake the bars in either a 9 x 13-inch cake pan, or a 8-inch square cake pan. However, since the recipe is kind of intense (how many Oreo-stuffed brownie-cookie hybrid bars can you eat, anyway?) I decided to make a very small batch version of the recipe.
What does that mean? These brownies are made in a 9 x 5-inch loaf pan, resulting in a serving size approximately a quarter of the size of other recipes. That means 8 petite servings. They’re small batch loaf pan brownies that make the perfect amount for a small household of 2 to 4 people!
For even more desserts baked in a loaf pan, check out Hummingbird High‘s small batch recipe collection.
The recipe makes both the chocolate chip cookie dough and brownie batter from scratch, avoiding artificial flavors.
Many “slutty brownie” recipes rely on ingredients like store-bought cookie dough and boxed mix brownies. While there’s nothing wrong with those ingredients (I happen to love both), I wanted to challenge myself by making the different components from scratch! Doing so enabled me to really customize this recipe.
For these brownies, I used a combination of some of my favorite from-scratch recipes from my cookbook, Weeknight Baking. I used the small batch version of my favorite chocolate chip cookie recipe. The recipe makes a wonderfully fudgy cookie that is chewy and dense in its center. I also used a small batch version of the cocoa powder brownies in my cookbook.
All in all, I’ve successfully created a brownie batter filled with cookies. The cookie filled brownies are perfectly chewy, with a flaky, paper-thin sugar top. You can see a version of the recipe on my friend Jeanine’s blog.
Despite instructing you to make two different doughs and batters from scratch, this brownie recipe comes together relatively quickly.
In general, hybrid desserts tend to be Baking Projects. Why? You’re basically making two different baked goods and combining them together. That means making two different recipes—in this case, one for chocolate chip cookie dough, and another one for brownie batter—and assembling them together. Doing so takes a significant amount of time and energy!
I wanted to be mindful of that when I developed my own brownie recipe. As a result, I made sure to pick chocolate chip cookie dough and brownie batter recipes that come together quickly. What does that mean? Both the cookie dough and brownie batter rely on melted butter—as a result, there’s no need to wait for the butter to come to room temperature.
Other shortcuts? Although I’m a stickler for using chopped chocolate in my cookies, I instruct you to use chocolate chips in this recipe. Similarly, although I prefer my brownies to be made with melted chocolate (see this recipe and that one), I use cocoa powder for these brownies to skip that step completely. Finally, both the chocolate chip cookie dough and brownie batter recipes are almost one bowl (I believe you only need two bowls to make each recipe!), and don’t require a stand mixer. I got your back!

Ingredients and Substitutions
Now that I’ve convinced you to make the recipe, here’s what you need to make the brownies:
Shopping List for Small Batch Triple Cookie Brownies For A Loaf Pan
- all-purpose flour
- baking soda
- kosher salt
- unsalted butter
- light OR dark brown sugar
- granulated sugar
- large eggs
- pure vanilla extract
- bittersweet, dark, OR semisweet chocolate chips
- Classic OR Double Stuf Oreos
- natural unsweetened OR Dutch-processed cocoa powder
- confectioners’ sugar
- Oreo minis (optional for garnish)
And let’s talk about some key ingredients and their potential substitutions:
Chocolate Chips
You need ¼ cup bittersweet, dark, OR semisweet chocolate chips to make the chocolate chip cookie base for these brownies.
Bittersweet versus Dark versus Semisweet Chocolate Chips
Whenever I share a recipe that uses dark chocolate, many of you ask if you can use bittersweet or semisweet chocolate. Many manufacturers make chocolate bars and chips that are specifically for baking; these are often labeled “bittersweet”, “semisweet”, or “unsweetened”. You’ll notice that “bittersweet” and “semisweet” typically don’t include cocoa percentages. That’s because there’s no official benchmark for each designation. Specifically: it’s up to the manufacturers to determine how much cocoa to use, and cacao percentages for each type will vary greatly between brands.
For these brownies, you can use the kind of chocolate chips you like best. It won’t matter too much if they’re bittersweet, semisweet, or dark chocolate chips. However, I don’t recommend using milk or white chocolate chips. It might make the already sweet brownies TOO sweet! Think about it: you’re already adding chocolate chip cookies and a layer of Oreos to a pan of brownies. It’s already intense, lol.
I don’t have any kind of chocolate chips on hand, but I do have chocolate bars. Can I use chopped chocolate instead?
Absolutely! You can substitute the chocolate chips with the same amount of chopped chocolate. Chop the chocolate into ½- or 1-inch pieces. Alternatively, you can also use store-bought chocolate chunks.
Oreos
You need 8 Classic OR Double Stuf Oreo sandwich cookies to make these brownies, plus mini Oreos for garnish.
What are Oreos?
Oreos are chocolate sandwich shortbread cookies made with two chocolate shortbread cookies that are sandwiched together with vanilla frosting. They come in many varieties: Golden Oreos (which are made with vanilla shortbread cookies), multiple flavors, and different levels of vanilla frosting filling.
For these small batch brownies, I recommend using Classic Oreos or Double Stuf (which has twice as much vanilla frosting filling than the Classic variety).
I’m feeling wild. Can I use another Oreo flavor like Fudge Covered Oreos, Chocolate Hazelnut Oreos, Java Chip Oreos, and whatever other flavor suits my fancy?
Absolutely! I recommend going with a flavor that goes well with chocolate. Think: any of the flavors listed above, plus Peanut Butter Oreos, Chocolate Marshmallow Oreos, and Caramel Coconut.
I would avoid fruit-flavored ones like these Lemon Oreos, or even this Carrot Cake variety. Lemon and carrot cake don’t really go with the chocolate chip cookie base and brownie topping, ya know?
I don’t like Oreos. Can I skip them in this brownie recipe?
Not gonna lie, friend—Oreos are half the point of the brownies! Without them, these brownies would basically just be brookie bars. And I already have a recipe for Small Batch Brookie Bars on Hummingbird High!
If you don’t like Oreos, I suggest making that recipe instead. The recipe layers the chocolate chip cookie dough on both the top and bottom of the bars, encasing the brownies in chocolate chip cookie bites. It’s delicious!
I don’t want to buy Oreos AND mini Oreos. Can I skip the mini Oreos?
Absolutely! You can omit the mini Oreos from the recipe, no problem. No need to change Bake Time or anything!
Cocoa Powder
You need 3 Tablespoons natural unsweetened OR Dutch-processed cocoa powder to make the brownie topping for the brownies.
Natural Unsweetened Cocoa Powder versus Dutch-Processed Cocoa Powder
Cocoa powder, when used in baking recipes, often comes in two varieties: natural unsweetened, and Dutch-processed.
Natural unsweetened cocoa powder is more typical and is cocoa powder in its purest form. It is slightly reddish brown in color and results in deeply flavored chocolate goods. Because it is slightly acidic, it is often paired with baking soda in baking recipes to help create a chemical reaction that will cause the baked good to rise in the oven.
Dutch-processed cocoa powder is natural unsweetened cocoa powder that’s been treated with alkaline to neutralize its acidity, giving it a darker color and milder flavor. It is the cocoa powder that is used for making midnight-black baked goods like Oreos.
For my brownies, I used natural unsweetened cocoa powder. Doing so resulted in a lighter colored brownie that made the Oreo inside really pop! But if Dutch-processed cocoa powder is all you have, go for it! It won’t make too much of a difference in terms of flavor. However, your brownies will likely come out darker in color.
How To Make The Brownies
To make the brownies, you need to make a chocolate chip cookie dough recipe and a brownie batter recipe. Here are the basic steps to them from scratch:
First, make the chocolate chip cookie dough for the brownie base.
- Prep the ingredients for the chocolate chip cookie dough. (Prep Time: 5 minutes)
Luckily, prepping the ingredients for the chocolate chip cookie dough is fairly easy. Measure out all the ingredients for the dough! That’s it. - Make the chocolate chip cookie dough. (Work Time: 5 minutes)
Similarly, the chocolate chip cookie dough comes together easily. First, whisk together all the dry ingredients for the cookies in a medium bowl. Then, melt the butter in the microwave in a heatproof bowl. Once melted, mix in the brown sugar, egg yolk, and vanilla. Then, mix in the dry ingredients. Boom!
Note that the recipe below does NOT instruct you mix the chocolate chips in with the cookie dough. You do that in the next step! Mixing the chocolate chips into the dough makes it hard to spread the dough into a thin layer for the base.
Next, start assembling the brownies.
- Make the chocolate chip cookie dough base for the brownies. (Work Time: 10 minutes)
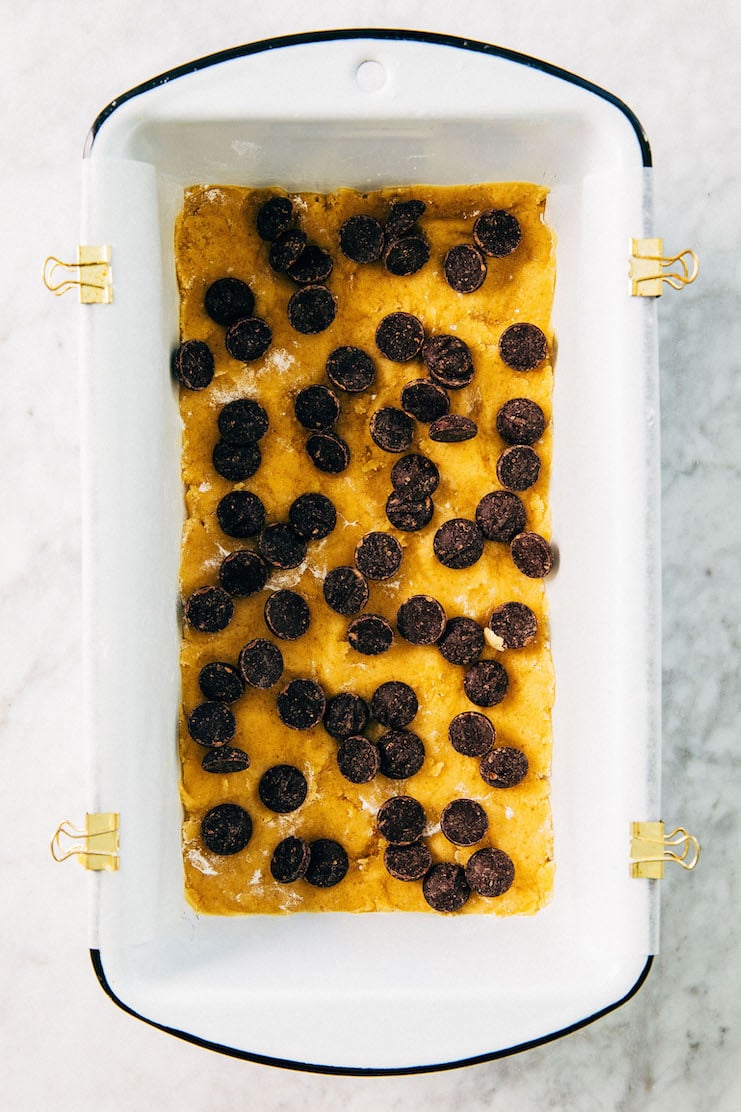
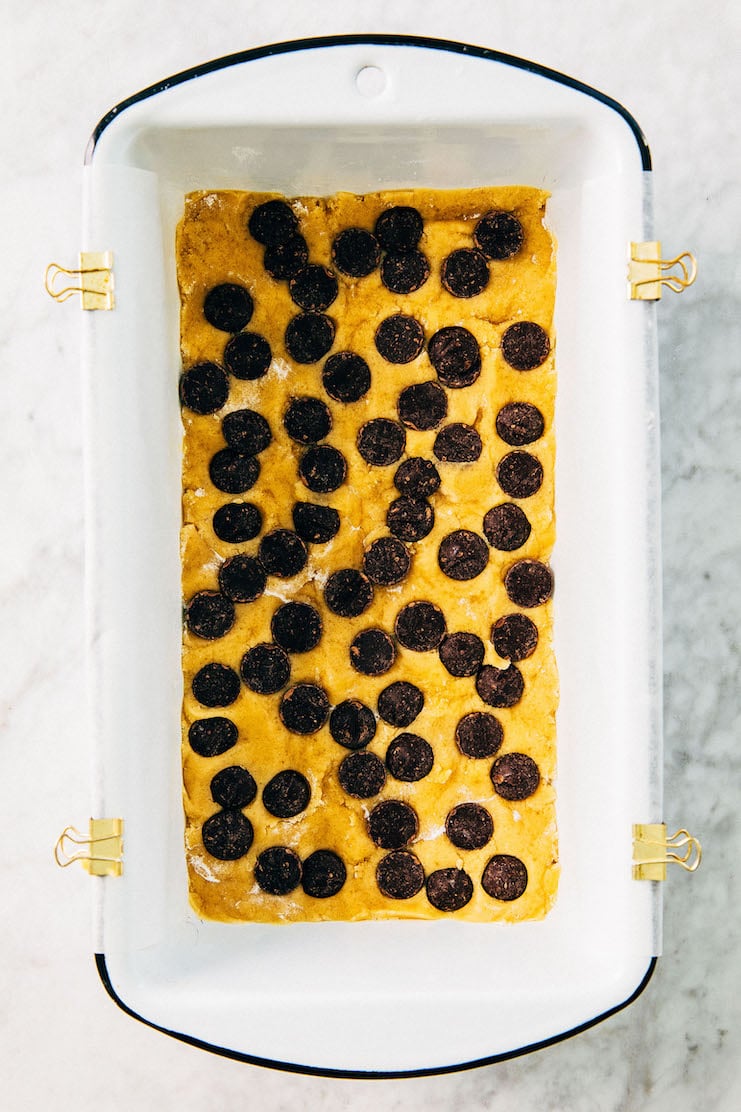
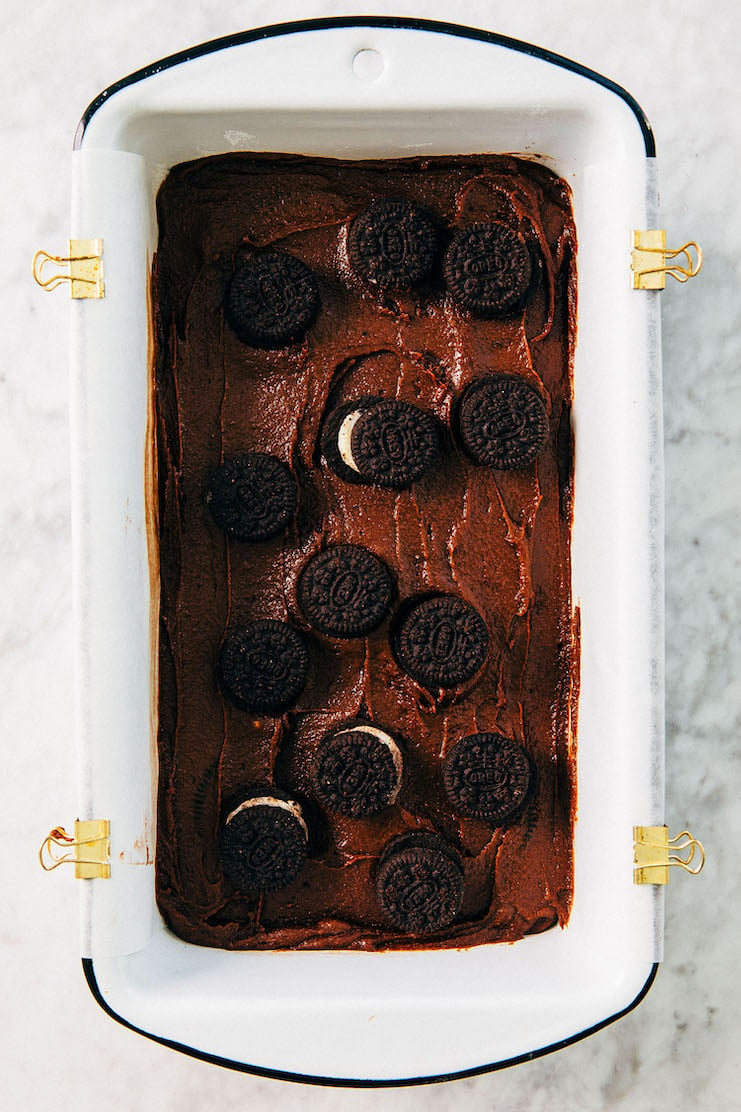
Use your hands to press the cookie dough into the prepared loaf pan, making sure to press the dough all the way up to the edges of the pan. Doing so will create a very thin layer of cookie dough. Don’t worry if the cookie dough doesn’t quite make it all the way up to the edges—we’ll fix that in the next step! However, it should definitely be 80% to 90% of the way there. - Layer the cookie dough base with chocolate chips, then Oreos. (Work Time: 5 minutes)
Sprinkle the chocolate chips over the cookie dough, and gently press down on the chips to meld them into the thin layer of dough. Doing so will help ensure that the thin layer of cookie dough now reaches all the way up to the edges of the pan! Cool, right?
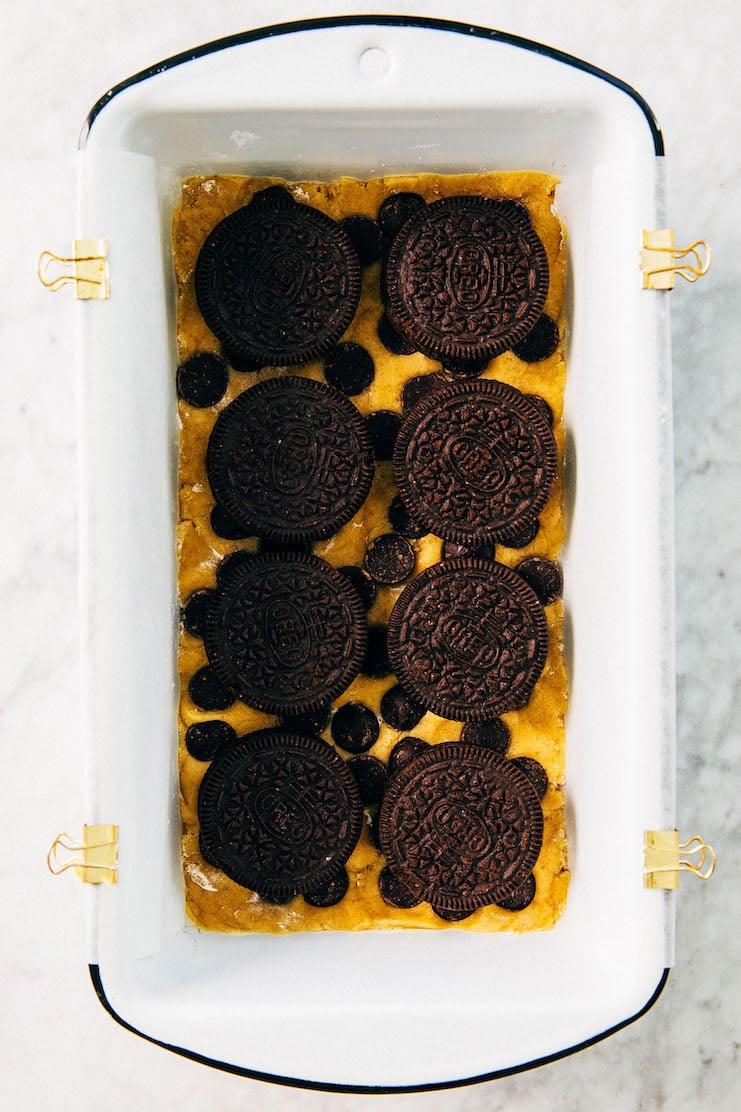
After that, arrange 8 Oreo cookies on top of the cookie dough. Arrange them in a way to ensure that every brownie square has an Oreo in its center. The easiest way to do so is to envision slicing the loaf pan in half lengthwise, then crosswise into 8 even squares. Each square should have an Oreo in its center.
Then, make the brownie topping for the brownies.
- Prep the ingredients for the brownie batter. (Prep Time: 5 minutes)
Similarly, prepping the ingredients for the brownie batter is fairly easy. Simply measure out all the ingredients for the batter, and prep the egg yolks.
If your cocoa powder and confectioners’ sugar is particularly lumpy, sift them into a medium bowl. Then, add the rest of the dry ingredients to that bowl. This way, you’ve already completed the first step of the brownie recipe. - Make the brownie batter. (Work Time: 5 minutes)
Like the chocolate chip cookie dough, the brownie batter comes together really easily. First, whisk together all the dry ingredients for the brownie batter in a medium bowl. Then, melt the butter in the microwave in a heatproof bowl. Once melted, mix in the egg yolks, water, and vanilla. Then, mix in the dry ingredients. That’s it!
Finally, finish assembling and bake the brownies.
- Make the brownie layer for the brownies. (Work Time: 5 minutes)
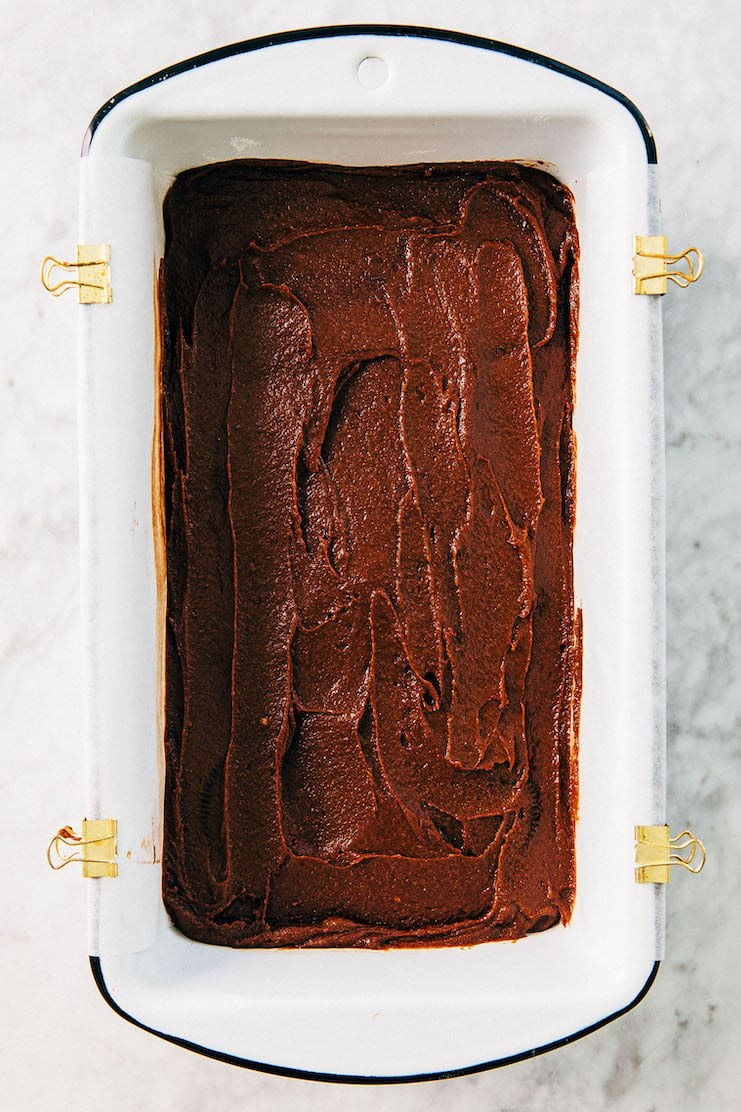
Pour the brownie batter into the loaf pan with the cookie dough and use an offset spatula to spread it to cover the cookie dough and Oreos and smooth its top. The batter will be thick and fudgy. - Bake the brownies. (Bake Time: 35 minutes)
The brownies need 35 to 40 minutes in the oven. It can be really hard to tell when the brownies are done. Because even when done, a skewer inserted into the center of the pan tends to come out gooey thanks to the chocolate chip and Oreo layers in the bars.
So it’s better to pull the brownies out of the oven early than leave them in too long—if you over bake the brownies, they’ll be tough! They might appear underbaked, but I promise that when they’ve cooled, they will be perfect.

Recipe Troubleshooting and FAQ
FAQ: What Baking Equipment Do I Need?
Can I bake these brownies in an 8 x 4-inch loaf pan instead of a 9 x 5-inch loaf pan?
Yes! However, your bars will likely be taller and thicker than mine. You may need to add 5 minutes to the recipe’s Bake Time as well.
I don’t have a microwave. Can I melt the butter on the stovetop instead?
Absolutely! If you don’t have a microwave, melt the butter in a small sauce pan over medium-low heat. As I say in the baker’s notes below, be mindful when melting the butter for these cookies! I like to chop it up into 1-inch cubes then melt it in a small sauce pot over medium-low heat. I stir the butter constantly while monitoring it.
FAQ: Questions About The Recipe’s Techniques
I don’t want to make both chocolate chip cookie dough AND brownie batter in the same day. Can I make one of them ahead?
Yes! If you don’t want to do too many dishes at once, I suggest making the chocolate chip cookie dough a day ahead.
Simply follow the recipe instructions to make the chocolate chip cookie dough. When done, cover the bowl of dough with plastic wrap and refrigerate overnight. Then, use the cookie dough in the recipe as instructed. There’s no need to bring the cookie dough back down to room temperature first! However, you may need to add a few minutes to Bake Time.
I’m lazy and don’t want to make the chocolate chip cookie dough from scratch. Can I use store-bought cookie dough instead?
Yes, with reservations. With store-bought cookie dough, it’s difficult to gauge how much dough you need to make a thin cookie dough base. The few times I tried it, I ended up using far too much dough. I ended up with incredibly thick brownies that took ages to bake in the oven!
So try it, but let me warn you now: you need far less cookie dough than you think. You’re aiming for a VERY thin layer for the brownies—think ⅛- or ¼-inch thick since it will puff up in the oven as it bakes. Anything thicker than that will result in super thick and dense brownies!
FAQ: How To Store The Brownies
How To Store Small Batch Triple Cookie Brownies For A Loaf Pan
The brownies can be stored in an airtight container or zip-top bag at room temperature for up to 3 days.
Can I freeze them?
Yes! To freeze the brownies, individually wrap any leftover bars in two layers of plastic wrap, then a layer of aluminum foil. The aluminum foil will prevent the bars from absorbing any other flavors or odors in the freezer. Freeze for up to 3 months.
When ready to serve, transfer to the refrigerator to thaw overnight. Rewarm in the microwave or in the oven at 350°F for 5 minutes before serving.
Best Recipe Tips
Best Equipment Tip
- This brownie recipe instructs you to make a cookie dough first, then a brownie batter. Both recipes require you to mix their dry ingredients in a medium bowl as its first step. Good news: you can reuse the same bowl for both the dough and batter. Save yourself from doing more dishes! In fact, you can reuse the same mixing spatulas, too. I mean… it all ends up in the same dessert anyway, lol.
Best Ingredient Tip
- Make sure that the water is very hot, as close to freshly boiled as possible, when you add it to the brownie batter. This is the secret to a super dark and chocolaty brownie! To ensure that my water stays very hot, I pour it into an insulated mug right after boiling. Then, I place a ceramic plate on top of the mug to act as a makeshift lid to trap heat inside.
Best Recipe Technique Tips
- Be mindful when melting the butter for both the cookie dough and brownie batter! You don’t want the butter to sizzle, crackle, or pop. I chop it up into 1-inch cubes then microwave it on low at 10-second intervals. If you don’t have a microwave, melt the. butter in a small sauce pot over medium-low heat. I stir the butter constantly while monitoring it.
- And on that note, it’s better to under-melt the butter than over-melt it. In fact, I like to pull the butter from the microwave/stovetop when there are still a couple of solid chunks left. I then stir the butter by hand to melt these chunks. Doing so ensures that my butter is warm but not overly hot. If the butter is too hot, you might risk scrambling and cooking your eggs since you’re adding them directly to the butter!
- The hardest part about this recipe involves pressing the cookie dough into the pan. It has a tendency to stick to your hands. You can dust your hands lightly in flour, or dip them in a bowl of water and use damp hands to press the dough into the pan—both methods will help prevent the dough from sticking. I suggest pressing dough down into the corners of the pan first, too. Doing so “glues” the parchment paper to the pan and prevents it from sliding around while you work with the rest of the dough.
Best Baking Tips
- It can be hard to tell when the brownies are done. Even when done, a skewer inserted into the center of the pan tends to come out gooey thanks to the Oreo frosting and chocolate chips in the brownies. The best way to test is to stick a skewer right in the middle of the bars, avoiding where any Oreo cookies might be. Stick it halfway through the bars, making sure to avoid penetrating the cookie dough layer. The skewer shouldn’t come out dry (that means the brownies are over-baked) or sludgy (that means the brownies are under-baked). Instead, it should come out with a few crumbs attached.
- Cool the brownies in the pan on a wire rack for 10 minutes, then turn them out into the wire rack to cool completely. If you let the brownies cool in the pan completely, they have a tendency to overbake from the residual heat of the pan!
More Brownie Recipes
- Almond Flour Brownies (Small Batch)
- Baileys Brownies (Small Batch)
- Better-Than-Supernatural Fudge Brownies
- Brookie Bars (Small Batch)
- Fudge Brownies (Small Batch)
- Flourless Gluten Free Cheesecake Brownies
- Supernatural Brownies
More Small Batch Recipes
- Banana Nut Muffins
- Blueberry Muffins
- Chocolate Chip Cookies
- Cinnamon Rolls
- Cranberry Orange Muffins
- Funfetti Sheet Cake
- Lemon Poppy Seed Muffins
- Magic Cookie Bars
- Peach Crumb Bars
- Strawberry Sheet Cake
- Yellow Sheet Cake
Get the Recipe: Small Batch Triple Cookie Brownies For A Loaf Pan
Ingredients
For the Chocolate Chip Cookie Dough
- 6 Tablespoons (1.65 ounces or 47 grams) all-purpose flour
- ¼ teaspoon baking soda
- ¼ teaspoon kosher salt
- 2 Tablespoons (1 ounces or 28 grams) unsalted butter
- 3 Tablespoons tightly packed (1.40 ounces or 40 grams) light OR dark brown sugar
- 1 Tablespoon granulated sugar
- 1 large egg yolk, at room temperature
- ½ teaspoon pure vanilla extract
Assembly
- ¼ cup (2 ounces or 57 grams) bittersweet, dark, OR semisweet chocolate chips
- 8 Classic OR Double Stuf Oreo sandwich cookies
For the Brownie Batter
- ½ cup (3.5 ounces or 99 grams) granulated sugar
- ¼ cup (1.15 ounces or 33 grams) all-purpose flour
- 3 Tablespoons (0.75 ounces or 21 grams) confectioners' sugar, sifted if necessary
- 3 Tablespoons (0.60 ounces or 17 grams) natural unsweetened OR Dutch-processed cocoa powder, sifted if necessary
- ½ teaspoon kosher salt
- 4 Tablespoons (½ stick or 2 ounces or 57 grams) unsalted butter
- 2 large egg yolks, at room temperature
- 2 teaspoons freshly boiled water
- ½ teaspoon pure vanilla extract
For Garnish
- Oreo Mini sandwich cookies
- bittersweet, dark, OR semisweet chocolate chips
Instructions
For The Small Batch Triple Cookie Brownies For A Loaf Pan
- Prep your oven and pan. Position a rack in the center of the oven and preheat the oven to 350°F. Lightly spray a 9 x 5-inch loaf pan with cooking spray and line with parchment paper, leaving a 2-inch overhang on the pan's two long sides. Spray the parchment, too.
- Make the chocolate chip cookie dough. In a medium bowl, whisk together the flour, baking soda, and salt.
- Melt the butter, then mix in the sugars, egg yolk, vanilla, and dry ingredients. Melt the butter in a medium, heatproof bowl in 15- to 20-second intervals, using a heatproof rubber spatula to stir as needed. Pour the sugars over the melted butter and mix with a heatproof rubber spatula until just combined. When melted, add the egg yolk and vanilla and mix until just combined. Gradually mix in the dry ingredients and mix until just combined.
- Start assembling the brownies by pressing the dough into the pan. Transfer the dough to the prepared pan and use a tart tamper or your hands to press it evenly over the bottom of the pan, all the way to the edges.
- Press the chocolate chips and Oreos over the dough. Sprinkle the chocolate chips over the dough. Gently press down on the pieces to meld them into the cookie dough. Arrange 8 Oreos on top of the chocolate chips and dough.
- Make the brownie batter. In a medium bowl, whisk together the granulated sugar, flour, confectioners' sugar, cocoa powder, and salt.
- Melt the butter, then add the egg yolks, water, vanilla, and dry ingredients. Melt the butter in a medium, heatproof bowl in 15- to 20-second intervals, using a heatproof rubber spatula to stir as needed. When melted, add the egg yolks, water and vanilla and mix until just combined. Gradually mix in the dry ingredients and mix until just combined.
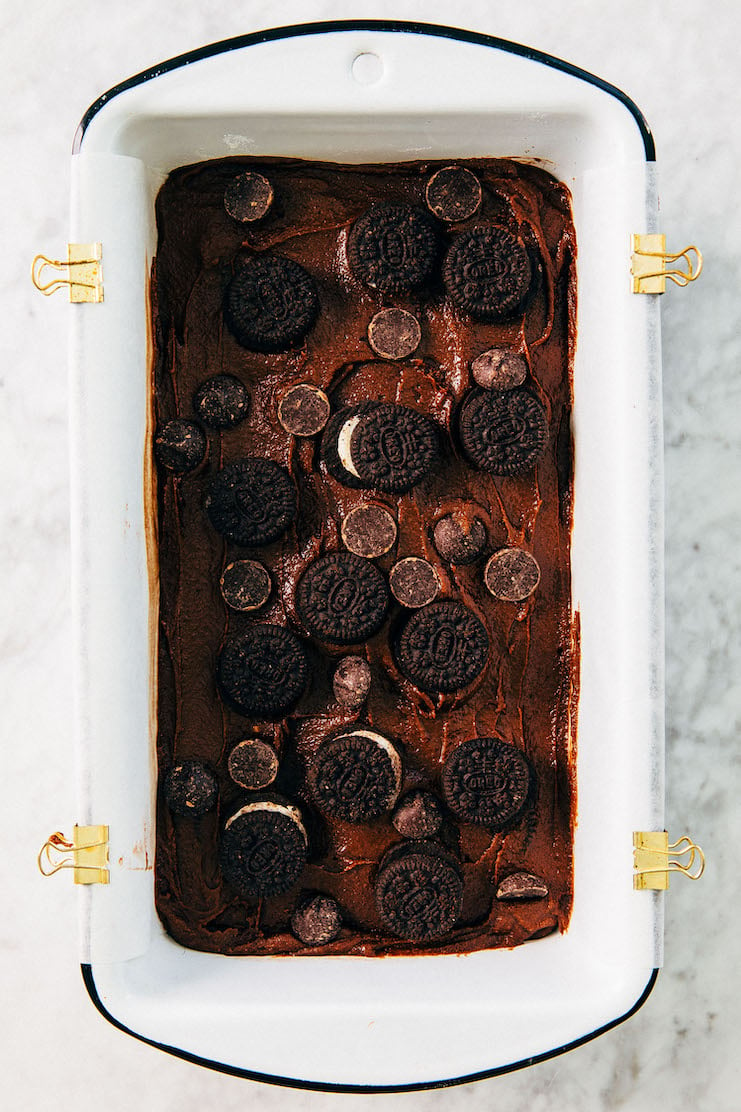
- Finish assembling the brownies. Pour the brownie batter into the prepared pan with the cookie dough and use an offset spatula to smooth the top. Sprinkle the top of the batter with mini Oreos and chocolate chips. Gently press down on the ingredients to meld them into the brownie batter.
- Bake the brownies. Bake for 35 to 40 minutes, or until a skewer inserted into the center of the brownies comes out with a few crumbs attached. Cool on a wire rack for 10 minutes, then run a butter knife or offset spatula along the edges of the pan. Use the overhanging parchment as handles to lift the bars out of the pan and onto the wire rack to cool completely.
- Serve and store. Serve warm, or at room temperature. Use a serrated knife to slice the bar lengthwise. Then, hold the two long slices together and slice them into quarters crosswise to create 8 brownies. The brownies can be stored in an airtight container or zip-top bag at room temperature for up to 3 days.
Notes
- This brownie recipe instructs you to make a cookie dough first, then a brownie batter. Both recipes require you to mix their dry ingredients in a medium bowl as its first step. Good news: you can reuse the same bowl for both the dough and batter. Save yourself from doing more dishes! In fact, you can reuse the same mixing spatulas, too. I mean… it all ends up in the same dessert anyway, lol.
- Make sure that the water is very hot, as close to freshly boiled as possible, when you add it to the brownie batter. This is the secret to a super dark and chocolaty brownie! To ensure that my water stays very hot, I pour it into an insulated mug right after boiling. Then, I place a ceramic plate on top of the mug to act as a makeshift lid to trap heat inside.
- Be mindful when melting the butter for both the cookie dough and brownie batter! You don’t want the butter to sizzle, crackle, or pop. I chop it up into 1-inch cubes then microwave it on low at 10-second intervals. If you don’t have a microwave, melt the. butter in a small sauce pot over medium-low heat. I stir the butter constantly while monitoring it.
- And on that note, it’s better to under-melt the butter than over-melt it. In fact, I like to pull the butter from the microwave/stovetop when there are still a couple of solid chunks left. I then stir the butter by hand to melt these chunks. Doing so ensures that my butter is warm but not overly hot. If the butter is too hot, you might risk scrambling and cooking your eggs since you’re adding them directly to the butter!
- The hardest part about this recipe involves pressing the cookie dough into the pan. It has a tendency to stick to your hands. You can dust your hands lightly in flour, or dip them in a bowl of water and use damp hands to press the dough into the pan—both methods will help prevent the dough from sticking. I suggest pressing dough down into the corners of the pan first, too. Doing so “glues” the parchment paper to the pan and prevents it from sliding around while you work with the rest of the dough.
- It can be hard to tell when the brownies are done. Even when done, a skewer inserted into the center of the pan tends to come out gooey thanks to the Oreo frosting and chocolate chips in the brownies. The best way to test is to stick a skewer right in the middle of the bars, avoiding where any Oreo cookies might be. Stick it halfway through the bars, making sure to avoid penetrating the cookie dough layer. The skewer shouldn’t come out dry (that means the brownies are over-baked) or sludgy (that means the brownies are under-baked). Instead, it should come out with a few crumbs attached.
- Cool the brownies in the pan on a wire rack for 10 minutes, then turn them out into the wire rack to cool completely. If you let the brownies cool in the pan completely, they have a tendency to overbake from the residual heat of the pan!
get new recipes via email:

buy the book
Weeknight Baking:
Recipes to Fit your Schedule
Over the past several years of running Hummingbird High, I kept a crucial aspect of my life hidden from my readers: I had a full-time, extremely demanding job in the tech world. In my debut cookbook, Weeknight Baking, I finally reveal the secrets to baking delicious desserts on a tight schedule.
Did you make this recipe?
Please leave a comment and rating for the recipe using the form below!
Your ratings make it easier to find the recipe online, and I’m always looking for ways to improve Hummingbird High.
Please call them Triple Threat Brownies. Or really any of the other names. Just please not slutty. I’ve never felt more uncomfortable reading a recipe and I don’t even want to print it before the name change. Thank youuu.
yeaaaaa the OG name is SO cringe!!!
Man this all looks so good! I can’t wait to try out these small batch slutty brownies this week! Not sure if these will last all week #SweetTooth
I have a question about salt. When using a recipe from an old cookbook, (or my grandmother, for example), the salt used was most likely table salt. Should I use table salt there or substitute kosher salt (and how much)? Thanks!
I would use table salt in that recipe if that’s what it specified/implied. However, I would use kosher salt in this brownie recipe since that’s what I specified 🙂
I have been saving this recipe up for days, so of course I started it without reading every last instruction first. Reading the ingredients section for the brownie batter, no eggs are listed. But the instructions for that part of the mix mentions yolks! I assumed two and not more, so crossed my fingers and carried on. And DANG THESE ARE DELICIOUS.
Oh no! I’m sorry about that—that’s so weird, I updated the recipe with the right amount of egg yolks (2 was correct!) a few days ago. Let me know if you still can’t see the egg yolks in the brownie ingredients list!
I just made these and they are great. I used a 9×5 loaf pan but my cookie layer had to be almost paper thin to go up all the way on the sides but the picture looks like the cookie layer is much thicker. I’d prefer a thicker cookie layer. Can you tell me how you got the cookie layer in the picture so thick?
Hi! The cookie layer should expand and puff in the oven. If that didn’t happen, feel free to double the quantities for the cookie layer… just note that you’ll end up with REALLY thick brownies that are almost loaf cake like. It will also bake for longer.
If that doesn’t sound ideal, the other route is to use an 8 x 4-inch pan. That will result in a thicker cookie base without having to alter any ingredients!
The brownies look delicious and the detailed instructions are most helpful – but when are you going to rename the recipe as promised?
I find it wonderful that you took the time to do poll on Instagram to find a new name and it’s wonderful that you put so much thought and consideration into renaming the recipe. I agree wholeheartedly with the points you’re making.
I’m just perplexed to see that you continue to use the word “s****y brownies” throughout the rest of the post.
Triple Threat Brownies has my vote, too.
They say the road to hell is paved with good intentions, and the last few months have been so busy and chaotic that this fell further and further down on my To-Do List until I forgot about it completely! Thanks for keeping me accountable; I’ve moved this up on my To-Do list again.
I appreciate that you went through all the trouble to run multiple polls about changing the name, but 2 years later they’re still called slutty. The fact that you still have a recipe up with this name really just makes you appear just as judgy and shaming as whoever originally came up with this problematic (and really just stupid) name – which, after actually reading the post, you clearly aren’t! I know life gets busy and this probably just fell off your radar, but PLEASE change it already.
P.S. add my vote to Triple Threat!
Girl, grow up. It’s a brownie recipe. There’s a lot more to worry about than this. Don’t bring your personal trauma into this.