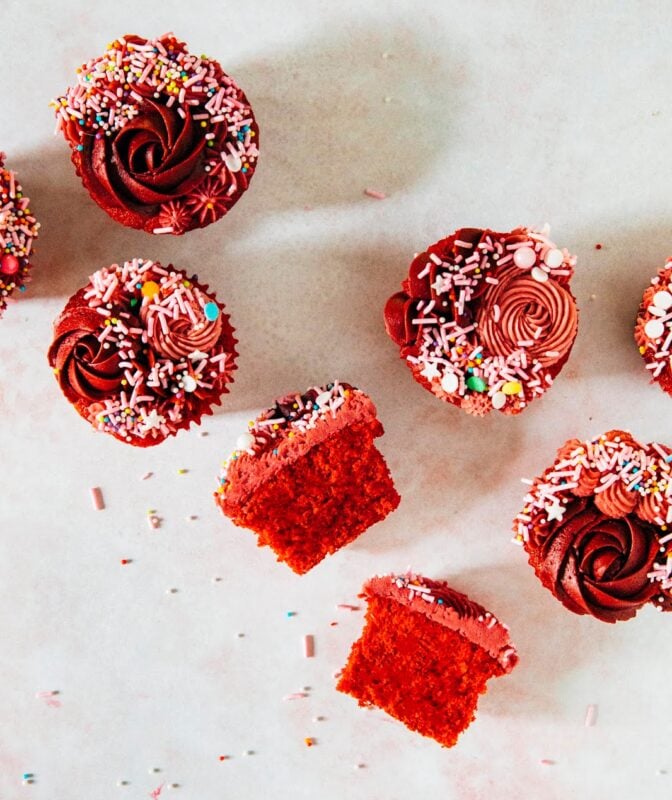
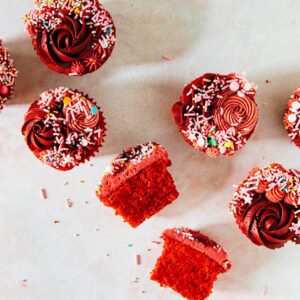
This red velvet cupcake recipe is adapted from my new cookbook, Weeknight Baking, and is made modern with a hint of cocoa powder and orange zest—jump to the recipe! The red velvet cupcakes are then decorated with a fancy orange blossom-flavored Swiss meringue buttercream frosting in celebration of my blog’s eight birthday. Cheers!

Happy EIGHT birthday to Hummingbird High! It’s hard for me to imagine that, eight years ago, I randomly popped open my laptop and created this space from scratch. Since then, a LOT has happened. I’ve lived in eight different apartments/houses (including one of my own!), moved to Portland, San Francisco, New York, and back to Portland again, and held three different jobs in both finance and tech before quitting to blog full-time and write a cookbook (that came out last week!).
But I’m not going to lie—I procrastinated writing this post. It was not for lack of things to say; my initial plan was to have this post complete my #tenyearchallenge series and focus on me and Erlend’s relationship (our unofficial TEN YEAR anniversary was last month). But then I started reading anniversary posts from previous years, and got particularly hung up on this post (featuring a really delightful-looking ube layer cake!) from last year and the year before (with a really pretty hummingbird cake, too).
In those posts, you can see my anxiety about the longevity of Hummingbird High. Although I still very much love this space, I find myself thinking about how much longer it’s going to last on an almost daily basis. Because the blog world has changed dramatically in the last eight years. While I love to bake and will always continue to do so, blogging is a different matter entirely—over the last few years, the act of “blogging” has definitely shifted from “writing about the thing you love doing” to things like “how to monetize your passion”, “how to grow your audience and social media following”, and “how to write for SEO”. Still a worthy endeavor, sure, but definitely less about baking and food (you know, the things that drove me to blogging in the first place).
I thought that writing a cookbook would help capture and bottle the magic of those early years of blogging—and in many ways, it did! As opposed to focusing on the business development aspect of blogging, my days instead were filled with developing recipes and staging and planning photoshoots. I worked my butt off, dedicating the last few years of my life to making Weeknight Baking the very best it could be. And that made my anniversary post from last year especially resonant—in it, I tell you guys all about the big plans I had to potentially prepare myself financially for a future without Hummingbird High.
But the truth is, a year later, I literally have accomplished none of what I promised.
Almost all my energy went into Weeknight Baking instead. And while I’m very proud of the recipes in the book, I find myself wondering if that was the right decision I’d underestimated the amount of time, effort, and heart really needed to go into it all. And that was even with the understanding that the book was ultimately going to be passion project. In pouring all my resources into the book, I’d neglected, well… me. I am no closer to figuring out what’s next after Hummingbird High.
Maybe that doesn’t matter. Like I said last year, even if I stop relying on Hummingbird High as my primary source of income (like I did in the last two years), I’ll still be here, baking new recipes and sharing them with you no matter what. I started this blog because I genuinely love to bake; everything else—the blogging, the photography, the sponsored posts, the followers, and the cookbook even—has been a wonderful yet secondary privilege. My hope is that my love for baking, desserts, and all things sweet will keep Hummingbird High going for many years to come.

Best Red Velvet Cake
When brainstorming recipes to celebrate my blogiversary, I found myself drawn to the idea of red velvet cupcakes repeatedly. I’ve actually made a red velvet cake for a few of my blog anniversaries, trying out new recipes here and there. That’s because in many ways, red velvet cupcakes marked the start of my baking career—I was baking them long before Hummingbird High was officially a thing! Red velvet cupcakes were the first recipe I ever baked from scratch (ie, not from a box mix) in my college dorm kitchen. I’d tried making them from a box mix, but was really dissatisfied by their flavor. I ended up googling a recipe, and baking the first search result. They happened to be for Paula Deen’s red velvet cupcakes with cream cheese frosting.
For my 21-year-old palette, Paula Deen’s recipe was the height of sophistication—they were made with lots of oil, butter, and cream cheese. With that much fat (seriously, look at how much oil is in that recipe, lol), anything is delicious! It was only later, in the summer after I’d graduated, that I had a slice of red velvet cake that then became my gold standard. I was in New York City for the summer visiting Erlend (we were not officially dating yet!) and he took me to a Morningside Heights BBQ restaurant that also offered slices of red velvet cake from a nearby Harlem bakery. The BBQ wasn’t very good, but the red velvet cake was no other: incredibly moist with deep notes of buttermilk, cocoa, and even orange zest.

What flavor is red velvet?
It was that cake that I had in my mind when I was developing the red velvet cake recipe for Weeknight Baking. In the past, bakers used beetroot to naturally dye the cake its signature red color. However, when I tried incorporating beets into my recipe, I found that it tasted too much like vegetables (which is no bueno—you’re eating cake, after all)! I’ve also heard folks describe red velvet as a cross between chocolate and vanilla cake; some food historians argue that the red color comes from cocoa powder’s reaction to the buttermilk and vinegar in the recipe. This is what red velvet tastes like to me—mostly buttermilk and vanilla with just the slightest hint of cocoa. My own recipe only uses about 2 teaspoons of cocoa powder.
But of course, no red velvet cake is without a creamy frosting. Traditionally, red velvet cakes were topped with ermine frosting. Unlike traditional American buttercream frostings, ermine frosting is made by cooking flour, sugar, and butter together to make a roux (similar to the roux you make for casseroles, lol). I gave it a try a few years back and found that it was a lot of work without that much pay off. I recommend sticking to something like cream cheese or buttercream frosting instead.
Although I ordinarily prefer a simple American buttercream frosting, for these cupcakes, I used a fancier Swiss meringue buttercream. Swiss meringue buttercream is less sweet than its American counterpart and has a perfect silky, smooth texture that’s easy to pipe into shapes. For these cupcakes, I used a variety of tips and just piped swirls, spirals, and dollops at random. I didn’t really think about it too hard, but they still came out pretty cute! To complement the orange zest in the cake batter, I also flavored the extract with orange blossom water—but in a pinch, you can use vanilla or orange extract, too.
And finally, before I leave you with the baker’s notes, I wanted to include a photo of the first batch of red velvet cupcakes I made from scratch:
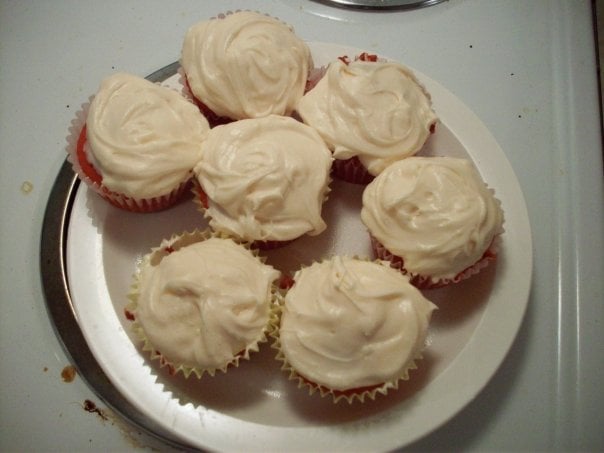
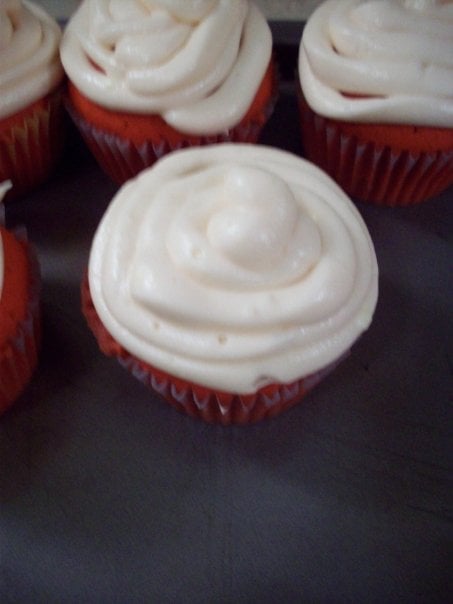
Like I said earlier, I made these cupcakes my senior year of college (a solid ten years ago!!!) using Paula Deen’s red velvet cupcake recipe. For the second picture, I even put some of the frosting in a Ziploc bag and cut off a corner to “pipe” the frosting! I was SO proud of them at the time (I posted these guys on FACEBOOK, lol), but let’s be honest—my red velvet cupcakes today (and my food photography!) are definitely a #glowup, lol.
See previous anniversary posts here:
- Ube Layer Cake for Seven Years of Hummingbird High
- Hummingbird Cake for Six Years of Hummingbird High
- The Best Red Velvet Cake for Five Years of Hummingbird High
- A Naked Red Velvet Cale for Four Years of Hummingbird High
- Homemade Funfetti Cake for Three Years of Hummingbird High
- Pink Champagne Cupcakes for Two Years of Hummingbird High
- Confetti Cookies for One Year of Hummingbird High

Best Red Velvet Cupcake Recipe Tips
- Red food coloring is essential for this recipe. It’s available in most grocery stores in individual large bottles or in a small bottle as part of a pack of four colors. The red food coloring in a pack will be just enough for this recipe. I suggest buying the large bottle so you always have some on hand for spontaneous baking projects!
- When making this cake, it’s especially important to prep the baking soda and vinegar in their own separate ramekins. You’ll combine the two ingredients in the final step of the recipe. When you do, the mixture will bubble and hiss—throw it immediately into the batter and mix, mix, mix. This helps give the cake a light and airy texture that is unique to red velvet.
- Let me warn you now—Swiss meringue buttercream can be finnicky to make. Make sure your butter is completely at room temperature (that is, between 65°F to 70°F) before adding it to the meringue. If it’s too melty, your Swiss buttercream will turn out like soup—but no worries, we can fix this! Simply stick it in the fridge for 15 minutes, before beating again. Alternatively, if your butter is too cold, the buttercream can curdle. If you find this happening, scoop out ¼ cup of the frosting (there’s no need to be precise—you can just eyeball it), microwave it for 15 seconds, then add it back to the frosting while beating it on medium-high speed. That should help bring the rest of the buttercream down in temperature and prevent any further curdling!
- To pipe the cupcakes, I used three tips: Ateco’s #847, and Wilton’s 4B and 1M tips. I divided my buttercream into three batches and colored each batch with varying amounts of maroon food coloring to create three shades of pink, maroon, and red. You can also just leave the buttercream white—it’ll still be plenty cute!
Get the Recipe: Red Velvet Cupcake Recipe
Ingredients
For the Red Velvet Cupcakes
- 2 cups (8 ounces) cake flour
- 2 teaspoons natural unsweetened cocoa powder, sifted if lumpy
- ¾ teaspoon baking powder
- ½ teaspoon kosher salt
- 1 ⅓ cups (9.35 ounces) granulated sugar
- Zest of 1 small to medium orange (about 1 tablespoon)
- 6 tablespoons 3 ounces unsalted butter, at room temperature
- ⅓ cup (2.65 ounces) canola oil
- 2 large eggs
- 1 tablespoon red food coloring
- 1 tablespoon pure vanilla extract
- 1 cup (8 ounces) buttermilk
- 1 teaspoon baking soda
- 1 teaspoon distilled white vinegar
For the Orange Blossom Swiss Meringue Buttercream Frosting
- ⅔ cup (6 ounces) egg whites, from about 5 large eggs
- a scant 1 ⅔ cup (11 ounces) granulated sugar
- ¾ teaspoon kosher salt
- ¼ teaspoon cream of tartar
- 2 ½ cups (20 ounces) unsalted butter, at room temperature and cut into 1-inch cubes
- 1 tablespoon orange blossom water
- maroon food coloring, I one from this Americolor kit
Equipment
- Special Equipment: a candy thermometer (preferably digital)
Instructions
For the Red Velvet Cupcakes
- Position a rack in the center of the oven and preheat the oven to 350°F. Line two muffin tins with paper liners.
- In a medium bowl, whisk together the flour, cocoa powder, baking powder, and salt.
- In the bowl of a stand mixer fitted with the paddle attachment, combine the sugar and orange zest. Use your fingers to rub the zest into the sugar—this will infuse the sugar with oils from the zest. Add the butter and oil and beat on medium until light, fluffy, and doubled in volume, 2 to 3 minutes, using a rubber spatula to scrape down the bottom and sides of the bowl as necessary. Reduce the mixer to low and add the eggs one at a time, adding the next egg only after the previous one has been fully incorporated, scraping down the bottom and sides of the bowl after each addition. Add the food coloring and vanilla and beat until the batter is a uniform red color.
- With the mixer on low, gradually add the dry ingredients in three parts, alternating with the buttermilk, beginning and ending with the dry ingredients. Beat until the last of the dry ingredients are just combined. Scrape down the bottom and sides of the bowl once more and beat for 30 seconds.
- Working quickly, place the baking soda in a small ramekin, add the vinegar, and whisk—the mixture will start to bubble and fizz almost immediately. With the mixer on low, pour the vinegar mixture into the cake batter and increase to medium, beating for an additional 30 seconds.
- Use a cookie dough scoop to fill each paper liner two-thirds of the way. Bake for 20 to 25 minutes. When done, the top of the cake should bounce back when gently pressed and a skewer inserted into the center of the cake should come out with a few crumbs attached. Cool completely in the pan(s) on a wire rack before frosting.
For the Orange Blossom Swiss Meringue Buttercream Frosting
- Fill a medium sauce pot with at least 1 ½ inches of water and place over medium-high heat until steaming hot, then adjust the temperature to maintain a gentle simmer.
- Combine the egg whites, sugar, salt, and cream of tartar in a medium, heatproof glass bowl and whisk to combine. Place the glass bowl over the medium sauce pot to create a homemade bain-marie, ensuring that the bottom of the glass bowl does not touch the steaming water. Fix a candy thermometer to the side of the bowl and use a rubber spatula to occasionally stir and scrape down the egg white mixture from the sides of the bowl as it warms to 185°F. This should only take around 10 to 12 minutes, so if the mixture is moving slowly, don't be afraid to turn up the heat!
- Once the egg white mixture reaches 185°F, transfer immediately to the bowl of a stand mixer fitted with a whisk attachment. Turn on the mixer to its highest setting and whip the egg whites for 10 minutes to create a glossy, stiff meringue that is cool to the touch (around 90°F).
- Once you've made the meringue, turn off the mixer and use a rubber spatula to scrape any excess meringue off the whisk attachment and back into the bowl. Swap out the whisk attachment for the paddle attachment and turn the mixer back on to a medium speed. Add the butter slowly, adding 1 or 2 tablespoons to the mixture at a time. Initially, the volume of the meringue will decrease dramatically and it will seem like the mixture is too liquidy — but as you add more butter, the mixture will thicken and cool. In the end, the buttercream should be thick, creamy, and soft but not runny.
- Reduce the mixer speed back to its slowest setting and add the orange blossom water. Use the buttercream right away; even though the buttercream will look like it’s too soft, it’s actually a dream to pipe with. Unless it’s a super hot day (above 85°F), there’s no need to refrigerate it for it to stiffen—doing so will just make it harder to work with.