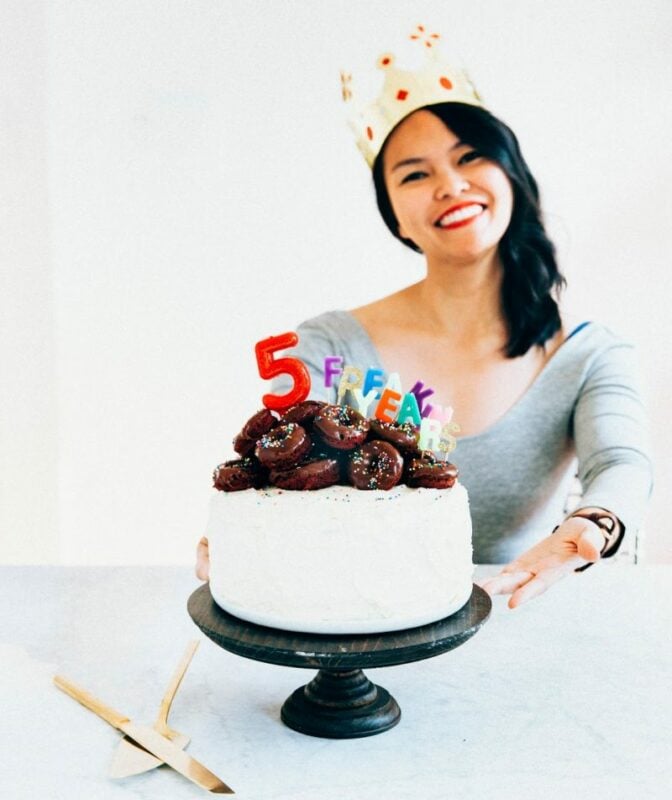
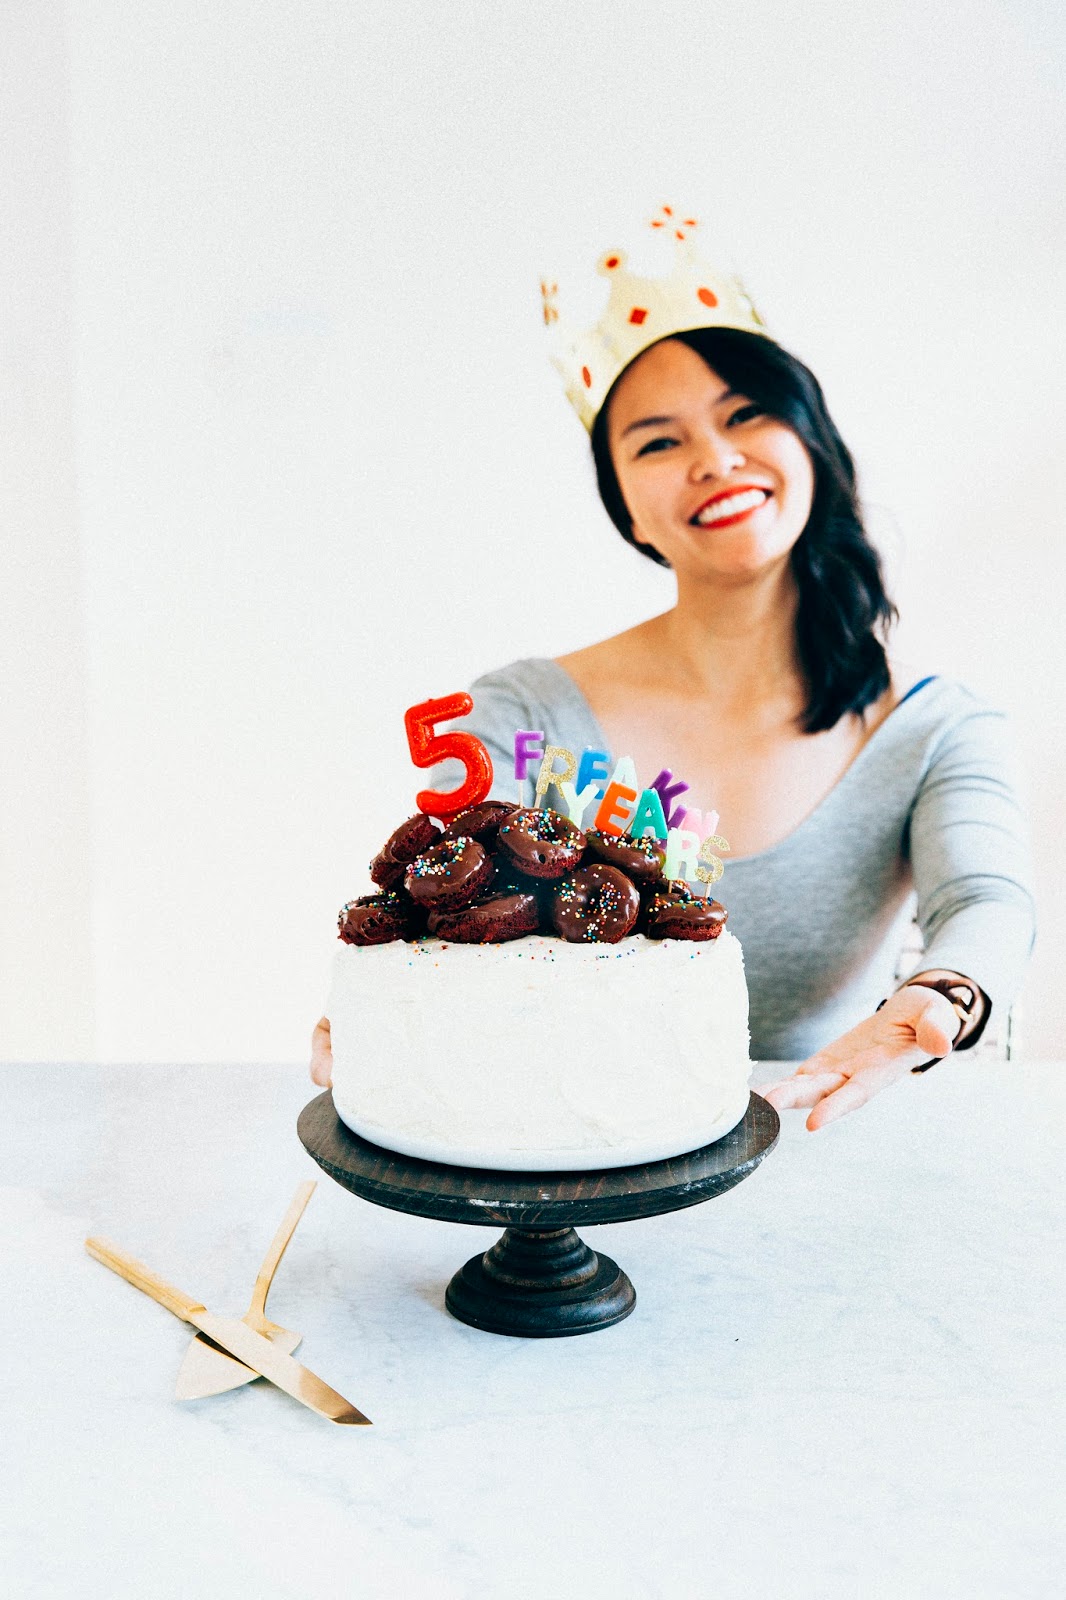
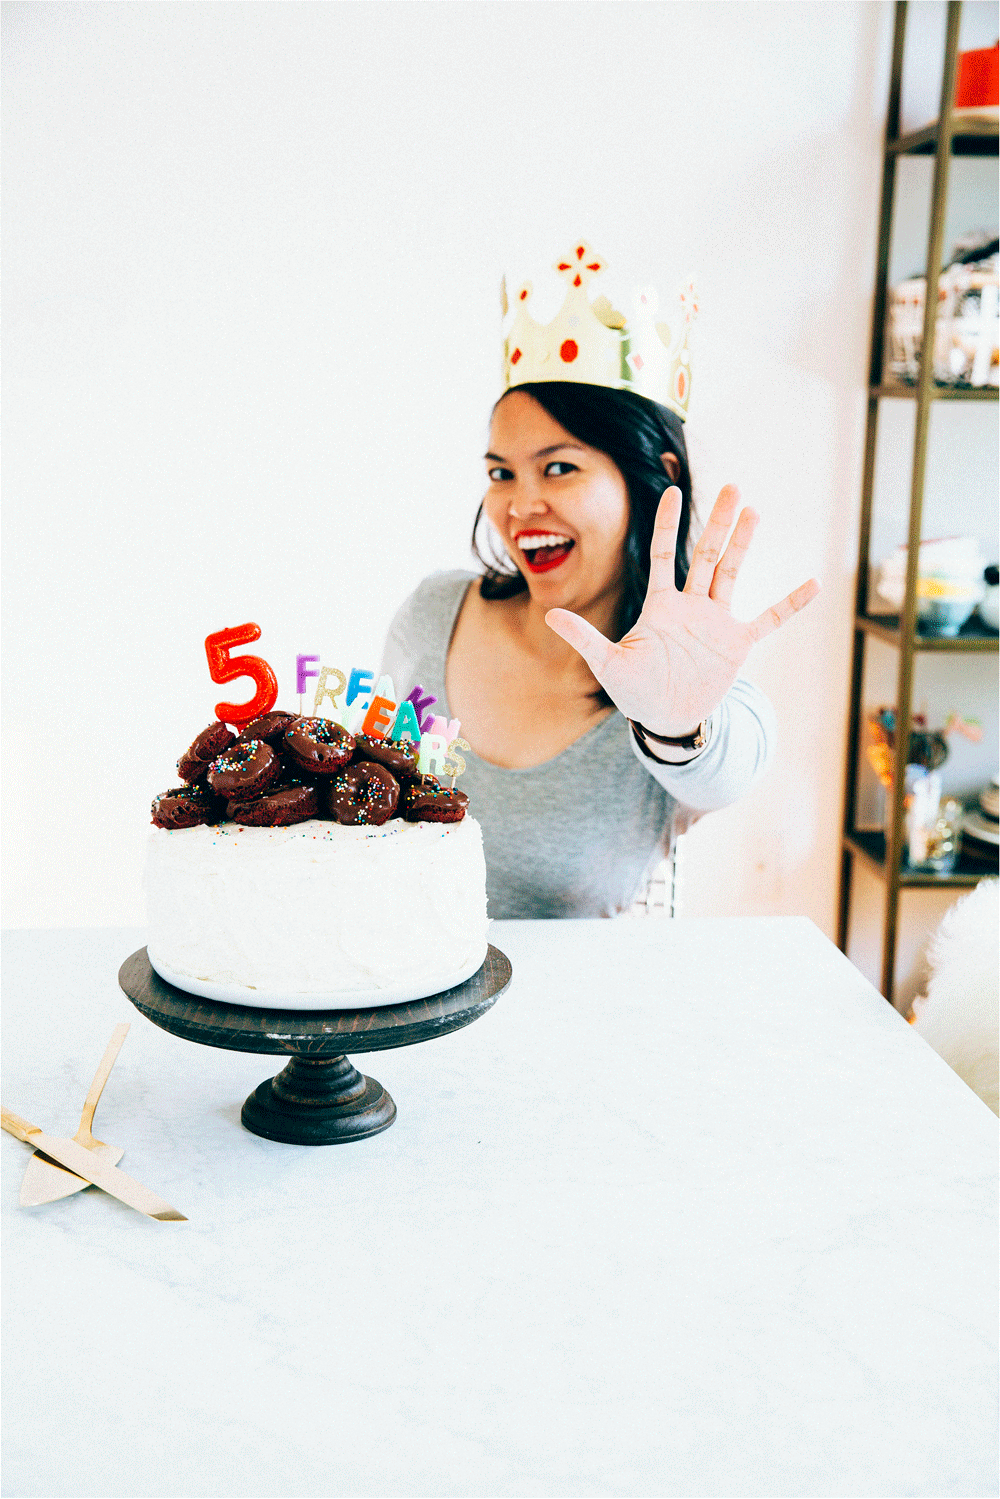
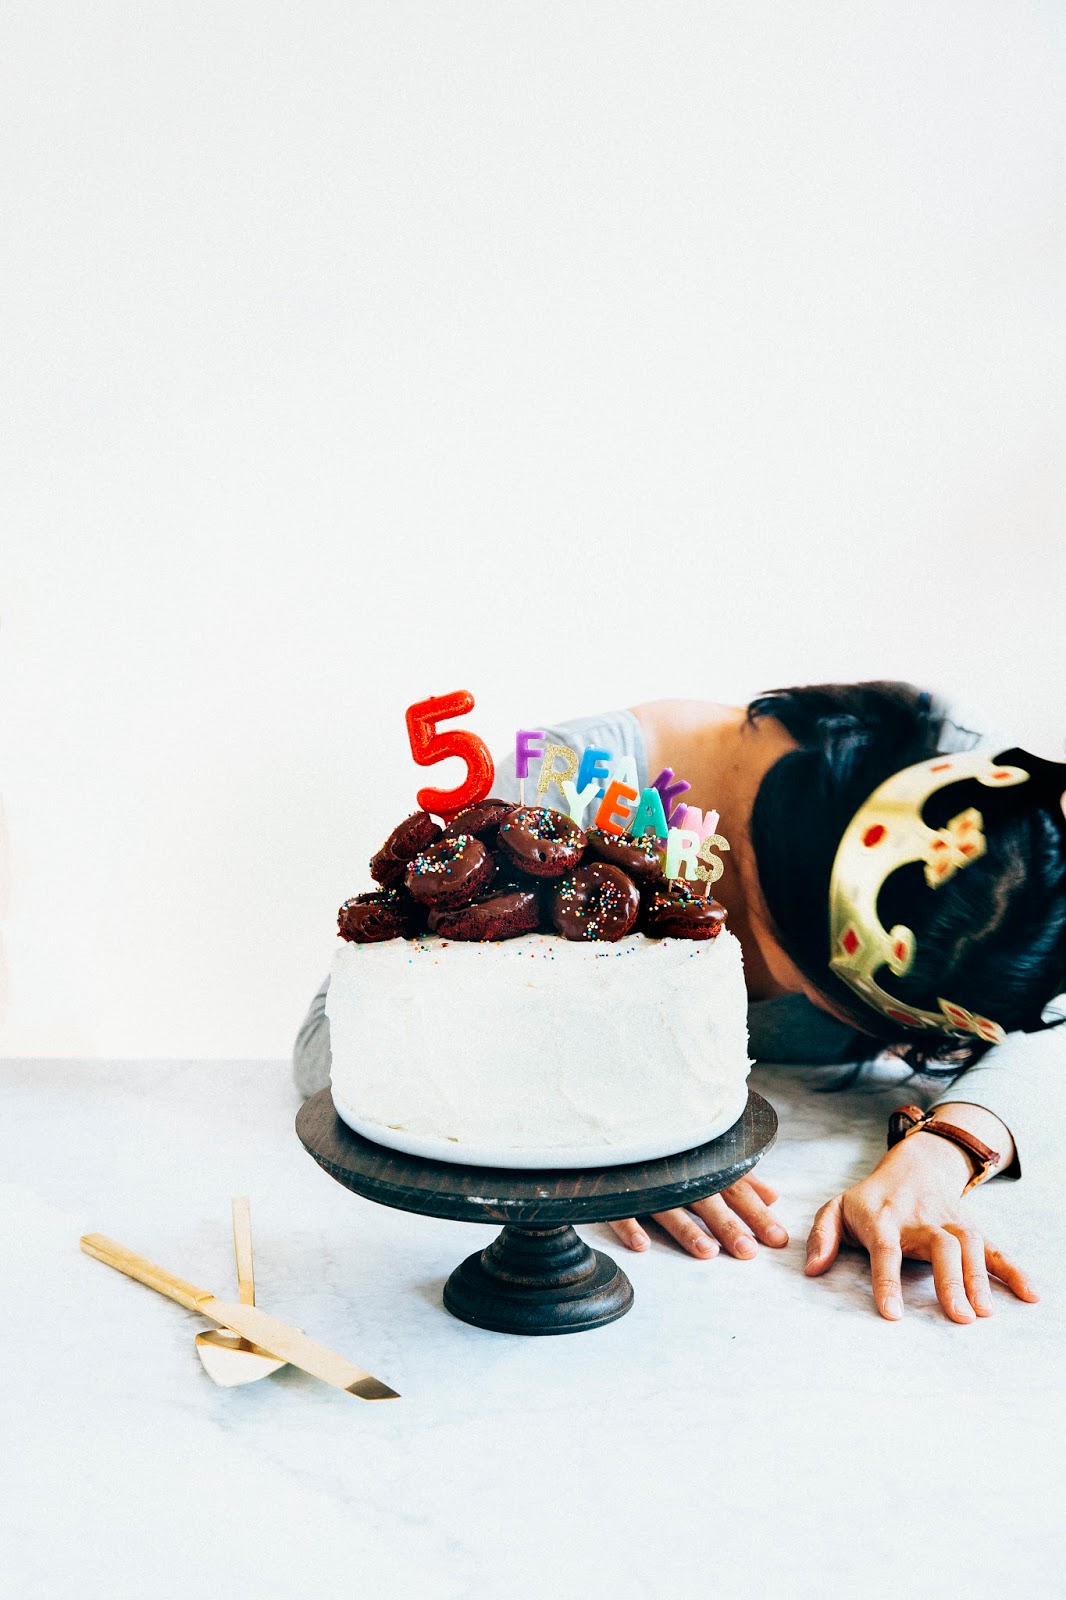
Today is my blog’s fifth birthday, and I can hardly believe it. Five freaking years, indeed!
And as per tradition, every year my blog’s birthday rolls around, I like to look back on its accomplishments and see how it’s grown and progressed. The first year, with these confetti cookies from (the now sorta lame) Momofuku Milk Bar, I was ecstatic. I talked about all the things I’d learned about blogging, how hard it was, and how excited I was to do more. The second year were some pink champagne cupcakes and my first giveaway; I talked about the accomplishments of the year (including my first Saveur nomination!) and upping my photo game with a new camera, Photoshop classes, and Instagram. The third year, with the help of Molly’s now crazy famous funfetti cake, I got real and talked about why I started this blog and how it inadvertently lifted me from a bout of depression. The fourth year, with a naked red velvet cake, I went even further and talked about all the new friends and relationships that are a direct result of this blog, and how grateful I am for all of it.
And as usual, this year, I am equal parts excited, motivated, nostalgic, thankful, and perhaps a new emotion: exhausted.
Maybe that’s not what you guys want to hear, especially at a time that’s supposed to be about celebration and accomplishment. But I’ve never been one to shy away from real talk when it’s needed, and I think it’s time for another one of those posts.
I don’t consider myself a veteran blogger. There are some folks who have been doing it since 2000s, while the rest of us were still in middle school updating our MySpace pages and chatting on AIM. In theory, five years is nothing compared to ten, fifteen. But still. In that time, I’ve watched with wonder, and almost a lack of control, as my blog turned into a hobby that I would work on when I felt like it to a small business that pays its own taxes, has its own agent and agency, and adheres to client contracts, SOWs, and FTC regulations.
But unfortunately, with this transition of blogging for a hobby to basically running a small business in addition to my full-time job, I’ve burnt myself out. Because over the last few years, the way I talked about my blog to close friends and families changed. The response to “What are your plans this weekend?” went from “Oh! I’m planning on trying out this recipe I bookmarked last week that I’ve been curious about for ages!” to “I have to develop a recipe for a client that requires this ingredient and make edits for a post for another client.” Reactions to the photos I saw on my Instagram stream went from “Oh, that’s gorgeous! I love that! Good for them!” to “What the fuck?! How does that person have so much engagement but have less followers than me?” The change was subtle and slow, but one day it was there all at once.
And this is where it gets tricky. Five years ago, it was rare to find people who blogged full time. Quite frankly, the opportunities weren’t there. But these days, brands have almost caught up. Bloggers can now earn a decent living working with companies, advertising, freelancing, and more. And I genuinely, genuinely believe that’s awesome. As I’ve said in the past, we all work too hard and too much for blogging to not be recognized as a legitimate career. I recognize that I’m incredibly lucky to have had the opportunities that were granted to me.
But at the same time, I think those opportunities might be killing my love for my blog.
Because those very same opportunities have made it difficult for me to see my blog in other terms besides its analytics. When every agent, agency, brand, company, and (if we’re being honest) blogger is judging your worth by your pageviews and social media numbers, it’s incredibly hard not to start to do so yourself. From there on, it’s easy to get taken over by The Bug, to get sucked into the game of “how to grow your blog from zero to a million”, and to try and keep up with the ever increasing demands of running a “successful” blog and all the damn internet trends that drive people to blogs and accounts (Tasty videos, I’m looking at you). The market is more saturated than ever, with more and more talented folks joining the game and doing all the easy tricks and hacks to grow fast (like what on earth is a feedfeed editor and why does they all seem to drive so much Instagram engagement?). It’s harder to get noticed and stay noticed. And with my focus now on keeping up with all those things and struggling to stay relevant, the reasons why I started blogging and why I kept on doing so for so long — my love for baking, photography, and my friends — are almost forgotten. Or at the very least, seem very, very far away.
There are days where I legitimately feel like I no longer enjoy what I do here.
So what do I do from here?
I’m wrapping up a few long term partnerships at the end of the year, and then I’m likely scaling back from all the events, sponsored posts, and trips. I’ll make an exception for the companies I really like and think is a good fit, but put my foot down on the ones I don’t (even more than I already do, because you should see three-quarters of the crap that lands in my inbox). I’ll start writing more about non-baking topics that interest me, even though it’ll probably make half of you guys yawn. And for several years, I’ve been following a strict editorial calendar dictating when and what to post. Haha, bye boi to that.
Because I recently read a post from Dine and Dish about slow blogging that I really, genuinely enjoyed and took to heart (in fact, it partially inspired this post!) . You can read more about it here, but the short of the long is that slow blogging is the focus on crafting meaningful posts at your own pace. For me, that means ignoring all those trends and pressures that I’ve been sucked into, and instead allowing myself to explore the new skills, topics, and recipes that genuinely interest me.
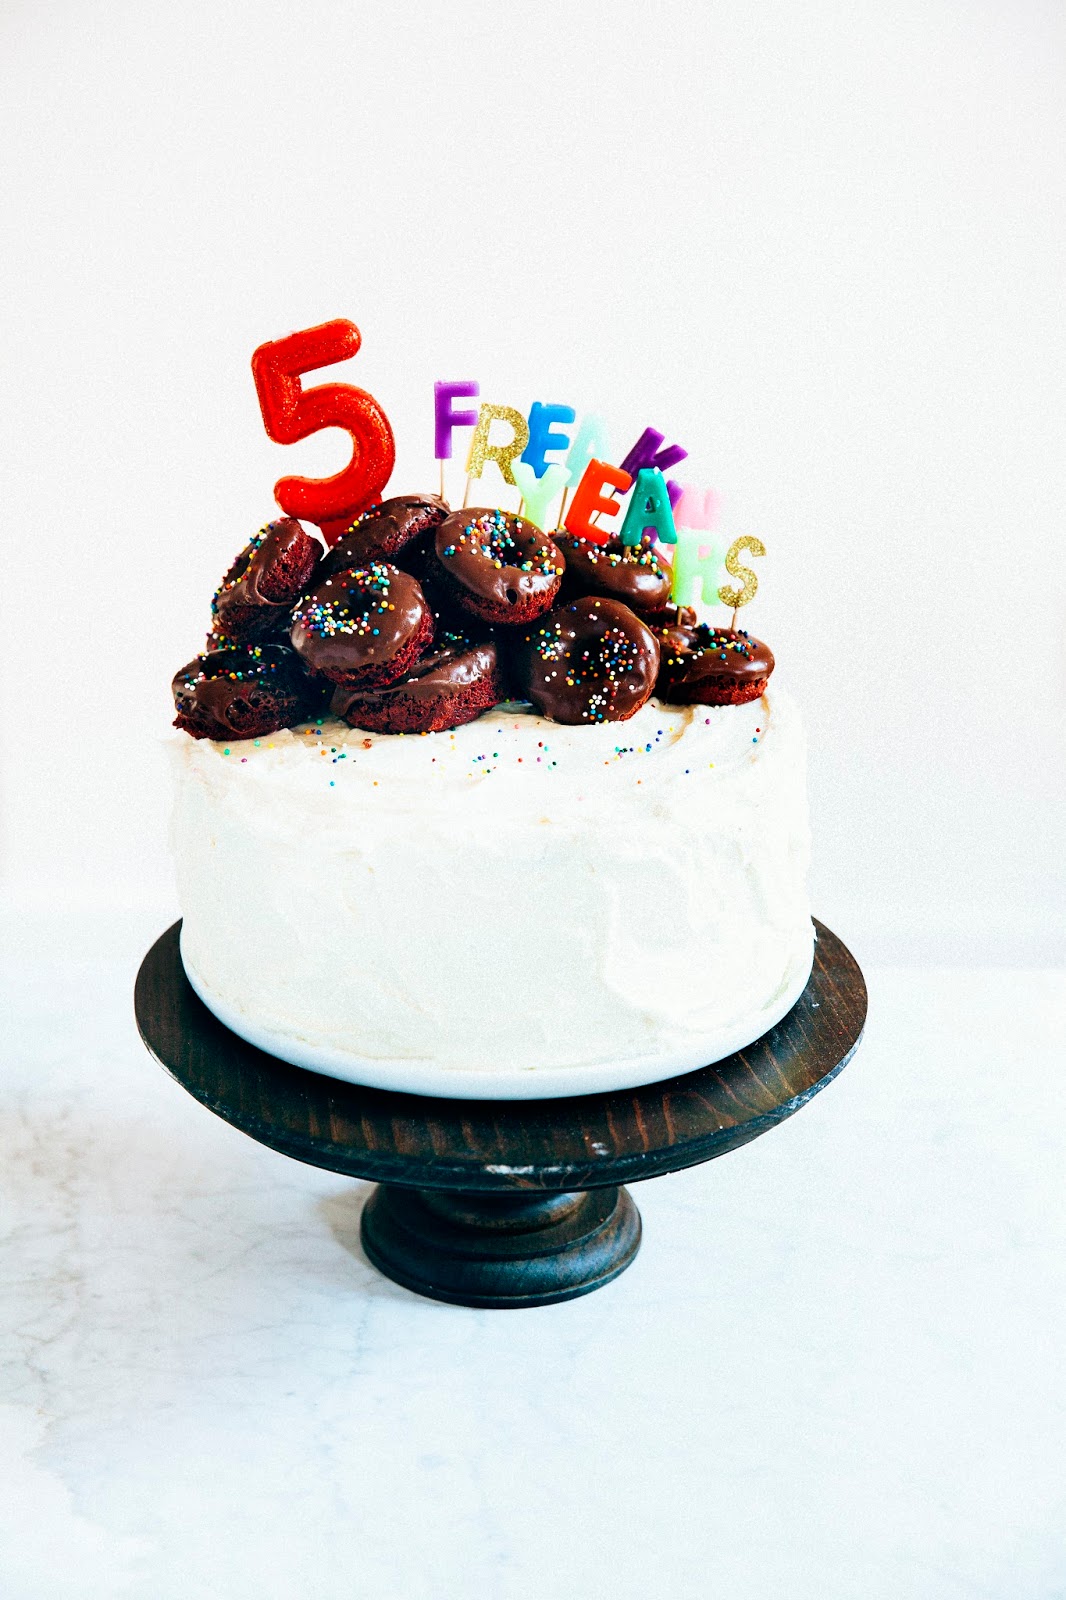
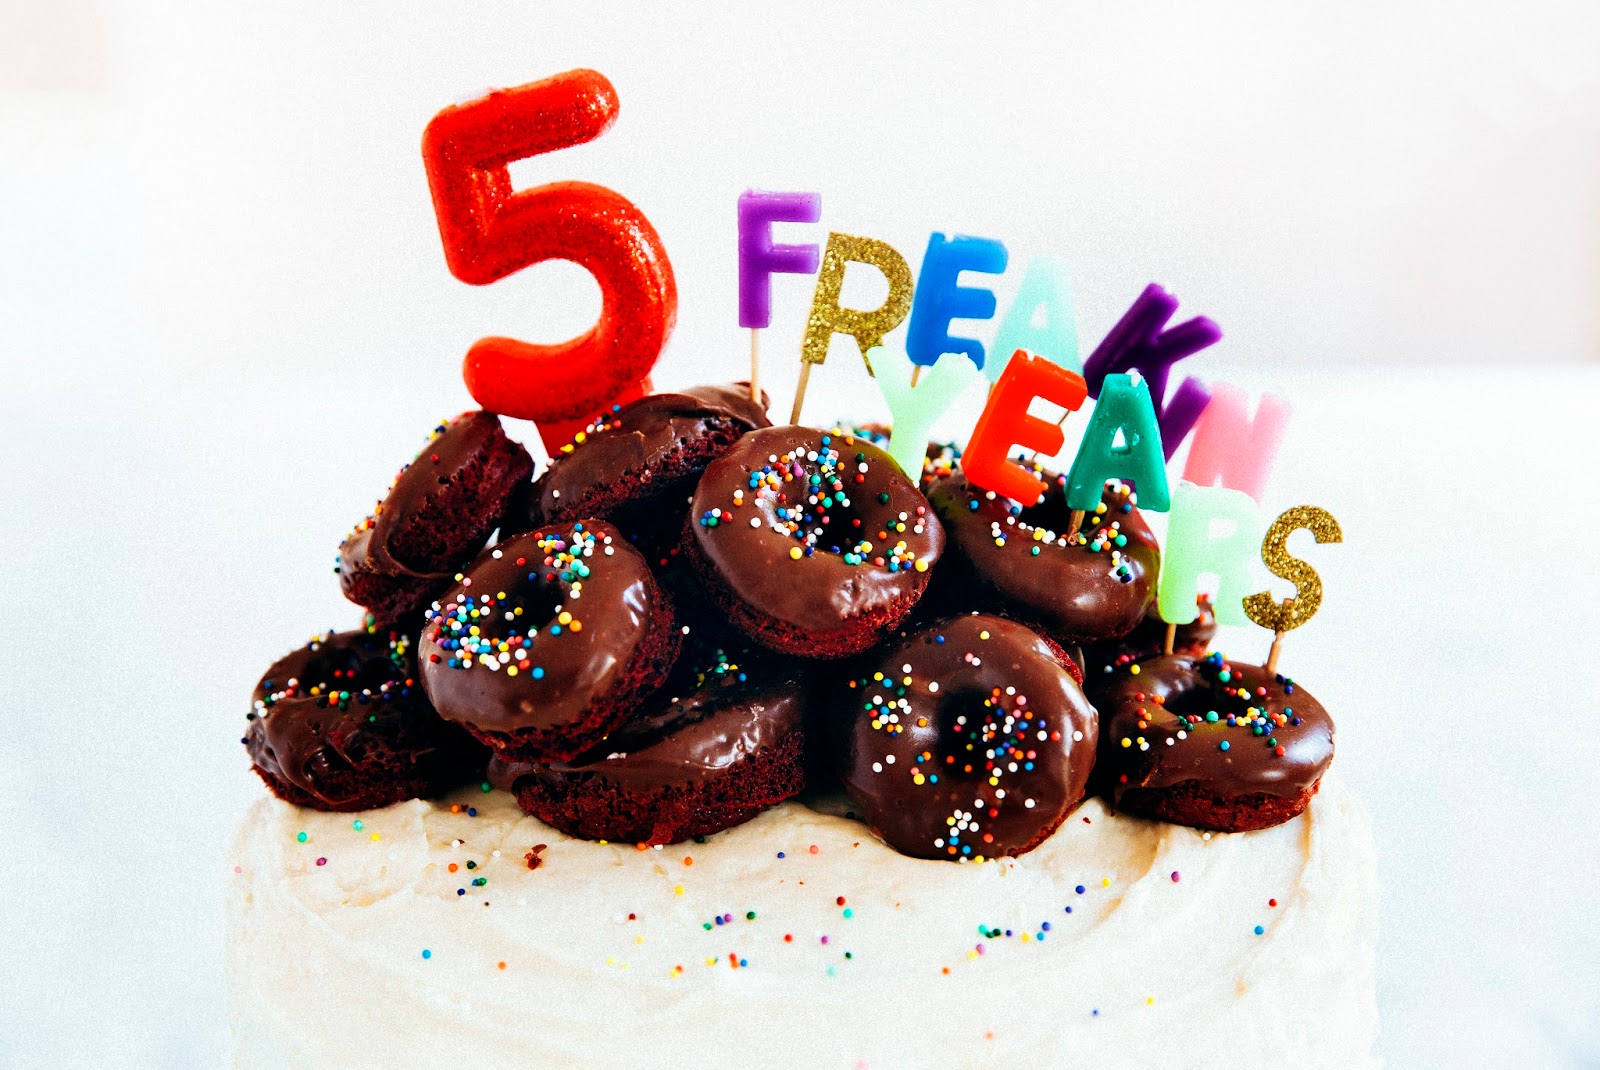
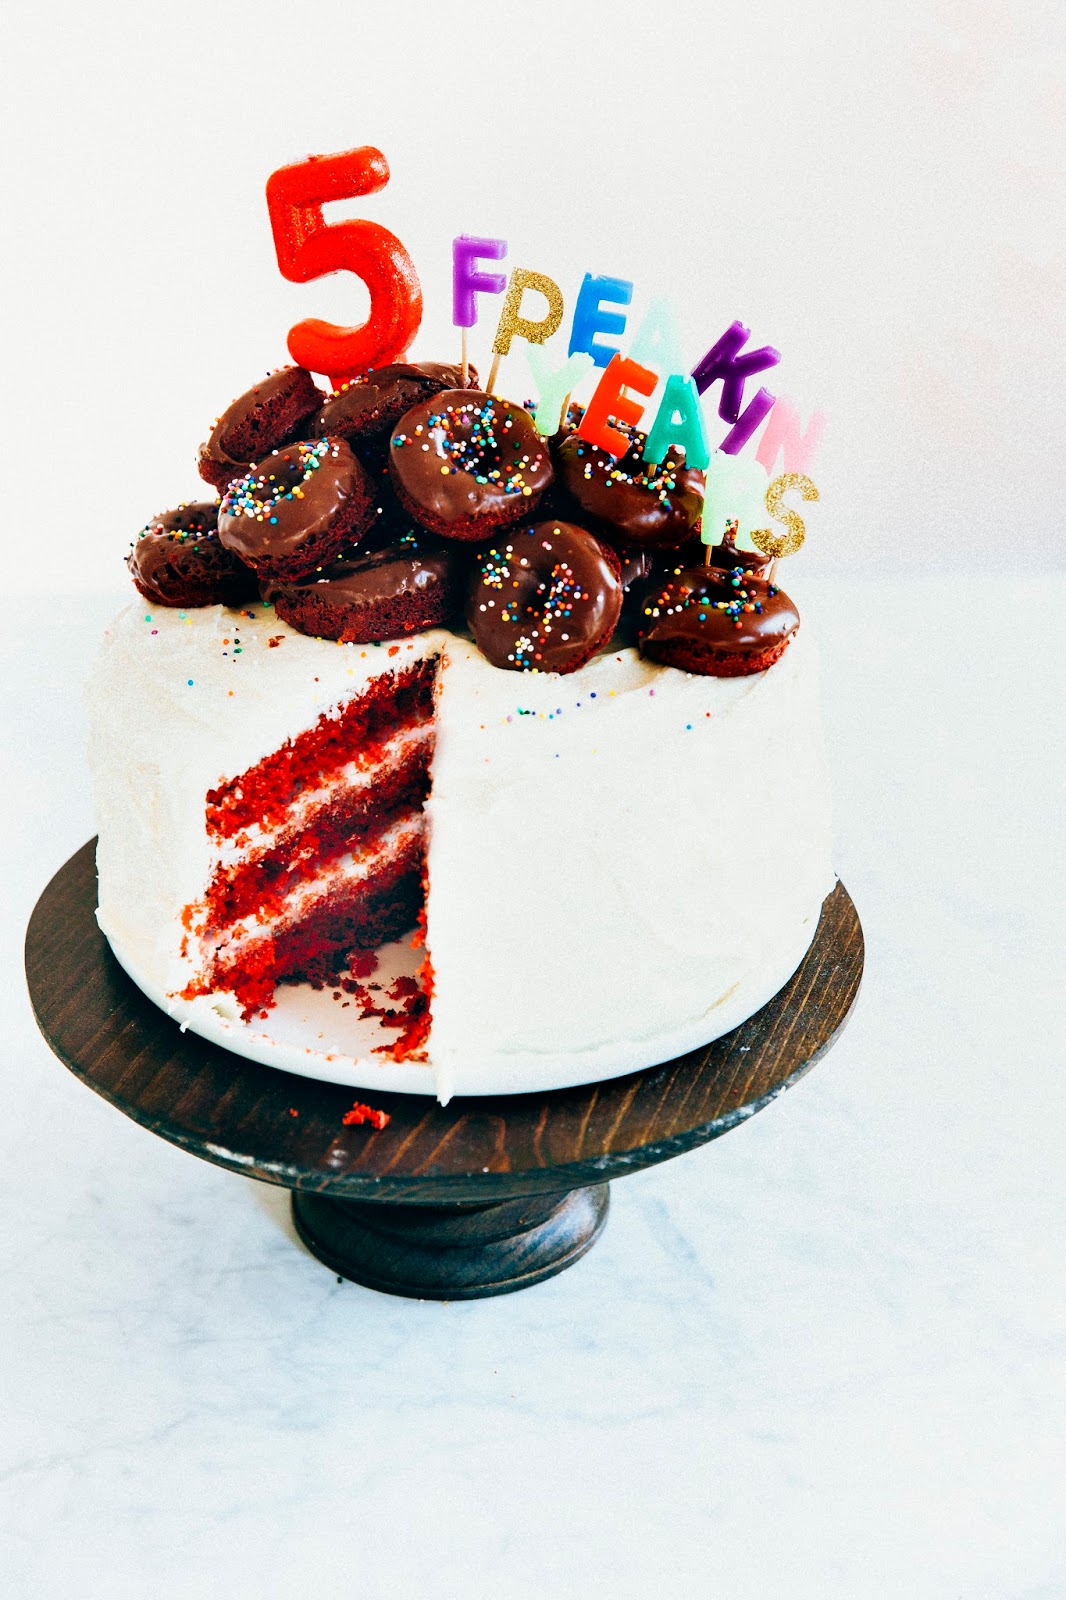
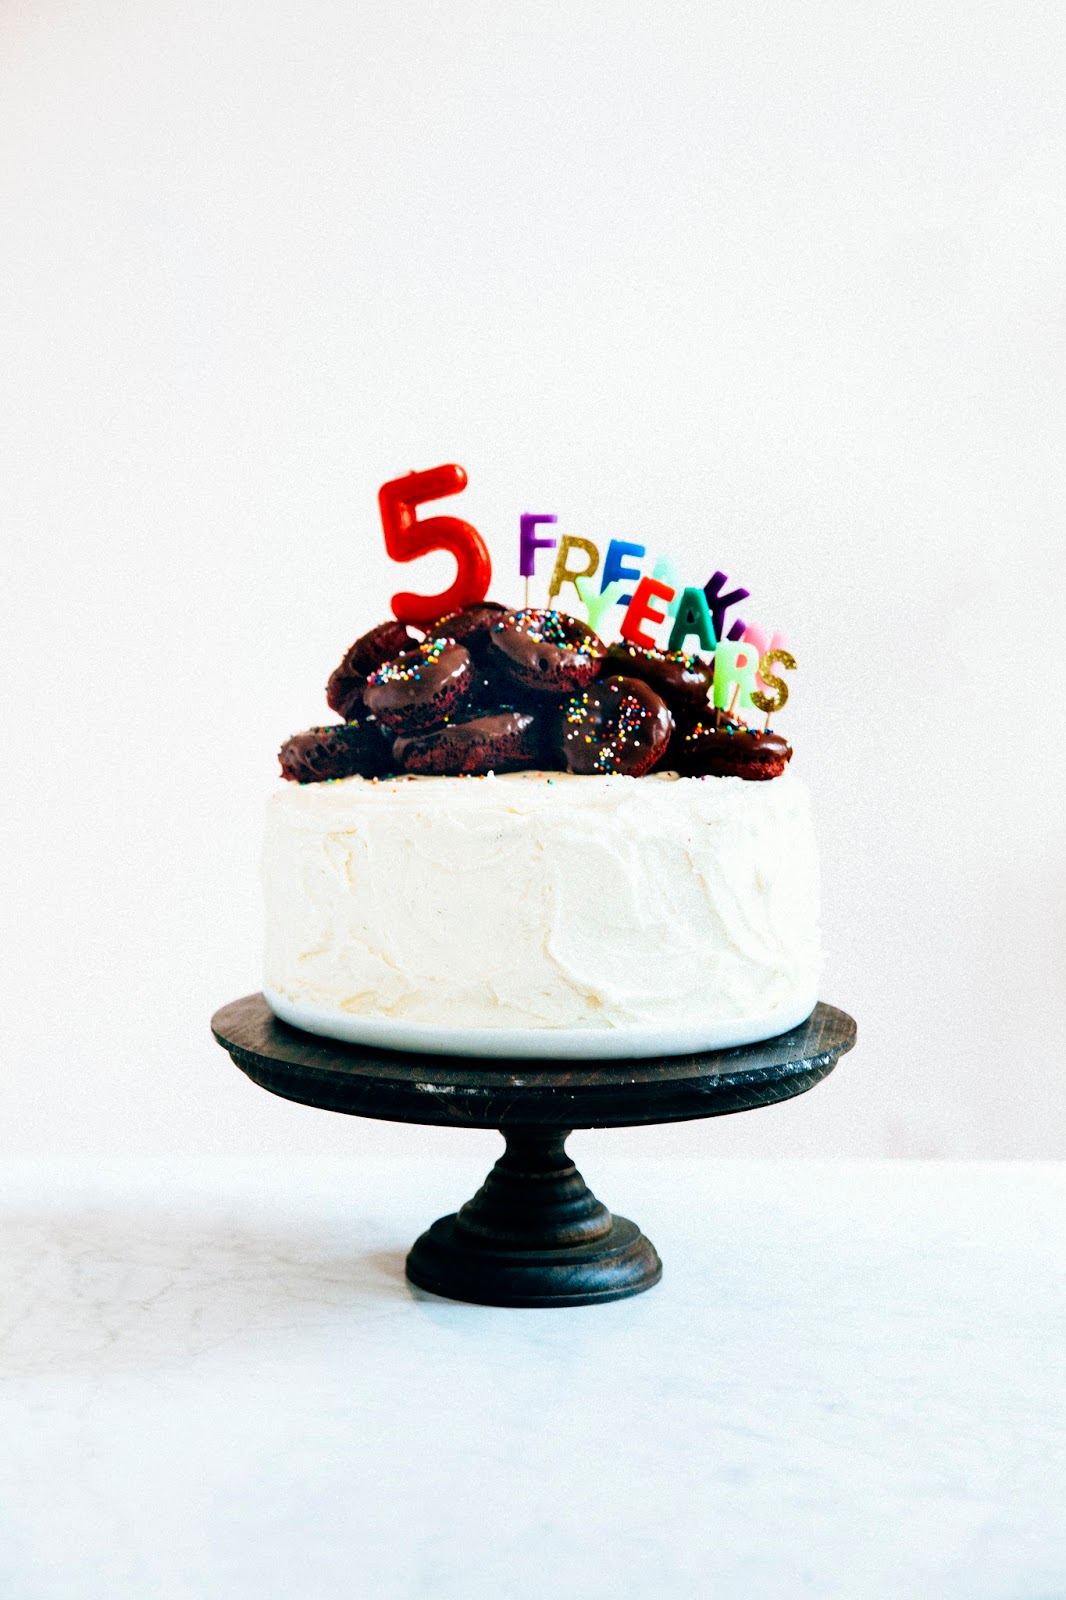
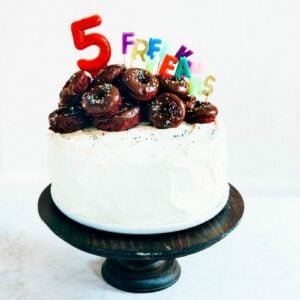
Like this red velvet cake.
For a long time, I really didn’t know what to make for such a significant milestone like my blog’s fifth birthday. I wanted to go all out. A red velvet cake certainly qualifies for the occasion, but I was paranoid that since I’d made one last year, it wouldn’t be all that special. But honestly, who the fuck cares besides me?
That’s right, no one. (I hope. Otherwise, get out of here!)
I’ve mentioned in last year’s post that I’ve been looking for the perfect red velvet cake recipe for many, many years. Last year’s cake base was near perfect — incredibly moist, with just the right touch of orange flavor that I’ve been looking for — but the frosting wasn’t quite right. No matter what people say (including what I’ve said in the past), red velvet cake should always be paired with cream cheese frosting. Which is what I’ve done here today.
So here’s to another five years of (hopefully SLOW) blogging!
Some baker’s notes:
-
- It can be quite difficult to frost this cake because its crumb is so open, light, and airy. I recommend making the cake the day before serving, wrapping each layer in plastic wrap, and refrigerating overnight to chill all the layers. Chilling the layers will help the crumbs stay together and not beak away from the cake when you frost it. If opting for a fully frosted cake, I definitely, definitely recommend covering the cake with a crumb layer first before frosting. Also, make sure to double the frosting ingredient quantities if going for the full look.
-
- A note on ingredients — this recipe uses a handful of specialty baking ingredients like espresso powder and Fiori di Sicilia extract. I wanted to go all out for five years, you see! Both are available at King Arthur Flour’s store. Espresso powder is there to enhance the otherwise subtle chocolate flavor of this red velvet cake. Fiori di Scilia is a sort of Italian citrusy extract that enhances the orange in the recipe. In a pinch, you can omit or replace with orange extract (for a more citrusy flavor) or orange blossom water (for a more floral flavor). Also, because this cake uses a lot of red food coloring, I suggest using a red food coloring gel as opposed to plain old red food coloring dye. In my experience, gels tend to disperse color more evenly throughout the batter and you end up with a more vividly colored baked good. I also think that gels taste less artificial than dyes, but that one might just be in my head.
- I saved a little bit of the cake batter to make the donuts you see on top of the cake. I actually wouldn’t recommend it — red velvet doesn’t really make for a good donut! It dries out too easily or something. But, if you really insist, you can reserve about a 1/2 cup of the batter and, using a mini donut pan, follow the instructions for baking the donuts and making the chocolate glaze in my recipe for mini funfetti donuts.
Get the Recipe: The Best Red Velvet Cake
Ingredients
For the Red Velvet Cake
- 2 cups (14 ounces) granulated sugar
- fresh zest from 2 medium oranges
- 3 cups (12 ounces) cake flour
- 1 tablespoon natural unsweetened cocoa powder
- 1 teaspoon espresso powder
- 1 teaspoon baking powder
- 1 teaspoon kosher salt
- 1/2 cup (4 ounces // 1 stick) unsalted butter,, at room temperature
- 1/2 cup (4 ounces) vegetable oil
- 2 tablespoons red food coloring
- 2 1/2 teaspoons pure vanilla extract
- 1/2 teaspoon Fiori di Sicilia extract (see baker's notes)
- 3 large eggs, at room temperature
- 1 1/2 cups (12 fluid ounces) buttermilk,, at room temperature
- 2 teaspoons distilled white vinegar
- 1 teaspoon baking soda
For the Cream Cheese Frosting
- 10 ounces cream cheese, at room temperature
- 1 cup (8 ounces // 2 sticks) unsalted butter,, at room temperature
- 1 1/2 teaspoons pure vanilla extract
- 1/8 teaspoon kosher salt
- 4 cups (16 ounces) confectioner’s sugar
Instructions
For the Red Velvet Cake
- Center a rack in the oven and preheat to 350 (F). Prepare three 8-inch round cake pans by spraying generously with cooking spray, and lining the bottom of each pan with a parchment paper circle. Spray the parchment circle as well.
- In a small bowl, combine 2 cups granulated sugar and the fresh zest from 2 medium oranges. Use you fingers to rub the orange zest into the sugar until it is fully distributed throughout the sugar and the mixture becomes fragrant — this will help release oils from the orange peel that will make your cake more flavorful. Set aside.
- In a medium bowl, whisk together 3 cups cake flour, 1 tablespoon natural unsweetened cocoa powder, 1 teaspoon espresso powder, 1 teaspoon baking powder, and 1 teaspoon kosher salt until well combined. Set aside.
- In the bowl of a freestanding electric mixer fitted with a paddle attachment, combine 1/2 cup unsalted butter and the sugar from the 2nd step and beat on medium speed until light and fluffy, about 2 minutes. While the butter and sugar are creaming, combine 1/2 cup vegetable oil, 2 tablespoons red food coloring, 2 1/2 teaspoons pure vanilla extract, and 1/2 teaspoon Fiori di Sicilia extract in a liquid measuring cup, using a fork or small whisk to briefly whisk together the ingredients. Lower the mixer speed to its slowest setting and stream into the oil mixture into the butter and sugar, making sure to stream the mixture down the sides of the bowl to avoid making a mess. Once the oil has been added, turn the mixer speed up to medium and continue beating for another 5 minutes, until the mixture is very light and fluffy and a vibrant pinkish color.
- Once the mixture is light and fluffy, reduce the mixer speed back down to its lowest setting. Add 3 large eggs, one at a time, only adding the next egg when the previous one has fully incorporated. Be sure to use a rubber spatula to scrape down the sides of the bowl after each addition.
- Once the eggs have been added, add the flour mixture from the 3rd step in three parts, alternating with 1 1/2 cups buttermilk in two parts, starting and ending with both the flour mixture. Continue mixing until the last of the flour is just incorporated — at this point, it’s okay to have one or two flour streaks left in the batter.
- In a small ramekin, combine 2 teaspoons distilled white vinegar with 1 teaspoon baking soda. The mixture will begin to bubble and fizz immediately. Quickly add it to the cake batter and mix for an additional minute or so.
- Divide the batter evenly among the prepared pans, and bake in the preheated oven for 30 to 35 minutes, or until a wooden skewer inserted in the center of each cake comes out clean and the tops of each cake bounce back when gently poked. Allow the cakes to cool in their pans on a wire rack for about 20 minutes, before turning out of the pans onto a wire rack to cool completely.
For the Cream Cheese Frosting
- In the bowl of a freestanding electric mixer fitted with a paddle attachment, combine 10 ounces cream cheese, 1 cup (8 ounces // 2 sticks) unsalted butter, 1 1/2 teaspoons pure vanilla extract, and 1/8 teaspoon kosher salt. Beat on medium-high speed for 1 to 2 minutes, until well combined.
- Lower the mixer speed to its slowest setting and add 4 cups (16 ounces) confectioner’s sugar all at once. Beat on low speed for a minute or so, just until the confectioner’s sugar has been absorbed into the cream cheese and butter. Turn the mixer speed up to medium-high, beating for at least 5 minutes or until light and fluffy. The longer you beat the frosting, the lighter and fluffier it will be.
I LOVE your cake recipes. I make them for all of my friends’ birthdays and they think I’m some kind of goddess. But really, if you can just follow a recipe then you can make a 5 star cake thanks to your awesome recipes. They’re elevated and a touch different than other cake recipes I’ve found and always turn out fabulous. Not small note, in step 7 of the cake it says: “In a small ramekin, combine 2 teaspoons distilled white vinegar with 1 teaspoon vinegar.” I think it should be 2 tsp vinegar + 1 tap baking soda (as it’s listed in the ingredients). Just wanted to point that out!