
Welp, we did it!
This past Monday, we officially signed a lease for a 2 bedroom apartment in a Brooklyn townhouse. I am in LOVE. Although it’s no #casahummingbirdhigh, it’s got south-facing windows, wood floors, and a DISHWASHER. And don’t worry — I’ll be sharing photos as soon as we get the keys!
Erlend thought it was a little hasty of us to sign for a place, but all my New York friends assured us that it was the right thing to do. The rental market here apparently gets scarcer as the summer goes on, becoming ultra-competitive in the months of August and September as the school season starts again. As a result, finding a place was surprisingly easy (perhaps shockingly so, especially when compared to finding a place in San Francisco), and I even managed to negotiate our rent down! #girlboss

And can I be honest with you guys? I love decorating, and thinking up of all the different ways to use up a space. If I weren’t a food blogger, I’d probably try and be some kind of home decor blogger. I’m beyond excited to start setting up our new place, picking out furnishings, and figuring out where all our stuff will go. I’m also excited to explore our new neighborhood, to set up our bicycles so that we can ride around the city and really get to know all of our new borough’s nooks and crannies. Because unlike my time in San Francisco, which felt so transitory (especially with our long-distance relationship and my basement studio), it feels different here.
It feels like a place that could be home.
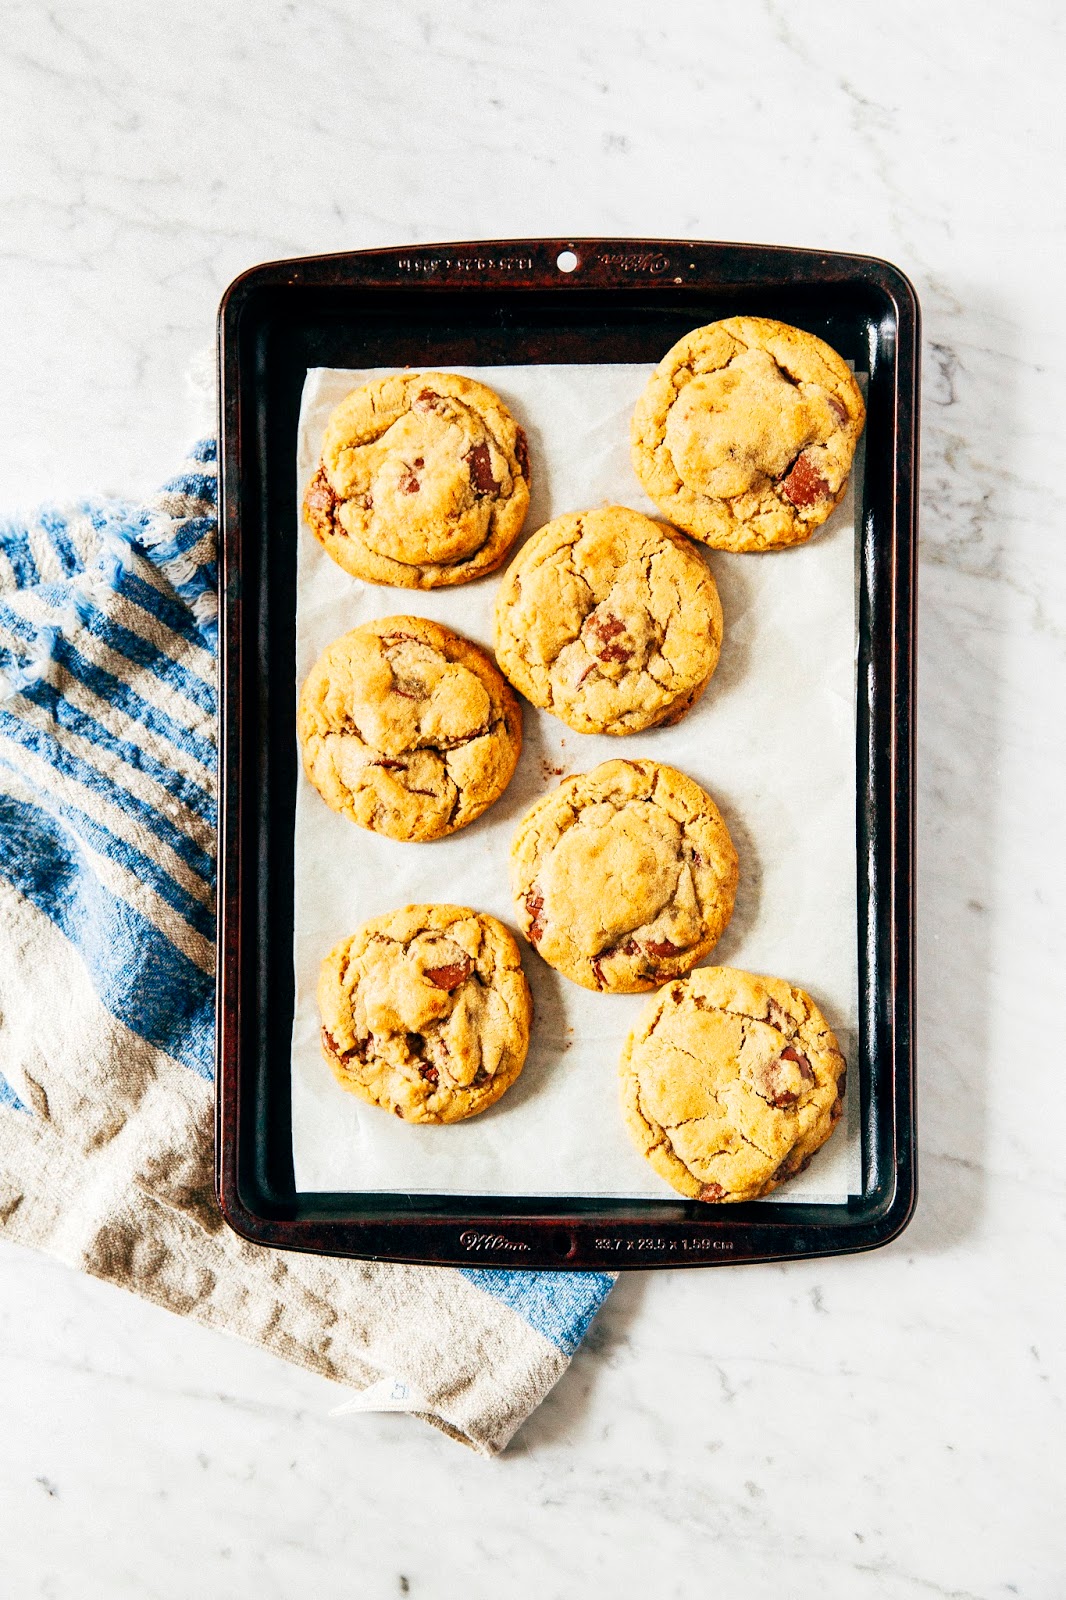
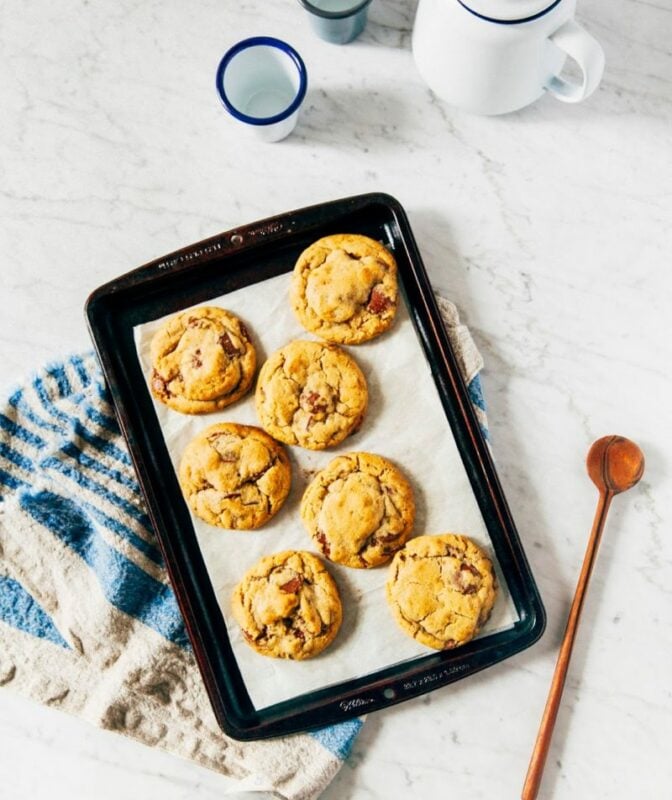
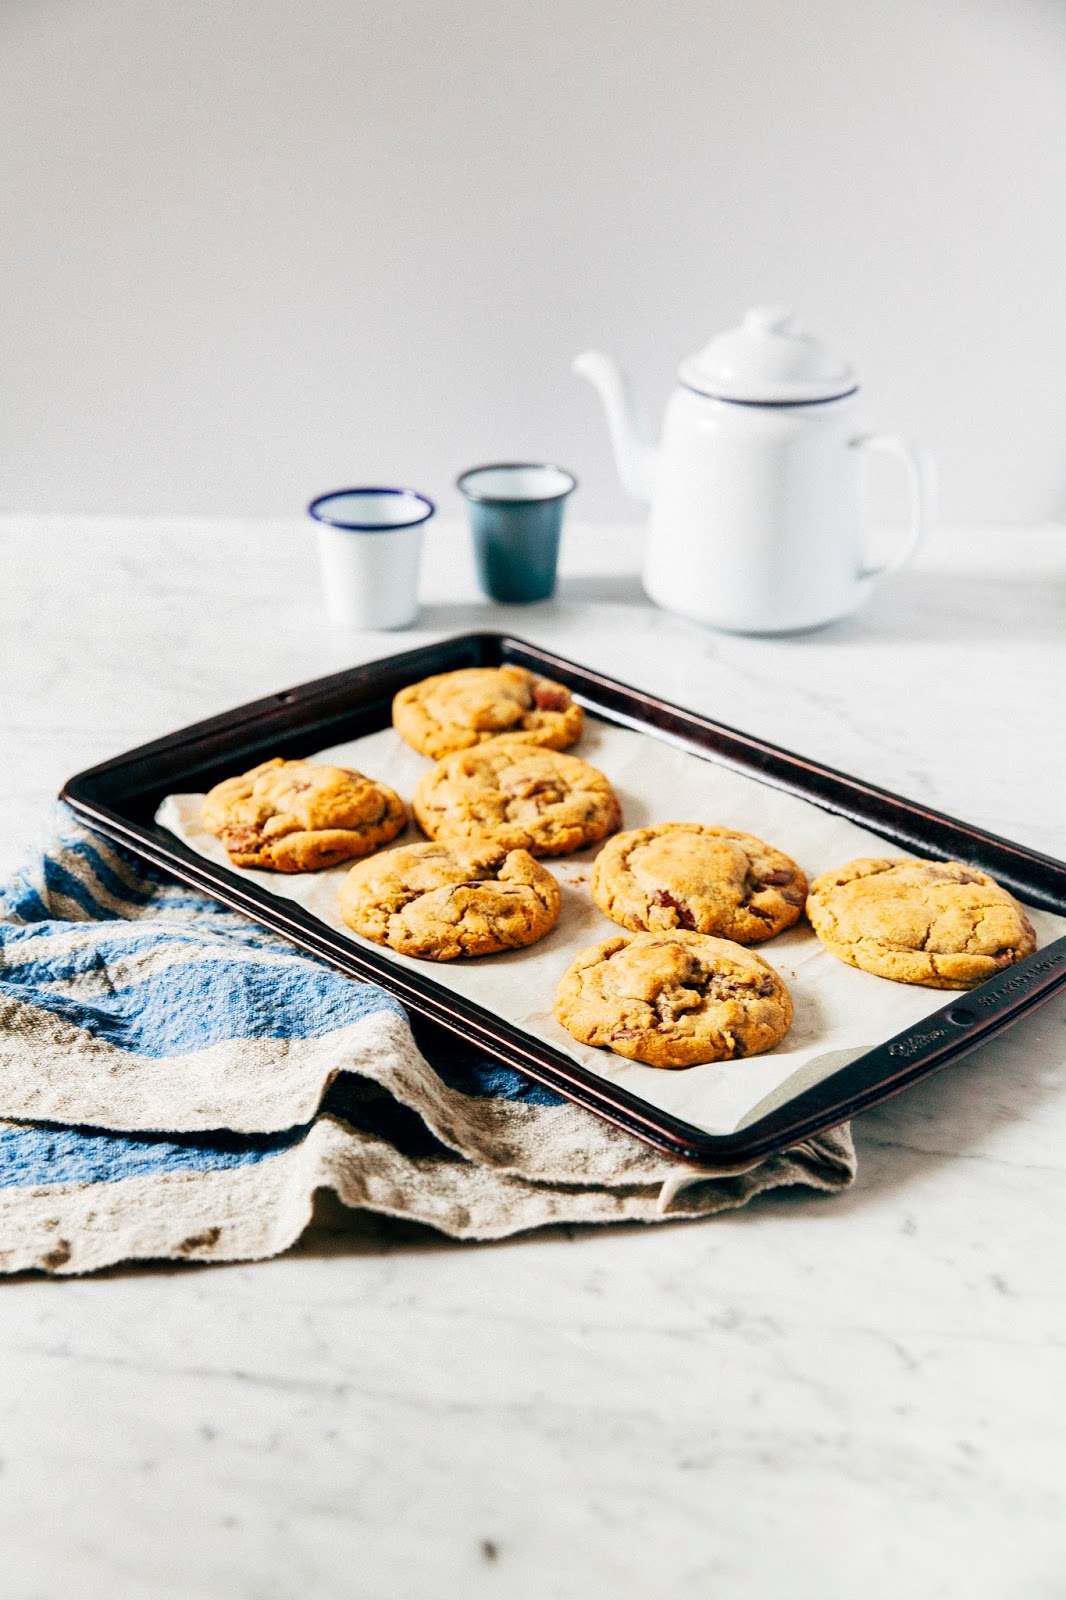
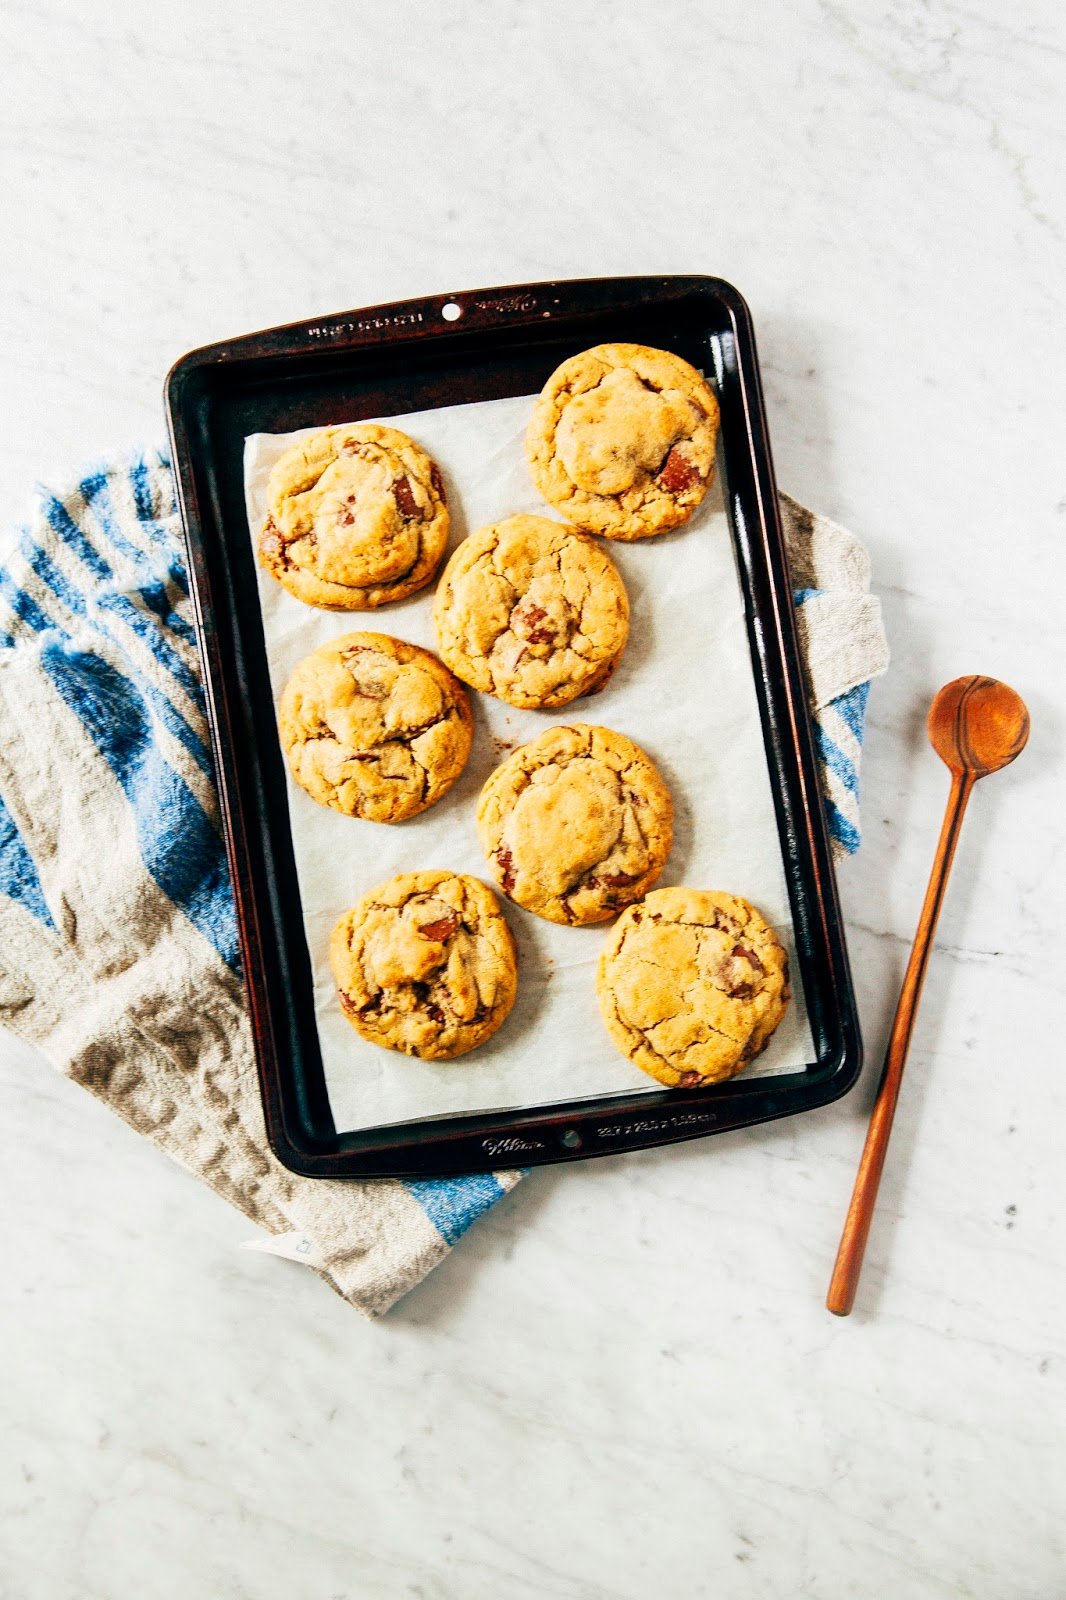
So! Let’s talk cookies. Again, this is one of those recipes I made in San Francisco when I was frantically trying to clear out my fridge. They’re from one of my current favorite cookbooks, The Violet Bakery Cookbook, and I’ve had the recipe bookmarked since the first day I flipped through the book. Because these are no ordinary chocolate chip cookies, nope. In place of whole eggs, Claire uses all egg yolk to give the cookies their distinct golden color, and a heartier, crumblier texture.
Enjoy!
Some baker’s notes:
- Plan ahead for this one! Claire’s recipe instructs you to freeze these cookies for at least an hour. (but preferably overnight for better flavor — there’s scientific proof behind this, I’m not even joking). You can still bake them without this freezing process, but the cookies will be flatter and crispier if you do.


Get the Recipe: Egg Yolk Chocolate Chip Cookie Recipe
Ingredients
For the Egg Yolk Chocolate Chip Cookies
- 2 ½ cups (11.5 ounces or 325 grams) all-purpose flour
- 1 ¼ teaspoon kosher salt
- ¾ teaspoon baking soda
- 1 cup plus 2 Tablespoons (9 ounces or 255 grams) unsalted butter, at room temperature
- 1 cup tightly packed (7.5 ounces or 213 grams) dark OR light brown sugar
- ½ cup (3.5 ounces or 100 grams) granulated sugar
- 3 large egg yolks, at room temperature
- ½ teaspoon pure vanilla extract
- 1 ½ cups (9 ounces or 255 grams) chocolate chips
Instructions
For the Egg Yolk Chocolate Chip Cookies
- Make the cookie dough. In a medium bowl, whisk together the flour, salt, and baking soda.
- In the bowl of a stand mixer fitted with the paddle attachment, combine the butter and sugars. Beat on medium-high until light, fluffy, and doubled in volume, 2 to 3 minutes, using a rubber spatula to scrape down the bottom and sides of the bowl as necessary. Reduce the mixer to low and add the egg yolks one at a time, adding the next egg yolk only after the previous one is fully incorporated, scraping down the bottom and sides of the bowl after each addition. Add the vanilla and beat until just combined. Scrape down the bottom and sides of the bowl.
- With the mixer on low, gradually add the dry ingredients and beat until just combined. Scrape down the bottom and sides of the bowl once more, and beat on low for an additional 30 seconds. Increase the mixer to medium-low, add the chocolate all at once, and beat until both is evenly distributed throughout, about 1 minute.
- Chill the dough. Line a quarter sheet pan with parchment paper. Use a 3-Tablespoon cookie dough scoop to portion the cookie dough into balls, placing the cookie dough balls on the prepared pan as you go. Cover loosely with plastic wrap and freeze for at least 1 hour, preferably overnight.
- Prep your oven and pans. Position a rack in the center of the oven and preheat the oven to 355°F. Line two half sheet pans with parchment paper. Place the chilled cookies at least 3 inches apart on the prepared sheet pans.
- Bake the cookies. Bake one pan at a time for 18 minutes, or until the edges have set but the centers are still gooey. Cool the cookies on the pan on a wire rack for 20 minutes, or until the edges and bottoms of the cookies have set and feel firm to the touch. Repeat with the remaining cookie dough (or freeze it to bake later).
- Serve and store. Serve warm or at room temperature. The cookies can be stored in an airtight container or zip-top bag at room temperature for up to 3 days.
Notes
This post was last updated 9/17/2020.
get new recipes via email:

buy the book
Weeknight Baking:
Recipes to Fit your Schedule
Over the past several years of running Hummingbird High, I kept a crucial aspect of my life hidden from my readers: I had a full-time, extremely demanding job in the tech world. In my debut cookbook, Weeknight Baking, I finally reveal the secrets to baking delicious desserts on a tight schedule.
I absolutely LOVE the flavor and texture! Can this recipe be doubled?
Yes! Just multiply all the ingredients x2. Nothing else changes!
Thanks, Michelle!